everyday food made simple

fluffernutter donuts

My coworker Katie, who’s from Massachusetts, recently informed me that their state sandwich is the fluffernutter sandwich (do you think they say it with an accent? Like a “fluffanutta” sandwich?). She told me that creamy peanut butter + marshmallow fluff sandwiched between two pieces of white bread was what her mom made her for an after school snack growing up, and it was basically the best thing ever.

I’ve never actually had a fluffernutter sandwich before and boy was I missing out.

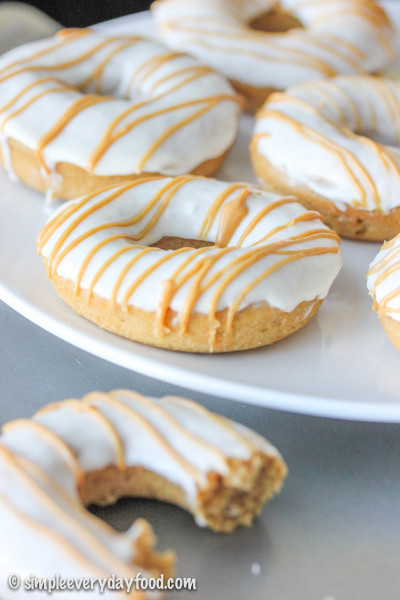
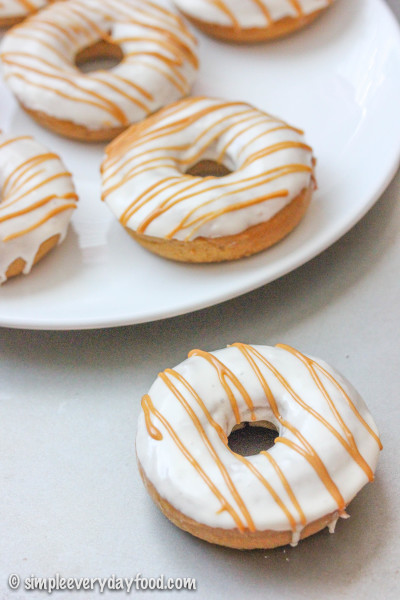
These donuts are soooo good!

fluffernutter donuts

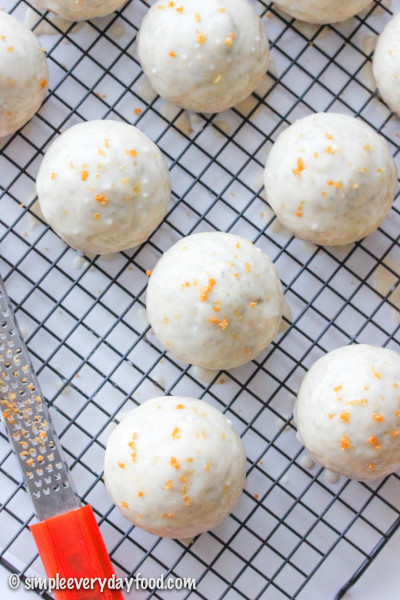
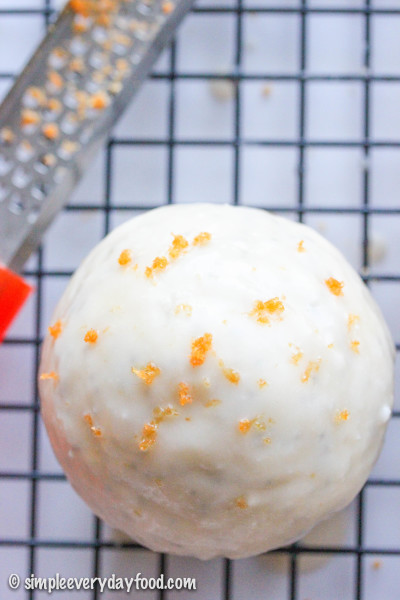
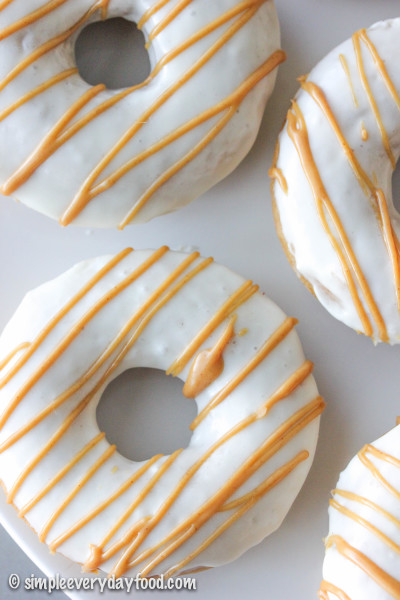
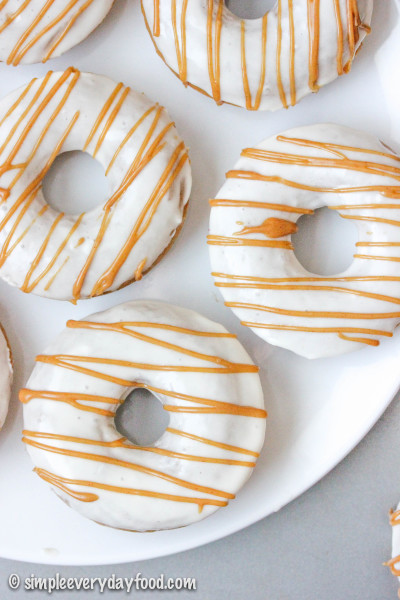
The peanut butter-based donuts are soft and fluffy and bursting with rich peanut butter flavor. One bite into and I bet you’re going to be all like OMGthisissogoodcanIhaveanotherone. I probably could’ve taken a whole dozen of these pre-frosted donuts and been happy about it. But this is a fluffernutter donut after all, and no donut is ever complete without a sweet sticky glaze on top… especially one that’s made with marshmallow fluff that transforms the entire donut from a peanut butter donut into a fluffernutter donut.

A fluffernutter donut you guys! It can’t get any better than this.

fluffernutter donuts

fluffernutter donuts

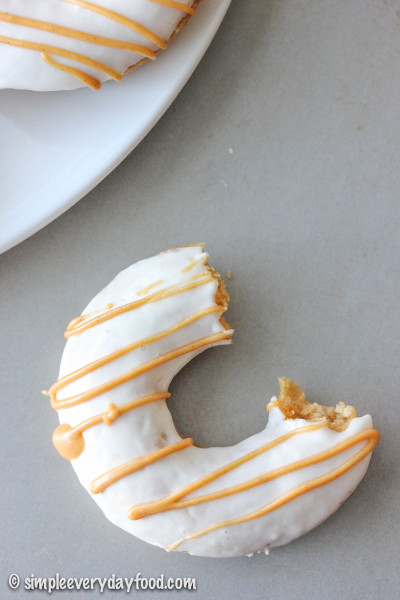
But wait! It totally did… you know what I did? Yep, I drizzled more peanut butter on top. Gooey, creamy melted peanut butter that I could’ve just slurped up with a straw.

fluffernutter donuts

fluffernutter donuts

And if you’re going to eat half a dozen donuts for breakfast, you might as well eat donuts that are healthier, right? To keep the cake soft and fluffy, we’re using protein-packed Greek yogurt, so naturally these are good for you. At least that’s what I’m telling myself.

fluffernutter donuts

Don’t worry, I won’t judge if you eat the entire pan – I almost did. #sorrynotsorry

After we demolished these donuts, I made myself fluffernutter sandwiches for breakfast for about a week straight. #truestory

baked fluffernutter donuts
Print
For the donuts
  1. 1 cup all-purpose flour
  2. 1 teaspoon baking powder
  3. 1/4 teaspoon salt
  4. 1/3 cup creamy peanut butter
  5. 2 tablespoons low-fat plain Greek yogurt
  6. 1/2 cup brown sugar, packed
  7. 1 large egg, at room temperature
  8. 1/3 cup skim milk
  9. 1 teaspoon vanilla extract
For the frosting
  1. 1 tablespoon butter, at room temperature
  2. 1/4 cup marshmallow fluff
  3. 1/2 cup powdered sugar
  4. 1-2 teaspoons heavy cream
  5. 1/4 teaspoon salt
  6. A few extra tablespoons of peanut butter, melted, for drizzling (optional)
Instructions
  1. Preheat the oven to 350 degrees. Generously spray your donut pan with nonstick cooking spray. Set aside. In a medium bowl, combine the flour, baking powder, and salt. Set that aside, too.
  2. Using an electric mixer fitted with the paddle attachment, beat the peanut butter, Greek yogurt, and brown sugar on medium speed, scraping the sides and bottom of the bowl with a spatula if necessary. Add in the egg, milk, and vanilla and beat for another 1-2 minutes until combined. Slowly add in the flour mixture and mix on medium-low speed until batter comes together. Bake for 9-11 minutes, or until an inserted toothpick comes out clean (mine took exactly 11 minutes). Remove donuts from oven, let cool for 3-5 minutes in the pan, then transfer to a wired cooling rack to cool completely.
  3. While the donuts are cooling, make the frosting: using an electric mixer, beat the butter, marshmallow fluff, powdered sugar, 1 teaspoon of heavy cream, and salt on medium speed until smooth. If the frosting looks too thick, add another teaspoon of the heavy cream. Dip the tops of the donuts in the frosting, letting the excess drip off, then place the donuts back on the rack for any extra frosting to run off. Drizzle the melted peanut butter over the tops. Donuts can be stored in an airtight container at room temperature for up to 3 days.
  4. Makes 9 donuts
Adapted from Buns In My Oven
Simple Everyday Food https://www.simpleeverydayfood.com/
Recipe adapted from Buns In My Oven

© Simple Everyday Food. All images & content are copyright protected. Please do not use any of my images without prior permission. If you want to republish this recipe, please re-write the recipe in your own words, or kindly link back to this post for the recipe.

Sharing is caring! Email this to someonePrint this pagePin on PinterestShare on YummlyShare on FacebookShare on Google+Tweet about this on Twitter

Welcome to the very first post of my new weekly series here on SEF, which I am calling “What You Need To Know Tuesdays”. I wanted to call it “What You Need To Know… Or What You Might Not Care About But I Want To Share It With You Anyway”, but then the abbreviation would’ve been WYNTKORWYMNCABIWTSIWYA, and that seemed a little ridiculous.

I figured this can be a place where I share interesting links I have stumbled upon on the interweb throughout the week, and serve as a platform for everyone to chime in and share things as well.

1. Did anyone try the birthday frappuccino from Starbucks last week? You know, the cake batter-flavored blended sugary drink that is topped with a pretty pink whipped cream that they rolled out to celebrate Frappuccino’s 20th birthday? It sounded amazing, and it tasted just as equally amazing.

IMG_2384

2. Does anyone have any experience with compact digital cameras such as these or these? We have a big trip coming up and I really don’t want to lug around my giant heavy DSLR camera during this trip and would really like something that’s light, compact for traveling but yet still takes high-quality pictures like my DSLR. Thoughts or suggestions are welcome.

3. In case you’re planning on spring cleaning soon, here’s 10 handy-dandy little shortcuts you can use. I’m quite dreading the weekend when we decide to tackle cleaning and purging things from our garage.

4. This potato salad. Bacon and Sriracha? Sold.

5. Apparently I’m on a salad kick because this pasta salad also looks and sounds amazing. I have a feeling I’ll be making a lot of pasta salads this summer.

6. A brewing guide for all coffee lovers. It’s more like a flowchart, which greatly pleases my Type A OCD personality. Me? I usually either go for my Keurig or Starbucks/Caribou.

7. A list of useful nail hacks for future manicures. I don’t paint my nails and get manicures on a regular basis (unless you count once a year as “regular”), but I’m definitely going to refer back to this guide next time when I get them done!

8. Are you ready for Easter? If you’ll be knee deep in dying Easter eggs this weekend, here’s a guide on how to make your own natural dyes that’s pretty, vibrant, and bold in color.

Hope everyone has a good rest of the week!

IMG_2274

Sharing is caring! Email this to someonePrint this pagePin on PinterestShare on YummlyShare on FacebookShare on Google+Tweet about this on Twitter

cheesy lasagna soup

A few months ago, it was brought to my attention by an ER doctor at work that he noticed something particular about Minnesotans’ grammar when it comes to a certain phrase, and after he mentioned it, I couldn’t help but notice it more and more.

QUESTION: when you’re asking someone if they would like to accompany you somewhere, what would you say?

Would you say: 1) “Would you like to come with me?”, or 2) “Would you like to come with?”

Did you pick 1)? I thought so. That’s how I say it too. And I’m pretty sure that’s how you’re supposed to say it. But apparently if you grew up in Minnesota, you would choose 2).

Now I’m not an English teacher, nor is my grammar the best in the world, but is anyone else with me when I say 2) doesn’t seem like a complete sentence whatsoever?? I mean, “come with me?” “come with us?” “come with us to go shopping?” “come with me to see a movie?”

The possibilities are endless. Next time someone asks me if I “would like to come with?”, I’m tempted to respond, “come with who?”

Seriously, if you’re from Minnesota or know someone from around the area, pay attention to how they word it next time and tell me I’m not the only one surrounded by people who talk like that.

[ahem Brian and Lori]

Now that we’ve got all that serious business out of the way, let’s move on to something better… like this cheesy, hearty, stick-to-your-bones lasagna soup with lots and lots of cheese.

cheesy lasagna soup

It tastes just like lasagna, minus all the work, and we’re definitely not sacrificing on any of the flavors either. There is no need to spend time layering everything; instead, just throw everything in a pot and let simmer. It’s so much easier and comes together much much quicker, and I mean just look at that cheese…!!

cheesy lasagna soup

cheesy lasagna soup

cheesy lasagna soup

Do you like cheese? I like cheese. I mean who doesn’t like cheese? And if you’re from Minnesota, there’s no excuse to not liking cheese.

However, I don’t particularly care for cottage cheese or ricotta cheese (or any sort of crumbly lumpy cheese), so I only used mozzarella and Parmesan cheese. If you’re into the lumpy cheeses, you can definitely use a mixture of everything.

Also, I used lasagna noodles to make it resemble like actual lasagna, but you can always use other smaller pasta shapes if you like… or whatever you have on hand, especially if you’re trying to clean out your cupboards!

 cheesy lasagna soup 

cheesy lasagna soup
Print
Ingredients
  1. 1 tablespoon EVOO
  2. 12 oz ground Italian sausage
  3. 1/2 yellow onion, diced
  4. 2 cloves garlic, minced
  5. 1/2 teaspoon red pepper flakes
  6. 4 cups reduced sodium chicken broth
  7. 28 oz fire roasted diced tomatoes
  8. 3 tablespoons tomato paste
  9. 2 teaspoon dried oregano
  10. 1 teaspoon dried basil
  11. 1/2 teaspoon salt
  12. 1/2 teaspoon black pepper
  13. 8 oz lasagna noodles, broken up in small pieces, uncooked
  14. 2 and 1/2 cups shredded mozzarella cheese
  15. 1/2 cup shredded parmesan cheese
Instructions
  1. In a large Dutch oven, heat the oil over medium high heat and brown the sausage, breaking it up into small pieces with a wooden spoon until no longer pink. Transfer to a plate and set aside.
  2. Using the remaining oil/fat in the pot, sautee the onions over medium heat until translucent, about 3 minutes, then add in the garlic and red pepper flakes and cook for another minute or two. Add in the chicken broth, diced tomatoes, tomato paste, oregano, basil, salt, pepper, and broken lasagna noodle pieces. Return the sausage back into the pot. Bring the soup to a boil, stirring occasionally to make sure the noodles don't stick to the bottom of the pot. Once the soup boils, turn the heat down to medium low and let it simmer for about 30 minutes, or until the noodles are cooked through. Make sure to give the soup a few stirs every few minutes. Remove from heat.
  3. Combine both cheeses in a small bowl, mix it around with a spoon and set aside.
  4. Turn your oven's broiler on. Ladle soup into oven-safe bowls and generously sprinkle a good layer of cheese over the tops. Place until the broiler for just a few minutes, keeping an eye on it the entire time, and remove soup from the oven as soon as the cheese starts to turn brown and bubbly. Remove from oven, let rest for a minute or two, and serve immediately.
  5. Serves 4-6
Adapted from Center Cut Cook
Simple Everyday Food https://www.simpleeverydayfood.com/
 Recipe adapted from Center Cut Cook

© Simple Everyday Food. All images & content are copyright protected. Please do not use any of my images without prior permission. If you want to republish this recipe, please re-write the recipe in your own words, or kindly link back to this post for the recipe.

Sharing is caring! Email this to someonePrint this pagePin on PinterestShare on YummlyShare on FacebookShare on Google+Tweet about this on Twitter

grapefruit poppyseed muffins  

So the other day we had a real life FRIENDS episode played out in our house.

For all you FRIENDS fanatics, remember the episode where Phoebe’s smoke detector started beeping so she thought taking the battery out would fix it but the stupid thing kept on beeping anyway? Then she got so mad she whacked that thing into pieces but the smoke detector still refused to die?

Yeaaaaaaah. That totally happened this week. Our smoke detector in the spare room started beeping one morning while we were getting ready for work, but after a half hour of beeping, it stopped. On the way back from the gym that day, I asked the mister if we should stop by the store to get batteries for it… he figured since it had stopped beeping, we should be fine… NOT.

PSA: If your smoke detector ever ever ever beeps, please please please for your own insanity’s sake, CHANGE THE BATTERIES. Seriously.

Because later that evening, the dang thing started beeping again. Brian ripped the thing off the ceiling and guess what? It kept beeping. We then decided that maybe taking the battery out would maybe fix the problem… except it didn’t. So we tossed it in the garage, hoping to be able to sleep in peace without getting woken up by the fire department (you know, like how they woke Phoebe up because she tossed hers down the trash chute?).

But wait, it gets better! Five minutes after we laid down, the smoke detector in the hallway started beeping… no joke. Seriously. It’s like they talk to each other…

“Hey hallway detector! I’m getting banished to the garage so keep the beeping going!” Ugh.

Needless to say, we had a terrible night’s sleep (we were just too lazy to get back out of  bed to rip the other one off), and we woke up super grouchy.

You know what would’ve made my morning a little bit more tolerable? These muffins.

grapefruit poppyseed muffins

grapefruit poppyseed muffins

They’re so citrusy and so easy to make! Each bite you take is like taking a bite of summer – light, sweet, and tangy all rolled into one, each double dunked – yes! double dunked – into a sweet glaze that will make you want to lick the bowl clean.

grapefruit poppyseed muffins

grapefruit poppyseed muffins

So the moral of the story is this: either 1) always change your smoke detector’s batteries when daylight savings time comes around like you’re supposed to, or 2) always keep a spare battery around the house.

But if you don’t and your smoke detector beeps at you all night, I sure hope you have these on hand for the next morning… you’ll need it.

grapefruit poppyseed muffins

If you’re looking for other breakfast items, you can check out where I keep all my other breakfast recipes here.

grapefruit poppy seed muffins
Print
For the muffins
  1. 2/3 cup granulated sugar
  2. Zest from 1 large grapefruit (plus more for garnish, if desired)
  3. 1/3 cup vegetable oil
  4. 1/8 cup poppy seeds
  5. 2 teaspoons grapefruit juice
  6. 2 teaspoons vanilla extract
  7. 1 large egg, at room temperature
  8. 2 and 1/2 cups all-purpose flour
  9. 3 and 1/2 teaspoons baking powder
  10. 1 teaspoon salt
  11. 1 and 1/4 cups milk
For the glaze
  1. 4 tablespoons unsalted butter, melted and cooled
  2. 2 and 1/2 cups powdered sugar
  3. 1 teaspoon vanilla extract
  4. 4~5 tablespoons grapefruit juice
Instructions
  1. Preheat oven to 350 degrees. Thoroughly spray 15 muffin tins with cooking spray, set aside.
  2. In the bowl of an electric mixer, combine the sugar and grapefruit zest. Rub together with your fingers until fragrant. The texture should resemble somewhat like wet sand.
  3. In a medium bowl, combine the flour, baking powder, and salt. Set aside.
  4. Add in the oil, poppy seeds, grapefruit juice, vanilla, and egg. Mix on low speed until just combined. Alternately, add in the flour mixture and milk, starting and ending with the flour mixture until just combined. Do not overmix.
  5. Using a medium cookie scoop (about 1.5 tablespoons), fill each well with muffin batter, about 2/3 full. Bake for 17-20 minutes, or until an inserted toothpick comes out clean. Cool for 5 minutes before removing them onto a cooling rack to cool completely.
  6. While muffins are cooling, make the glaze: combine all the glaze ingredients in a medium bowl. Dip the tops of each cooled muffin in the glaze and return it to the cooling rack. Let glaze set for 10 minutes, then dip the muffins in the glaze again for a thicker coating of glaze. Top with additional grapefruit zest, if desired. Muffins can be stored in an airtight container for up to 5 days.
  7. Makes 15 muffins
Adapted from Girl Versus Dough
Simple Everyday Food https://www.simpleeverydayfood.com/
Recipe adapted from Girl Versus Dough

© Simple Everyday Food. All images & content are copyright protected. Please do not use any of my images without prior permission. If you want to republish this recipe, please re-write the recipe in your own words, or kindly link back to this post for the recipe.

Sharing is caring! Email this to someonePrint this pagePin on PinterestShare on YummlyShare on FacebookShare on Google+Tweet about this on Twitter

I wanted to title today’s post as “Because there are already 184,750,172,902 mint chocolate cupcakes out there on the Internet, so why not add another recipe to the mix”, but that title seemed a little too lengthy, plus I figured people would have a hard time remembering the name of it when I tell them about this wonderfully delicious and moist chocolate cupcake topped with some mint Oreo buttercream frosting.

IMG_3276 copy

So I settled with a concise, to-the-point title of “Mint Oreo Cupcakes”. Short and sweet, just like these cupcakes.

IMG_3275 copy

IMG_3303 copy

I’m typically not a fan of St. Patrick’s Day, because I’m not a fan of beer drinking, I’m not particularly fond of corned beef and cabbage, and I really don’t look good in green attire.

However, green = mint, which gives me an excuse to make all things mint chocolate. Like this mint chocolate fudge.

IMG_3012 copy

And these mint chocolate chip meringue cookies.

IMG_3411 copy

Oh, and have I mentioned my addiction to McDonald’s Shamrock Shakes? I don’t care what people say about them and how many calories and how many grams of sugar those things have, it’s the only thing I look forward to when St. Patrick’s Day starts rolling around the corner.

In celebration of the upcoming holiday, today I made you mint Oreo cupcakes – a light and fluffy chocolate cake studded with mint Oreo bits in every bite, topped with a mint Oreo buttercream with swirls of green for a festive look. It really is a mint-chocolate-lover’s perfect cupcake!

IMG_3321 copy

IMG_3292 copy

IMG_3288 copy

Now if you could excuse me, I’m going to go get myself a Shamrock Shake…

Shake in one hand, cupcake in the other, because that’s how everyone should celebrate St. Patty’s Day.

mint oreo cupcakes
Print
For the cupcakes
  1. 1 box Devil's Food cake mix
  2. 3 large eggs, at room temperature
  3. 1/2 cup vegetable oil
  4. 1 cup buttermilk
  5. 1/2 cup sour cream
  6. 2 teaspoon vanilla extract
  7. 20-24 mint Oreos, coarsely chopped
For the frosting
  1. 1/2 cup (1 stick) unsalted butter, at room temperature
  2. 8 oz cream cheese
  3. 1 and 1/2 teaspoon peppermint extract
  4. 1 tablespoon heavy whipping cream
  5. 3-4 cup powdered sugar
  6. Green food coloring
  7. 6-7 mint Oreo cookies, finely crushed and sifted to get rid of any large chunks
Instructions
  1. Preheat the oven to 350 degrees. Line cupcake tins with liners and set aside.
  2. Sift the cake mix over a medium bowl and set aside.
  3. In a large mixing bowl, combine the eggs, oil, buttermilk, sour cream, and vanilla extract. Whisk until smooth. Stir in the cake mix and mix until just combined. Gently fold in the chopped Oreos.
  4. Fill the cupcake liners ~3/4 fill and bake for 15-20 minutes, or until an inserted toothpick comes out clean. Remove from oven and let cool for 5 minutes before transferring them onto a wired cooling rack to cool completely.
  5. While the cupcakes are cooling, make the frosting: beat the butter and cream cheese over medium speed until smooth and fluffy. Add in the peppermint extract and heavy whipping cream. Slowly add in 3 cups of powdered sugar and beat until smooth. If the frosting is still too loose, add in 1/2 cup of powdered sugar until you reach your desired consistency. Add in the green food coloring, one drop at a time, until the color is to your liking. Gently fold in your crushed Oreos* and pipe over cooled cupcakes with your favorite piping tip.
Notes
  1. *Make sure not to overmix the crushed Oreos, otherwise your frosting will turn into a sickly, unappetizing (yet still delicious) shade of gray.
Adapted from Your Cup of Cake
Simple Everyday Food https://www.simpleeverydayfood.com/
Recipe adapted from Your Cup of Cake

© Simple Everyday Food. All images & content are copyright protected. Please do not use any of my images without prior permission. If you want to republish this recipe, please re-write the recipe in your own words, or kindly link back to this post for the recipe.

Sharing is caring! Email this to someonePrint this pagePin on PinterestShare on YummlyShare on FacebookShare on Google+Tweet about this on Twitter