If you haven’t heard, I was offered a brand spankin’ new full time job about a month ago and just started it this week ! I’m super ecstatic about it, as I wasn’t really expecting to be able to find a job (at a place I really wanted to work at) this fast, just a few weeks after graduation. Of course, I wasn’t able to do it without the help of some wonderful people I listed as my references. As far as I know, a few of them were contacted by this employer, and they must’ve wrote a bunch of nice things about me, and I’m forever grateful about it :)
This will be my first ever full-time big girl job, and I took the entire process very seriously (more than usual) – from the initial submission of my resume and cover letter, to the actual interview, and the thank you letters thereafter – I applied everything I have learned in my career capstone class and meticulously read and reread everything prior to hitting the “submit” button. I’m glad a little bit of networking and hard work pays off… I love it so far!
This whole journey really made me realize that no matter where you go in life and what big milestones you have achieved, you really can’t get there without the help of people along the way – whether they are friends, family, coworkers, or even strangers… many people played a part in this job hunting process, and even now, I feel just as grateful as I did the day I was offered the position.
Ever since I was little, my mom had ingrained in my brain that it is important to express your gratitude towards those that have helped you in life. And that’s why the day after I got this new job, I decided to make some sweets for those people who took time out of their busy schedules to write recommendation letters for me. I figured if they were kind enough to take time to write nice things about me, the least I can do is take time out of my day to make a little something to show them how much I appreciate their efforts.
I would’ve made cookies, but one of my references happened to be gluten free, which is why I decided to make fudge instead. I’ve never made fudge in my entire life before, but since it’s a new year, and new years are all about trying new things, I decided to give it a whirl. And since I’m still on this mint chocolate craze, mint chocolate fudge it was (it’s only my favorite chocolate combination, if you haven’t figured that out already).
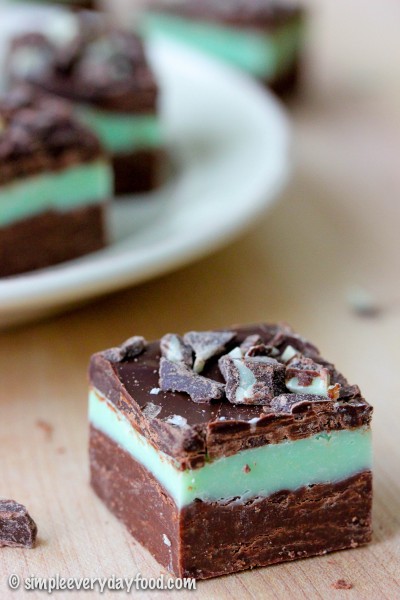
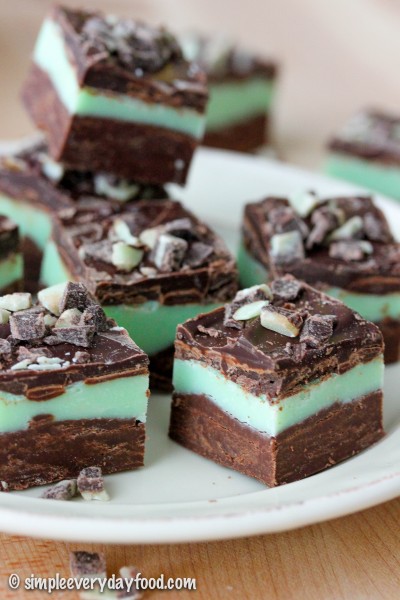
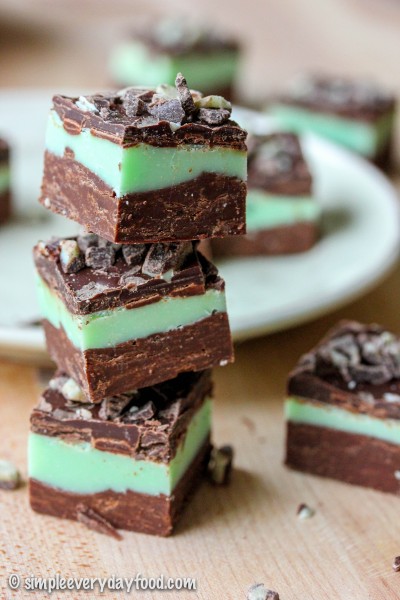
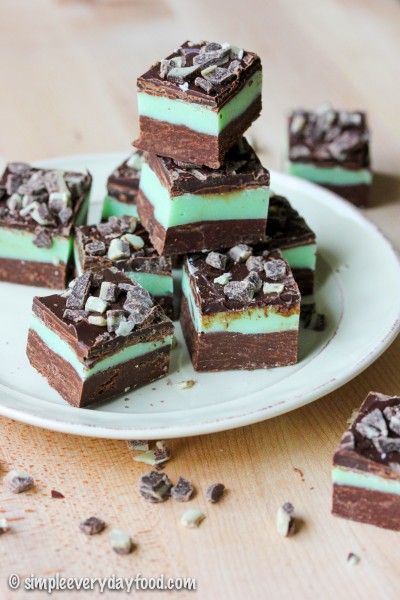
These little fudge squares are just like giant Andes mints and they’re so easy to make! The bottom layer consists of sweet chocolate chips with condensed milk, followed by another fudgey layer of white chocolate chips, a little bit more condensed milk, peppermint extract, and a few drops of food coloring. The thin top chocolate layer has a nice little crunch, which contrasts nicely with the bottom two smooth velvety fudgey layers. Heaven, I tell ya.


I have never had luck with melting chocolate in the microwave or directly over a heat source. It just somehow never works for me, so for all chocolate-melting recipes, I always always always melt my chocolates using a makeshift double boiler over low heat – it heats the chocolate up a lot slower, but it also gives me less anxiety. I take it as a fair trade off.
If you’ve never made fudge (like me) before, I just want to warn you that when you melt the chocolate chips with the condensed milk, the mixture is going to be thick. I was expecting the mixture to be nice and smooth and runny like melted chocolate, but nooooo… it was thick. So thick that the only good utensil to stir it with is with a sturdy wooden spoon.. and that if you stir it constantly, your arm is going to get tired. I initially thought my chocolate had seized up on me, and I started to get very frustrated. Mind you this was at 9:30 a.m. and I’m pretty sure Brian decided to stay the heck away from the kitchen for the rest of the morning.
Moral of the story: chocolate chips + condensed milk = thick mixture (read: don’t freak out).
- 2.5 cups semi-sweet chocolate chips, divided
- One 14-oz can sweetened condensed milk, divided
- 1.5 cups white chocolate chips
- 1 teaspoon peppermint extract
- 2-3 drops green food coloring
- 1 teaspoon shortening
- 1/2 cups Andes Creme de Menthe Baking Chips
- Line an 8x8" baking pan with aluminum foil and spray generously with nonstick cooking spray. Set aside.
- Using a double boiler, melt 1.5 cups of the semi-sweet chocolate chips with 3/4 cups of the sweetened condensed milk over low heat. Stir occasionally until smooth, then pour mixture into the baking pan. Spread mixture evenly (I used an offset spatula), and place in the fridge to chill.
- While the chocolate mixture is chilling in the fridge, melt the white chocolate chips with the remaining sweetened condensed milk over a double boiler over low heat, stirring until smooth. Remove from heat and add in the peppermint extract and green food coloring. Stir until the mixture is even in color, then pour mint layer evenly over chilled chocolate layer and place back into the refrigerator.
- Melt the remaining 1 cup of semi-sweet chocolate chips and the shortening over a double boiler. Stir until smooth. Pour evenly over the mint layer, top generously with Andes Creme de Menthe baking chips, and chill in fridge for at least 3-4 hours until set.
- Cut into small squares before serving and store in the refrigerator for up to two weeks.
- Makes about 36 small squares
Recipe adapted from Sally’s Baking Addiction
© Simple Everyday Food. All images & content are copyright protected. Please do not use any of my images without prior permission. If you want to republish this recipe, please re-write the recipe in your own words, or kindly link back to this post for the recipe.