everyday food made simple

IMG_6908 copy

I don’t know about you, but my summer is flying by right before my eyes. It didn’t seem all that long ago the sun rose and painted the sky a pretty mixture of pinks, purples, and oranges at 5 a.m., it was still bright out at 9 p.m., we grilled burgers and steaks and pork chops every night, and Starbuck’s iced coconut mocha macchiato became my summer jam.

Every year around this time I always look back at my summer bucket list, and every year I realize there are so many things I wanted to do but didn’t accomplish – I wish I went to the farmer’s market more, baked a little more, blogged a little more, spent more days out in the sun, checked off more books off of my list, went to more fairs, and ate more ice cream.

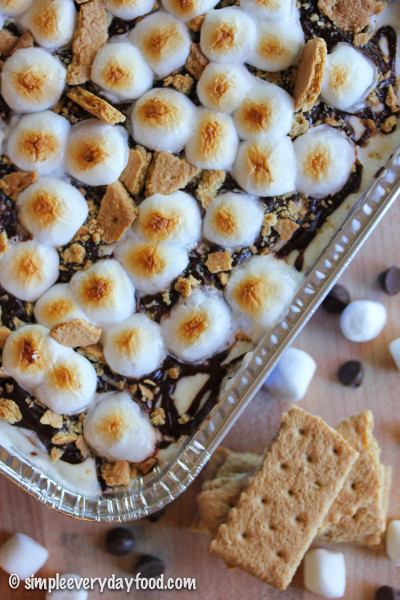
What I did do, however, was make this cake. This amazingly simple, no-oven-required-because-we-all-know-how-hot-it-already-is, cake.

IMG_6807 copy IMG_6840 copy

IMG_6929 copy   

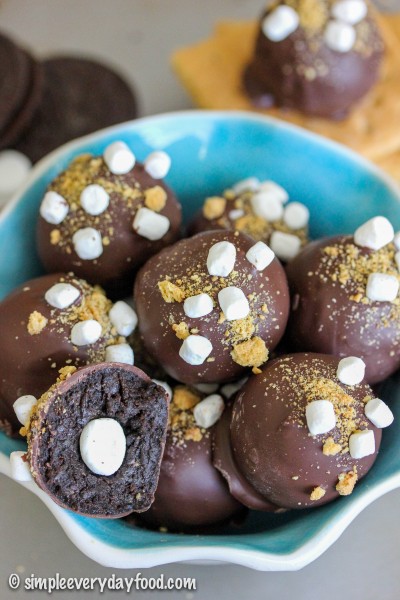
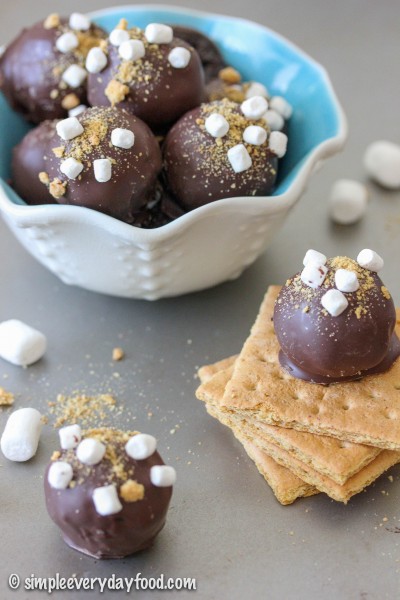
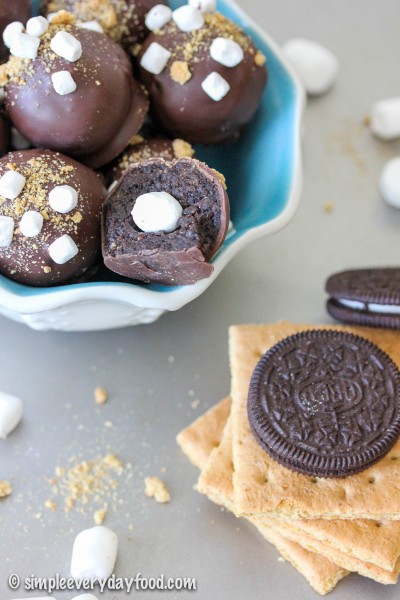
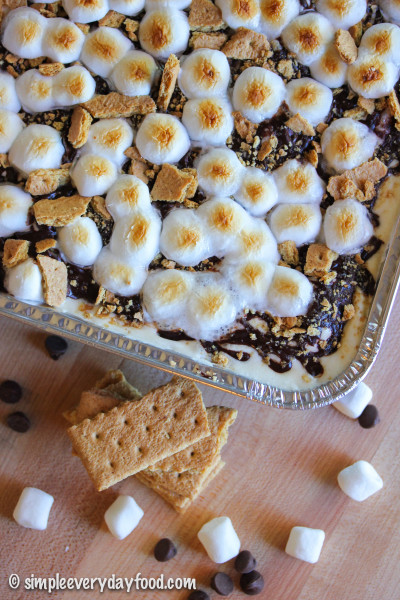
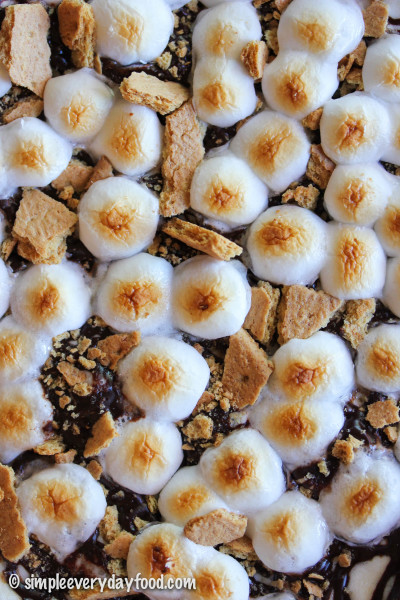
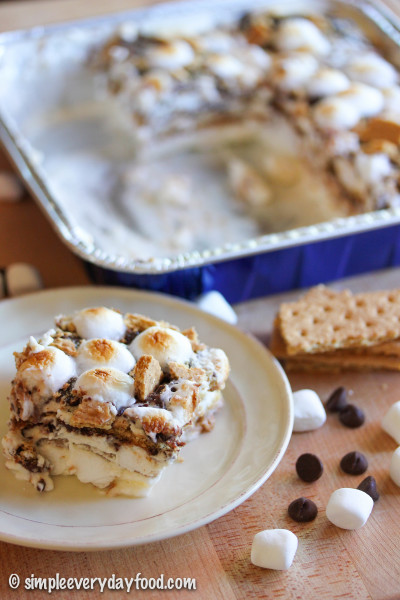
S’mores icebox cake, to be exact. Layers of creamy marshmallow cream on top of sweet chocolate ganache on top of graham crackers, topped off with mini marshmallows that’s broiled to toasty perfection. So so good to where you will want to eat it straight out of the pan when your husband isn’t home.

IMG_6903 copy

IMG_6909 copy

So before summer is over, before the weather starts to cool down, before your kids go back to school, please make this as a last hurrah to summer – I promise you won’t regret it.

s'mores icebox cake
Print
Ingredients
  1. 2 and 3/4 cups heavy cream, divided
  2. 7 oz marshmallow fluff
  3. 1 and 1/2 cups mini marshmallows, divided
  4. 11 oz semisweet chocolate chips
  5. 1 box graham crackers (you probably won't use the entire box)
Make the marshmallow cream
  1. Using a stand or hand mixer, beat 2 cups heavy cream on medium-high for 5 minutes or until stiff peaks form. Add in the marshmallow fluff and continue beating on medium-high speed for another 3 minutes. Gently stir in 1 cup mini marshmallows, set aside.
Make the chocolate ganache
  1. In a small saucepan over medium-low heat, heat the remaining heavy cream until simmering. Remove from heat and pour over chocolate chips in a heat-proof bowl. Let mixture sit for 5 minutes, then stir until combined and smooth.
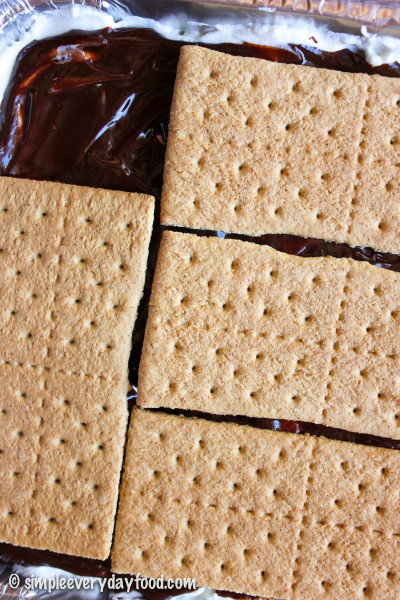
  2. In a 9x9" baking dish, spread a thin layer of the marshmallow cream on the bottom. Top with a layer of graham crackers. Break the crackers into pieces to make sure all the marshmallow cream is covered. Top with another layer of marshmallow cream, then generously drizzle/spread the ganache over the top. Repeat layers once more, leaving about 1/4" from the top of the pan.
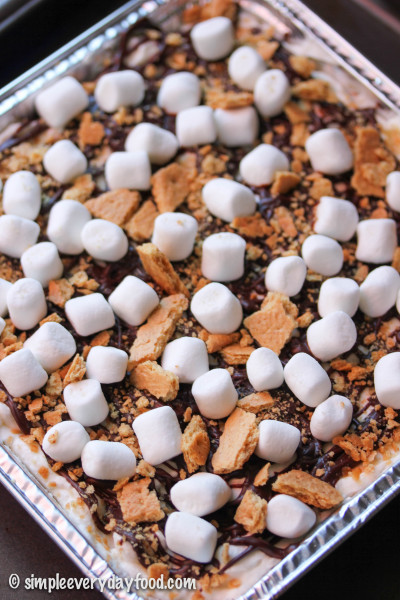
  3. Garnish the top with remaining mini marshmallows, crushed graham cracker pieces, and extra chocolate chips, if desired. Cover with plastic wrap and refrigerate overnight.
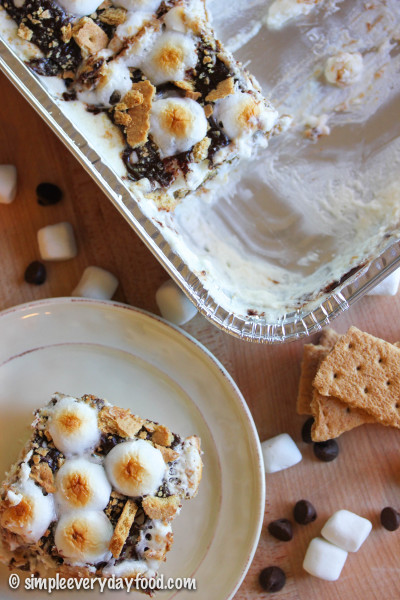
  4. Right before serving, turn on your broiler and broil the cake for 1 minute or until marshmallows are brown and toasty. Remove immediately and freeze for 10 minutes to let set and serve. Cake can be stored in the refrigerator in an airtight container for up to 3 days.
  5. Makes one 9x9" pan
Adapted from Delish.com
Simple Everyday Food https://www.simpleeverydayfood.com/
The beautiful thing about this recipe is that you can change up the layers based on what you like more. Want more chocolate? Then add in a few more layers of chocolate ganache. Love graham crackers? Then put it another layer of graham crackers. Whatever you decide to do, it’ll be delicious either way.

IMG_6920 copy

Recipe adapted from Delish

© Simple Everyday Food. All images & content are copyright protected. Please do not use any of my images without prior permission. If you want to republish this recipe, please re-write the recipe in your own words, and kindly link back to this post for the recipe.


Sharing is caring! Email this to someonePrint this pagePin on PinterestShare on YummlyShare on FacebookShare on Google+Tweet about this on Twitter

lucky charms bars

I know I’m a little late in the game, but I finally watched Big Hero 6 and I loved it! Have you seen it yet? I’ve heard so much about it when it first came out, but never really put too much thought into it until a coworker of mine brought it for me one day and told me it was her daughter’s new favorite movie.

There were definitely parts of the movie that I totally wasn’t expecting to happen, but there were also a lot of other parts of it that were cute and made me smile.

Baymax totally reminded me of a giant walking talking marshmallow, which in turn reminded me that I needed to share these ridiculous bars I made a while ago that involved sticky gooey marshmallows….

lucky charms bars   lucky charms bars

Marshmallow treat bars are probably one of the easiest things to make – they only require a few ingredients, they don’t require any special equipment or powering on the oven, and a batch of these things is usually enough to feed a crowd. Cheap, quick, and easy is the kind of desserts I like to bring to a potluck.

lucky charms bars

lucky charms bars

I’m sure we’ve all had terrible marshmallow treats before. You know, the kind that may have sat out for a few days too long? The kind that’s not at all soft and gooey when you bite into it? The kind that scrapes a layer of epithelial tissue off the roof of your mouth that leaves the top of your mouth raw and sore for days? Yeah… if you’re looking for that kind of a marshmallow treat (WHYYYYYY would you ever want a rock hard marshmallow treat would be beyond me), this recipe is not it.

lucky charms bars

They’re oh so soft, so chewy, so gooey, so sweet, and so so so delicious. Not to mention on top of the 5 cups of marshmallows that goes into it, there’s more than plenty colorful Lucky Charms marshmallows in them, which makes them yummy to eat, and even prettier to look at.

lucky charms bars

lucky charms bars   lucky charms bars

This was only the second time I’ve ever made marshmallow treats. The last time I made them a few years ago, I’m pretty sure I got sticky marshmallow goo all over my hands and hair, my bars were hard, and Brian landed himself a trip to the ER that ended with 7-8 stitches on his toes… but that’s a whole ‘nother story for a different day.

Although my marshmallow bars weren’t a huge success that day, I did learn a few things that day about making these treats that I’m going to share with you, so listen up!

lucky charms bars   lucky charms bars

The single most helpful tip I learned was to grease EVERYTHING that will be coming in contact with the cereal/marshmallow mixture – that includes every single inch of the pan, the spatula you’ll be stirring with, and your hands if you’re using them to press the cereal treats into the pan rather than wax paper.

lucky charms bars

I actually lined my baking pan with parchment paper for easy removal of the bars once they cool. That way you can lift the entire pan of marshmallows onto a cutting board to cut them into squares rather than trying to cut them up while they’re in the pan.

lucky charms bars

When you’re pouring your cereal/marshmallow treats into the pan, don’t press them too hard into the pan. The more you try to cram them together, the denser they’ll get, and the harder they will become once they cool. If you’re not into greasy hands, you can also gently press them in with a sheet of wax paper.

lucky charms bars

lucky charms bars

These really do taste best if you eat them the same day they’re made, but they will still taste great the day after. I wouldn’t recommend storing them for more than two days, unless you’re purposely trying to end up with dry, hard marshmallow bars.

lucky charms bars   lucky charms bars

Sorry for the photo overload, my friends. I was having an indecisive day!

lucky charms bars
Print
Ingredients
  1. 4 tablespoons unsalted butter, plus more for greasing the pan
  2. 5 cups mini marshmallows
  3. 6 cups Lucky Charms cereal
Instructions
  1. Lightly coat a 9x13" baking pan with butter, line with parchment paper (the butter will help the parchment paper stick to the pan), then grease the parchment paper with another thin coat of butter. Set aside.
  2. Melt butter in a large pot over low heat. Add the marshmallows and stir until the marshmallows are completely melted. Remove from heat and stir in the Lucky Charms with the buttered spatula until combined.
  3. Pour cereal mixture into the prepared greased baking pan, pressing the tops gently with waxed paper* and let cool. Remove the bars from the pan using the parchment paper and transfer onto a cutting board. Cut into squares and serve. Bars can be stored at room temperature in an airtight container for up to 2 days.
  4. Makes one 9x13" pan
Adapted from A Pumpkin & A Princess
Simple Everyday Food https://www.simpleeverydayfood.com/
 Recipe adapted from A Pumpkin And A Princess

© Simple Everyday Food. All images & content are copyright protected. Please do not use any of my images without prior permission. If you want to republish this recipe, please re-write the recipe in your own words, or kindly link back to this post for the recipe.

Sharing is caring! Email this to someonePrint this pagePin on PinterestShare on YummlyShare on FacebookShare on Google+Tweet about this on Twitter

Lately I’ve been thinking about getting a Fitbit Charge HR. I already own a FitBit Flex, but I’m really digging the additional functions the Charge HR provides (heart rate monitoring, time display, automatic sleep detection, etc). But as I added it into my shopping cart and typed in my credit card information one day, I suddenly remembered that the iWatch is scheduled to come out sometime this year, and that’s when the internal debate began…

I’m sort of an Apple geek – all my electronic toys have the little half-bitten apple logo on it. When I initially heard of this iWatch, I laughed and vowed I would never need a wrist gadget that did a lot of the things my phone could do. “Why do I need a watch like that when I can just use my Fitbit?” Buuuut… after reading all about its features, I’m kind of ashamed to admit that I have since changed my mind and I now want a iWatch, especially since it also contains a pretty cool health & fitness app within.

Question: Do any of you guys have the new Fitbit Charge HR? Do you recommend it? Are you planning on getting the iWatch when it comes out? Why or why not? I’d like to hear your opinions!

Maybe the reason why I’m thinking so much about activity trackers is because I may have accidentally ate a few too many of these Samoa cookie chocolate cups.. they’re little chocolate cups filled with gooey sweet and salty caramel coconut mixture and a bite-sized piece of shortbread cookie, all in this little chocolate cup… and oh boy are they dangerous!

IMG_5134 copy

IMG_5126 copy

IMG_5110 copy     

They don’t require any sort of mixer, and they don’t require any baking. It may seem like a long process to make them, but there’s a lot of waiting around in between steps, which is perfect for getting miscellaneous things done around the house… or spending some time on Pinterest…. or finding things to buy online… or taking a few of those silly BuzzFeed quizzes…

IMG_5079 copy

IMG_5115 copy

First you melt the chocolate and spread the chocolate around in the liners so it covers everysingleinch of it. Freeze those babies for half an hour (this would be the time to do those things we previously talked about). Then add a little bit of the caramel coconut mixture on the bottom of each cup and top with a little bite of the shortbread cookie.

Are you still following me?

IMG_5060 copy

Top the cookies with more caramel coconut and sprinkle the tops with some sea salt, if the salty-sweet combo is your kind of thing. Freeze some more (patience, grasshopper!).

IMG_5063 copy

Then top it up with more melted chocolate and garnish with toasted coconut flakes. Freeze a little bit longer (almost there!), then EAT and DEVOUR!

IMG_5109 copy

IMG_5088 copy

I will not be responsible for the amount of chocolate cups you eat in one single sitting. Nor will I be responsible if you end up with a stomach ache after eating half the pan… just sayin’.

IMG_5085 copy

IMG_5090 copy

But just look at that ooey gooey caramel-y deliciousness! I mean, how can you resist?!

I apologize for the over abundance of pictures…

IMG_5124 copy

IMG_5146 copy

samoa cookie chocolate cups
Print
Ingredients
  1. 2 and 1/2 cups semi sweet chocolate chips
  2. 1 and 1/4 cups sweetened coconut flakes
  3. 1 cup caramel syrup
  4. 6 shortbread cookie squares, cut into quarters
  5. Sea salt, for sprinkling, if desired
Instructions
  1. Line a 24 mini muffin pan with liners and set aside.
  2. Using a double boiler, melt 2 cups of the chocolate chips, stirring occasionally until smooth. Drop 1-2 teaspoons of melted chocolate into each liner, spreading the chocolate up the sides of the liner using a pastry brush or a spoon. Make sure the sides are nicely coated. Freeze for 30 minutes.
  3. In the meantime, toast the coconut flakes in a nonstick pan over medium heat. Once you notice the flakes are starting to brown, stir constantly until most of the coconut flakes turn golden brown in color. Be careful not to burn them! Remove from heat and reserve 1/4 cup for garnish.
  4. Combine the caramel sauce and the remaining cup of coconut flakes in a medium bowl and mix well. Remove the frozen chocolate cups from the freezer and spoon ~1/2 teaspoon of the caramel/coconut mixture on the bottom of each cup, top with a quarter piece of the shortbread cookie, then top with ~1 teaspoon of the caramel mixture. Sprinkle tops with a little bit of sea salt (if desired). Freeze for another 30 minutes.
  5. Melt remaining 1/2 cup of chocolate chips over a double boiler (or in the microwave) until completely melted and smooth. Remove chocolate cups from freezer, and cover each cup with a thin layer of the melted chocolate, smoothing the tops with a spoon if needed. Garnish with the reserved toasted coconut flakes. Freeze for an additional 15 minutes. Chocolate cups can be stored either at room temperature, in the fridge, or in the freezer in an airtight container, depending on your preference!
  6. Makes 24 chocolate cups
Adapted from The Housewife In Training
Simple Everyday Food https://www.simpleeverydayfood.com/
Recipe adapted from The Housewife In Training

© Simple Everyday Food. All images & content are copyright protected. Please do not use any of my images without prior permission. If you want to republish this recipe, please re-write the recipe in your own words, or kindly link back to this post for the recipe.

Sharing is caring! Email this to someonePrint this pagePin on PinterestShare on YummlyShare on FacebookShare on Google+Tweet about this on Twitter

I don’t know about the rest of the country, but the weather here in Minnesota has been nothing but gorgeous the past few weeks. Every day has been sunny with a few puffs of clouds in the sky, and somewhere between 75-85 degrees. After a long, brutal winter, I was more than ready to dust off the boxes where my summer shorts and tank tops have lived for the past 7 months and bring them back into my regular clothing “circulation”. It’s always a monumental day when I deem the weather warm (and stable) enough to pack up my winter boots, and put all my scarves, gloves, hats, and jackets away in the closet…. it signifies the arrival of warmer weather, longer days, shorts and flip flops, grilling, ice cold lemonade, and everything summer is about.

You know what else is a universal icon of summer? S’mores.

IMG_3522 copy

IMG_3516 copy

For someone who doesn’t care for camping, I really am a big fan of s’mores – I even have an entire section in my recipe book dedicated to all things s’mores! It’s without a doubt my second favorite flavor combination of all time. It lands in 2nd place because nothing – I mean nothing – can top mint + chocolate in my world. Whoever decided to sandwich a toasted gooey marshmallow with some chocolate in between graham crackers is a genius.

These truffles are super easy to make and requires no baking at all! All you really need is a food processor, which means they’re quick… and you won’t even have to make your house any hotter by turning on the oven. I modified the original recipe by adding several squares of graham crackers into the Oreo/cream cheese base, just to amplify the s’mores flavor, and let me tell you, everyone thought these were deeeelicious!

IMG_3531 copy

It even has a little mini marshmallow surprise inside when you take a bite out of it!

IMG_3519 copy

IMG_3521 copy

I have made several different kinds of truffles in the past, but these hands down take the crown – they are without a doubt the best tasting truffles I’ve ever made. It’s a bold statement, but that’s how good they were. They were so good that Brian alone ate 4 of them one day when I was at work, and I ended up having to make another batch of them to share with my coworkers!

IMG_3539 copy

IMG_3525 copy

Oreo s'more truffles
Print
Ingredients
  1. 15 original Oreo cookies
  2. 6 graham cracker squares, divided
  3. 2.5 oz low fat cream cheese
  4. ~11 mini marshmallows
  5. 8 oz chocolate CandiQuik
  6. ~2 tablespoons marshmallow bits (optional)
Instructions
  1. In a food processor, pulse 2 squares of graham cracker squares until it turns into fine crumbs. Place in a small bowl and set aside.
  2. In the same food processor, pulse the Oreo cookies and the remaining 4 graham cracker squares until roughly crumbled. Add in the cream cheese and pulse on HIGH until the mixture comes together. The mixture turns into a doughy consistency and should not be crumbly - you should easily to able to form them into balls without it falling apart in your hands.
  3. Roll the mixture into balls (about 1-1.5 tablespoon each) and place on a parchment paper-lined baking sheet. Take each ball and make an indentation in the middle with your thumb, and place a mini marshmallow in the center. Reform the truffle mixture back into a ball, making sure the mixture encases the mini marshmallow entirely. Repeat with the rest of the truffles. Place the truffles in the refrigerator to chill.
  4. While your truffles are chilling, make the candy coating: using a double boiler, melt the CandyQuik until smooth. Working one truffle at a time, place a ball in the CandyQuik while spooning the chocolate over the truffle with a spoon. Gently lift the ball up with a fork and gently tap off the excess candy coating.
  5. Place the truffle onto the baking sheet and immediately garnish with graham cracker crumbs and marshmallow bits. Repeat with the rest of the truffles. Return decorated truffles into refrigerator to chill. Store in an airtight container in a cool dry place for up to 5 days (if they even last that long).
  6. Makes 11 truffles
Adapted from Crazy for Crust
Simple Everyday Food https://www.simpleeverydayfood.com/
I personally love to use CandyQuik to coat all my truffles. You can also use the Wilton candy melts or Almond Bark if those are the kind you prefer. I also personally prefer to melt all my chocolates and candy coatings over a double boiler rather than throwing them in a microwave or directly over a heat source – I’ve tried microwaving them in the past, but they just never seemed to work as well for me as using a double boiler. However, if you have better luck than I do with a microwave or over a stove, feel free to do it that way – it’s probably faster anyway :)

Recipe adapted from Crazy for Crust

© Simple Everyday Food. All images & content are copyright protected. Please do not use any of my images without prior permission. If you want to republish this recipe, please re-write the recipe in your own words, or kindly link back to this post for the recipe.

Sharing is caring! Email this to someonePrint this pagePin on PinterestShare on YummlyShare on FacebookShare on Google+Tweet about this on Twitter

If you haven’t heard, I was offered a brand spankin’ new full time job about a month ago and just started it this week ! I’m super ecstatic about it, as I wasn’t really expecting to be able to find a job (at a place I really wanted to work at) this fast, just a few weeks after graduation. Of course, I wasn’t able to do it without the help of some wonderful people I listed as my references. As far as I know, a few of them were contacted by this employer, and they must’ve wrote a bunch of nice things about me, and I’m forever grateful about it :)

This will be my first ever full-time big girl job, and I took the entire process very seriously (more than usual) – from the initial submission of my resume and cover letter, to the actual interview, and the thank you letters thereafter – I applied everything I have learned in my career capstone class and meticulously read and reread everything prior to hitting the “submit” button. I’m glad a little bit of networking and hard work pays off… I love it so far!

This whole journey really made me realize that no matter where you go in life and what big milestones you have achieved, you really can’t get there without the help of people along the way – whether they are friends, family, coworkers, or even strangers… many people played a part in this job hunting process, and even now, I feel just as grateful as I did the day I was offered the position.

Ever since I was little, my mom had ingrained in my brain that it is important to express your gratitude towards those that have helped you in life. And that’s why the day after I got this new job, I decided to make some sweets for those people who took time out of their busy schedules to write recommendation letters for me. I figured if they were kind enough to take time to write nice things about me, the least I can do is take time out of my day to make a little something to show them how much I appreciate their efforts.

IMG_3006 copy

IMG_3012 copy

I would’ve made cookies, but one of my references happened to be gluten free, which is why I decided to make fudge instead. I’ve never made fudge in my entire life before, but since it’s a new year, and new years are all about trying new things, I decided to give it a whirl. And since I’m still on this mint chocolate craze, mint chocolate fudge it was (it’s only my favorite chocolate combination, if you haven’t figured that out already).

IMG_3009 copy

These little fudge squares are just like giant Andes mints and they’re so easy to make! The bottom layer consists of sweet chocolate chips with condensed milk, followed by another fudgey layer of white chocolate chips, a little bit more condensed milk, peppermint extract, and a few drops of food coloring. The thin top chocolate layer has a nice little crunch, which contrasts nicely with the bottom two smooth velvety fudgey layers. Heaven, I tell ya.

IMG_3027 copy

IMG_3028 copy

I have never had luck with melting chocolate in the microwave or directly over a heat source. It just somehow never works for me, so for all chocolate-melting recipes, I always always always melt my chocolates using a makeshift double boiler over low heat – it heats the chocolate up a lot slower, but it also gives me less anxiety. I take it as a fair trade off.

If you’ve never made fudge (like me) before, I just want to warn you that when you melt the chocolate chips with the condensed milk, the mixture is going to be thick. I was expecting the mixture to be nice and smooth and runny like melted chocolate, but nooooo… it was thick. So thick that the only good utensil to stir it with is with a sturdy wooden spoon.. and that if you stir it constantly, your arm is going to get tired. I initially thought my chocolate had seized up on me, and I started to get very frustrated. Mind you this was at 9:30 a.m. and I’m pretty sure Brian decided to stay the heck away from the kitchen for the rest of the morning.

Moral of the story: chocolate chips + condensed milk = thick mixture (read: don’t freak out).

IMG_3025 copy

mint chocolate fudge
Print
Ingredients
  1. 2.5 cups semi-sweet chocolate chips, divided
  2. One 14-oz can sweetened condensed milk, divided
  3. 1.5 cups white chocolate chips
  4. 1 teaspoon peppermint extract
  5. 2-3 drops green food coloring
  6. 1 teaspoon shortening
  7. 1/2 cups Andes Creme de Menthe Baking Chips
Instructions
  1. Line an 8x8" baking pan with aluminum foil and spray generously with nonstick cooking spray. Set aside.
  2. Using a double boiler, melt 1.5 cups of the semi-sweet chocolate chips with 3/4 cups of the sweetened condensed milk over low heat. Stir occasionally until smooth, then pour mixture into the baking pan. Spread mixture evenly (I used an offset spatula), and place in the fridge to chill.
  3. While the chocolate mixture is chilling in the fridge, melt the white chocolate chips with the remaining sweetened condensed milk over a double boiler over low heat, stirring until smooth. Remove from heat and add in the peppermint extract and green food coloring. Stir until the mixture is even in color, then pour mint layer evenly over chilled chocolate layer and place back into the refrigerator.
  4. Melt the remaining 1 cup of semi-sweet chocolate chips and the shortening over a double boiler. Stir until smooth. Pour evenly over the mint layer, top generously with Andes Creme de Menthe baking chips, and chill in fridge for at least 3-4 hours until set.
  5. Cut into small squares before serving and store in the refrigerator for up to two weeks.
  6. Makes about 36 small squares
Adapted from Sally's Baking Addiction
Simple Everyday Food https://www.simpleeverydayfood.com/
Even though I’m not a big fudge fanatic, everyone who were able to get their hands on a little piece of this decadent minty goodness all said it was phenomenal!

Recipe adapted from Sally’s Baking Addiction

© Simple Everyday Food. All images & content are copyright protected. Please do not use any of my images without prior permission. If you want to republish this recipe, please re-write the recipe in your own words, or kindly link back to this post for the recipe.

Sharing is caring! Email this to someonePrint this pagePin on PinterestShare on YummlyShare on FacebookShare on Google+Tweet about this on Twitter