everyday food made simple

Happy Smores Day!

IMG_1603

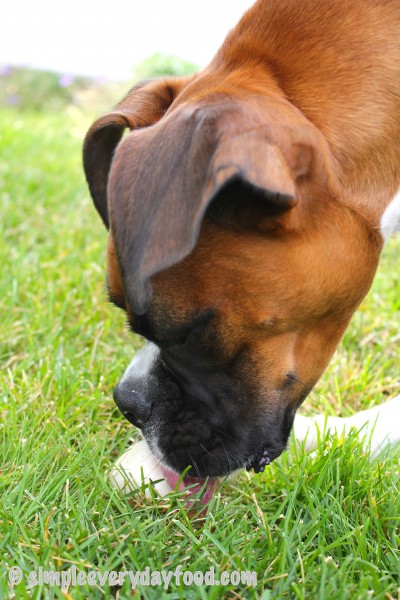
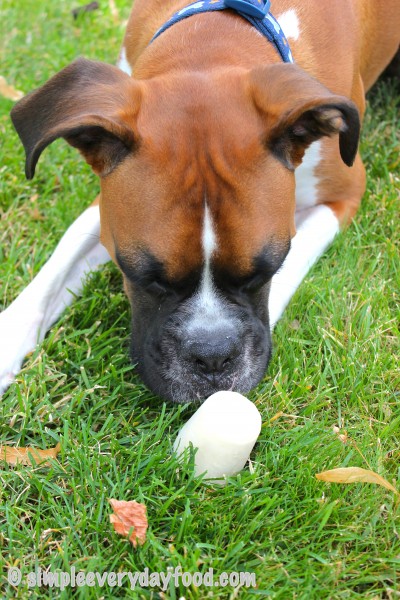
I’ve never sat by a campfire and roasted s’mores before. I’m 27 – is that weird? As much as I try to avoid camping, I absolutely looooove s’mores (and the smell of the campfire). It wasn’t until a few months ago did I have my very first roasted marshmallow on a stick over an open flame… and that was just using the leftover flames from the grill. You’d probably think that I’m sheltered – I would probably agree with you on that.

Summer is the perfect season for s’mores and any kind of dessert that involves the trio of marshmallows, chocolate, and graham crackers – last time I checked, the Blizzard of the Month flavor at DQ was a S’mores Blizzard (!). I can’t exactly pinpoint why I adore s’mores-flavored anything so much. I think it’s something with the combination of the marshmallows and chocolate and the combination of the different textures – sweet, rich chocolate paired with roasted ooey gooey marshmallows sandwiched between crunchy graham crackers…. just thinking about it is making my mouth water. There really isn’t a dessert flavor combination I love more (well, mint chocolate does win by just a teeny tiny bit…) – I have a whole board on Pinterest dedicated to s’mores desserts to prove it!

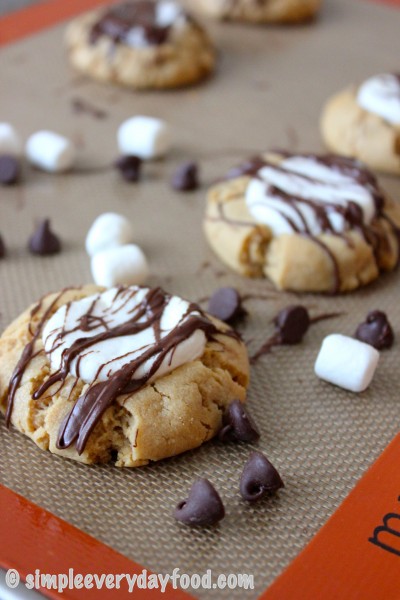
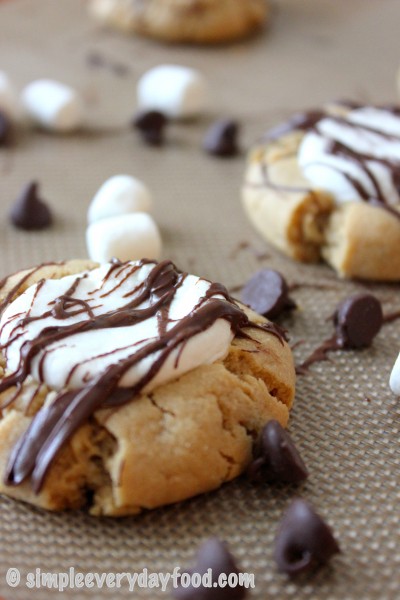
When I saw this recipe a few days ago, I knew I had to make it. It’s a spin on the traditional s’mores – we’re using a peanut butter cookie as a base instead of graham crackers. I promise it tastes even better! It’s the perfect cookie for those who are peanut butter & chocolate fans and those that are s’mores fans as well. You just can’t go wrong with it!

IMG_1609

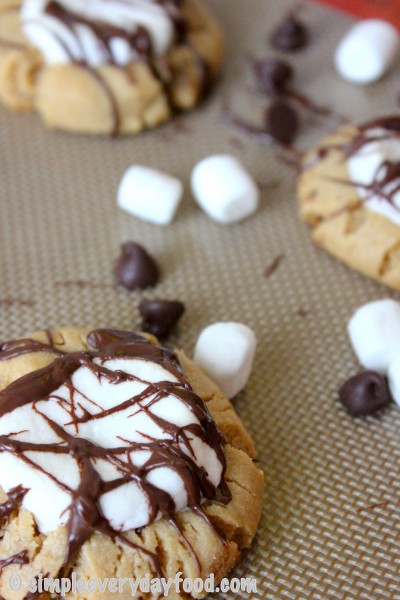
Brian who doesn’t even care for s’mores, was a fan of this cookie! I think he loved the peanut butter cookie base that won him over. These cookies are so soft that it’ll be hard not to leave any crumbs behind!

peanut butter s'mores cookies
Print
Ingredients
  1. 1/2 cup salted butter, softened to room temperature
  2. 1/2 cup light brown sugar
  3. 1/4 cup sugar
  4. 3/4 cup creamy peanut butter
  5. 1 large egg
  6. 1 teaspoon vanilla extract
  7. 1/2 teaspoon baking soda
  8. 1 and 1/4 cups all purpose flour
  9. 10-12 large marshmallows, cut in half length wise
  10. 8 oz chocolate chips
Instructions
  1. In an electric mixer, cream the butter and sugars together on medium speed. Add in the peanut butter. Mix. Then add the egg. Mix. Finally, add the vanilla extract. Beat until combined. Slowly add in the baking soda and flour, scraping down the sides as needed. Place in refrigerator and chill for 30 minutes to an hour.
  2. Preheat the oven to 350 degrees. Line 2 baking sheets with parchment paper or a silicon baking mat. Roll 1.5 tablespoons of dough into balls. Bake for 7 minutes. Take the cookies out, gently press a marshmallow onto the cookie. Bake for another 3-4 minutes, until marshmallow is slightly brown on top.
  3. Remove from oven and let cool. In the meantime, melt the chocolate chips on a double boiler. Using a spoon or a fork, drizzle the chocolate over the cookies.
  4. Store in airtight container for 7 days.
  5. Makes 20-22 cookies
Adapted from Sally's Baking Addiction
Simple Everyday Food https://www.simpleeverydayfood.com/
It’s important to bake these cookies for exactly 7 minutes so they don’t overbake. Take them out. Press the marshmallows into them, and stick them back into the oven for a few more minutes to allow the marshmallows to melt and for the cookie to finish baking. Once the chocolate and spooned over the top and the cookie is cooled, you’ve got yourself a rich, decadent peanut butter cookie with a gooey marshmallow center and a little chocolate drizzle on top.

IMG_1604

IMG_1612

Of course, no one said you have to wait til the chocolate and cookie are cooled to eat these! I wasn’t patient enough to wait and accidentally had a few right away… oops.

If you happen to have any left after they’re completely cooled, place them in an airtight container and store for a week… if they even last that long. :)

Enjoy!

Recipe from Sally’s Baking Addiction

© Simple Everyday Food. All images & content are copyright protected. Please do not use any of my images without prior permission. If you want to republish this recipe, please re-write the recipe in your own words, or kindly link back to this post for the recipe.

Sharing is caring! Email this to someonePrint this pagePin on PinterestShare on YummlyShare on FacebookShare on Google+Tweet about this on Twitter

1. I’m totally guilty of #1 on this link, “16 Ways Foodies Drive You Crazy”

foodie

Yep, that is sooooo me! Ask Brian. Half the time when I make things that end up on this blog, he suffers from having to sit in front of hot, yummy-smelling food while I take pictures of it until I’m satisfied. Even though he always sits there patiently staring at his food telling me to take my time, I still feel guilty about making him wait.

2. I really need to get this notebook. It’d probably constantly be full of homework/projects/errands that I need to get done. I’m notorious for making lists. I think I have a list with me at all times – on my phone, in my purse, in my wallet, on my MacBook… on paper, on receipts, electronically, on napkins… if it’s not on a list, it’s not going to get done! My favorite part about making a list is the satisfaction I get when I finally get to cross it off. I’m sure all list-makers would agree with me on that.

notebook

3. I thought it was the most genius idea when Reese’s came out with the miniature peanut butter cups. It’s like they knew that their product was so good that people hated wasting time trying to unwrap peanut butter cups from their wrappers. Did you know Starburst now also has a mini “unwrapped” version?!

starburst-minis

[photo source]

For you Starburst lovers, you won’t have to waste precious time peeling the wrappers off of these fruity chewy candies anymore!

4. It’s Shark Week all week! Is anyone else a fan? Nothing like being fascinated by those ginormous predators on TV and spooking yourself out when you step foot in the ocean… Anyone watch Monday’s episode about Megalodon? I personally think they exist based on the facts they provided.

5. For the past two weekends (and this weekend), we have been fortunate enough to have the weekends off of work. And even more fortunate that the weather has been gorgeous this whole time! We’re excited that it’s going to be another picture-perfect weekend! Brian is excited to try out some new recipes from the cookbook I bought him a few weeks ago, so stay tuned!

Sharing is caring! Email this to someonePrint this pagePin on PinterestShare on YummlyShare on FacebookShare on Google+Tweet about this on Twitter

This is perhaps the best thing I have ever made in the Crockpot. Ever. Now granted I haven’t made a whole lot of different things in the Crockpot, but this one is amazing (if I may say so myself) and it will definitely be a repeat for my next busy homework-filled day.

IMG_1530

I’ve been finding the perfect recipe for a traditional Chinese/Taiwanese noodle soup broth, and I think this might be it. It literally brought me back home and I think I almost shed a tear when I tasted it for the first time today. I almost felt like I was transported back in time: finding some tiny little hole-in-the-wall noodle shop on the streets of Taiwan, sitting with my family at a small table on metal stools, waiting for our food to be cooked. Most of these restaurants only have big industrial fans during the hot summer months, so we usually sit somewhere near a fan. As if we weren’t hot enough, we usually all order noodle soup (I think I order noodle soup half the time not because of the noodles, but simply because I love the “soup” part of it).

Noodle soup has a special place in my heart. It’s usually something that can made within 15, 20 minutes with a variety of ingredients, so we ate a lot of it growing up, especially when my parents didn’t have much time to cook after coming home from work. Now when I say “noodle soup”, I don’t mean the American “chicken noodle soup”. The Asian version is very different and in my (biased) opinion, tastes way better :)

Anyway, back to soup… I used a pork butt roast for this rather than a pork shoulder – you can definitely use a pork shoulder if you’d like. The pork butt is slightly fattier, but it also gives the broth an amazing flavor as well.

IMG_1528

The combination of soy sauce, ginger, garlic, and star anise play an important part in making this a true authentic Taiwanese/Chinese dish. I added about 1.5 cups of water after taking the roast out to dilute the broth a little bit more; however, if you prefer your broth on the more concentrated and salty side, feel free to omit the additional water. I used Napa cabbage as my vegetable simply because that was all my grocery store had at the time, but if you prefer bok choy, that’ll work as well.

IMG_1538

slow cooker asian pork and noodle soup
Print
Ingredients
  1. 3 cups low-sodium chicken broth
  2. 1/4 cup soy sauce
  3. 3 tablespoons light brown sugar
  4. 3 cloves garlic, smashed
  5. 1-2" piece ginger, peeled and sliced
  6. 2 pieces star anise
  7. 1/4 teaspoon salt
  8. 3 pounds pork butt roast
  9. 1.5 cups water
  10. 2 cups Napa cabbage, chopped
  11. 3-4 oz dried Mai-Fun noodles
Instructions
  1. In a 5-6 quart slow cooker, combine the chicken broth, soy sauce, brown sugar, garlic, ginger, star anise and salt. Add the pork, then cover and cook on low 8 hours, or until pork is fork tender.
  2. Remove pork and place on a large plate. Shred with a fork and set aside.
  3. Add the water, Napa cabbage, and noodles to the slow cooker, making sure they are submerged. Cover and cook for 30 more minutes, or until noodles are done.
  4. Divide the noodles, Napa cabbage, and pork among bowls, then ladle in the broth.
  5. Serves 3
Adapted from Food Network
Simple Everyday Food https://www.simpleeverydayfood.com/
Not only is the flavor of this soup very nostalgic to me, it also makes the house smell like a little hole-in-the-wall Taiwanese noodle place. I placed the roast in the slow cooker this morning before leaving for class, and when I came back 8 hours later, I could smell the deliciousness before I even opened the front door. Not to mention finding a recipe this delicious that only requires a Crockpot is always a win in my book!

IMG_1540

Enjoy!

Recipe slightly adapted from Food Network

© Simple Everyday Food. All images & content are copyright protected. Please do not use any of my images without prior permission. If you want to republish this recipe, please re-write the recipe in your own words, or kindly link back to this post for the recipe.

Sharing is caring! Email this to someonePrint this pagePin on PinterestShare on YummlyShare on FacebookShare on Google+Tweet about this on Twitter

Can you believe it’s August already?! Where did my summer go???? Next thing we know, the leaves are going to be turning red, falling off of trees, it’s going to be cold, and there’s going to be snow on the ground.

Ugh, I don’t even want to think about snow right now. It’s August, folks! August is the last month of summer in my opinion, and therefore all of the remaining hot sunny days need to be treasured. I’m already looking forward to the Minnesota State Fair that starts August 22nd! We’ve already bought our tickets and Blue Ribbon Book, and I’ve already read about all the new vendors/foods-on-a-stick that are going to be at the fair! And for those of you that are big State Fair fans nerds like me, there are going to be 40 new fair foods this year!

Jalapeno corn dogs. Comet corn. Breakfast sausage corn dogs. Cajun pork rinds. Funnel cake sundaes. Idaho nachos. Mini donut batter crunch ice cream (!!).. and much more that I want to try!

And then there’s always the all-time favorites: root beer floats, cheese curds, pronto pups, deep-fried chocolate chip cookie dough on a stick, chocolate dipped keylime pie on a stick, sweet corn ice cream, mac & cheese on a stick, the corn roast, Sweet Martha’s cookies, Tom Thumb’s mini donuts, cream puffs, potato skins, Dole Whip floats (!!), french fried mushrooms, porcupine meatballs on a stick, walleye fries, Minneapple pies….. whew. Should I go on?

And once again, I’m going off track here… at the beginning of this summer, I wanted to buy some popsicle molds and make some homemade popsicles. I also wanted to buy an ice cream maker attachment for the KitchenAid mixer, but figured we should wait until we sell the house and move before adding more things to my kitchen collection. Since I didn’t get to make any popsicles or ice cream this summer, I figured I can make Bentley some doggie popsicles instead.

This recipe really is super simple. It only requires 4 ingredients and a blender. It only takes a total of 5 minutes to make (excluding freezing time). And there’s only a total of 5 simple steps. FIVE! It’s that easy – no reason not to make these for your four-legged canine kids.

Step 1: Blend ingredients.

Step 2: Pour into Dixie cups.

IMG_1544

Step 3: Freeze overnight.

IMG_1546

Step 4: Peel away Dixie cup from popsicle.

IMG_1547

Step 5: Give to dog, and wait to receive a cute “thank you you’re the best, mom!” look with a muzzle full of melted popsicle drippings <3

IMG_1561

IMG_1577

This is more like his “awww my treat is gone! Can I have another one?” look. Hard to say no to that, but I stood my ground (for 6 hours).

doggie peanut butter yogurt popsicles
Print
Ingredients
  1. 32 oz plain yogurt
  2. 3 tablespoons creamy peanut butter
  3. 1 tablespoon honey
  4. 1 banana
  5. 15-17 mini Dixie cups
Instructions
  1. In a blender, combine the yogurt, peanut butter, honey, and banana. Blend until smooth.
  2. Fill mini Dixie cups about 3/4 full with mixture. Place in freezer and freeze overnight.
  3. When ready to serve, peel off the Dixie cup from the popsicle. The bottom part of the cup may stick to the popsicle, but should be easily peeled off with a little help of your fingernails.
  4. Give to your four-legged canine friend outside or on a easily cleanable surface (hardwood floors, tiles).
  5. Makes about 15 mini Dixie cup popsicles
Notes
  1. If you have a mini muffin pan, I found out that the mini Dixie cups fit pretty well in those and make it easier to transport all of them into the freezer. Otherwise you can place the Dixie cups in a cake pan or rimmed cookie sheet as well.
Simple Everyday Food https://www.simpleeverydayfood.com/
We used mini Dixie cups, but if you have any extra ice cube trays laying around the house, those would work too! I chose to use Dixie cups because 1. they hold a little bit more than an ice cube well would, 2. it’s easier to pick one and give it to Bentley (as opposed to trying to pop them out from a tray), and 3. they’re disposable (read: less things to wash).

Now this can be a little messy to eat, so I would strongly encourage you to give these to your furry babies outside… unless you’re willing to clean up trails of sticky melted peanut butter yogurt ice cream :-)

Bentley was able to enjoy his in the yard today! It was a beautiful day out, perfect for something popsicles! It was his first time having any sort of a popsicle so he wasn’t quite sure what to do with it in the beginning… he spent 99% of the time licking his frozen treat and pushing it around the yard with his nose, it was comical.

IMG_1550

IMG_1560

I didn’t personally try it, so I can’t tell you guys how it tastes, but it’s Bentley approved!

© Simple Everyday Food. All images & content are copyright protected. Please do not use any of my images without prior permission. If you want to republish this recipe, please re-write the recipe in your own words, or kindly link back to this post for the recipe.

Sharing is caring! Email this to someonePrint this pagePin on PinterestShare on YummlyShare on FacebookShare on Google+Tweet about this on Twitter