everyday food made simple

1. Last week I discovered the greatness of this:

photo 2

If you haven’t tried this and it sounds like something you might like, I highly recommend you go get a bottle and try it out. You won’t be disappointed – I used mine as a dipping sauce for some chicken nuggets and they were delicious!

2. While we’re on the topic of chicken nuggets: we made some last week with some fries, and it looked like Bentley was all about being patient and looking cute, hoping I’d give him and share my nuggets with him…

photo 1

3. Have you ever been to an alpaca farm? I got up close and personal with a whole herd of 9 alpacas yesterday! We went on a field trip to a local alpaca farm for our productions class, where we learned how to restrain, give vaccinations, and perform physical exams on them. I must say, as weird as they look, they are pretty cute!

photo 5

The cria (baby alpaca) was especially cute with with her little fuzzy face…

1005683_10103522255847980_1255647673_n

4. Earlier last week, I decided it would be a good idea to create some business cards for Simple Everyday Food. It’s been about 6 months since I’ve started this, and I’ve really enjoyed watching it grow! I’ve had a lot of people from work and school that have asked me about it, and I figured it’d be a good way to spread the word…. On Monday, they came in the mail! I’ve gotta say, I’m pretty happy about how they turned out!

photo 3

photo 4

5. This has got to be the coolest, most awesomest (yes, I just made that word up) mug I currently own in my collection. The moment I saw it, I knew I just had to get it!

photo 1

photo 2

Have a good rest of the week, guys! The Minnesota State Fair starts tomorrow! WOO HOO!

Sharing is caring! Email this to someonePrint this pagePin on PinterestShare on YummlyShare on FacebookShare on Google+Tweet about this on Twitter

One weird thing about me is that I tend to only drink smoothies or anything that involves blending ice cubes in a blender during the summer. Once the temperature starts to drop and the days get shorter, I can say “bye bye see you next summer” to frappes, smoothies, and coolers (I love my Caribou Coffee!)…

You can’t blame me, the frigid Minnesota winter is cold enough as it is, I don’t need to make myself any colder by drinking anything cold!

Now that it’s mid-August and there’s only a few more weeks of “real” summer left, I need to get all my slushie/smoothie fixes in before it starts getting cold outside.

IMG_1636

So today I’ve brought to you a very simple yet summery watermelon drink. It’s super easy, yet super refreshing. Watermelon is perhaps the iconic fruit of summer. I haven’t met a person who doesn’t like watermelon – kids love it. I love it. My grandma loves it. Even my dog loves it. It’s truly a fruit enjoyed by people (and dogs) of all ages! It only makes sense making a cold, minty, sweet, refreshing drink with it… right?

IMG_1641

IMG_1646

watermelon mint slushie
Print
Ingredients
  1. 3 cups watermelon cubes, frozen
  2. 8 oz plain coconut water
  3. Juice of 1/2 lime
  4. 6-7 mint leaves, additional for garnish if desired
  5. 1 cup ice cubes
Instructions
  1. Place all ingredients in a blender. Blend on high for a minute, or until smooth.
  2. Divide evenly among 2 glasses, garnish with additional mint leaves.
  3. Serve immediately.
  4. Makes ~24 ounces (2 glasses)
Simple Everyday Food https://www.simpleeverydayfood.com/
A little bit of separation is normal after you’ve poured these drinks into glasses. It’s just like your blended coffee settling after a while – the icy part floats to the top, leaving the liquid portion on the bottom. Stir it up a little if you’d like and enjoy! You can even substitute the coconut water with some club soda for a little extra fizz. Let me know what you think!

IMG_1647

Enjoy!

Recipe adapted from Skirt.com

© Simple Everyday Food. All images & content are copyright protected. Please do not use any of my images without prior permission. If you want to republish this recipe, please re-write the recipe in your own words, or kindly link back to this post for the recipe.

Sharing is caring! Email this to someonePrint this pagePin on PinterestShare on YummlyShare on FacebookShare on Google+Tweet about this on Twitter

Before I try to sell you on how delicious this fish is, I’ll just tell you what Brian said today after he took a few bites of it. Now mind you, he’s really not a big fan of fish, unless it’s walleye beer battered and fried. So the fact that he loved it so much says a lot about how good it was.

IMG_1632

“This is probably the best fish I’ve ever had. It’s way better than walleye.”

“This may be the best thing I’ve ever made on the grill”. He’s made plenty of yummy things on the grill before, but this is definitely his best grilled fish ever. And what’s even more impressive is that it was his first time grilling fish directly on a grill.

“If I would’ve won the powerball, I could make these and eat it 2-3 times a day!”

Yep, it was that good. I thought it was delicious as well. I’m a big fan of white, flaky fish (sea bass, cod) as opposed to denser meatier fish (salmon, mahi mahi). Though I’ve only had a handful of very memorable experiences with fish entrees the past few years, this definitely tops the charts. I can probably eat this three times a week and totally be happy with it.

IMG_1627

caribbean citrus marinated grilled sea bass
Print
Ingredients
  1. 2 6-7 oz fresh sea bass
  2. EVOO
  3. Salt
For the marinade
  1. 2 teaspoons orange zest
  2. 1/2 cup orange juice
  3. 1 teaspoon lime zest
  4. 1/4 lime juice
  5. 1/4 EVOO
  6. 1/4 chile and garlic powder
  7. 1 and 1/2 tablespoons minced garlic
  8. 1 and 1/2 teaspoons ground coriander
  9. 1 teaspoon minced jalapeno pepper
  10. 3/4 teaspoon ground allspice
  11. 3/4 teaspoon ground black pepper
  12. 1/4 teaspoon cayenne pepper
Instructions
  1. In a medium bowl, combine all the marinade ingredients. Place the fish fillets into the bowl, making sure all sides of the fish are coated with the marinade. Cover and refrigerate for 3 hours, turning the fish over halfway through to make sure all surfaces are evenly marinated.
  2. Prepare your grill for direct cooking over high heat.
  3. Remove the fish from the bowl, brush with EVOO and sprinkle with salt.
  4. Grill the fillets, skin side up over direct high heat for 8-10 minutes, turning once after 6-7 minutes or when they're easily released from the cooking grate.
  5. Serves 2
Notes
  1. Cooking time may be based on how thick your fish fillets are. Eight to 10 minutes is for fillets that are about 1" thick.
Adapted from Weber's Way To Grill
Simple Everyday Food https://www.simpleeverydayfood.com/
It’s important that you use fresh fish for this. Don’t take the shortcut and use frozen fish.. it’s not going to taste the same. If you can’t find sea bass, use whatever else is fresh and available – cod, shrimp, scallops, halibut, swordfish, etc.

This fish is perfectly marinated with oranges, limes, garlic, seasonings, and jalapeno peppers for a spicy kick. You place it on the grill skin side up so the fish ends up with beautiful grill marks. It’s smokey, citrus-y, tender, moist, and very flaky. You know a piece of fish is perfectly cooked when the fish flakes apart very easily with a fork! I was in heaven :)

IMG_1635

Enjoy!

Recipe from Weber’s Way To Grill by Jamie Purviance

© Simple Everyday Food. All images & content are copyright protected. Please do not use any of my images without prior permission. If you want to republish this recipe, please re-write the recipe in your own words, or kindly link back to this post for the recipe.

Sharing is caring! Email this to someonePrint this pagePin on PinterestShare on YummlyShare on FacebookShare on Google+Tweet about this on Twitter

1. In case you missed it, this past Saturday was National S’mores Day! I celebrated this “holiday” by making peanut butter s’mores cookies. These turned out to be a huge hit! Everyone who was fortunate enough to try a bite became instant fans. As I was shooting photos for that post, Brian was able to get an “action shot”:

photo 1

I’m not sure if Bentley wanted to be part of the picture, or if he was just waiting for the opportune moment to steal some peanut butter cookies…..

And to round out the day, we stopped by Dairy Queen for the first time this summer (I know! Crazy, right?) after dinner and I just had to order their S’mores Blizzard.

photo 2

Best. Blizzard. EVER! Let me just say that it was about 32498714 times better than what I thought it was going to be. It definitely exceeded all my expectations and then some. Definitely wasn’t disappointed.

2. The sitcom FRIENDS is perhaps one of my favorite shows ever. I’ve probably watched every episode at least 5 times (that’s a conservative estimate), and I can tell you exactly which episode it is by watching the first 30 seconds of a clip. I can also recite many parts of the show word for word, in the character’s exact same tone of voice.

….as if you didn’t know I was a nerd already……..

My best friend Nicky (Hi Nicky!) who was my maid of honor knew I loved the series so much that she got us the entire season as a wedding gift.

Here are 25 facts that you probably didn’t know about FRIENDS. Did you know Ross’ middle name is Eustace? And that during its run, the show actually released 2 soundtracks?

3. I knew from a long time ago, McDonald’s around the world tend to cater their menu to the palates of the country’s population. When we went to Hawaii, their McD’s had menu items involving Spam. In Taiwan, they have shrimp burgers, rice burgers, and some sort of a grilled salmon burger on their menu too. But did you know about these other food items offered at different international McDonald’s????

  • Bulgogi Burger (South Korea) – yes, I’d like to try that.
  • Spinach and Parmesan cheese chicken nuggets (Italy) – uh, gross.
  • Singapore Curry, Korean Chili, and Sesame Miso dipping sauces for chicken nuggets (Hong Kong) – yes please!
  • Vanilla chai tea iced frappe (Canada) – these should be sold at every McDonald’s in the US.
  • Toblerone McFlurry (Turkey) – as if those chocolates aren’t good enough by itself…

Maybe next time I travel out of the country, it will be my mission to try something different from their McDonald’s.

4. Has anyone read the book Orange Is The New Black? I’ve been seeing the name brought it in various social medias, and was wondering if it’s worth reading or not.

5. Most of these pictures made me smile and feel warm and fuzzy inside. Some of them brought tears to my eyes. It just shows that as cruel as the world may seem sometimes, true love and devotion still exist.

© Simple Everyday Food. All images & content are copyright protected. Please do not use any of my images without prior permission.

Sharing is caring! Email this to someonePrint this pagePin on PinterestShare on YummlyShare on FacebookShare on Google+Tweet about this on Twitter

I wasn’t going to share this recipe with you guys until later this week (or even this weekend), but I posted a picture of this on Instagram the night we had this for dinner, and my friend Christy asked me today when I was going to put it on my blog… so here it is, a few days early.

IMG_1668

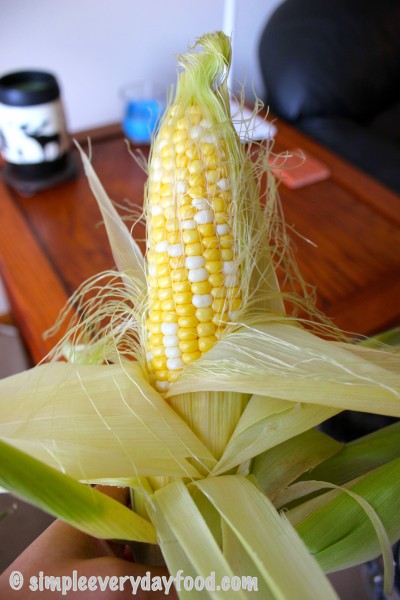
There is never a shortage of corn in our house. In the winter we have bags of frozen corn in our freezer, but then during the summer months, it’s all about taking advantage of fresh sweet corn on the cob.

IMG_1652

When I saw this recipe, I just knew I had to make it. Not only do we like sweet corn, we also loooooove pasta. Anything that involves pasta is 99% of the time guaranteed a thumbs-up. I sure wasn’t disappointed, because this pasta was a huge hit at the dinner table a few nights ago!

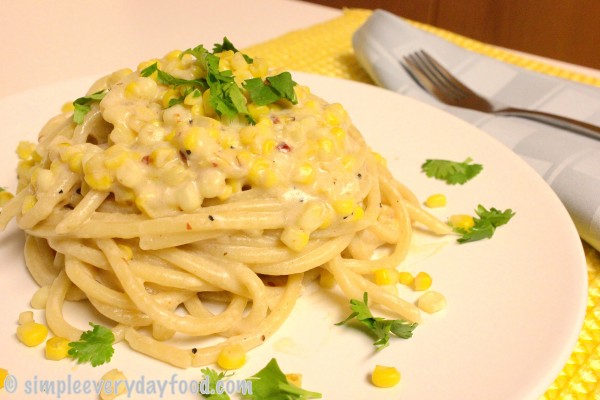
The “roasted” sweet corn that had a nice char on the outside. The spicy kick from Chipotle peppers. The creaminess of the sauce. The pasta cooked just al dente all played an important part in making this a quick summery dinner. I like my pasta sauce a little bit on the runny side, so if you’re like me, add a little bit more Greek yogurt and pasta water.

You place the corn cobs into a pot of boiling water to get the cooking process started (promptly remove from heat and cover as soon as you add the corn to the water). Although this isn’t a required step, I do recommend it! It makes your job a lot easier later, I promise.

We chose to use bucatini pasta rather than fettuccine. The reason behind it is simple: the straw-like noodles will be able to “trap” some of that yummy creamy sauce in it, so every bite you take, you get pasta with a burst of spicy sauce. Whoever thought of putting a hole through spaghetti is a genius.

IMG_1659

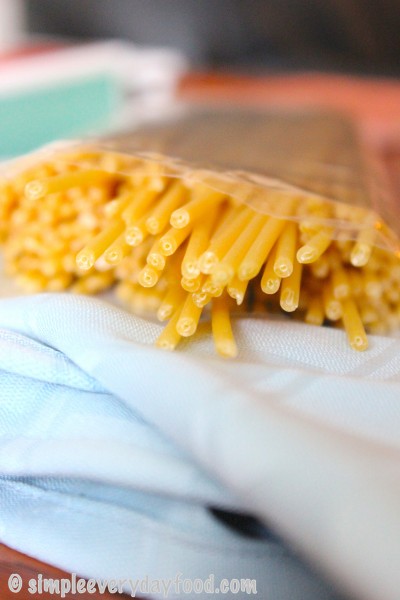
Of course, this can easily be tweaked into a kid-friendly dish by eliminating the peppers. And if you can’t find bucatini noodles, use whatever you can find – fettuccine, thin spaghetti, or regular spaghetti noodles would all work just fine.

IMG_1667

sweet corn bucatini
Print
Ingredients
  1. 4 ears of fresh sweet corn
  2. 1 lb bucatini noodles
  3. 3 tablespoons butter
  4. 2 cloves garlic, minced
  5. ¼ cup flour
  6. 1 cup milk
  7. ½ cup fat-free half and half
  8. ½ teaspoon salt
  9. ½ cup plain Greek yogurt
  10. 1 chipotle pepper in adobo sauce, minced
Instructions
  1. Fill a large pot with water. Bring to a boil. Place the sweet corn in the pot, cover, and remove from heat. Let the ears of corn "cook" in the hot water for a few minutes. Remove from the water and let cool. Reserve 3/4 cup of the water. Once cooled, cut the corn kernels off the ears.
  2. Place the corn kernels in a large skillet without any butter or oil in a single layer (the best you can). Resist the urge to stir them. Let them sit for a few minutes, Stir them around, and let them sit some more until they start getting roast-y looking. Turn off heat, transfer to a bowl and set aside.
  3. Cook the pasta according to package directions. Drain, while reserving a cup of pasta water for later.
  4. In a large wok (or skillet), melt the butter over medium-low heat, then add the garlic. Stir, making sure you don't burn the garlic. Add the flour and stir some more.
  5. Combine the milk and half-and-half to the flour mixture, whisk until there are no more lumps. Then add in the Greek yogurt and minced chipotle pepper.
  6. Once everything is thoroughly combined, combine the corn kernels and pasta. Stir until everything is mixed well.
  7. Serves 4
  8. If you like your pasta sauce a little bit runnier, add in more Greek yogurt and reserved pasta water until it reaches your desired consistency.
Adapted from Pinch of Yum
Simple Everyday Food https://www.simpleeverydayfood.com/
The sweet corn was probably my favorite part of this dish. By putting them in the boiling water and removing the corn after slightly “roasting” them, it prevents you from overcooking it later on. As a result, as you’re eating your pasta, the corn kernels are so fresh and perfectly cooked that they literally burst and pop in your mouth… it’s amazing.

IMG_1670

IMG_1673

So next time when you invite your vegetarian friends over, make this for them! It’s filling, delicious, and flavorful.

Enjoy!

Recipe adapted from Pinch of Yum

© Simple Everyday Food. All images & content are copyright protected. Please do not use any of my images without prior permission. If you want to republish this recipe, please re-write the recipe in your own words, or kindly link back to this post for the recipe.

Sharing is caring! Email this to someonePrint this pagePin on PinterestShare on YummlyShare on FacebookShare on Google+Tweet about this on Twitter