everyday food made simple

Have you ever set a list of goals of what you need to accomplish by a certain day, only to realize that you’ve gotten little to none of it done when the day comes?

Here’s the thing: When my quarter break started, I wrote down a list of things that I wanted to get done before the new quarter started. Well, my break has been over for almost a week, the new quarter has started already, and more than half of the things on my list still hasn’t been crossed off yet. The garage is still a mess, the vacuum and Keurig filters haven’t been cleaned, I have piles and piles of laundry that needs to be done, and I haven’t gotten a chance to spend quality time with my Kindle (i.e. read a book).

Where the heck did my time go? More importantly, what have I been doing with my time?! Well, I guess having a list of 3-4 recipes I wanted to make during break doesn’t really make matters better either.

Oh well. Baking comes first. Studying and laundry can come second (until I run out of socks).

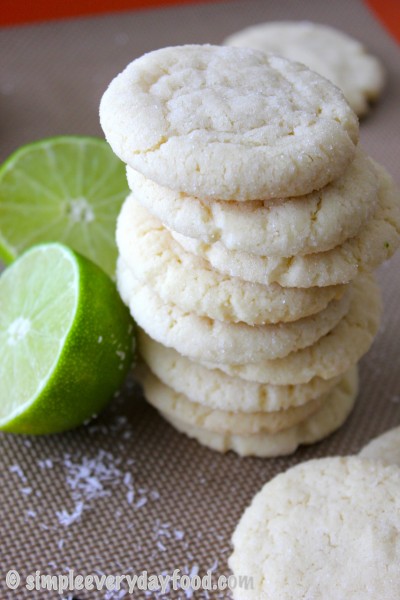
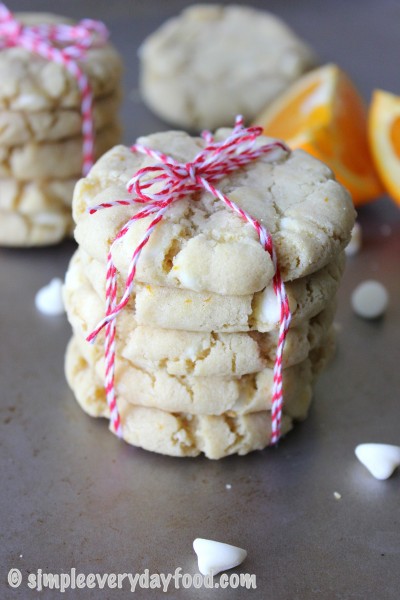
Good thing these cookies are super easy to make! And what’s even better is that they taste great too!! Remember about a month ago I made these orange creamsicle puppy chow? Well, I turned them into a cookie, and they taste equally as good – or in Brian’s words, “the best cookie [I’ve] ever made”.

IMG_1905 copy

IMG_1897 copy

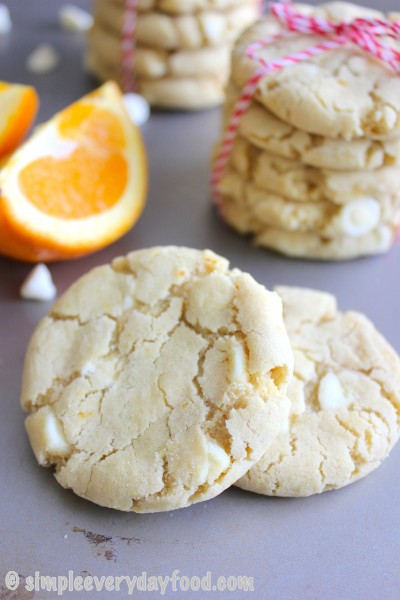
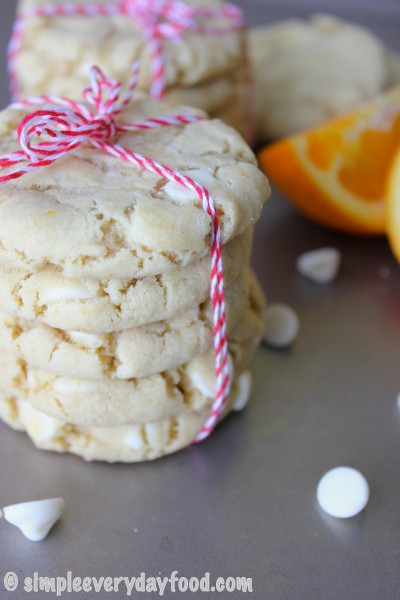
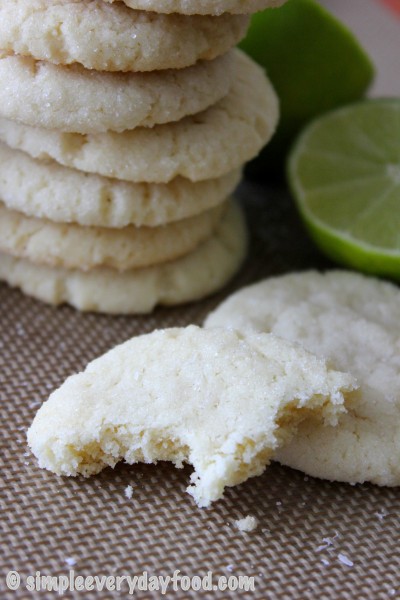
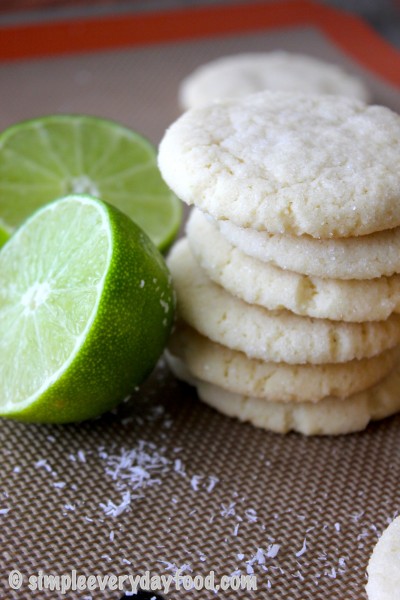
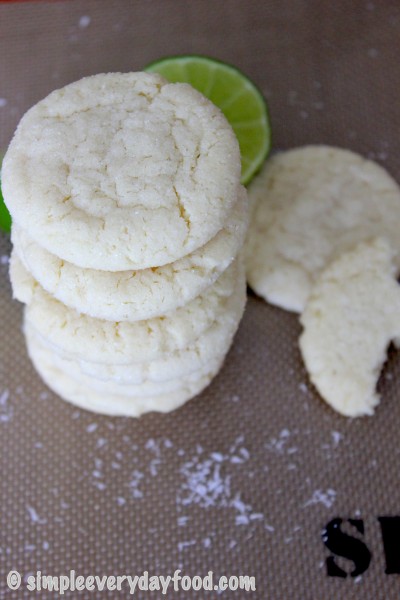
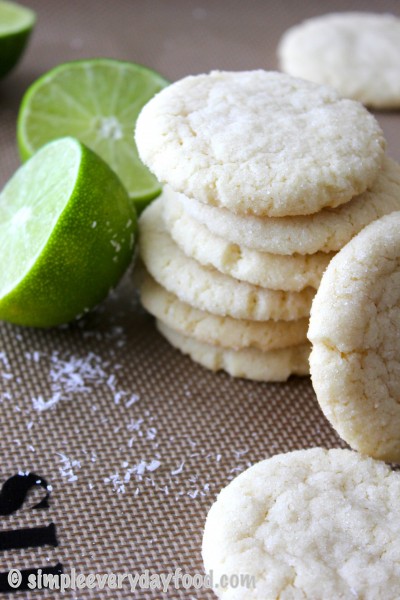
These cookies are soft and chewy, bursting with bright citrus-y flavors, and white chocolate chips are guaranteed in every single bite. Seriously, when I was rolling these into little dough balls, there were times I thought I was rolling balls of white chocolate rather than balls of cookie dough… As with my pumpkin chocolate chip cookies, I baked these for 8 minutes, slightly flattened them out with the back of a spoon, and baked them for another 1-2 minutes. Flattening the cookies out in between gives them the cracks and crinkles that I adore so much in cookies.

IMG_1907 copy

soft and chewy orange creamsicle cookies
Print
Ingredients
  1. 2 and 1/2 cups all-purpose flour
  2. 3/4 teaspoon baking soda
  3. 1/2 teaspoon salt
  4. 1 cup unsalted butter, softened to room temperature
  5. 1/2 cup granulated sugar
  6. 1/2 light brown sugar
  7. 1 large egg, to room temperature
  8. 1 teaspoon vanilla extract
  9. 2 tablespoons orange zest
  10. 1 (12 oz) bag white chocolate chips
Instructions
  1. Preheat oven to 375 degrees. Line baking sheets with parchment paper or silicone baking mats.
  2. In a medium sized bowl, combine the flour, baking soda, and salt. Set aside.
  3. Using an electric mixer, cream the butter and sugars until light and fluffy. Beat in the egg and vanilla extract, then gradually add in the dry ingredients. Mix under medium speed until combined. Stir in the orange zest and chocolate chips.
  4. Using a medium cookie scoop (I used one that holds about 1.5 tablespoons of dough), scoop dough out onto the prepared baking sheet. Roll into balls with your hands.
  5. Bake cookies for about 8 minutes, take them out of the oven, slightly flatten them with the back of a spoon, then bake for another 1-2 minutes or until they start to slightly brown around the edges. Let cool on baking sheet for 5-10 minutes, then transfer to a wired cooling rack for them to completely cool.
  6. Store in airtight container for up to 7 days.
  7. Yields 30-32 cookies.
Adapted from The Girl Who Ate Everything
Simple Everyday Food https://www.simpleeverydayfood.com/
IMG_1896 copy

IMG_1891 copy

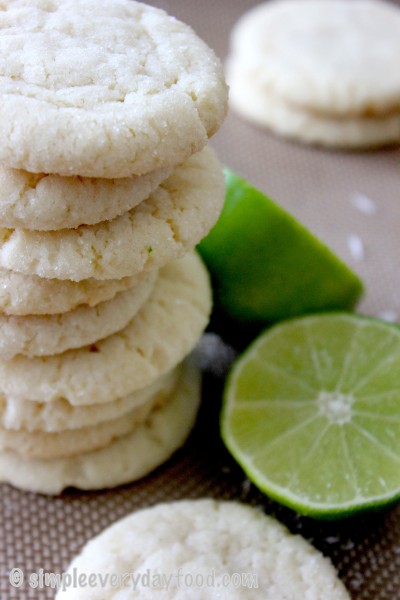
So when you’re missing summer this fall/winter season, make these! Or you can make these too. Or you can make both, because you can never have too many cookies, right?

Recipe from The Girl Who Ate Everything

© Simple Everyday Food. All images & content are copyright protected. Please do not use any of my images without prior permission. If you want to republish this recipe, please re-write the recipe in your own words, or kindly link back to this post for the recipe.

Sharing is caring! Email this to someonePrint this pagePin on PinterestShare on YummlyShare on FacebookShare on Google+Tweet about this on Twitter

First of all, is that even how you spell “ooey“? Initially I started typing it as “ooy” but that didn’t look right. “Oo-y” would’ve worked too, but I don’t think that’s how people spell it either. Ooey will just have to suffice for now.

IMG_1785 copy

I’ve been boycotting posting anything pumpkin-related on here ever since I found out my local Caribou coffee decided to start promoting their pumpkin drinks at the end of August (that obviously changed today).

August – really?  Can’t we just enjoy one season at a time? It’s like a competition between chain coffee stores nowadays to see who can come out with fall drinks the earliest. Why are these stores rushing the months away? I want to enjoy my summer to the fullest, then I’ll savor the fall scents and flavors when the time comes. It only makes sense – that way there’s something to look forward to every month, right? Am I the only one who feels this way? I mean, summer’s not even over yet in August, for cryin’ out loud. The days are still (relatively) long, it’s still hot out, and if it’s still warm enough for me to be out in shorts and a t-shirt, it’s sure not the right time to be sipping pumpkin-anything just yet.

In my world, pumpkins are synonymous with Halloween, which occurs in October, therefore pumpkin drinks and desserts should be saved for the month of October only.

Hooooweveeerrr… I caved in. Yes, that’s right, I caved in and made these cookies before the month of October even arrived. Well, I guess it’s technically fall now, and October is just a few days away… so I’ll forgive myself for jumping the gun a little bit earlier this year.

IMG_1777 copy

I’m not as big of a fan of pumpkin as many of my other food blogger friends, but I don’t mind it I guess. I won’t go out and eat a whole slice of pumpkin pie, but an occasional bite or two of it is okay with me. I think I associate pumpkin desserts with pumpkin pie and pumpkin puree, and I’m not a fan of the texture of either of those. They’re mushy. I don’t like mushy. It’s also the reason why I don’t eat hummus or guacamole… yeah, I don’t like guacamole. I’m weird.

IMG_1790 copy

This recipe is simple and straight forward. You don’t even need an electric mixer for it! The cookies turn out to be super soft and bursts with plenty of pumpkin flavor and pumpkin spices. I think the cookies would’ve been delicious enough by itself, but then you add in chocolate chips and guess what – it becomes even more amazing. Bites of soft pumpkin cookie with chocolate chips… because chocolate chips always make cookies taste better!

IMG_1783 copy

These cookies don’t spread much when they’re in the oven, so you can either 1) bake them in the oven for 8 minutes, take them out, flatten them with the back of a spoon and bake for another minute; or 2) flatten them first and then bake them for 8-10 minutes. I chose the do the former simply because I loved the little cracks and crinkles that are created once you flatten out a semi-cooked cookie :)

ooey gooey pumpkin chocolate chip cookies
Print
Ingredients
  1. 1/2 cup unsalted butter
  2. 1/4 cup light brown sugar
  3. 1/2 cup granulated sugar
  4. 1 teaspoon vanilla extract
  5. 6 tablespoons pumpkin puree (not pumpkin pie filling) - use a little bit more if you want more pumpkin flavor
  6. 1 and 1/2 cups all-purpose flour
  7. 1/4 teaspoon salt
  8. 1/4 teaspoon baking powder
  9. 1/4 teaspoon baking soda
  10. 1 and 1/2 teaspoons ground cinnamon
  11. 1/2 teaspoon ground nutmeg
  12. 1/4 teaspoon ground cloves
  13. 1/4 teaspoon pumpkin pie spice, if desired
  14. 1/2 cup (90 grams) semi-sweet chocolate chips
Instructions
  1. In a medium bowl, combine the melted butter and the two sugars together, whisk until thoroughly combined. Whisk in the vanilla and pumpkin until smooth and set aside.
  2. In a large bowl, add in the flour, salt, baking powder, baking soda, cinnamon, nutmeg, and cloves. Slightly mix with a spatula. Pour the wet ingredients into the dry ingredients and mix well. Fold in 1/2 cup semi-sweet chocolate chips and mix some more. Cover the dough and chill for 30-60 minutes.
  3. Preheat the oven to 350 degrees. Line baking sheets with parchment paper or silicone baking mats and set aside.
  4. Roll about 1.5 tablespoons of cookie dough into balls. Bake for ~8 minutes. Take the baking sheet out and slightly flatten the dough balls with the back of a spoon until they're about 1/2" thick. Bake for another 1-2 minutes. Remove from oven and let the cookies cool on the baking sheet for 5-10 minutes, then transfer to a cooling rack. If the cookie dough still doesn't seem flattened enough, flatten them out a little bit more after you take them out to cool. Store in an airtight container for up to a week.
  5. Makes about 20 cookies
Adapted from Sally's Baking Addiction
Simple Everyday Food https://www.simpleeverydayfood.com/
The only complaint I have about these cookies is that they don’t make enough! I had to debate long and hard on how many to bring to school to share, and how many to keep at home for ourselves. Next time I’m totally making a double batch of these!

IMG_1793 copy

Now that I’ve gotten my first pumpkin dessert of the way, stay tuned for more yummy pumpkin-related desserts in the next few months!

I’m sure a certain someone would love to see more pumpkin puree used around the house!

IMG_1797 copy

IMG_1798 copy

I’m just glad I haven’t seen any Christmas decorations out on the shelves in September…. yet.

Enjoy!

Recipe adapted from Sally’s Baking Addiction

© Simple Everyday Food. All images & content are copyright protected. Please do not use any of my images without prior permission. If you want to republish this recipe, please re-write the recipe in your own words, or kindly link back to this post for the recipe.

Sharing is caring! Email this to someonePrint this pagePin on PinterestShare on YummlyShare on FacebookShare on Google+Tweet about this on Twitter

I’ve been on a real huge “lime” kick this summer. I’ve been adding it in drinks…

IMG_1641

IMG_0901

In main dishes…

IMG_0844

IMG_1627

In appetizers…

IMG_1220

…And in an assortment of baked goods such as bars…

IMG_1046

(okay, these are key lime pie bars, but still close enough to “limes”)

Donuts…

Zemanta Related Posts Thumbnail

And now… cookies!

IMG_1733


IMG_1740

I’m a big fan of coconut and coconut flavored anything, so even though the recipe says to toast 1/2 cup of shredded coconut, I “accidentally” spilled a little bit more onto the baking sheet…. oops :)

If you’ve never toasted coconut before, you really have to stand right by the oven to keep an eye on it. It was my first time toasting coconut – I set the timer for 5 minutes, and when I peaked at it after 2-2.5 minutes, they were already brown and on the way to being burnt! The second time I only had them in there for 1.5 minutes and they turned out way better.

Before you put the cookie dough balls into the oven, slightly press the dough balls down with a few fingers to flatten them out a bit. This allows the cookie to spread out a bit more as they cook in the oven, resulting in a nice round flat cookie complete with little crinkles and cracks on the top :)

IMG_1728

IMG_1748     

soft and chewy coconut lime sugar cookies
Print
Ingredients
  1. 2 3/4 cups all-purpose flour
  2. 1 teaspoon baking soda
  3. ½ teaspoon baking powder
  4. ½ teaspoon salt
  5. 1 cup (2 sticks) butter, at room temperature
  6. 1 ½ cups white sugar
  7. 1 egg
  8. ½ teaspoon vanilla extract
  9. Zest of one large lime
  10. 3 tablespoons fresh squeezed lime juice
  11. ½ cup unsweetened shredded coconut
  12. ½~1 cup sugar for rolling cookies
Instructions
  1. Preheat oven to 350 degrees and line baking sheets with parchment paper or silicone baking mats.
  2. First, toast your coconut. Place the shredded coconut on a baking sheet. Spread it out as much as possible. Place in oven and toast for 1-2 minutes, keeping an eye on it the entire time - they can burn fast! Once done, remove from oven and let cool.
  3. In a medium bowl, combine the flour, baking soda, baking powder, and salt.
  4. In an electric mixer bowl, beat the butter and sugar on medium~medium high until smooth and fluffy. Add in the egg, vanilla extract, lime zest, and lime juice. Mix well.
  5. Slowly add in the flour mixture and toasted coconut while mixing under medium speed until everything is thoroughly combined.
  6. Drop tablespoon sized dough balls into the sugar and place onto the baking sheet, about 1.5" apart. Gently press the dough balls down with your fingers so they're slightly flat. Bake for 8-9 minutes. Remove from oven and cool on cookie sheet for 2-3 minutes, then remove cookies onto wired cooling rack and cool completely.
  7. Makes about 4 dozen.
Adapted from The Girl Who Ate Everything
Simple Everyday Food https://www.simpleeverydayfood.com/
These cookies are light, chewy, soft, with a hint of lime and coconut – it’s “summer” in a cookie! The coconut flavor isn’t super pronounced, but as you chew on every bite, you get hints of coconut with the shredded coconut flakes inside. If you really want the coconut flavor to pop, adding a few drops of coconut extract wouldn’t hurt either. The lime zest gives it a slight tart flavor which really balances out the sugar cookie itself. Nothing is too sweet, too overpowering. It’s a delicate balance in flavors.

IMG_1729

IMG_1737

I even had a little visitor during my photoshoot :)

IMG_1736

Even Brian, who complained I didn’t make something “more traditional” (a.k.a. peanut butter cookies), ended up having at least 5 or 6 as they sat on the counter to cool. I don’t think he was as disappointed with my choice of cookie in the end… he even admitted that they were pretty good, even though I was secretly hoping he wouldn’t like it so I could have all of it! Mwahahaha!

Enjoy!

Recipe adapted from The Girl Who Ate Everything

© Simple Everyday Food. All images & content are copyright protected. Please do not use any of my images without prior permission. If you want to republish this recipe, please re-write the recipe in your own words, or kindly link back to this post for the recipe.

Sharing is caring! Email this to someonePrint this pagePin on PinterestShare on YummlyShare on FacebookShare on Google+Tweet about this on Twitter

Happy Smores Day!

IMG_1603

I’ve never sat by a campfire and roasted s’mores before. I’m 27 – is that weird? As much as I try to avoid camping, I absolutely looooove s’mores (and the smell of the campfire). It wasn’t until a few months ago did I have my very first roasted marshmallow on a stick over an open flame… and that was just using the leftover flames from the grill. You’d probably think that I’m sheltered – I would probably agree with you on that.

Summer is the perfect season for s’mores and any kind of dessert that involves the trio of marshmallows, chocolate, and graham crackers – last time I checked, the Blizzard of the Month flavor at DQ was a S’mores Blizzard (!). I can’t exactly pinpoint why I adore s’mores-flavored anything so much. I think it’s something with the combination of the marshmallows and chocolate and the combination of the different textures – sweet, rich chocolate paired with roasted ooey gooey marshmallows sandwiched between crunchy graham crackers…. just thinking about it is making my mouth water. There really isn’t a dessert flavor combination I love more (well, mint chocolate does win by just a teeny tiny bit…) – I have a whole board on Pinterest dedicated to s’mores desserts to prove it!

When I saw this recipe a few days ago, I knew I had to make it. It’s a spin on the traditional s’mores – we’re using a peanut butter cookie as a base instead of graham crackers. I promise it tastes even better! It’s the perfect cookie for those who are peanut butter & chocolate fans and those that are s’mores fans as well. You just can’t go wrong with it!

IMG_1609

Brian who doesn’t even care for s’mores, was a fan of this cookie! I think he loved the peanut butter cookie base that won him over. These cookies are so soft that it’ll be hard not to leave any crumbs behind!

peanut butter s'mores cookies
Print
Ingredients
  1. 1/2 cup salted butter, softened to room temperature
  2. 1/2 cup light brown sugar
  3. 1/4 cup sugar
  4. 3/4 cup creamy peanut butter
  5. 1 large egg
  6. 1 teaspoon vanilla extract
  7. 1/2 teaspoon baking soda
  8. 1 and 1/4 cups all purpose flour
  9. 10-12 large marshmallows, cut in half length wise
  10. 8 oz chocolate chips
Instructions
  1. In an electric mixer, cream the butter and sugars together on medium speed. Add in the peanut butter. Mix. Then add the egg. Mix. Finally, add the vanilla extract. Beat until combined. Slowly add in the baking soda and flour, scraping down the sides as needed. Place in refrigerator and chill for 30 minutes to an hour.
  2. Preheat the oven to 350 degrees. Line 2 baking sheets with parchment paper or a silicon baking mat. Roll 1.5 tablespoons of dough into balls. Bake for 7 minutes. Take the cookies out, gently press a marshmallow onto the cookie. Bake for another 3-4 minutes, until marshmallow is slightly brown on top.
  3. Remove from oven and let cool. In the meantime, melt the chocolate chips on a double boiler. Using a spoon or a fork, drizzle the chocolate over the cookies.
  4. Store in airtight container for 7 days.
  5. Makes 20-22 cookies
Adapted from Sally's Baking Addiction
Simple Everyday Food https://www.simpleeverydayfood.com/
It’s important to bake these cookies for exactly 7 minutes so they don’t overbake. Take them out. Press the marshmallows into them, and stick them back into the oven for a few more minutes to allow the marshmallows to melt and for the cookie to finish baking. Once the chocolate and spooned over the top and the cookie is cooled, you’ve got yourself a rich, decadent peanut butter cookie with a gooey marshmallow center and a little chocolate drizzle on top.

IMG_1604

IMG_1612

Of course, no one said you have to wait til the chocolate and cookie are cooled to eat these! I wasn’t patient enough to wait and accidentally had a few right away… oops.

If you happen to have any left after they’re completely cooled, place them in an airtight container and store for a week… if they even last that long. :)

Enjoy!

Recipe from Sally’s Baking Addiction

© Simple Everyday Food. All images & content are copyright protected. Please do not use any of my images without prior permission. If you want to republish this recipe, please re-write the recipe in your own words, or kindly link back to this post for the recipe.

Sharing is caring! Email this to someonePrint this pagePin on PinterestShare on YummlyShare on FacebookShare on Google+Tweet about this on Twitter

When it comes to desserts, I don’t do boring.

By “boring“, I mean traditional – like chocolate cake, vanilla cake, red velvet cupcakes, oatmeal raisin cookies, chocolate chip cookies…. you get the idea. I like making desserts that aren’t your everyday “boring” flavors….My reasoning is, if I want old fashioned dessert flavors, I’m sure I can find them at just about every bakery/grocery store in the neighborhood. If I’m spending the time to make something from scratch, it’d better be something I can’t find easily.

Wait, but isn’t this post about “plain”, “regular”, “boring” chocolate chip cookies?

IMG_1053

Yeah yeah… today I actually felt like making some traditional chocolate chip cookies. Actually, one of the reasons why I chose chocolate chip was simply because I didn’t feel like going to the store and buying a bunch of ingredients for cupcakes. I also didn’t feel like standing in the kitchen for hours making cupcakes either. Talk about laziness – I just wanted something sweet, something homemade, and something easy to make.

That’s when I decided to go back to the basics and make something simple.

I like my cookies chewy, and the high proportion of brown sugar kept these cookies soft and moist (sorry!) in the middle. Slightly golden crunchy edges with gooey soft chocolatey centers.

IMG_1056

IMG_1059

chewy chocolate chip cookies
Print
Ingredients
  1. 2 3/4 cups all-purpose flour
  2. 1 teaspoon salt
  3. 1 teaspoon baking powder
  4. 1 teaspoon baking soda
  5. 2 1/2 sticks butter, softened to room temperature
  6. 1 3/4 cups packed brown sugar
  7. 1/4 cup granulated sugar
  8. 2 large eggs, at room temperature
  9. 2 teaspoons vanilla extract
  10. 2 cups semi-sweet chocolate chips
Instructions
  1. In a large bowl, sift together flour, salt, baking powder, and baking soda. Set aside.
  2. Using an electric mixer, beat the butter, brown sugar, and granulated sugar on medium-high until pale and fluffy, about 3-4 minutes.
  3. Beat in the eggs, one at a time, then beat in the vanilla. Reduce the speed to low, then slowly incorporate the flour mixture into the egg mixture. Stir in the chocolate chips by hand.
  4. Cover with plastic wrap and chill in refrigerator for at least an hour, preferably overnight.
  5. Preheat the oven to 375 degrees. Line 2 baking sheets with parchment paper. Roll cookie dough into ~1" balls and place onto prepared cookie sheets. Bake for 10-12 minutes, or until edges begin to brown.
  6. Remove cookies from oven, cool on the baking sheet for 10 minutes, then remove and cool completely on a wired cooling rack.
  7. Makes about 48 cookies
Adapted from Food Network Magazine
Simple Everyday Food https://www.simpleeverydayfood.com/
So this recipe makes about 48 cookies. Of course we’re not going to eat all of them (although Brian would’ve polished off the whole bowl of raw cookie dough last night if I wasn’t guarding the bowl with my life), so it’s a good thing I’ll be swinging by work today to drop some off for my lucky coworkers!

IMG_1068

After putting some cookies in a Tupperware for work, there were about 20 left. We divided the rest amongst the two of us – I got five, and the hubs took the rest of the 15.

Somehow he thinks I won’t be touching his cookies if he placed them all the way up on the cupboards……

IMG_1077

Little does he know, there’s not a whole lot that can stand between a girl and her sweets…. I might be short, but I have my ways. MWAHAHAHAHAHAHA!!

Yep, that’s my evil laugh.

Enjoy!

Sharing is caring! Email this to someonePrint this pagePin on PinterestShare on YummlyShare on FacebookShare on Google+Tweet about this on Twitter