everyday food made simple

IMG_6908 copy

I don’t know about you, but my summer is flying by right before my eyes. It didn’t seem all that long ago the sun rose and painted the sky a pretty mixture of pinks, purples, and oranges at 5 a.m., it was still bright out at 9 p.m., we grilled burgers and steaks and pork chops every night, and Starbuck’s iced coconut mocha macchiato became my summer jam.

Every year around this time I always look back at my summer bucket list, and every year I realize there are so many things I wanted to do but didn’t accomplish – I wish I went to the farmer’s market more, baked a little more, blogged a little more, spent more days out in the sun, checked off more books off of my list, went to more fairs, and ate more ice cream.

What I did do, however, was make this cake. This amazingly simple, no-oven-required-because-we-all-know-how-hot-it-already-is, cake.
IMG_6807 copy IMG_6840 copy

IMG_6929 copy   

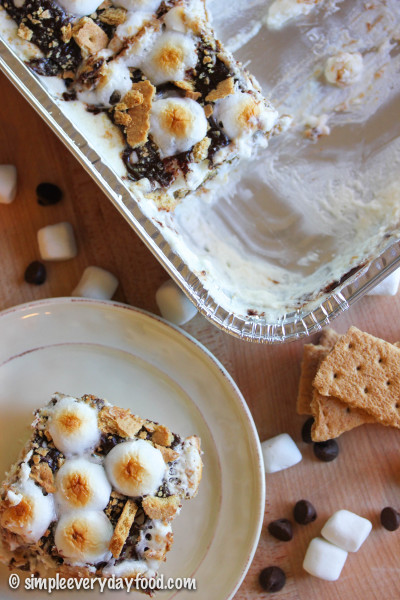
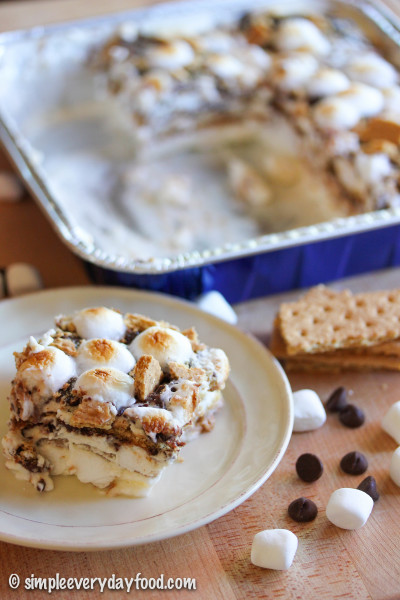
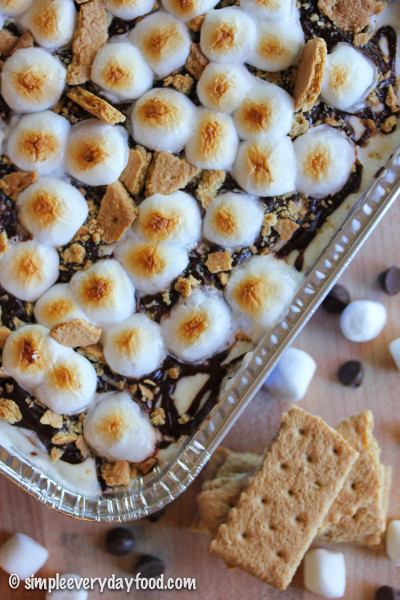
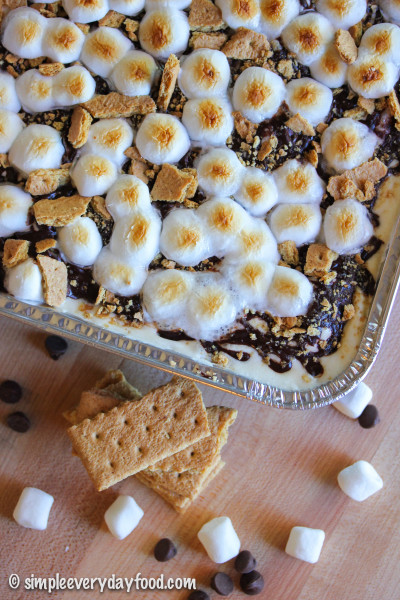
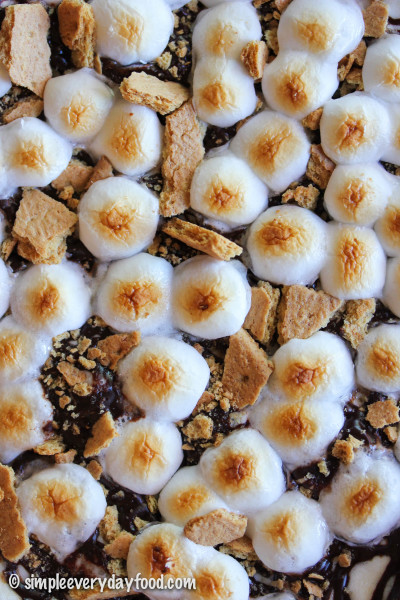
S’mores icebox cake, to be exact. Layers of creamy marshmallow cream on top of sweet chocolate ganache on top of graham crackers, topped off with mini marshmallows that’s broiled to toasty perfection. So so good to where you will want to eat it straight out of the pan when your husband isn’t home.
IMG_6903 copy

IMG_6909 copy

So before summer is over, before the weather starts to cool down, before your kids go back to school, please make this as a last hurrah to summer – I promise you won’t regret it.

s'mores icebox cake
Print
Ingredients
  1. 2 and 3/4 cups heavy cream, divided
  2. 7 oz marshmallow fluff
  3. 1 and 1/2 cups mini marshmallows, divided
  4. 11 oz semisweet chocolate chips
  5. 1 box graham crackers (you probably won't use the entire box)
Make the marshmallow cream
  1. Using a stand or hand mixer, beat 2 cups heavy cream on medium-high for 5 minutes or until stiff peaks form. Add in the marshmallow fluff and continue beating on medium-high speed for another 3 minutes. Gently stir in 1 cup mini marshmallows, set aside.
Make the chocolate ganache
  1. In a small saucepan over medium-low heat, heat the remaining heavy cream until simmering. Remove from heat and pour over chocolate chips in a heat-proof bowl. Let mixture sit for 5 minutes, then stir until combined and smooth.
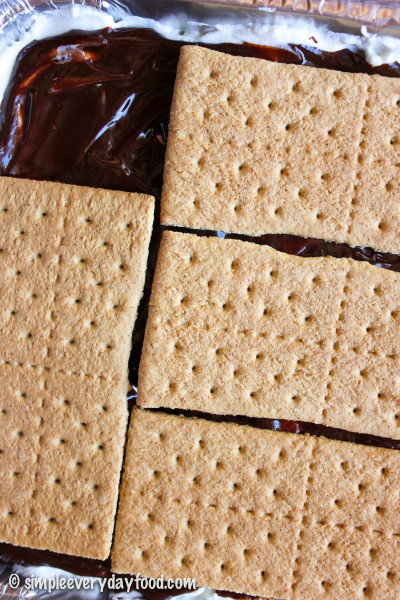
  2. In a 9x9" baking dish, spread a thin layer of the marshmallow cream on the bottom. Top with a layer of graham crackers. Break the crackers into pieces to make sure all the marshmallow cream is covered. Top with another layer of marshmallow cream, then generously drizzle/spread the ganache over the top. Repeat layers once more, leaving about 1/4" from the top of the pan.
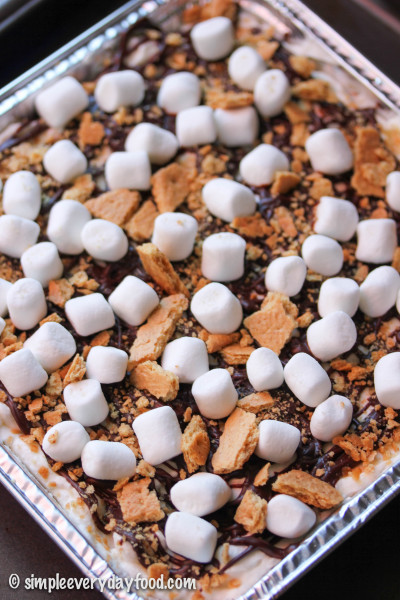
  3. Garnish the top with remaining mini marshmallows, crushed graham cracker pieces, and extra chocolate chips, if desired. Cover with plastic wrap and refrigerate overnight.
  4. Right before serving, turn on your broiler and broil the cake for 1 minute or until marshmallows are brown and toasty. Remove immediately and freeze for 10 minutes to let set and serve. Cake can be stored in the refrigerator in an airtight container for up to 3 days.
  5. Makes one 9x9" pan
Adapted from Delish.com
Simple Everyday Food https://www.simpleeverydayfood.com/
The beautiful thing about this recipe is that you can change up the layers based on what you like more. Want more chocolate? Then add in a few more layers of chocolate ganache. Love graham crackers? Then put it another layer of graham crackers. Whatever you decide to do, it’ll be delicious either way.

IMG_6920 copy

Recipe adapted from Delish

© Simple Everyday Food. All images & content are copyright protected. Please do not use any of my images without prior permission. If you want to republish this recipe, please re-write the recipe in your own words, and kindly link back to this post for the recipe.


Sharing is caring! Email this to someonePrint this pagePin on PinterestShare on YummlyShare on FacebookShare on Google+Tweet about this on Twitter

I don’t know about the rest of the country, but the weather here in Minnesota has been nothing but gorgeous the past few weeks. Every day has been sunny with a few puffs of clouds in the sky, and somewhere between 75-85 degrees. After a long, brutal winter, I was more than ready to dust off the boxes where my summer shorts and tank tops have lived for the past 7 months and bring them back into my regular clothing “circulation”. It’s always a monumental day when I deem the weather warm (and stable) enough to pack up my winter boots, and put all my scarves, gloves, hats, and jackets away in the closet…. it signifies the arrival of warmer weather, longer days, shorts and flip flops, grilling, ice cold lemonade, and everything summer is about.

You know what else is a universal icon of summer? S’mores.

IMG_3522 copy

IMG_3516 copy

For someone who doesn’t care for camping, I really am a big fan of s’mores – I even have an entire section in my recipe book dedicated to all things s’mores! It’s without a doubt my second favorite flavor combination of all time. It lands in 2nd place because nothing – I mean nothing – can top mint + chocolate in my world. Whoever decided to sandwich a toasted gooey marshmallow with some chocolate in between graham crackers is a genius.

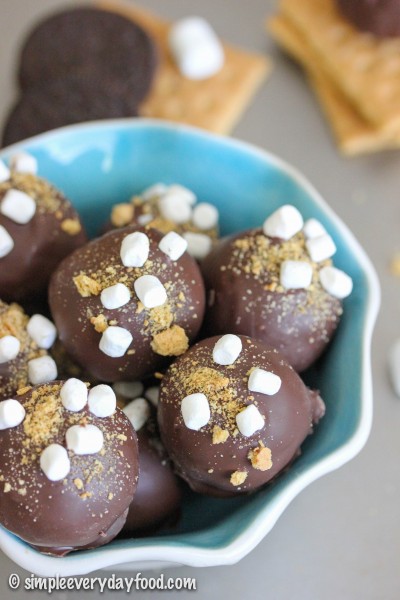
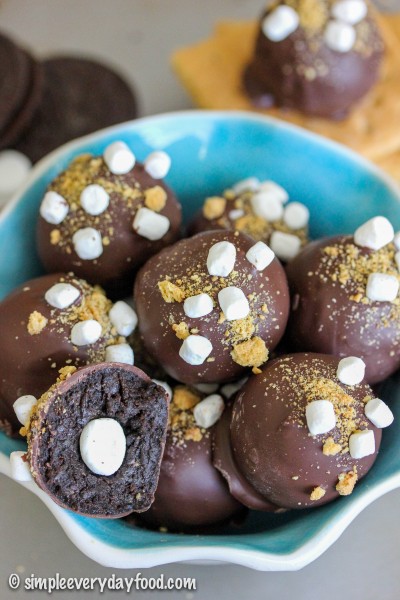
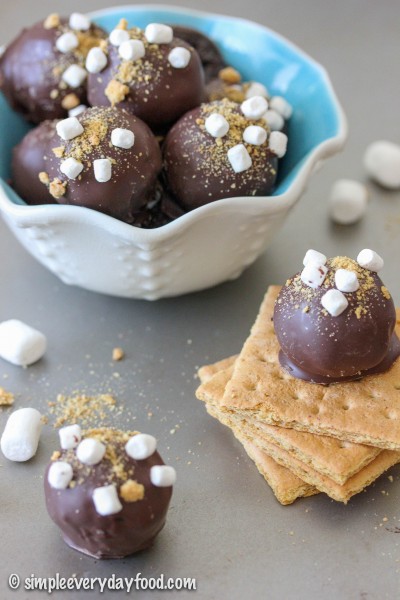
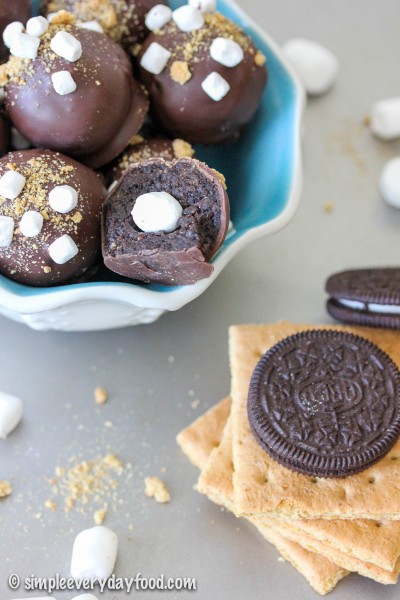
These truffles are super easy to make and requires no baking at all! All you really need is a food processor, which means they’re quick… and you won’t even have to make your house any hotter by turning on the oven. I modified the original recipe by adding several squares of graham crackers into the Oreo/cream cheese base, just to amplify the s’mores flavor, and let me tell you, everyone thought these were deeeelicious!

IMG_3531 copy

It even has a little mini marshmallow surprise inside when you take a bite out of it!

IMG_3519 copy

IMG_3521 copy

I have made several different kinds of truffles in the past, but these hands down take the crown – they are without a doubt the best tasting truffles I’ve ever made. It’s a bold statement, but that’s how good they were. They were so good that Brian alone ate 4 of them one day when I was at work, and I ended up having to make another batch of them to share with my coworkers!

IMG_3539 copy

IMG_3525 copy

Oreo s'more truffles
Print
Ingredients
  1. 15 original Oreo cookies
  2. 6 graham cracker squares, divided
  3. 2.5 oz low fat cream cheese
  4. ~11 mini marshmallows
  5. 8 oz chocolate CandiQuik
  6. ~2 tablespoons marshmallow bits (optional)
Instructions
  1. In a food processor, pulse 2 squares of graham cracker squares until it turns into fine crumbs. Place in a small bowl and set aside.
  2. In the same food processor, pulse the Oreo cookies and the remaining 4 graham cracker squares until roughly crumbled. Add in the cream cheese and pulse on HIGH until the mixture comes together. The mixture turns into a doughy consistency and should not be crumbly - you should easily to able to form them into balls without it falling apart in your hands.
  3. Roll the mixture into balls (about 1-1.5 tablespoon each) and place on a parchment paper-lined baking sheet. Take each ball and make an indentation in the middle with your thumb, and place a mini marshmallow in the center. Reform the truffle mixture back into a ball, making sure the mixture encases the mini marshmallow entirely. Repeat with the rest of the truffles. Place the truffles in the refrigerator to chill.
  4. While your truffles are chilling, make the candy coating: using a double boiler, melt the CandyQuik until smooth. Working one truffle at a time, place a ball in the CandyQuik while spooning the chocolate over the truffle with a spoon. Gently lift the ball up with a fork and gently tap off the excess candy coating.
  5. Place the truffle onto the baking sheet and immediately garnish with graham cracker crumbs and marshmallow bits. Repeat with the rest of the truffles. Return decorated truffles into refrigerator to chill. Store in an airtight container in a cool dry place for up to 5 days (if they even last that long).
  6. Makes 11 truffles
Adapted from Crazy for Crust
Simple Everyday Food https://www.simpleeverydayfood.com/
I personally love to use CandyQuik to coat all my truffles. You can also use the Wilton candy melts or Almond Bark if those are the kind you prefer. I also personally prefer to melt all my chocolates and candy coatings over a double boiler rather than throwing them in a microwave or directly over a heat source – I’ve tried microwaving them in the past, but they just never seemed to work as well for me as using a double boiler. However, if you have better luck than I do with a microwave or over a stove, feel free to do it that way – it’s probably faster anyway :)

Recipe adapted from Crazy for Crust

© Simple Everyday Food. All images & content are copyright protected. Please do not use any of my images without prior permission. If you want to republish this recipe, please re-write the recipe in your own words, or kindly link back to this post for the recipe.

Sharing is caring! Email this to someonePrint this pagePin on PinterestShare on YummlyShare on FacebookShare on Google+Tweet about this on Twitter

Happy Smores Day!

IMG_1603

I’ve never sat by a campfire and roasted s’mores before. I’m 27 – is that weird? As much as I try to avoid camping, I absolutely looooove s’mores (and the smell of the campfire). It wasn’t until a few months ago did I have my very first roasted marshmallow on a stick over an open flame… and that was just using the leftover flames from the grill. You’d probably think that I’m sheltered – I would probably agree with you on that.

Summer is the perfect season for s’mores and any kind of dessert that involves the trio of marshmallows, chocolate, and graham crackers – last time I checked, the Blizzard of the Month flavor at DQ was a S’mores Blizzard (!). I can’t exactly pinpoint why I adore s’mores-flavored anything so much. I think it’s something with the combination of the marshmallows and chocolate and the combination of the different textures – sweet, rich chocolate paired with roasted ooey gooey marshmallows sandwiched between crunchy graham crackers…. just thinking about it is making my mouth water. There really isn’t a dessert flavor combination I love more (well, mint chocolate does win by just a teeny tiny bit…) – I have a whole board on Pinterest dedicated to s’mores desserts to prove it!

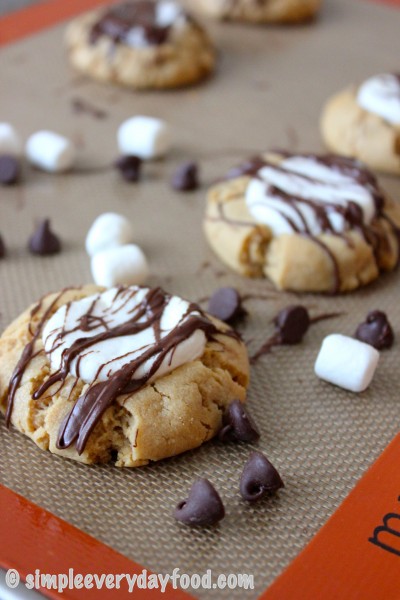
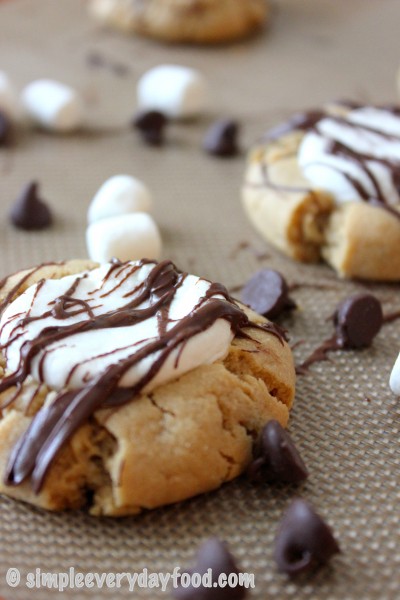
When I saw this recipe a few days ago, I knew I had to make it. It’s a spin on the traditional s’mores – we’re using a peanut butter cookie as a base instead of graham crackers. I promise it tastes even better! It’s the perfect cookie for those who are peanut butter & chocolate fans and those that are s’mores fans as well. You just can’t go wrong with it!

IMG_1609

Brian who doesn’t even care for s’mores, was a fan of this cookie! I think he loved the peanut butter cookie base that won him over. These cookies are so soft that it’ll be hard not to leave any crumbs behind!

peanut butter s'mores cookies
Print
Ingredients
  1. 1/2 cup salted butter, softened to room temperature
  2. 1/2 cup light brown sugar
  3. 1/4 cup sugar
  4. 3/4 cup creamy peanut butter
  5. 1 large egg
  6. 1 teaspoon vanilla extract
  7. 1/2 teaspoon baking soda
  8. 1 and 1/4 cups all purpose flour
  9. 10-12 large marshmallows, cut in half length wise
  10. 8 oz chocolate chips
Instructions
  1. In an electric mixer, cream the butter and sugars together on medium speed. Add in the peanut butter. Mix. Then add the egg. Mix. Finally, add the vanilla extract. Beat until combined. Slowly add in the baking soda and flour, scraping down the sides as needed. Place in refrigerator and chill for 30 minutes to an hour.
  2. Preheat the oven to 350 degrees. Line 2 baking sheets with parchment paper or a silicon baking mat. Roll 1.5 tablespoons of dough into balls. Bake for 7 minutes. Take the cookies out, gently press a marshmallow onto the cookie. Bake for another 3-4 minutes, until marshmallow is slightly brown on top.
  3. Remove from oven and let cool. In the meantime, melt the chocolate chips on a double boiler. Using a spoon or a fork, drizzle the chocolate over the cookies.
  4. Store in airtight container for 7 days.
  5. Makes 20-22 cookies
Adapted from Sally's Baking Addiction
Simple Everyday Food https://www.simpleeverydayfood.com/
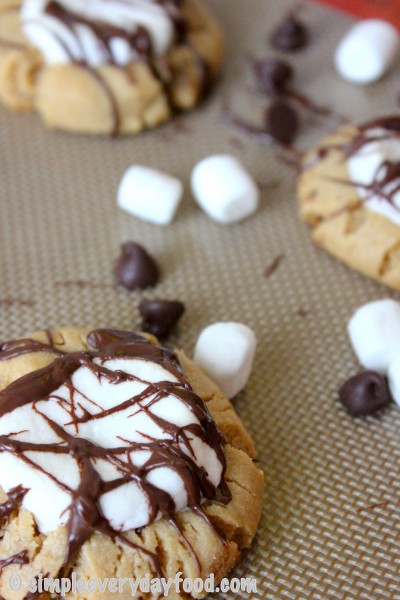
It’s important to bake these cookies for exactly 7 minutes so they don’t overbake. Take them out. Press the marshmallows into them, and stick them back into the oven for a few more minutes to allow the marshmallows to melt and for the cookie to finish baking. Once the chocolate and spooned over the top and the cookie is cooled, you’ve got yourself a rich, decadent peanut butter cookie with a gooey marshmallow center and a little chocolate drizzle on top.

IMG_1604

IMG_1612

Of course, no one said you have to wait til the chocolate and cookie are cooled to eat these! I wasn’t patient enough to wait and accidentally had a few right away… oops.

If you happen to have any left after they’re completely cooled, place them in an airtight container and store for a week… if they even last that long. :)

Enjoy!

Recipe from Sally’s Baking Addiction

© Simple Everyday Food. All images & content are copyright protected. Please do not use any of my images without prior permission. If you want to republish this recipe, please re-write the recipe in your own words, or kindly link back to this post for the recipe.

Sharing is caring! Email this to someonePrint this pagePin on PinterestShare on YummlyShare on FacebookShare on Google+Tweet about this on Twitter