everyday food made simple

Growing up in Taiwan, I remember eating a lot of fish as a kid. For those of you that aren’t familiar with the whereabouts of this country: Taiwan’s an island, located approximately 110 miles off the southeastern coast of China.

I’m not going to get into the nitty gritty details about Taiwan… if you want to learn more about it, I’m sure Google and Wikipedia would be more than happy to provide you with some insight…

My whole point about mentioning Taiwan is because since we are an island country, I grew up eating fish probably 2-3 times a week. Not only did people eat lots of seafood, they made it amazing without having to throw it in the deep fryer. I know a lot of people who aren’t fans of seafood – it seems like deep frying fish is how a lot of restaurants try to get Americans to eat fish that were supposed to be good for you.

My mom’s signature dish growing up was probably salmon with bean sprouts. I remember having “salmon with bean sprouts” for lunch for days in a row when I was in middle school that my friend asked me one day, “you’re having that again?!” Looking back, she sure knew how to get healthy omega-3 fatty acids into her child :)

Now I’m living in the Midwest (read: not surrounded by the ocean), I miss being able to eat fresh seafood whenever I please. Yeah, we have the local walleye that’s famous, but when it comes to fresh fish, scallops, shrimp, lobsters, crabs, clams, I’m pretty much out of luck. Oh, I’m sure the high-end fancy grocery stores have them, but nothing really beats fresh-caught seafood…. just another reason why I’m ready to move to the coast.

Since I have to work with what I have, I’ve trying to make fish I buy packaged in individual vacuumed packs (found in the freezer section) taste good. It’s nothing like what I’m used to having, but it’ll do until I have the resources to make fresh seafood.

IMG_0940

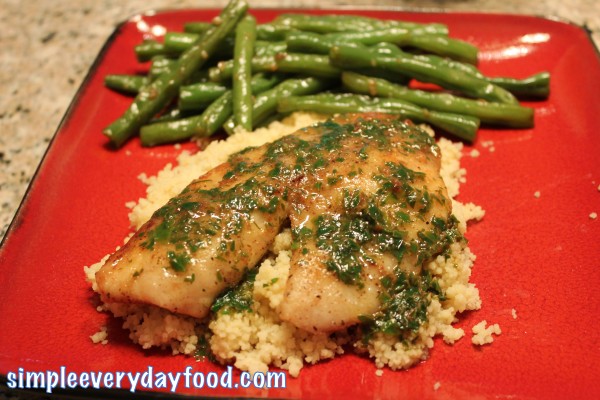
Before we started buying salmon, cod, and other ocean fish a few months back, we bought a lot of tilapia. Nothing against tilapia – I’m just used to eating ocean fish instead. I found a big bag of unopened tilapia fillets in the freezer last night, so I figured I should use it up before it goes bad.

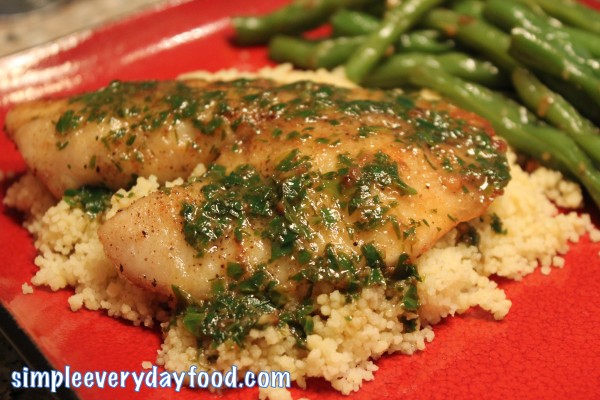
This is probably not the healthiest seafood dish I’ve ever made, but I wanted to try something different, something that I’ve never made before. The lemony buttery sauce was a perfect complement to the fish. Next time, however, I would be a little bit more careful in drizzling the sauce over the tilapia. I added a little too much and it pooled onto the couscous beneath it and gave it a very sour taste – not good. Maybe I’ll drizzle the sauce over the fish before I serve it next time.

IMG_0935

IMG_0937

tilapia with lemon herb butter
Print
Ingredients
  1. 2-3 tilapia fillets (about 12-16 oz total)
  2. Juice of 1/2 a lemon
  3. 1/4 cup fresh parsley, chopped
  4. 4 tablespoons butter, divided
  5. 2 tablespoons olive oil
  6. 1/4 cup flour
Instructions
  1. Chop the parsley and juice the lemon. Set aside.
  2. About 5 minutes before cooking, place tilapia fillets onto a plate lined with paper towels to absorb excess moisture. Season with salt and pepper if desired.
  3. Dust the fillets with a thin coat of flour, shaking off the excess.
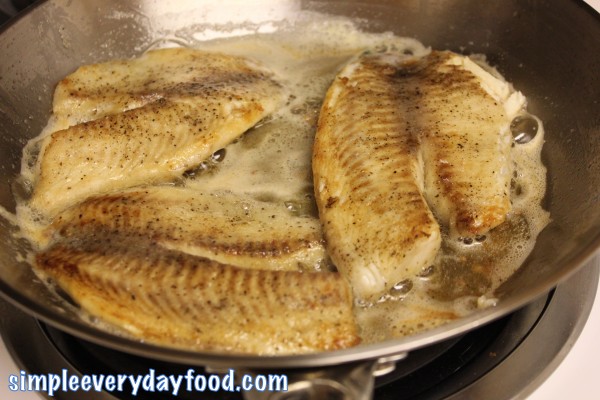
  4. Melt 2 tablespoons of butter and the olive oil in a large skillet over medium heat. Once the butter starts to bubble, add the fish and cook for 3-4 minutes. Don't be too eager and flip the fish too early - the fish will end up sticking to the pan. Just let it cook and it will be easy to flip when it's ready.
  5. Flip the fillets and cook for another 3-4 minutes on the other side or until flaky. Remove to a large plate and keep warm.
  6. Add the remaining 2 tablespoons of butter into the skillet. Once the butter has melted, stir in the lemon juice and parsley. Spoon sauce over fish.
Notes
  1. As lemon pairs well with fish, it doesn't pair well with the rest of your dinner - drizzle the sauce over the tilapia fillets before serving it onto your dinner plate. That way there won't be any excess lemony sauce that ends up overpowering everything else you have on the plate.
Adapted from Food.com
Simple Everyday Food https://www.simpleeverydayfood.com/
The dish overall was a success. It’s been a while since I made fish in a frying pan/skillet (I usually bake my fish), so the biggest accomplishment of the night was being patient enough to let the fish cook on its own for a full 3 minutes before flipping it. Yay me!

IMG_0942

Enjoy!

Sharing is caring! Email this to someonePrint this pagePin on PinterestShare on YummlyShare on FacebookShare on Google+Tweet about this on Twitter

You know, why do they call a piece of breaded steak “chicken-fried steak”? You know how confusing that is to a teenager that just came to the U.S. from a country that doesn’t even really eat steak?!

For the longest time I didn’t know if it was actually chicken or steak. I would always wonder who came up with this silly name… is it chicken, or is it steak? I’m not sure who told me or if I just came to the conclusion that chicken-fried steak is actually “steak”, but to this day I still think it’s funny when I see something called “chicken-fried xxx” when it has nothing to do with chicken lol.

I’ve never had chicken-fried anything before, but once in a while when we’d go to Perkins for breakfast, the hubs will order their chicken-fried steak as his “dinner” after getting off work on nights.

If he likes it, it’s probably pretty good… which means that I’ll probably like it.

Yep, that’s how I determined what we should have for dinner this weekend. I figured we’d try something new and adventurous, something we’ve never made before.

IMG_0912

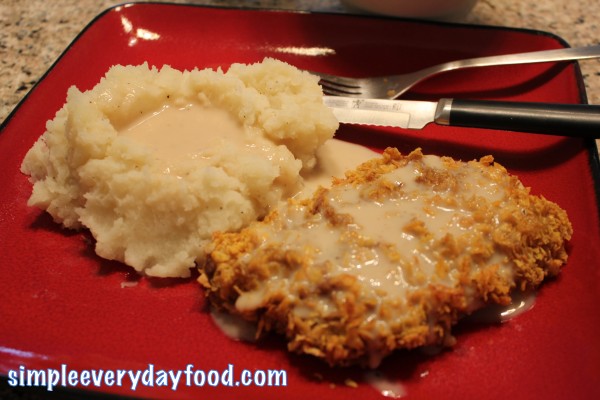
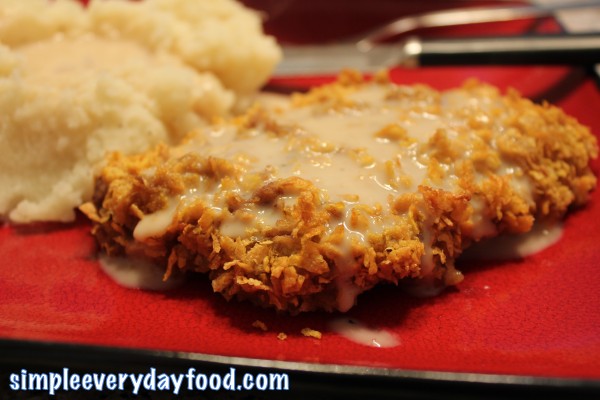
Well, this recipe sure didn’t disappoint me, because the breading was suuuuper flavorful and the meat was actually quite tender. It’s healthier than the traditional chicken fried steak since we made it in the oven instead of frying it in a frying pan, and if I can make something that’s just as tasty but healthier, I’m all for it.

IMG_0903

IMG_0905

IMG_0907

healthy chicken-fried steak with cream gravy
Print
Ingredients
  1. 1/4 cup all-purpose flour
  2. 1/4 cup skim milk
  3. 1 large egg, beaten
  4. Cooking spray
  5. Hot chili pepper sauce, to taste
  6. 3 cups cornflakes, crushed
  7. 2 teaspoons Lowry's seasoning
  8. 3-4 cube steaks, about 16 oz total
  9. 1 tablespoon cornstarch
  10. 1/2 cup low-sodium beef broth
  11. 1/4 fat-free half-and-half
  12. Salt and pepper
Instructions
  1. Preheat the oven to 400 degrees. Line a baking sheet with foil and spray generously with cooking spray.
  2. Tenderize the meat with a meat tenderizer while making sure the steaks are uniform in thickness.
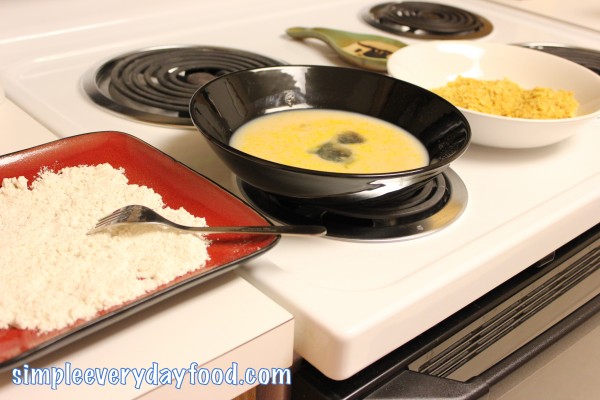
  3. Using three shallow bowls, place the flour in one bowl. In the other, whisk together the milk, egg, and hot sauce. In the last bowl, combine the cornflakes and 1 teaspoon of the Lowry's.
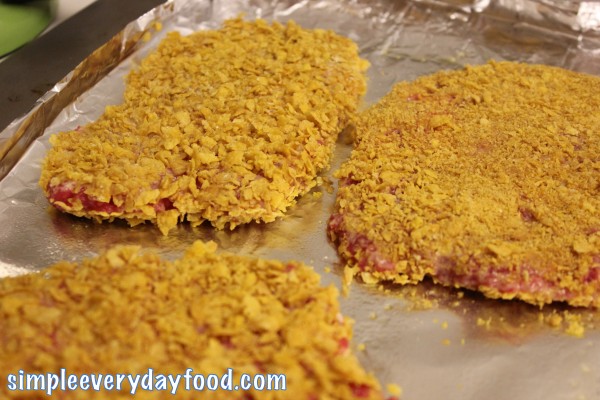
  4. Season the steaks with the remaining Lowry's seasoning. Dredge the steaks in the flour, patting off the excess. Then dip them into the egg mixture, letting any excess drip off. Finally, dredge them in the crushed cornflakes, slightly pressing on them to help the flakes stick to the steaks.
  5. Place the steaks on the prepared baking sheet. Spray the top of the steaks lightly with more cooking spray. Bake for 13-15 minutes, or until cooked through.
While the steaks are cooking, make the gravy
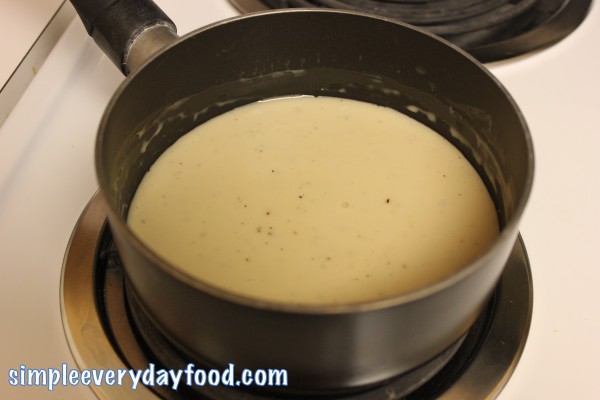
  1. In a small bowl, combine the cornstarch with 1 tablespoon of beef broth. Whisk until thoroughly combined. In a small saucepan, combine the cornstarch mixture with the remaining beef broth and half-and-half. Bring to a boil over medium heat. Turn the heat down to medium-low and let simmer until thickened while stirring constantly. Season generously with black pepper.
  2. Serve the steaks with the cream gravy.
Adapted from Food Network Magazine
Simple Everyday Food https://www.simpleeverydayfood.com/
We served ours with some homemade mashed potatoes and a side salad – I know I’ll be fighting the hubs for that last steak tomorrow for lunch!

IMG_0909

Enjoy!

Sharing is caring! Email this to someonePrint this pagePin on PinterestShare on YummlyShare on FacebookShare on Google+Tweet about this on Twitter

I know I’ve been talking a lot of about the warm weather and all these plans I have for this summer and I’m pretty sure you guys are sick of me talking about summer this, summer that… but I can’t help it – after 7 months of cold, snowy winter, I’m just sooooo excited that it’s finally (FINALLY!) warm and sunny!!

Last summer I had big ambitions of making a bunch of summery drinks… well, somehow summer went by so fast that next thing I knew, the leaves were turning red, the snow was falling, and I didn’t make any of the drinks I wanted to. I promised myself the same situation isn’t going to happen this year, so I found a bunch of drinks recipe  and will be making them all summer (all non-alcoholic as I don’t drink – sorry guys!) :)

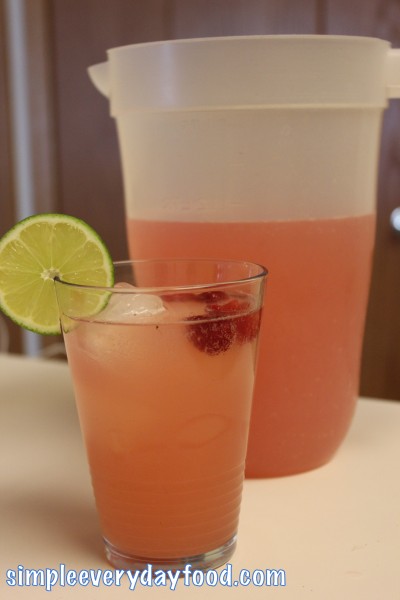
To kick start the summer drinks series, we’re starting off with a sparkling raspberry limeade. It almost tastes the same as those bottled limeades you get at the grocery store – except this recipe calls for club soda, which gives it a refreshing fizziness. Everything tastes better when it’s carbonated!

IMG_0889

IMG_0895

sparkling raspberry limeade
Print
Ingredients
  1. 6 oz raspberries
  2. 1 cup sugar
  3. 1 cup water
  4. 1 cup lime juice
  5. 1 liter club soda
Instructions
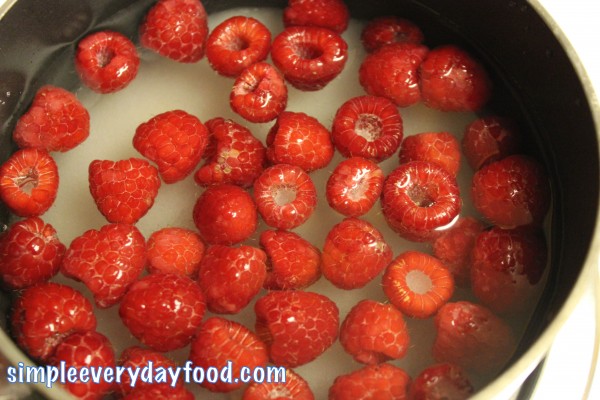
  1. In a small saucepan, combine the raspberries, sugar, and water over medium heat until a small boil. Turn the heat down to medium-low and simmer for about 10 minutes while stirring occasionally until the sugar dissolves. Using the back of a wooden spoon, gently press the raspberries against the side of the pan to release its juices.
  2. Strain the mixture into a bowl, let cool and set aside.
  3. After the raspberry syrup has cooled down, combine the lime juice, club soda, and raspberry syrup in a large pitcher.
  4. Serve over ice and garnish with a few raspberries and lime slices if desired.
Adapted from Food Network Magazine
Simple Everyday Food https://www.simpleeverydayfood.com/
IMG_0899

IMG_0901

Mmm mmm mmm! Nothing says summer more than a glass of ice cold homemade raspberry limeade!!

Enjoy!
Sharing is caring! Email this to someonePrint this pagePin on PinterestShare on YummlyShare on FacebookShare on Google+Tweet about this on Twitter

At my job, my coworkers love finding a reason to do potlucks:

Birthdays.

Going away parties.

Holidays.

Big events (i.e. SuperBowl)

And oh why not, let’s just do a potluck just because.

Who doesn’t like potlucks? It’s the perfect opportunity for people to make their signature dish (or try making new ones) and bring recipes to share with others.

This week, I decided to try out a new truffle recipe – people at my job are suckers for sweets. Our nurses love to bake – cookies, cupcakes, cake, brownies, bread… you name it, someone in our ER can make it. Usually when we do a potluck, we have about 2-3 savory dishes and 5-6 different desserts.

Yeah, we’re probably not the healthiest bunch of healthcare workers lol.

I’m generally known to make something “different” when it comes to dessert – other people like making traditional, classic desserts like brownies or chocolate chip cookies. I like to make peppermint chocolate cupcakes, sugar cookie cupcakes with orange buttercream frosting, and gingerbread whoopie pies.

Last time I made some mint chocolate truffles and received rave reviews from my coworkers, so this time I decided to stick with truffles but change it up a bit. I saw this recipe a while back and have been waiting for the perfect opportunity to make them – well, I’m glad I didn’t disappoint my coworkers, because this was a big hit this past weekend too.

IMG_0878

IMG_0866

IMG_0867

IMG_0868

IMG_0871

frosted animal cracker truffles
Print
Ingredients
  1. 1-13 oz package of frosted animal crackers
  2. 6 oz light cream cheese, softened
  3. 8 oz almond bark
  4. white chocolate chips or sprinkles for decorations
Instructions
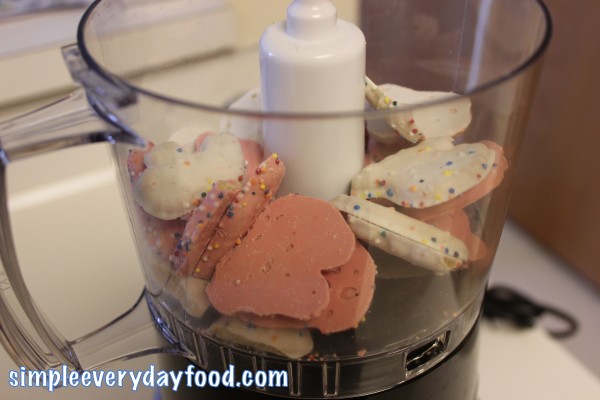
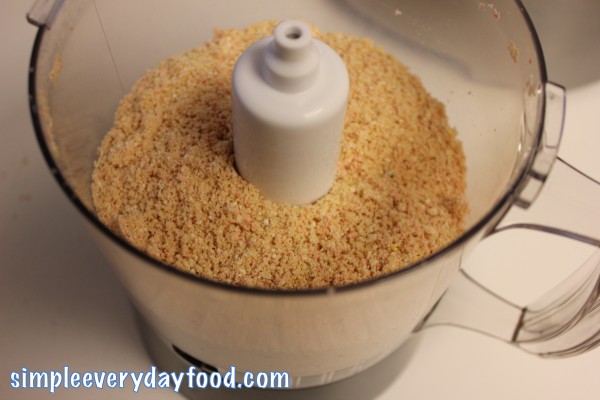
  1. Using a food processor, pulse the crackers until they turn into fine crumbs.
  2. Add in the cream cheese and mix until thoroughly combined - you can use your hands, but I used an electric stand mixer to make the process easier.
  3. Roll the mixture into 1" balls and place onto a parchment-lined baking sheet. Chill in the fridge for 30 minutes.
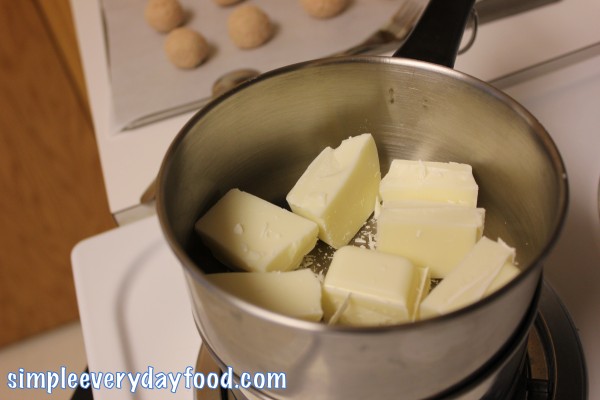
  4. While the cookie balls are chilling, make the candy coating: melt the almond bark in a double boiler over medium-low heat, stirring constantly to make sure you don't burn it.
  5. Dip the cookie balls in the melted almond bark, one at a time, until evenly covered. Return back onto parchment paper and return into refrigerator and chill for another 30 minutes.
  6. If desired, melt some white chocolate chips over a double boiler with a few drops of food coloring. Add the melted mixture into a Ziploc bag. Cut the corner of the bag with a pair of scissors and drizzle over truffle balls.
Notes
  1. I dipped half of my cookie/cream cheese balls into the plain melted almond bark, then added a few drops of pink food coloring into the remaining melted almond bark and dipped the rest of the cookie balls in them to get truffles with two different colored coatings.
Adapted from Cookin' Cowgirl
Simple Everyday Food https://www.simpleeverydayfood.com/
IMG_0876

IMG_0873

IMG_0872

Can you tell I was mildly obsessed at how pretty these truffles turned out?

I’m sure we’re going to have another potluck soon – I’m already searching for the next new dessert recipe I can try. Cupcakes? Cookies? Either way, I’m sure my coworkers will all gladly be my guinea pigs :)

Recipe adapted from Cookin’ Cowgirl

Sharing is caring! Email this to someonePrint this pagePin on PinterestShare on YummlyShare on FacebookShare on Google+Tweet about this on Twitter

Since last time I tried a dry rub recipe on some ribeyes and they turned out to be super amazing, I figured I’d try a different dry rub recipe for pork tenderloins today.

IMG_0864

Despite the fact that it rained all day here in the Twin Cities, it was almost as if Mother Nature knew we had plans to grill out tonight and gave us some nice (but chilly) weather in the end :)

Thank goodness the skies cleared up – if it would’ve kept on raining, we would’ve had to quickly find a Plan B for dinner. And being the strong Type A person that I am, a last-minute Plan B would not bode well with me (especially when I’ve already gotten everything ready to go). Type A people like to make plans, and stick to their plans. They don’t do well when plans do not go as planned…. in the end, everything ended up going as planned, so I I’m a happy camper.

IMG_0852

IMG_0856

IMG_0859

grilled pork tenderloin
Print
Ingredients
  1. Pork tenderloin, about 1.5 pounds
  2. 2 teaspoons EVOO
  3. 1 tablespoon paprika
  4. 2 teaspoons salt
  5. 1/2 teaspoons black pepper
  6. 1 teaspoon brown sugar
  7. 1 teaspoon ground cumin
  8. 1 teaspoon mustard powder
  9. 1/2 teaspoon garlic powder
  10. 1/2 teaspoon onion powder
Instructions
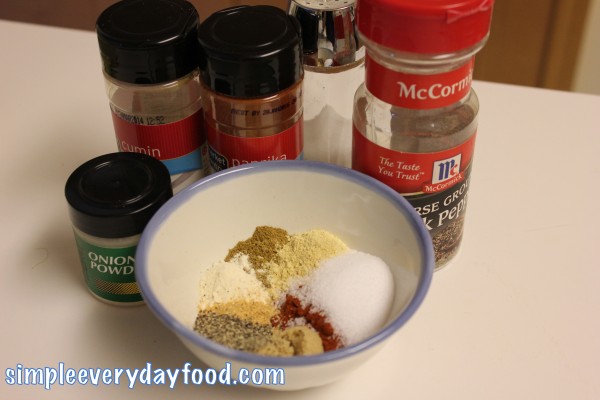
  1. In a small bowl, combine the paprika, salt, pepper, brown sugar, ground cumin, mustard powder, garlic powder, and onion powder.
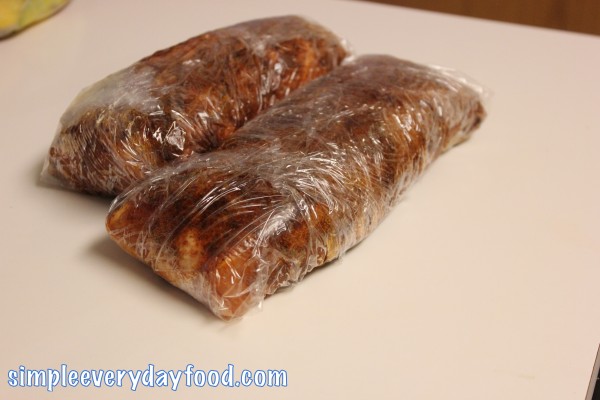
  2. Rub the EVOO over the pork tenderloin, then generously coat with the spice rub. Wrap the pork tenderloin in plastic wrap and place in the fridge for 3-6 hours.
  3. Remove the pork from the fridge about 30 minutes before grilling.
  4. Using a charcoal grill, set it up so the coals are nice and hot.
  5. Place the pork over direct heat. Cook for about 20-30 minutes (depending on the size of the pork), turning once halfway, or until a thermometer inserted into the thickest part registers 140-145 degrees.
  6. Transfer to cutting board and let rest for 15 minutes.
  7. Slice the pork and serve.
Adapted from Food Network Magazine
Simple Everyday Food https://www.simpleeverydayfood.com/
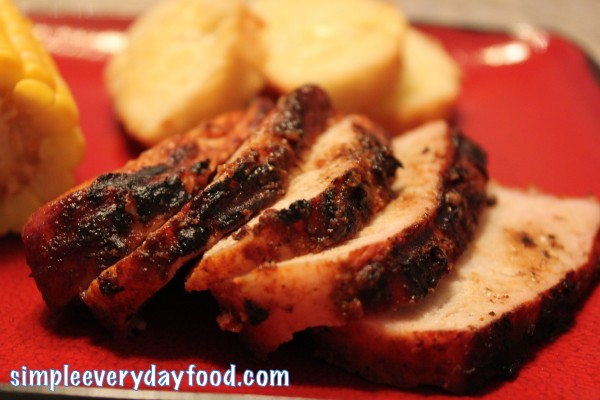
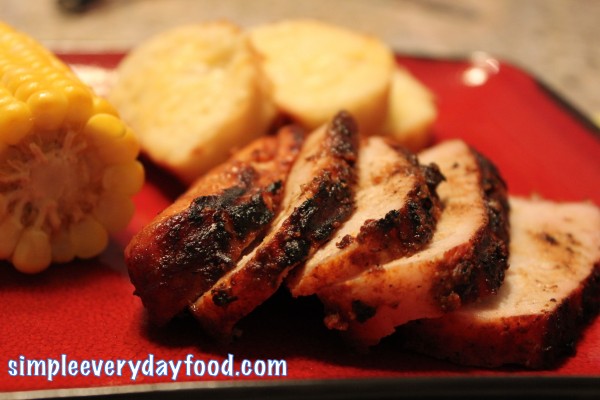
Anyway… what’s not to like about pork tenderloin? These babies were so juicy, tender, and full of flavor. The dry rub gave it a crusty crust on the outside, and the charcoals gave it a nice smoky flavor on the inside. Along with the corn on the cob and cheesy bread to go along with it, who says you can’t have restaurant-quality meals at home?!

IMG_0863

Yep, it was good – definitely a repeat for whenever summer decides to show up in Minnesota. I’m glad we decided to buy two tenderloins, so now we’ve got plenty of yummy meals for the next few days. Next time, I’m going to be sitting on the patio soaking up some sun with some lemonade while the hubs makes me dinner :)

Enjoy!
Recipe adapted from Food Network Magazine

Sharing is caring! Email this to someonePrint this pagePin on PinterestShare on YummlyShare on FacebookShare on Google+Tweet about this on Twitter