everyday food made simple

Now, before I go any further, let me make a disclaimer: I like to give sites credit when I tweak my recipes from their original ones. However, today when I went on Pinterest to find where exactly this recipe came from, it redirected me to a page “that no longer exists”…. so whoever came up with this recipe in the first place, let me know and I will gladly put your name/website on here :)

There has been a “pin” on Pinterest that both the hubs and I have pinned on separate occasions a while back that claims it’s supposedly “the best steak marinade in existence”. Since summer is slooooowly approaching and grilling season is upon us, we figured we’d try it out and see exactly how good it is.

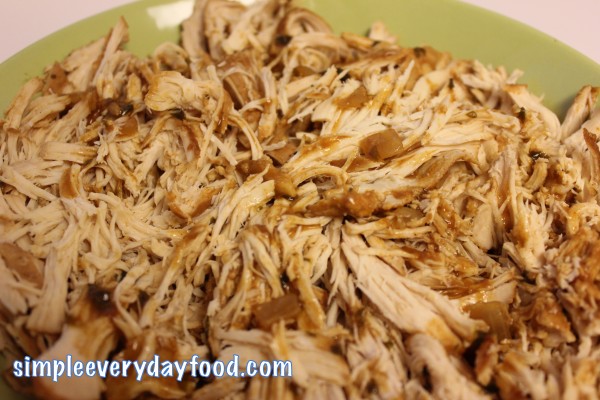
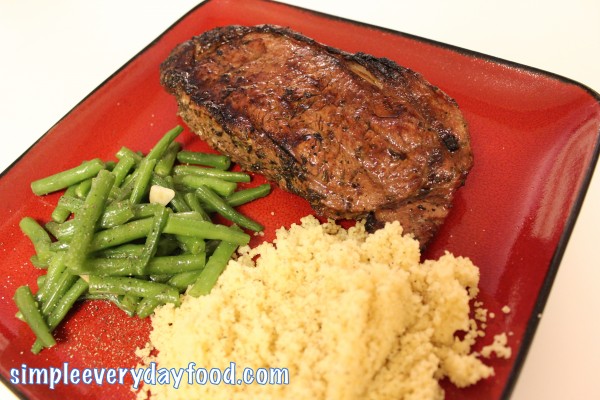
It turned out to be something like this:

IMG_0850

Looks pretty tasty huh?

steak marinade
Print
Ingredients
  1. 2-10 oz ribeye steaks (or any other cuts of steak of your liking)
  2. 1/3 cup low-sodium soy sauce
  3. 1/2 cup EVOO
  4. Juice of 1 lemon
  5. 1/4 Worcestershire sauce
  6. 1.5 tablespoons garlic powder
  7. 3 tablespoons dried basil
  8. 1.5 tablespoons dried parsley flakes
  9. 1 teaspoon black pepper
  10. 2 cloves garlic, minced
Instructions
  1. Add all the ingredients (except the steaks) into a large Ziploc bag. Stir to combine.
  2. Add the steaks. Squeeze out all the excess air, seal the bag, and make sure the steaks are covered completely by the marinade. Marinate the steaks in the fridge for up to 8 hours.
  3. About 30 minutes before you put the steaks on the grill, take the steaks out to room temperature.
  4. Using a charcoal grill, set the grill up so the coals are nice and hot.
  5. Place steaks over direct heat and cook for about 14 minutes, flipping once halfway through, or until it's done the way your like it.
Adapted from Unknown
Simple Everyday Food https://www.simpleeverydayfood.com/
We served our steaks with garlicky green beans and couscous (can you tell it’s our new favorite form of carbs? lol).

IMG_0851

My conclusion: it’s not bad.

Just “not bad”?

Yeah. It was good, tasty, but nothing “amazing” (in my opinion). Lets just say that I’ll be sticking to my dry rub recipe next time. However, it did keep the steak pretty juicy and the Worcestershire and lemon flavor was pretty pronounced. Other than that, I wasn’t really able to taste any of the dry herbs that was in it.

Let me just quote something the hubs said: “if it claims it’s the ‘best marinade in existence’, it better be so amazing that I fall out of my chair.”

Maybe my project for the summer is to perfect this recipe and make it into my own version of “the best steak marinade ever” :)

Enjoy!

Sharing is caring! Email this to someonePrint this pagePin on PinterestShare on YummlyShare on FacebookShare on Google+Tweet about this on Twitter

It’s midquarter already – that means there’s only about 5 more weeks of class until summer. But it also means that there’s only 5 weeks left until all 5 of my projects are due.

Well, since it’s the weekend and it’s the perfect time to catch up on homework, what better meals to prepare than something in a Crockpot? Something simple, something healthy, and something tasty. Then I won’t have to slave in the kitchen for hours prepping and cooking.

IMG_0818

IMG_0840

IMG_0843

crockpot cilantro lime chicken tacos
Print
Ingredients
  1. 1 lb. boneless skinless chicken breasts
  2. Juice from 2 limes
  3. 1/2 cup of cilantro
  4. 1 packet of taco seasoning
  5. 1/4 cup diced onions
  6. 1/2 cup of water
  7. Salt & pepper
  8. Taco tortillas
Instructions
  1. In a 3-5 quart Crockpot, combine everything except the chicken. Stir well, then add the chicken.
  2. Cook on low for about 4-6 hours or until the chicken is tender enough to shred with a fork.
  3. Take the chicken out and place on a plate. Shred, then drizzle some of the remaining sauce over the chicken to keep it moist.
  4. Spoon the chicken mixture into soft taco tortillas. Top with your favorite toppings.
Notes
  1. We cooked the chicken for about 8 hours and it turned out a tad on the dry side. It was already very tender at about the 4-6 hour mark, so next time we'll be keeping an eye on it to make sure it stays juicy.
Adapted from The Vintage Grove
Simple Everyday Food https://www.simpleeverydayfood.com/
IMG_0844

Another bonus of making Crockpot meals – not a whole lot of dishes to clean up in the end!

Oh hey, just in time for Cinco de Mayo!

Enjoy!

Recipe adapted from The Vintage Grove

Sharing is caring! Email this to someonePrint this pagePin on PinterestShare on YummlyShare on FacebookShare on Google+Tweet about this on Twitter

So I thought I would satisfy my baking itch by making Bentley some doggie treats… yep I was wrong, because the first thing I did this morning after eating breakfast was to look for cookie recipes.

I have a very tasty soft and chewy gingersnap cookie recipe that I like to make during the holidays – I’m not saying these gingerbread cookies are bad – I’m just thinking next time I’m going to try making this recipe with the gingersnap recipe I already have. I think with the combination of the yummy buttercream filling, it’ll be amazing. Nonetheless, I’ve never made whoopie pies before, and I was quite impressed at how these turned out.

IMG_0825

IMG_0833

IMG_0837

And they’re pretty to look at :)

IMG_0836

Who said gingersnaps are only for Christmastime?

gingerbread whoopie pies with vanilla buttercream filling
Print
For the Cookies
  1. 3 3/4 cups all-purpose flour
  2. 1 teaspoon salt
  3. 1 1/2 teaspoons ground ginger
  4. 1 teaspoon ground cinnamon
  5. 1/4 teaspoon ground nutmeg
  6. 1/4 cup vegetable shortening
  7. 1 stick butter, softened
  8. 3/4 cup light brown sugar
  9. 1 large egg
  10. 3/4 cup molasses
  11. 3/4 cup milk
For the Filling
  1. 1 stick butter
  2. 2 cups powdered sugar
  3. 2 tablespoons milk
  4. 1 teaspoon pure vanilla extract
For the Cookies
  1. Preheat the oven to 375.
  2. In a medium-sized mixing bowl, combine the flour, salt, baking soda, and spices. Set aside.
  3. Using an electric mixer, combine the shortening, butter and brown sugar; beat until the mixture is smooth and fluffy.
  4. Add the egg and mix thoroughly.
  5. Add half of the flour mixture to the butter mixture and mix to combine.
  6. Mix in the molasses, the remaining dry ingredients, and the milk.
  7. Drop 1 tablespoon of dough onto parchment-lined baking sheets, leaving 2 inches between. Press the dough down until it's about 1/4" thick.
  8. Bake the cookies for 12 minutes. Remove and cool completely on a cooling rack.
For the filling
  1. Beat butter with mixer on high until light and fluffy.
  2. Add powdered sugar, 1/2 cup at a time, and continue to mix until combined.
  3. Pour in the milk and vanilla. Beat on high until mixture is at a fluffy consistency.
  4. Scoop frosting into a piping bag, pipe a dollop of frosting onto the bottoms of the cookies and sandwich it with another cookie. Press together until frosting is visible on the sides.
Notes
  1. If you don't have a piping bag, you can simply use a spatula or spoon to spread the frosting onto the cookies.
Adapted from Diethood
Simple Everyday Food https://www.simpleeverydayfood.com/
Well, now that I’ve satisfied that baking itch, I have two containers full of sweet sitting around the house. I guess whoever is working tomorrow is in luck :)

IMG_0834

IMG_0848

Enjoy!

Recipe adapted from Diethood

Sharing is caring! Email this to someonePrint this pagePin on PinterestShare on YummlyShare on FacebookShare on Google+Tweet about this on Twitter

Today is Bentley’s lucky day – his mamma decided since she’s still on a healthy diet and shouldn’t be making cookies and cupcakes, the best way to to satisfy her baking itch is to make her little puppy some puppy treats instead. That way, Bentley gets homemade biscuits and mommy gets to bake!

These are super easy to make and you really don’t need an electric stand mixer for it either (although I was lazy and decided to put my KitchenAid to work). Including baking time, it only takes about half an hour. Not only is it quick and simple, but according to the website, the best part of these treat is that “your kids can eat them too!”

IMG_0811

…I don’t think these would be very popular at a bake sale – although I did try some myself and must say that they don’t taste all that bad.

It was almost as if Bentley knew I was making these just for him…

IMG_0791

banana bites
Print
Ingredients
  1. 2 cups quick cooking oats
  2. 1-1/4 cup of flour
  3. 2 eggs
  4. 1/4 cup oil
  5. 1/2 cup honey
  6. 1/2 cup milk
  7. 3 mashed bananas
Instructions
  1. Preheat oven to 325 degrees.
  2. In a large bowl, mix the eggs, oil, honey, milk, and bananas. Add in the oats and flour. Mix until thoroughly combined.
  3. Pour batter onto a parchment-lined baking sheet. Spread out batter on baking sheet with a spatula until it's about 1/4" thick.
  4. Bake for 25 minutes and cut into small square bites with a pizza cutter when it's cooled down a bit.
  5. Cut into little square pieces and place on cooling rack for it to cool completely.
Adapted from Colleen Cancio via Animal Planet
Simple Everyday Food https://www.simpleeverydayfood.com/
IMG_0809

Bentley gave his stamp of approval!

IMG_0795

IMG_0797

IMG_0805

Recipe adapted from Animal Planet

Sharing is caring! Email this to someonePrint this pagePin on PinterestShare on YummlyShare on FacebookShare on Google+Tweet about this on Twitter