everyday food made simple

I don’t know about the rest of the country, but the weather here in Minnesota has been nothing but gorgeous the past few weeks. Every day has been sunny with a few puffs of clouds in the sky, and somewhere between 75-85 degrees. After a long, brutal winter, I was more than ready to dust off the boxes where my summer shorts and tank tops have lived for the past 7 months and bring them back into my regular clothing “circulation”. It’s always a monumental day when I deem the weather warm (and stable) enough to pack up my winter boots, and put all my scarves, gloves, hats, and jackets away in the closet…. it signifies the arrival of warmer weather, longer days, shorts and flip flops, grilling, ice cold lemonade, and everything summer is about.

You know what else is a universal icon of summer? S’mores.

IMG_3522 copy

IMG_3516 copy

For someone who doesn’t care for camping, I really am a big fan of s’mores – I even have an entire section in my recipe book dedicated to all things s’mores! It’s without a doubt my second favorite flavor combination of all time. It lands in 2nd place because nothing – I mean nothing – can top mint + chocolate in my world. Whoever decided to sandwich a toasted gooey marshmallow with some chocolate in between graham crackers is a genius.

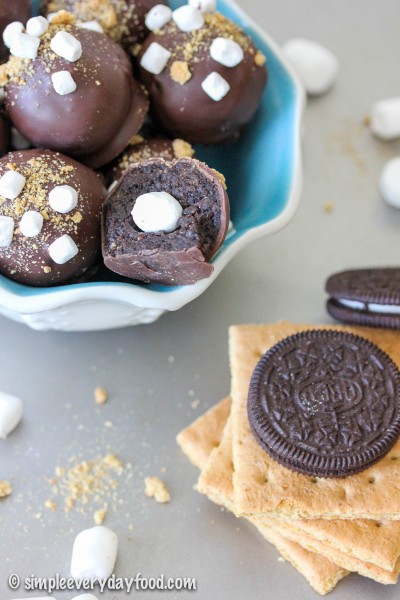
These truffles are super easy to make and requires no baking at all! All you really need is a food processor, which means they’re quick… and you won’t even have to make your house any hotter by turning on the oven. I modified the original recipe by adding several squares of graham crackers into the Oreo/cream cheese base, just to amplify the s’mores flavor, and let me tell you, everyone thought these were deeeelicious!

IMG_3531 copy

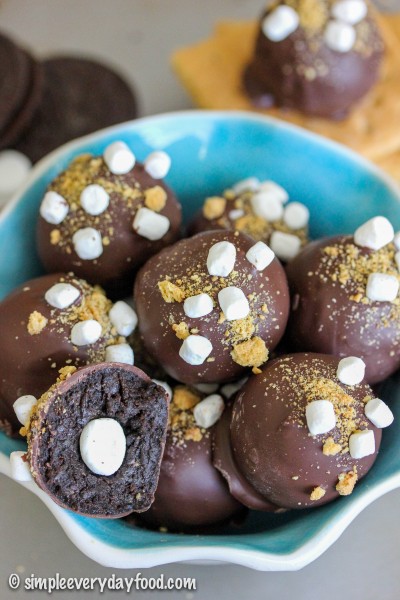
It even has a little mini marshmallow surprise inside when you take a bite out of it!

IMG_3519 copy

IMG_3521 copy

I have made several different kinds of truffles in the past, but these hands down take the crown – they are without a doubt the best tasting truffles I’ve ever made. It’s a bold statement, but that’s how good they were. They were so good that Brian alone ate 4 of them one day when I was at work, and I ended up having to make another batch of them to share with my coworkers!

IMG_3539 copy

IMG_3525 copy

Oreo s'more truffles
Print
Ingredients
  1. 15 original Oreo cookies
  2. 6 graham cracker squares, divided
  3. 2.5 oz low fat cream cheese
  4. ~11 mini marshmallows
  5. 8 oz chocolate CandiQuik
  6. ~2 tablespoons marshmallow bits (optional)
Instructions
  1. In a food processor, pulse 2 squares of graham cracker squares until it turns into fine crumbs. Place in a small bowl and set aside.
  2. In the same food processor, pulse the Oreo cookies and the remaining 4 graham cracker squares until roughly crumbled. Add in the cream cheese and pulse on HIGH until the mixture comes together. The mixture turns into a doughy consistency and should not be crumbly - you should easily to able to form them into balls without it falling apart in your hands.
  3. Roll the mixture into balls (about 1-1.5 tablespoon each) and place on a parchment paper-lined baking sheet. Take each ball and make an indentation in the middle with your thumb, and place a mini marshmallow in the center. Reform the truffle mixture back into a ball, making sure the mixture encases the mini marshmallow entirely. Repeat with the rest of the truffles. Place the truffles in the refrigerator to chill.
  4. While your truffles are chilling, make the candy coating: using a double boiler, melt the CandyQuik until smooth. Working one truffle at a time, place a ball in the CandyQuik while spooning the chocolate over the truffle with a spoon. Gently lift the ball up with a fork and gently tap off the excess candy coating.
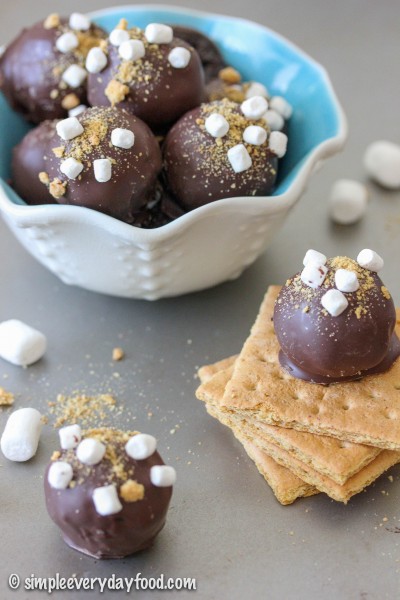
  5. Place the truffle onto the baking sheet and immediately garnish with graham cracker crumbs and marshmallow bits. Repeat with the rest of the truffles. Return decorated truffles into refrigerator to chill. Store in an airtight container in a cool dry place for up to 5 days (if they even last that long).
  6. Makes 11 truffles
Adapted from Crazy for Crust
Simple Everyday Food https://www.simpleeverydayfood.com/
I personally love to use CandyQuik to coat all my truffles. You can also use the Wilton candy melts or Almond Bark if those are the kind you prefer. I also personally prefer to melt all my chocolates and candy coatings over a double boiler rather than throwing them in a microwave or directly over a heat source – I’ve tried microwaving them in the past, but they just never seemed to work as well for me as using a double boiler. However, if you have better luck than I do with a microwave or over a stove, feel free to do it that way – it’s probably faster anyway :)

Recipe adapted from Crazy for Crust

© Simple Everyday Food. All images & content are copyright protected. Please do not use any of my images without prior permission. If you want to republish this recipe, please re-write the recipe in your own words, or kindly link back to this post for the recipe.

Sharing is caring! Email this to someonePrint this pagePin on PinterestShare on YummlyShare on FacebookShare on Google+Tweet about this on Twitter

I always seem to hop on the holiday baking train a few days late. Rarely do I ever find myself getting ahead of the game and baking things in anticipation of the upcoming holiday. Don’t ask why – it has always been a problem and I don’t think I plan on fixing that problem anytime soon. I have too many things to take care of, and right now baking ahead of schedule just isn’t as important as things such as studying for boards, spending time with family, working a full-time job, making sure everyone is fed and happy at the dinner table, and squeezing in time to run errands and do housework (I absolutely despise doing laundry).

[It’s soooo hard to work full-time and find time to cook, bake, photograph, edit, write, and post blog posts! I’m open to any advice, tips, and tricks anyone can give me!]

To me, this blog isn’t about making and posting a number of holiday desserts in anticipation of a holiday… don’t get me wrong, I admire (and am a little jealous of) all the talented food bloggers out there that are able to do so, and if I ever have the opportunity to make a full-time income off of SEF, I’d do it in a heartbeat. However, my current lifestyle simply does not allow such extensive food blog planning, so you guys will just have to put up with whatever my little heart felt like making at the moment… even if that means making Valentine-y red velvet desserts days and days after the holiday is over :)

IMG_3150 copy

So, about these whoopie pies.

IMG_3134 copy

I always like to think of whoopie pies as soft, puffy, big fat Oreos. Except these are thicker and softer than an Oreo cookie and has at least twice as much filling. And they’re soooo easy to make! I was itching to bake something the other day and just wanted a super simple recipe that didn’t require a long list of ingredients and a bunch of steps to follow. These really are not that complicated at all. The directions can be condensed into 6 simple steps:

1.  Make cookies

IMG_3115 copy

(Oooh… those crinkles. I absolutely looooove crinkly cookies!!)

2.  Bake cookies

3.  Make filling

4.  Pipe filling

IMG_3118 copy

5.  Sandwich cookies

IMG_3159 copy

6.  DEVOUR! (with a big glass of ice cold milk is highly recommended)

See? Simple. So simple that a monkey can do it. Okay, maybe not a monkey, but it is a really straight-forward recipe. l I even made these a “double stuffed” whoopie pie by generously piping the cream cheese frosting on BOTH cookies, because well, who doesn’t like extra frosting?! If you don’t have a piping bag, you can also just smear the frosting on the bottom of the cookies using a spoon, knife, spatula, or any kind of kitchen utensil you have handy before sandwiching them together.

IMG_3127 copy

IMG_3145 copy

I think I could’ve probably eaten the cookies by themselves without the cream cheese frosting – they were so soft and so moist and so good! They even remained soft and moist in an airtight container three days later! My favorite way of eating them was twisting them open and eating each half of the sandwich with a little bit of cookie and a little bit of frosting.

red velvet whoopie pies
Print
For the cookies
  1. One 16.25-oz box of red velvet cake mix
  2. 2 eggs
  3. 1/2 cup vegetable oil
For the frosting
  1. 1/4 cup (1/2 stick) butter, softened to room temperature
  2. 8 oz cream cheese, softened to room temperature
  3. 2 teaspoons milk
  4. 1 teaspoon vanilla extract
  5. 3 cups powdered sugar
Instructions
  1. Preheat oven to 375 degrees. Line two baking sheets with parchment paper or silicone baking mats and set aside.
  2. Using an electric mixer, combine all the ingredients for the cookies until well mixed. Roll the cookie dough into dough balls 1" in diameter. Place dough balls ~2" apart and bake for 8 minutes, or until the tops of the cookies start to crack. Remove from oven and let cool completely.
  3. While the cookies are cooling, make the frosting: combine the butter, cream cheese, milk, and vanilla extract in a large bowl. Then add the powdered sugar, one cup at a time, making sure the mixture is well-mixed in between each addition.
  4. Spread a generous amount of frosting on the bottom of all the cookies*, and pair cookies up together, pressing gently to sandwich them together. Store an an airtight container for up to 5 days.
  5. Makes about 13 cookies
  6. *I spread the frosting on the cookies using a piping bag and a starred tip. If you don't have piping supplies, you can also simply spread the frosting onto the bottom of the cookies with a knife, offset spatula, a regular spatula, or whatever kitchen utensil you have handy.
Adapted from Six Sisters' Stuff
Simple Everyday Food https://www.simpleeverydayfood.com/
Recipe adapted from Six Sisters’ Stuff

© Simple Everyday Food. All images & content are copyright protected. Please do not use any of my images without prior permission. If you want to republish this recipe, please re-write the recipe in your own words, or kindly link back to this post for the recipe.

Sharing is caring! Email this to someonePrint this pagePin on PinterestShare on YummlyShare on FacebookShare on Google+Tweet about this on Twitter

IMG_2733 copy  

It’s no secret that I’m a sucker for chocolate. Not just a plain old boring milk chocolate bar, mind you, but fancy dark chocolate with different flavors infused in it – mint chocolate, dark chocolate cherry, chai chocolate, birthday cake chocolate, coconut chocolate…. The kind where you have to spend more than $3.50 for a small little chocolate bar. Yeah, I’m fancy.

I especially loooove dark chocolate with a hint of orange – dark chocolate with bits and pieces of candied orange peels throughout – it really is a match made in heaven! Since it’s hard for me to get my hands on certain fancy brands, Lindt’s chocolates are one of my go-tos when I’m in the mood to indulge.

photo 1

I see it as getting my daily vitamin C intake along with some antioxidants – it’s a win-win situation – no?

This cookie is kind of the opposite of what these candy bars are about. Instead of orange infused chocolate, it’s more of an orange cookie with a hint of chocolate. Instead of using regular chocolate chips, I used some 70% dark cacao chips instead to give the cookie a more intense dark chocolate flavor, that way you can eat a few without feeling like you’re going to slip into a sugar coma.

IMG_2720 copy

IMG_2727 copy

These cookies are soooo soft! They’re soft and moist. Not cakey, and not chewy either. Just soft. Like melt-in-your-mouth soft, thanks to the small amount of cream cheese added to the batter. One thing to note about these cookies is that when you mix everything together, the batter will be SUPER sticky. You’re probably going to think that something went wrong – nope! It’s just the way it is. And for that reason, I strongly suggest mixing everything together with a mixer… unless you’re trying to gain some arm strength – then more power to you, you overachievers.

orange chocolate chip cookies
Print
Ingredients
  1. 1/2 cup (1 stick) unsalted butter, softened to room temperature
  2. 3-oz low fat cream cheese, softened to room temperature
  3. 1/2 cup granulated sugar
  4. 1 egg, at room temperature
  5. 1 teaspoon vanilla extract
  6. 1 teaspoon grated orange zest
  7. 1 cup all-purpose flour
  8. 1/2 teaspoon salt
  9. 1 cup 60% dark cocoa chocolate chips
Instructions
  1. Preheat oven to 350 degrees. Line baking sheets with parchment paper or silicon baking mats.
  2. In a medium bowl, combine the flour and salt. Set aside.
  3. Using an electric mixer, cream together the butter, cream cheese, and sugar. Add in the egg an mix until smooth. Add in the orange zest and vanilla, stir until incorporated. Slowly add in the dry ingredients to the butter mixture. Mix until combined. Stir in the chocolate chips.
  4. Drop heaping tablespoonfuls of the dough onto the prepared baking sheets. The dough will be very sticky - this is normal! Bake for 12-14 minutes or until the edges just begin to brown slightly. Store in an airtight container for up to 7 days.
  5. Makes 16-18 cookies
Adapted from Taste and Tell Blog
Simple Everyday Food https://www.simpleeverydayfood.com/
IMG_2732 copy

Next time when I make these, I think I’m going to roughly chop up the dark chocolate chips prior to adding them into the batter. That way there will be more chocolate dispersed throughout the dough, and the chocolate will be nice and gooey and melty when you take them out of the oven.

Okay, I need to go find myself some chocolate now….

Recipe adapted from Taste and Tell Blog

© Simple Everyday Food. All images & content are copyright protected. Please do not use any of my images without prior permission. If you want to republish this recipe, please re-write the recipe in your own words, or kindly link back to this post for the recipe.

Sharing is caring! Email this to someonePrint this pagePin on PinterestShare on YummlyShare on FacebookShare on Google+Tweet about this on Twitter

If you haven’t heard, I was offered a brand spankin’ new full time job about a month ago and just started it this week ! I’m super ecstatic about it, as I wasn’t really expecting to be able to find a job (at a place I really wanted to work at) this fast, just a few weeks after graduation. Of course, I wasn’t able to do it without the help of some wonderful people I listed as my references. As far as I know, a few of them were contacted by this employer, and they must’ve wrote a bunch of nice things about me, and I’m forever grateful about it :)

This will be my first ever full-time big girl job, and I took the entire process very seriously (more than usual) – from the initial submission of my resume and cover letter, to the actual interview, and the thank you letters thereafter – I applied everything I have learned in my career capstone class and meticulously read and reread everything prior to hitting the “submit” button. I’m glad a little bit of networking and hard work pays off… I love it so far!

This whole journey really made me realize that no matter where you go in life and what big milestones you have achieved, you really can’t get there without the help of people along the way – whether they are friends, family, coworkers, or even strangers… many people played a part in this job hunting process, and even now, I feel just as grateful as I did the day I was offered the position.

Ever since I was little, my mom had ingrained in my brain that it is important to express your gratitude towards those that have helped you in life. And that’s why the day after I got this new job, I decided to make some sweets for those people who took time out of their busy schedules to write recommendation letters for me. I figured if they were kind enough to take time to write nice things about me, the least I can do is take time out of my day to make a little something to show them how much I appreciate their efforts.

IMG_3006 copy

IMG_3012 copy

I would’ve made cookies, but one of my references happened to be gluten free, which is why I decided to make fudge instead. I’ve never made fudge in my entire life before, but since it’s a new year, and new years are all about trying new things, I decided to give it a whirl. And since I’m still on this mint chocolate craze, mint chocolate fudge it was (it’s only my favorite chocolate combination, if you haven’t figured that out already).

IMG_3009 copy

These little fudge squares are just like giant Andes mints and they’re so easy to make! The bottom layer consists of sweet chocolate chips with condensed milk, followed by another fudgey layer of white chocolate chips, a little bit more condensed milk, peppermint extract, and a few drops of food coloring. The thin top chocolate layer has a nice little crunch, which contrasts nicely with the bottom two smooth velvety fudgey layers. Heaven, I tell ya.

IMG_3027 copy

IMG_3028 copy

I have never had luck with melting chocolate in the microwave or directly over a heat source. It just somehow never works for me, so for all chocolate-melting recipes, I always always always melt my chocolates using a makeshift double boiler over low heat – it heats the chocolate up a lot slower, but it also gives me less anxiety. I take it as a fair trade off.

If you’ve never made fudge (like me) before, I just want to warn you that when you melt the chocolate chips with the condensed milk, the mixture is going to be thick. I was expecting the mixture to be nice and smooth and runny like melted chocolate, but nooooo… it was thick. So thick that the only good utensil to stir it with is with a sturdy wooden spoon.. and that if you stir it constantly, your arm is going to get tired. I initially thought my chocolate had seized up on me, and I started to get very frustrated. Mind you this was at 9:30 a.m. and I’m pretty sure Brian decided to stay the heck away from the kitchen for the rest of the morning.

Moral of the story: chocolate chips + condensed milk = thick mixture (read: don’t freak out).

IMG_3025 copy

mint chocolate fudge
Print
Ingredients
  1. 2.5 cups semi-sweet chocolate chips, divided
  2. One 14-oz can sweetened condensed milk, divided
  3. 1.5 cups white chocolate chips
  4. 1 teaspoon peppermint extract
  5. 2-3 drops green food coloring
  6. 1 teaspoon shortening
  7. 1/2 cups Andes Creme de Menthe Baking Chips
Instructions
  1. Line an 8x8" baking pan with aluminum foil and spray generously with nonstick cooking spray. Set aside.
  2. Using a double boiler, melt 1.5 cups of the semi-sweet chocolate chips with 3/4 cups of the sweetened condensed milk over low heat. Stir occasionally until smooth, then pour mixture into the baking pan. Spread mixture evenly (I used an offset spatula), and place in the fridge to chill.
  3. While the chocolate mixture is chilling in the fridge, melt the white chocolate chips with the remaining sweetened condensed milk over a double boiler over low heat, stirring until smooth. Remove from heat and add in the peppermint extract and green food coloring. Stir until the mixture is even in color, then pour mint layer evenly over chilled chocolate layer and place back into the refrigerator.
  4. Melt the remaining 1 cup of semi-sweet chocolate chips and the shortening over a double boiler. Stir until smooth. Pour evenly over the mint layer, top generously with Andes Creme de Menthe baking chips, and chill in fridge for at least 3-4 hours until set.
  5. Cut into small squares before serving and store in the refrigerator for up to two weeks.
  6. Makes about 36 small squares
Adapted from Sally's Baking Addiction
Simple Everyday Food https://www.simpleeverydayfood.com/
Even though I’m not a big fudge fanatic, everyone who were able to get their hands on a little piece of this decadent minty goodness all said it was phenomenal!

Recipe adapted from Sally’s Baking Addiction

© Simple Everyday Food. All images & content are copyright protected. Please do not use any of my images without prior permission. If you want to republish this recipe, please re-write the recipe in your own words, or kindly link back to this post for the recipe.

Sharing is caring! Email this to someonePrint this pagePin on PinterestShare on YummlyShare on FacebookShare on Google+Tweet about this on Twitter

IMG_2656 copy 

Just because the holiday season was sooooo last year, doesn’t mean that we should wait another 11 months to start making anything involving peppermint and chocolate. I have stocked up enough Andes peppermint baking chips and Hershey’s mint chocolate chips to last for the next 3-4 months.. so don’t be surprised if you see a post or two (or three… or four) about mint chocolate desserts on SEF this spring!

Remember these amazingly decadent gooey bars I made a while back? Well, today I have created a cookie version of those bars, and they’re equally as delicious! It’s a chocolate cookie base with tons of crunchy peppermint chips sprinkled throughout, so you’re guaranteed plenty of crunchy minty chocolatey goodness in each bite!

IMG_2660 copy

IMG_2658 copy

I also added extra semi-sweet chocolate chips into the batter simply because, well, you just can’t have too much chocolate in a cookie! Although it’s not required, it is highly recommended since it makes the chocolate flavor even more pronounced (read: even more amazing).

Soft, chewy chocolate cookies with bits of mint crunchiness in each bite – I bet you won’t be able to eat just one!

IMG_2674 copy

Just like all my other cookie recipes, I took these out 2 minutes prior to the regular recommended baking time, gently pressed the tops with the back of a fork, and put them back in the oven to cook for another 1-2 minutes. I do this a lot for cookies that don’t naturally spread out a whole lot during their time in the oven, just to achieve a nice crinkly cracked top in the end. I have tried just pressing them down after removing them from the oven completely, but I realized that they the end results aren’t as nice as taking them out after cooking them for 80% of the recommended time.

peppermint chocolate pudding cookies
Print
Ingredients
  1. 1 cup (2 sticks) unsalted butter, softened to room temperature
  2. 3/4 cup packed brown sugar
  3. 3/4 cup granulated sugar
  4. 2 eggs, at room temperature
  5. 2 teaspoon vanilla extract
  6. 1 teaspoon salt
  7. 1 teaspoons baking soda
  8. 1 tablespoon hot water
  9. 2 and 1/4 cups all-purpose flour
  10. 1/4 cup dark cocoa powder
  11. 3.9 oz instant chocolate pudding mix
  12. 1 cup Andes peppermint baking chips
  13. 1 cup semi-sweet chocolate chips
Instructions
  1. Preheat oven to 350 degrees. Line baking sheets with parchment paper or silicon baking mats.
  2. In a large bowl, combine the flour, salt, cocoa powder, and pudding mix. Gently mix with a spatula and set aside.
  3. Using an electric mixer, beat the butter on medium high speed until smooth. Add in the sugars and beat until light and fluffy. Add in the eggs, one at a time, mixing well in between additions.
  4. In a small bowl, dissolve the baking soda in the hot water. Add the baking soda mixture to the butter mixture. Then add in the vanilla. Mix well.
  5. Slowly add in the dry ingredients into the mixer bowl. Mix under medium speed until combined. Add in the baking chips and chocolate chips and mix some more.
  6. In heaping tablespoons, scoop the cookie dough on the baking sheets. Bake for 10 minutes, slightly press the tops with a spoon or a fork, and bake for another 1-2 minutes. Remove cookie sheets from oven and let cool for at least 5 minutes before transferring cookies to a wire cooling rack to cool completely. Store in an airtight container for up to 7 days.
  7. Makes about 40 cookies
Adapted from Something Swanky
Simple Everyday Food https://www.simpleeverydayfood.com/
IMG_2651 copy

I actually decided to freeze half the batch of cookie dough balls for later – not only would they be readily available when I’m craving cookies at a later date, I was hoping it will limit how many cookies I eat a day… note to self for next time: if Amy wants to eat 10 cookies a day, Amy will eat 10 cookies a day, regardless if there are 10 or 20 cookies laying around the house.

Well, at least I have enough peppermint baking chips for a few more batches!

Recipe adapted from Something Swanky

© Simple Everyday Food. All images & content are copyright protected. Please do not use any of my images without prior permission. If you want to republish this recipe, please re-write the recipe in your own words, or kindly link back to this post for the recipe.

Sharing is caring! Email this to someonePrint this pagePin on PinterestShare on YummlyShare on FacebookShare on Google+Tweet about this on Twitter