everyday food made simple

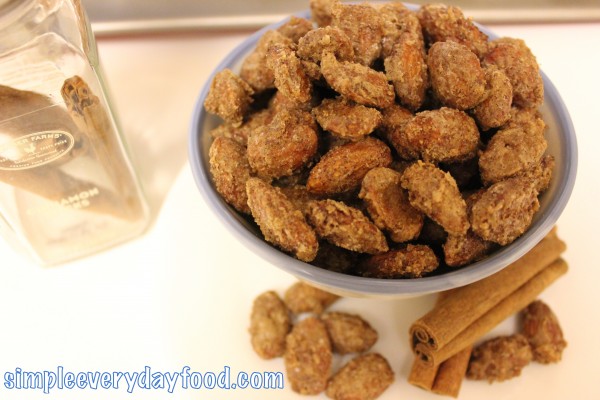
Last summer during the Minnesota State Fair, I was introduced to the amazing deliciousness of cinnamon roasted almonds.

“How have I never had these before?”, I asked myself.

Almonds coated with sweet, crunchy, cinnamon-y goodness…. mmm mmm mmm.

After the State Fair was over, I was on a mission to recreate these tasty addicting snacks on my own. I did, and since this recipe makes a whole lot, I brought some to school to share, where people have been asking me to share the recipe since. Yes, this was a year ago, and I just finally gotten to it now. Talk about procrastination….

IMG_1034

I like my almonds thoroughly coated with the egg white/vanilla mixture to ensure they all get a nice thick crunchy coat of the cinnamon sugar in the end, which is why I used 2 egg whites instead of one. I made these right after I made my key lime pie bars a few weeks back – I felt guilty throwing away four perfectly fine egg whites, so I figured I’d put those egg whites to good use instead of throwing them down the drain.

I’m also a big fan of cinnamon, so I tend to be quite generous when it comes to any recipe that calls for cinnamon – if you don’t want an overpowering cinnamon flavor to your almonds, don’t add the cinnamon in heaping teaspoons (and then some) like I did….

IMG_1012

IMG_1036

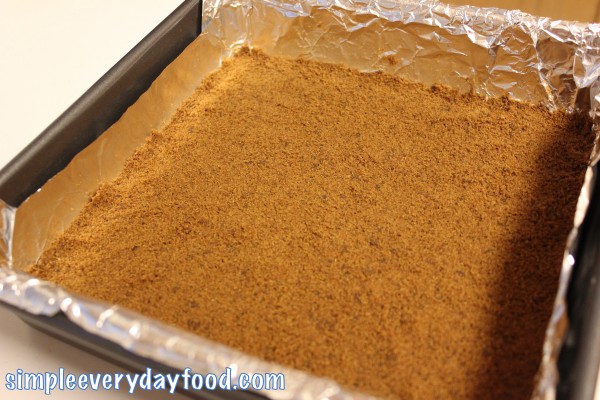
I also highly recommend lining your baking sheet with some foil. Not only will it prevent the almonds from sticking to it, it will also save you a lot of time and energy when it comes to cleaning up. Trust me, no one likes to stand in front of the kitchen sink trying to scrape off brunt crusty sugar bits!

cinnamon roasted almonds
Print
Ingredients
  1. 2 eggs whites
  2. 1 1/4 teaspoon vanilla extract
  3. 4 cups raw whole almonds
  4. 1/2 cup granulated sugar
  5. 1/2 cup brown sugar
  6. 3 heaping teaspoons ground cinnamon
  7. 1/2 teaspoon salt
Instructions
  1. Preheat oven to 250 degrees. Line a large baking sheet with aluminum foil. Set aside.
  2. In a large bowl, whisk egg whites and vanilla extract until slightly foamy. In another bowl, combine the sugars, ground cinnamon, and salt.
  3. Add the almonds into the bowl with the egg mixture, toss until all the almonds are thoroughly coated. Mix in the sugar mixture to the almonds, toss some more to make sure the almonds are all coated with the cinnamon sugar.
  4. Spread the almonds onto the baking sheet in one single layer. Bake for 75 minutes, tossing 2-3 times in between.
  5. Remove from oven and cool completely. Store in an airtight container for 1-2 weeks.
  6. Makes about 4 cups
Simple Everyday Food https://www.simpleeverydayfood.com/
They’re good warm out of the oven, or after the almonds have had a chance to cool to room temperature.  I tend to like my almonds cooled to room temperature, but I did catch the hubs nibbling on them as they were cooling on the kitchen counter :)

Trust me, these almonds are yummy, and I bet you can’t just eat one (or just a handful for that matter)!

IMG_1029

Enjoy!

Sharing is caring! Email this to someonePrint this pagePin on PinterestShare on YummlyShare on FacebookShare on Google+Tweet about this on Twitter

Making pies can be such a daunting task. First you have to make the crust, then you have to make the filling.. then depending on what kind of pie you’re making, you have to either make some sort of a meringue or a pie crust lattice and make sure that looks nice and pretty. Every step requires much diligence to make sure the entire pie turns out nice and presentable in the end.

Talk about pressure – if the whole pie doesn’t turn out to be as photogenic as you imagined it to be, you’re either left with nothing to show for, or you’ll just have to try to capture the best angle of your pie.

For those reasons, I haven’t been brave enough to tackle a pie yet – maybe I can try to check that off of my to-do list this summer during my break from school.

On the other hand, cookies, bars, cupcakes, truffles are much easier to make. If some don’t turn out as pretty as you hoped, at least you still got a bunch more to choose from to be part of your picture.

That being said, I opted for some easy key lime pie bars instead of making a whole pie. When you think of summer, you think of key lime pies – they’re light, tart, tangy, and sweet all at the same time.

IMG_1046

IMG_1008

IMG_1009

IMG_1016

Waiting for these babies to cool in the fridge was probably the most difficult part, but the end result was totally worth the wait!

IMG_1050

key lime pie bars
Print
Ingredients
  1. 2 cups finely crushed gingersnap crumbs
  2. 3 tablespoons butter, melted
  3. 4 oz cream cheese, softened to room temperature
  4. 4 large egg yolks
  5. 1 14-oz can sweetened condensed milk
  6. 1/2 cup key lime juice
  7. 2 teaspoons lime zest, plus more for garnishing
Instructions
  1. Preheat oven to 350 degrees. Line a 9x9" cake pan with foil, leaving some overhanging on the sides and spray with nonstick spray. Set aside.
For the crust
  1. Using a food processor, pulverize the gingersnap cookies into fine crumbs.
  2. Pour crumbs into a medium bowl, combine with melted butter.
  3. Press firming into cake pan. Make sure the crumbs are evenly distributed throughout. Bake for 10 minutes.
While the crust is in the oven, make the filling
  1. Using a handheld mixer (I was lazy and used an electric stand mixer), beat cream cheese on high until smooth. Slowly incorporate the egg yolks. Beat in the sweetened condensed milk, key lime juice, and lime zest. Mix until all ingredients are thoroughly combined. Pour into pan with warm crust.
  2. Bake for 16-18 minutes, or until the edges just begin to brown slightly.
  3. Remove from oven, garnish with additional lime zest if desired. Let the bars cool in the pan on a wired rack, then transfer them to the refrigerator for 3-4 hours or until completely chilled.
  4. Once chilled, remove the bars from pan with the overhanging foil and cut into squares.
Adapted from Sally's Baking Addiction
Simple Everyday Food https://www.simpleeverydayfood.com/
This recipe is really easy – if making a key lime pie is this easy, I think it just might be the first ever pie I attempt to make. I’m not a fan of cheesecakes, but the little bit of cream cheese added in here gives it a creamy texture. The gingersnap cookie crust is also recommended over the traditional graham cracker crust, as the sweet/spiciness of crust goes very (very) well with the creamy tartness of the filling.

IMG_1045

I brought this to work last weekend for a pot luck and received plenty of rave reviews. Everyone loved it, except for the hubs, who is a wimp when it comes to anything tart… he had an expression as if I made him eat a whole bag of Sour Patch Kids at once (I would’ve taken a picture of his facial expression if he would’ve let me). Trust me, these bars are delicious and are just perfect for summer! Plus it only requires a few ingredients and little baking time!

Enjoy!

Recipe adapted from Sally’s Baking Addiction

Sharing is caring! Email this to someonePrint this pagePin on PinterestShare on YummlyShare on FacebookShare on Google+Tweet about this on Twitter

On Friday, I finally broke down and got myself my very first (ever) cookie scoop!

Yes, all these years of baking and I’ve never owned a cookie scoop of any kind. I have never been a fan of using fancy kitchen gadgets when I cook – I grew up cooking with a few simple equipment, so I always stuck to the old fashion way of cooking.

Seriously though, all my mom had in the kitchen growing up were a few knifes, a cutting board, a wok, a spatula, a ladle, and a few pots. No fancy garlic presses, mango slicers, or onion choppers…

To this day, I still don’t own a lot of those fancy kitchen gadgets. I’m not caving into getting a garlic press, a mango slicer, or a juicer just yet, but I do own an onion chopper only because it was given to us as a wedding gift (which, has saved me a lot of tears lol). It also took me a few years to finally get a rolling pin. Before the rolling pin joined our family, I created my own cheap version of a rolling pin by wrapping a bottle of cooking wine in plastic wrap…

Anyway, now that I finally own a cookie scoop, I was determined to find a cookie recipe that required scooping cookie dough out of my mixer bowl this past weekend.

I’m not particularly fond of making desserts with premade cake mixes, but this recipe intrigued me so much that I just had to give it a try (and I was feeling a little lazy…). Plus, strawberries and chocolate are like a match made in heaven – just like cookies and milk, peanut butter and jelly, peanut butter and chocolate, chips and salsa, mashed potatoes and gravy, burger and fries…. need I go on?

I made these for a family cookout and they were a big hit. I added a few minutes onto the original cooking time stated on the site that I got the recipe from and they turned out soft and chewy. Plus, they were pink and were pretty to look at.

IMG_1000

IMG_0993

strawberry chocolate chip cookies
Print
Ingredients
  1. 1 box strawberry cake mix
  2. 1 teaspoon baking powder
  3. 2 large eggs
  4. 1/3 cup vegetable oil
  5. 1/2 teaspoon vanilla extract
  6. 1 1/4 cup semi-sweet chocolate chips
Instructions
  1. Preheat oven to 350 degrees. Line baking sheets with parchment paper and set aside.
  2. In a large mixing bowl, combine the cake mix and baking powder. In a smaller bowl, whisk the eggs, oil, and vanilla extract. Add the egg mixture to the cake mixture. Gradually turn electric mixer to medium speed and thoroughly mix batter for about 3 minutes, or until all the ingredients are combined. Stir in chocolate chips.
  3. Drop rounded balls of cookie dough, about 1.5 tablespoons each, onto the prepared baking sheet.
  4. Bake for 10-12 minutes, making sure the cookies do not turn brown. Remove from oven and let cool. As the cookies cool, the tops may settle down a bit. If not, you can press them down gently with your fingers. Transfer cookies onto wired cooling rack and allow to cool completely.
Adapted from Sally's Baking Addiction
Simple Everyday Food https://www.simpleeverydayfood.com/
IMG_0994

Surprisingly enough, these turned out to be pretty good. They were gone within minutes at our family cookout, and I think I may just have to make them again sometime to bring to work. Maybe I’ll make a double batch next time.

IMG_1001

Who am I kidding, I just want to make more cookies just so I can use my new cookie scoop……

Enjoy!

Recipe adapted from Sally’s Baking Addiction

Sharing is caring! Email this to someonePrint this pagePin on PinterestShare on YummlyShare on FacebookShare on Google+Tweet about this on Twitter

When you find a good recipe, it never hurts to make it again… right?

Our dry-rubbed ribeye steaks from a few months back was such a success that we decided to make it again tonight to kick-start the weekend. Except this time we decided to be fancy and make some grilled shrimp to make a surf-and-turf instead.

Wooo… fancy, eh?

We’ve never made shrimp on the grill before, so it was a first for us.

We decided on some spicy Cajun rubbed shrimp with a spicy chipotle mayonnaise dipping sauce.

IMG_0971

It sounds fancy, but it’s actually quite simple to make. If you like shrimp and you like spicy dipping sauces, there’s no excuse why you shouldn’t try this out this summer!

IMG_0965

IMG_0967

cajun shrimp with spicy chipotle mayonnaise
Print
For the shrimp
  1. 1 lb medium shrimp, peeled and deveined with tail on
  2. 2 tablespoons olive oil
  3. 1 tablespoon Cajun seasoning
  4. 1/2 tablespoon chipotle peppers in adobo sauce, finely chopped
  5. 1/2 teaspoon brown sugar
For the mayonnaise
  1. 1/2 cup mayonnaise
  2. 2 canned chipotles in adobo sauce
  3. 1 teaspoon adobo sauce
  4. Juice of 1/4 lime
For the shrimp
  1. Soak bamboo skewers in water. In the meantime, get your charcoal grill ready so it's nice and hot.
  2. In a large bowl, toss shrimp with olive oil, brown sugar, Cajun seasoning, and chopped chipotle peppers so all the shrimp are evenly coated with seasoning.
  3. Cover and refrigerate for 30 minutes.
  4. With 3-4 shrimp per skewer, cook on grill over direct heat, about 1-2 minutes per side, or until they turn pink, turning once or twice (we cooked ours for 1.5 minutes per side and they were perfectly done).
For mayonnaise sauce
  1. Combine all ingredients in a food processor and blend. Transfer to a small bowl and chill in refrigerator until ready to serve.
Notes
  1. Depending on taste, you can add more or less chipotle peppers to your seasoning & mayonnaise sauce. Our mayo turned out to be a little spicier than what I thought, but it was still quite delicious.
Adapted from Scrumpdillyicious
Simple Everyday Food https://www.simpleeverydayfood.com/
Even though my steak tasted amazing, the star on my plate was definitely the shrimp. They were succulent, juicy, flavorful, spicy all at the same time.

We threw some russet potatoes in the oven for a quick side of (unhealthy) carbs.

IMG_0970

The chilled mayo dipping sauce can play tricks on your palate though – just when you think the chilled mayo was going to balance out the hot spiciness of the shrimp, you taste the kick of the chipotle peppers in the sauce. Although spicy, they were super addicting. These would be great for either a side dish (like we did), or as an appetizer if you have a group of people over for a cookout this summer.

Enjoy!

Recipe adapted from Scrumpdillyicious

Sharing is caring! Email this to someonePrint this pagePin on PinterestShare on YummlyShare on FacebookShare on Google+Tweet about this on Twitter

The 2nd recipe as part of our “make more homemade drinks this summer” movement will be a homemade peach lemonade.

IMG_0978

As you recall a few weeks back, I have decided to make more smoothies/drinks/slushies myself this summer rather than looking back when summer is over, wishing I would’ve made a gazillion different things I wanted to make when summer first started.

Instead of just “planning” things this summer, I’m determined to execute all these “plans”. Nothing like getting off your butt and getting stuff done, right?

I started things off with a sparkling raspberry limeade. This week, since peaches are in season (and super cheap at the moment), a peach lemonade sounded like the perfect idea.

IMG_0960

IMG_0962

IMG_0973

peach lemonade
Print
Ingredients
  1. 4 cups water
  2. 2 cups peaches, coarsely chopped
  3. 3/4 cups sugar
  4. 1 cup lemon juice
  5. 1-1.5 cups water
Instructions
  1. In a medium saucepan, combine the water, sugar, and peaches. Heat until a boil, then turn down heat and let the mixture simmer for 10 minutes.
  2. Pour mixture into a blender, blend until smooth. **see Note below*
  3. Pour blended mixture into a saucepan, cover, and chill in refrigerator overnight.
  4. Strain the peach puree into a pitcher, pressing with a wooden spoon to get the most liquid out of it. Discard the solids.
  5. Add lemon juice and 1 cup water. Taste. If it still tastes too concentrated, dilute with an additional 1/2 cup water.
  6. Serve over ice and garnish with additional peach wedges if desired.
Notes
  1. Do NOT close the lid entirely when blending the hot liquid. You'll need to vent the lid to allow steam to escape (and to prevent an "explosion" of hot sticky peach juice).
  2. After placing the lid back onto the blender, remove the little clear center piece from the lid.
  3. Fold a kitchen towel a few times into a square, large enough to cover up where the clear center piece used to be.
  4. Secure the towel on the lid by placing one of your hands over it. Blend.
Adapted from Macaroni and Cheesecake
Simple Everyday Food https://www.simpleeverydayfood.com/
Let me just tell you that this drink wasn’t made without some blood, sweat, and tears (okay, no tears were involved, but there was blood, and there was sweat).

First, my knife decided to attack me as I’m chopping up the peaches. I’ve been cooking since I was a teenager, and I’ve only cut myself twice. Not a bad record, I’d say, but every time it happens, it’s almost like my eyes see it coming, but my brain is too slow to send signals to my hand, telling it to stop.

I guess you can see it three ways: 1) either my brain is slow to send signals to my hand, 2) somehow my motor neurons are disconnected to my brain and acts on its own accord, or 3) I just have very bad hand-eye coordination. My vote is for Option #3.

Secondly, I learned that when you’re blending hot liquids in a blender, do NOT close the lid entirely unless you want hot liquids all over your counters, toaster, floors, mixer, or all over yourself. In my defense, I’ve only used the blender for making smoothies in the past, and no one ever told me that you need to vent the lid to allow steam to escape.

Well, that would’ve been nice to know.

I ended up with hot, sticky, peach & sugar water concentrate all over my counters and floors and gave myself a nice little burn on the hand that just endured the knife attack 10 minutes prior to the peach explosion.

Once I took off the little clear center piece of my lid and covered the lid with a kitchen towel instead, it worked out perfectly.

So note to self (and my lovely readers): when you’re blending hot liquids in the blender, make sure you take the center piece of the lid off and cover it with a kitchen towel instead. If it’s tolerable, I’d advise you to secure the towel on the lid by placing one of your hands over it.

Even though there were quite a few obstacles I had to deal with while making this recipe, the end product turned out to be super yummy. It’d be a good complement to any summer cookout.

IMG_0976

IMG_0982

For me, however, I think it’ll take some time before I’m brave enough to revisit this recipe after all the abuse my body had to go through just to make this lol.

Enjoy!

Sharing is caring! Email this to someonePrint this pagePin on PinterestShare on YummlyShare on FacebookShare on Google+Tweet about this on Twitter