everyday food made simple

IMG_4033 copy   

So while I’m sitting here at my local coffee shop writing today’s post, I contemplated about telling you guys the horrifying experience I had at this very same coffee shop just a few days ago, which involved two small birds flying into the glass window with a loud “thud!” right next to where I was sitting and landing on the sidewalk. And a phone call to a local emergency veterinary clinic regarding said collision that left me angry and frustrated. I started writing and then proceeded to deleted the two paragraphs I have written, because I figured this story is probably pretty dang unappetizing for a food blog, and the last thing I want to do is to turn you guys off.

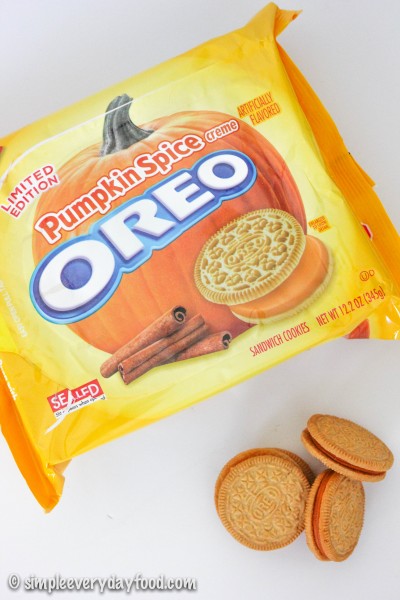
So let’s start over…. despite the numerous pumpkin recipes I have posted here on SEF, would you believe me if I told you there once was a time where I hated pumpkin-flavored anything? I still don’t care for pumpkin pie to this day, but I do like some things that are pumpkin-spice-flavored. I have been seeing a lot of seasonal pumpkin flavor-related items on my Instagram feed lately and a lot of people stocking up on all things pumpkin (apparently Trader Joe’s have transformed itself into America’s pumpkin headquarters), but other than these pumpkin spice Oreo cookies, I have yet to stock up my pantry with any of these seasonal items.

I have to admit, these Oreos are pretty dang amazing. I had to hoard a stack of these babies and tuck them away in my cupboard for this recipe, just in case I didn’t have the self control to stop eating them.

IMG_3990 copy

IMG_3994 copy

These cookies are soft, puffy, and filled with pumpkin deliciousness! You may remember these ooey gooey pumpkin chocolate chip cookies I made last year. This time, I switched out the milk chocolate chips for white chocolate chips instead, and I think I actually like these better!

IMG_4034 copy

IMG_4022 copy

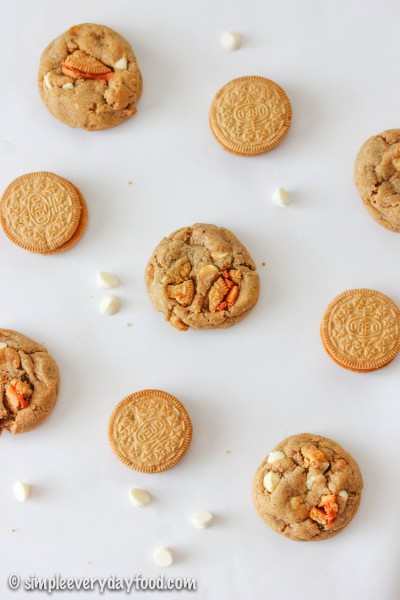
The white chocolate chips are a perfect complement to the golden Oreo cookies. All the flavors shine through and the ingredients don’t overpower one another. They are slightly crunchy on the outside, but so soft and chewy on the inside. And when you get a bite with the chopped Oreo cookies, it’s like a little bite of heaven.. so good!

IMG_4037 copy

IMG_4018 copy

IMG_4008 copy

soft and chewy pumpkin spice oreo cookies
Print
Ingredients
  1. 1/2 cup (1 stick) unsalted butter, melted and cooled
  2. 3/4 cup granulated sugar
  3. 1/4 cup dark brown sugar
  4. 2 teaspoons vanilla extract
  5. 1/4 pumpkin puree
  6. 2 cups all-purpose flour
  7. 1 teaspoon baking soda
  8. 2 teaspoons cornstarch
  9. 1/4 teaspoon salt
  10. 1 teaspoon ground cinnamon
  11. 1/8 teaspoon ground nutmeg
  12. 1/4 teaspoon ground cloves
  13. 1/4 teaspoon ground ginger
  14. 1/3 cup white chocolate chips
  15. 1/2 cup pumpkin spice oreos, coarsely chopped
Instructions
  1. In a medium sized bowl, combine the flour, baking soda, cornstarch, salt, cinnamon, nutmeg, cloves, and ginger. Set aside.
  2. Using an electric mixer with the paddle attachment, beat together the melted butter and both sugars. Add in the vanilla extract and pumpkin puree. Mix over medium speed until combined. Gently stir in the white chocolate chips and chopped Oreos.
  3. Cover and refrigerate for at least 30 minutes. Meanwhile, preheat the oven to 350 degrees and line two baking sheets with parchment paper and set aside.
  4. Using a medium cookie scoop (about 1.5 tablespoons), drop dough balls approximately 1" apart on the baking sheets. Bake for 8-10 minutes, rotating the pans halfway to ensure even baking. Remove from oven and gently press the tops with the back of a spoon if the cookies are too puffy for your liking (I did, because I love my cookies with slight cracks but yet still slightly puffy). Let cool on the baking sheet for 5-10 minutes before transferring them to a wired cooling rack to cool completely. Cookies can be stored in an airtight container for up to 5 days.
  5. Makes 2 dozen cookies
Adapted from The Domestic Rebel
Simple Everyday Food https://www.simpleeverydayfood.com/
Recipe adapted from The Domestic Rebel

© Simple Everyday Food. All images & content are copyright protected. Please do not use any of my images without prior permission. If you want to republish this recipe, please re-write the recipe in your own words, or kindly link back to this post for the recipe.

Sharing is caring! Email this to someonePrint this pagePin on PinterestShare on YummlyShare on FacebookShare on Google+Tweet about this on Twitter

I know it’s December, and December is the month for all things mint chocolate, but I can’t help but share these pumpkin cupcakes with you guys. I made these for thanksgiving this year and they were a hit!

IMG_2332 copy

IMG_2338 copy

I’ve never made mini cupcakes before, but I found some cute Thanksgiving mini cupcake liners at Michael’s a few months back, and decided what better cupcakes to make for these than pumpkin ones? And let me tell ya, these babies are GOOD.

I was afraid the cupcakes were going to be slightly on the drier side because of their smaller size, but the pumpkin spiced cream cheese filling kept the cupcakes nice and moist. Every single bite is filled with cinnamon-y, nutmeg-y, pumpkin-y goodness…. oooh yeah, my mouth waters just thinking about them. Good thing this this recipe yielded almost 40 cupcakes, because the other dessert I initially had planned failed miserably (sigh. maybe I’ll try it again some other time). I don’t think anyone (i.e. Brian) minded only having one dessert since these cupcakes were so good and there were so many to go around.

IMG_2351 copy

pumpkin cream cheese cupcakes
Print
Ingredients
  1. 1 cup all-purpose flour
  2. 1 teaspoon pumpkin pie spice
  3. 1 teaspoon baking powder
  4. 1/2 teaspoon cinnamon
  5. 1/2 teaspoon baking soda
  6. 1/4 teaspoon nutmeg
  7. 1/4 teaspoon salt
  8. 1 cup pumpkin puree
  9. 1/2 cup granulated sugar
  10. 1/3 cup brown sugar
  11. 1/2 cup vegetable oil
  12. 2 large eggs
For the filling
  1. 4 ounces cream cheese, at room temperature
  2. 1/3 cup granulated sugar
  3. 1/2 teaspoon pumpkin pie spice
For the vanilla buttercream
  1. 2 sticks unsalted butter, softened
  2. 3 cups powdered sugar
  3. 2 tablespoons milk
  4. 2 teaspoons vanilla extract
  5. 1 teaspoon pumpkin pie spice
Instructions
  1. Preheat oven to 350 degrees. Line a mini cupcake pan with cupcakes liners and set aside.
  2. Using an electric mixer, make the filling first by beating the cream cheese, sugar, and pumpkin pie spice on medium speed until light and fluffy. Transfer to a large Ziploc bag. Snip off a small portion of a corner and set aside.
  3. In a large bowl, combine the flour, pumpkin pie spice, baking powder, cinnamon, baking soda, nutmeg, and salt. Set aside.
  4. In another large bowl, whisk together the pumpkin puree, sugars, vegetable oil, and eggs. Slowly add the dry ingredients into the wet ingredients, stir until just combined.
  5. Scoop small spoonfuls of the batter into the bottom of the cupcake wells, covering about 1/4 of the well (or just enough to where it covers the bottom). Squeeze small dollops (~1/4 teaspoon) of the cream cheese filling mixture into each well. Top with remaining batter to completely cover the filling, making sure each well is only about 2/3 full. Bake for 13-14 minutes, or until a toothpick comes out clean. Remove from oven and cool completely on a wired cooling rack.
  6. While the cupcakes are cooling, make the frosting: using an electric mixer, beat the butter and powdered sugar on medium~medium high speed until light and fluffy. Turn the speed down to low and add the milk, vanilla, and pumpkin pie spice. Beat until combined, then increase speed back up to medium and beat for another 2-3 minutes.
  7. Using an offset spatula or your favorite frosting tip, pipe frosting onto cupcakes and serve immediately. Cupcakes can be stored in an airtight container for 3-5 days.
  8. Makes 35 mini cupcakes
Adapted from Damn Delicious
Simple Everyday Food https://www.simpleeverydayfood.com/
IMG_2354 copy

I’m usually not a fan of eating cream cheese in its regular form (i.e. the mushy form), but I actually really liked the filling – maybe because I figured if I shoved the entire cupcake in my mouth, all the flavors and textures would play out harmoniously in my mouth and I wouldn’t be able to concentrate so much on the mushy cream cheese. And sure enough, it worked, because I’ll definitely be making these again sometime soon.

IMG_2336 copy

IMG_2343 copy

Hey, nobody ever said pumpkin desserts are only for the fall!

Recipe adapted from Damn Delicious

© Simple Everyday Food. All images & content are copyright protected. Please do not use any of my images without prior permission. If you want to republish this recipe, please re-write the recipe in your own words, or kindly link back to this post for the recipe.

Sharing is caring! Email this to someonePrint this pagePin on PinterestShare on YummlyShare on FacebookShare on Google+Tweet about this on Twitter

I am no longer allowed to go shopping at Target by myself. This latest time when I shopped there myself, these came out of my kitchen:

IMG_2084 copy

IMG_2075 copy

I have proven that I have no self control when it comes to that store. It also doesn’t help that there’s a Super Target literally right across the street from our house, which also happens to be on the way home from school.

When Brian and I go, he’s always my voice of reason. “You don’t need that”, “don’t you already have something like that?”, “when would you ever use that?”. He probably saves us a good chunk of money every month by going to Target with me.

When I go by myself, it’s a totally different story. Yes, I make a list of things I need.. and I do try my hardest to stick to only things on that list. But somehow 30 minutes later, I always come out of there spending at least $30 more than what I would’ve spent if I stuck to my list. It’s just so easy to grab a basket, stroll through the aisles, look through the clearance racks, and find things that you absolutely “need” or are too good of a deal to pass up.

Please tell me I’m not the only one that has this problem. Next time I really shouldn’t even grab a basket. Once my hands are full, it’s time to head to the checkout lanes… oh but that’s easier said than done.

Anyway… the other day when I went to Target, I saw these out of the corner of my eye and just had to get them.

photo

Dang you Target, for putting Fall/Halloween candy in the 50% off clearance aisle!

I had the perfect idea – pumpkin spice puppy chow. I know what you’re thinking – it’s already November and pumpkin spice needs to make way for peppermint desserts. It’s true, but I can’t let these Kisses sit on the shelves all by themselves, can I? Someone needs to rescue them…….

I still had some leftover pumpkin pie spice from last month, so it just sounded like a no-brainer. Cinnamon Chex cereal coated with white chocolate pumpkin Hershey Kisses, dusted with powdered sugar with hints of pumpkin spice. Mmm mmm mmm.

IMG_2072 copy

Initially I dreaded unwrapping two bags of Hershey Kisses by hand. I thought I would find it tedious and time-consuming. Once I got a system down though, the process went by faster than I imagined. And somehow the melting process also seemed to go a lot smoother than my other puppy chow recipes..

pumpkin spice puppy chow
Print
Ingredients
  1. 9 cups Cinnamon Chex cereal
  2. 1.5 10oz bags of Hershey's pumpkin spice Kissees, unwrapped
  3. 2 cups powdered sugar
  4. 2 heaping teaspoons pumpkin spice
Instructions
  1. Place Chex cereal in a large bowl, set aside. Then in a medium bowl, add the powdered sugar and pumpkin spice. Stir to combine and set aside.
  2. Using a double boiler, melt the pumpkin Kisses. Pour the melted chocolate over the Chex mix, stir until all the Chex is covered with chocolate. Then gradually sprinkle the powdered sugar mixture onto the cereal. Stir until everything is covered evenly with powdered sugar.
  3. Makes ~9 cups
Simple Everyday Food https://www.simpleeverydayfood.com/
IMG_2076 copy

IMG_2080 copy

Although the pumpkin spice Kisses taste a little artificial if you eat them by themselves, these puppy chow don’t taste artificial at all! This is probably because most of my puppy chow recipes already utilize vanilla almond bark or white chocolate, so the white chocolate center of these Kisses were a perfect fit for this recipe! The cinnamon-y, pumpkin-spiced powdered sugar coating is the perfect combination with the subtle hints of pumpkin spice flavoring in these chocolates… It was a hit with all my pumpkin-loving friends!

Now that pumpkin season is unofficially over, it’s now time to move on to one of my top favorite flavor combos – chocolate + mint.

Here are a few more recipes came out of my kitchen this pumpkin season:

Pumpkin n’ spice cream cheese truffles

IMG_1827 copy

Ooey gooey pumpkin chocolate chip cookies

IMG_1785 copy

Glazed pumpkin coffee cake

IMG_1881 copy

Pumpkin peanut butter dog biscuits

IMG_1959 copy

© Simple Everyday Food. All images & content are copyright protected. Please do not use any of my images without prior permission. If you want to republish this recipe, please re-write the recipe in your own words, or kindly link back to this post for the recipe.

Sharing is caring! Email this to someonePrint this pagePin on PinterestShare on YummlyShare on FacebookShare on Google+Tweet about this on Twitter

Have you ever looked at a recipe and just knew it was going to turn out to be delicious?

Well, a few weeks ago I got that feeling and it took me by surprise – I never like to get too overconfident when I’m in the kitchen just to avoid the disappointing letdown if something doesn’t turn out the way I had it pictured in my head. However…. when I saw this recipe, something in my head told me it was going to turn out great – so great that I needed to make two of them so I can bring one to work to share with my coworkers.

I’m glad to tell you that that little voice in my head was right, and I’m sooooo incredibly glad that I made two coffee cakes. I know those coworkers that got to try it were glad I made two also!

Enter Part 4 of my latest obsession with pumpkin desserts – a rich, moist pumpkin coffee cake complete with a thick, crumbly layer of streusel topping and a vanilla glaze.

IMG_1855 copy

When I had my mind set on making two of these cakes, I pre-measured the streusel ingredients (minus the butter) and dry ingredients into separate tupperware bowls the night before, just to make my life easier when I’m ready to make them the next day. I have to say, it really did save me quite a bit of time on baking day, because all I had left to do was to measure out the wet ingredients and add the two together. I’m totally going to be prepping this way from now on!

These cakes were also made with a little love from Brian… here’s the story: when I decided on making two cakes, I realized that we would be short of pumpkin puree and ground cloves. The syrup we had on hand also expired August of 2011… so I sent him to Target to pick things up for me while I got things ready. You know baking season is in full swing when Target has absolutely no ground cloves whatsoever. None. So being the loving husband that he is, he drove to Wal-Mart just to get me the ground cloves that I needed. That deserves a pat on the back in my book :)

IMG_1863 copy

IMG_1881 copy

glazed pumpkin coffee cake
Print
For the streusel
  1. 1/2 cup all-purpose flour
  2. 1/4 cup cold unsalted butter
  3. 1/2 cup light brown sugar
  4. 1/4 teaspoon salt
  5. 2 teaspoons ground cinnamon
For the cake
  1. 2 cups flour
  2. 1 teaspoon baking soda
  3. 1/2 teaspoon baking powder
  4. 1/2 teaspoon salt
  5. 2 teaspoons ground cinnamon
  6. 1/2 teaspoon ground nutmeg
  7. 1/4 teaspoon ground cloves
  8. 1 cup pumpkin puree
  9. 1/2 cup light brown sugar
  10. 1/2 cup vegetable oil
  11. 1/4 cup maple syrup
  12. 1/4 cup milk
For the glaze
  1. 1 cup powdered sugar
  2. 1-2 tablespoons pumpkin spice coffee creamer or milk
Instructions
  1. Preheat the oven to 350 degrees. Spray a 9x9 baking pan with nonstick spray and set aside.
Make the streusel
  1. Combine the flour, brown sugar, salt, and cinnamon together in a small bowl. Using a pastry cutter or a fork, add in the cold butter and mix until you get pea-sized clumps of butter. Set aside.
Make the cake
  1. In a large bowl, add in the flour, baking soda, baking powder, salt, cinnamon, nutmeg, and cloves. Mix until combined. Using a medium bowl, add in the pumpkin, brown sugar, oil, maple syrup, and milk. Mix. Add the wet ingredients to the dry ingredients and mix until combined. Do not overmix.
  2. Pour the batter into the baking pan, spreading out the batter with a spatula to create an even surface. Generously sprinkle the streusel topping onto the cake, pressing them slightly down into the batter.
  3. Bake the cake for 30 minutes, or until an inserted toothpick comes out clean. Remove the cake from the oven and let cool.
Make the glaze
  1. While the cake is cooling, make the glaze by whisking the powdered sugar and 1 tablespoon of creamer/milk together until smooth. If it's too thick, add another tablespoon of creamer/milk. Add more creamer/milk until desired consistency is reached. Drizzle over cake and enjoy!
  2. Store cake in an airtight container for up to 5 days.
Adapted from Sally's Baking Addiction
Simple Everyday Food https://www.simpleeverydayfood.com/
IMG_1872 copy

When you mix everything up, the batter will be thick – don’t panic! That’s totally normal and it’ll turn out great in the end, trust me. What makes the dessert over-the-top amazing is the thick layer of streusel topping. I think I could probably bake a whole cake pan of the streusel and be okay with it. If you have pumpkin spice creamer on hand (which I did), use that instead of milk to make the glaze  for a more intense pumpkin flavor! If you don’t have pumpkin creamer, you don’t have to go out and buy a whole bottle of it – using milk would work just fine too. Depending on how thick/thin you like your icing, add less/more milk to the powdered sugar accordingly. I went a little pumpkin-creamer-happy on one and the glaze turned out to be a little thinner than I would’ve liked. Either way, it’s not going to affect the taste or texture of your cake – it’s just a matter of personal preference.

Vanilla glaze dripping down the sides… don’t you want to just reach through the screen and catch some of that glaze with your finger?!

IMG_1856 copy

IMG_1878 copy

This cake can either be served warm or at room temperature, so there’s no need to wait for it to cool! It’s a good thing no cooling is required, otherwise I would probably have to leave the house for an hour so I wouldn’t be tormented by constant wafts of delicious smells!

Happy baking!

Recipe adapted from Sally’s Baking Addiction

© Simple Everyday Food. All images & content are copyright protected. Please do not use any of my images without prior permission. If you want to republish this recipe, please re-write the recipe in your own words, or kindly link back to this post for the recipe.

Sharing is caring! Email this to someonePrint this pagePin on PinterestShare on YummlyShare on FacebookShare on Google+Tweet about this on Twitter

Warning: the following post contains A LOT of pictures.

So not only are my coworkers and Brian benefiting from my latest baking-with-pumpkin spree, even Bentley got lucky today and got some homemade pumpkin treats as well!

IMG_1944 copy

IMG_1956 copy   IMG_1954 copy

Can’t forget my little guy, right?

I figured I should get all the baking I want to get done here the next few weeks, since once my internship goes into full swing, who knows when I’m going to be able to bake “just because”?

I have to say though, although I’m a little nervous and anxious about starting this internship, the anxiousness is also mixed with a little bit a lot of excitement. I’m excited to start utilizing all the skills I’ve learned in class into everyday practice and to see how much I’ve learned (and retained) within the past two years. And it also means I’m that much closer to graduating! Wish me luck – I hope I make everyone proud :)

These biscuits do not require any special ingredients (other than the pumpkin), and I bet you have most of them in your cupboards already! They was inspired by a very simple biscuit recipe I used to make for Bentley, but instead of adding bananas, I substituted them with pumpkin puree instead – you know, ever since Bentley discovered the yummy goodness of canned pumpkin a few weeks ago, he’s just as big of a fan of it as I am.

IMG_1948 copy

pumpkin peanut butter dog biscuits
Print
Ingredients
  1. 2 cups all-purpose flour (or you can use whole wheat flour)
  2. 1 large egg
  3. 1/8 cup all natural creamy peanut butter
  4. 1/2 cup pumpkin puree
  5. A pinch of salt
  6. 1/4 teaspoon ground cinnamon
Instructions
  1. Preheat oven to 350 degrees. Line baking sheet with parchment paper or silicone baking mat.
  2. Add all the ingredients into a mixing bowl, whisk until thoroughly combined.
  3. Transfer dough onto a floured surface. Using a rolling pin, roll dough out until it's about 1/2" thick.
  4. Cut into desired shapes and bake for 30-40 minutes, or until biscuits are dry and hard. Transfer to wired cooling rack and let cool. Store in airtight container for 7 days.
Simple Everyday Food https://www.simpleeverydayfood.com/
IMG_1934 copy

IMG_1959 copy

These are way healthier and cheaper than buying those store-bought doggie treats! No preservatives, no artificial flavors. They’re made with all natural ingredients that you can pronounce and you can feel good about giving them to your favorite pup.. or pups :)

Bentley had to check them out during my photoshoot session…

IMG_1983 copy    IMG_1986 copy IMG_1985 copy    IMG_1984 copy

“Ooops… BUSTED!”

IMG_1987 copy

“I’m gonna try again….”

IMG_1988 copy    IMG_1991 copy IMG_1990 copy

“Almost there!”

IMG_1994 copy

“YESSSS!! I got one!!”

IMG_2005 copy   IMG_2006 copy

“Mwahahahahaha…. I’m sneaky. Mommy didn’t even notice.”

IMG_2007 copy

© Simple Everyday Food. All images & content are copyright protected. Please do not use any of my images without prior permission. If you want to republish this recipe, please re-write the recipe in your own words, or kindly link back to this post for the recipe.

Sharing is caring! Email this to someonePrint this pagePin on PinterestShare on YummlyShare on FacebookShare on Google+Tweet about this on Twitter