everyday food made simple

I am determined to make as many lemon-flavored recipes as I can before the summer ends. In case you missed it, here are some of the “summery” recipes I have made within the past 3 months:

overnight blueberry sweet rolls with lemon glaze

IMG_2819 copy

lemon poppy seed loaf cake

IMG_3514 copy

lemon gooey bars

IMG_3451 copy

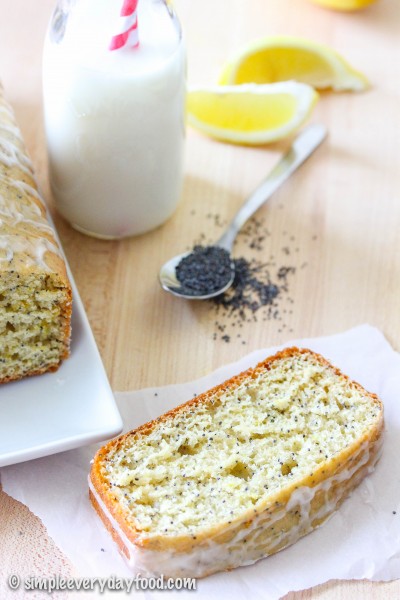
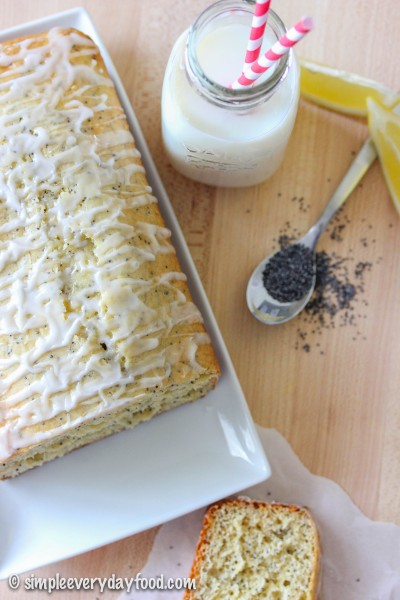
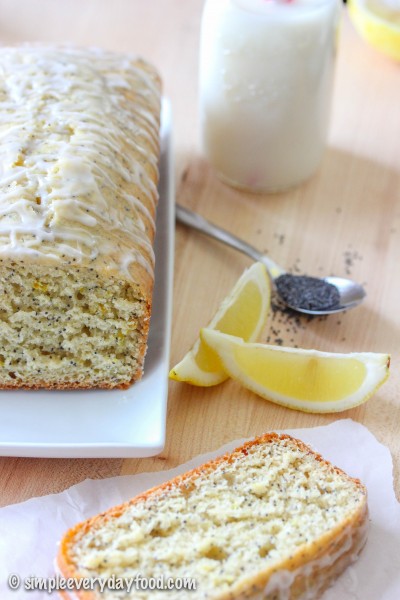
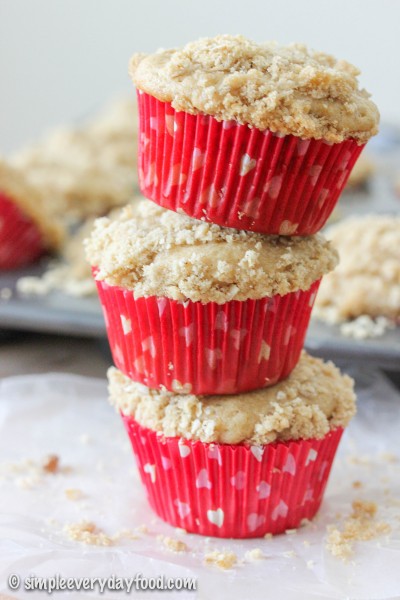
And now I present to you: lemon poppy seed muffins!

IMG_3338 copy

IMG_3360 copy     

My breakfast eating habits seem to go in phases. I tend to eat a lot of the similar things for breakfast weeks in a row, then I’ll get sick of it, move on to something else, and eat that for a few weeks until I get sick of that and find something else to obsess over. A few weeks ago, I was eating breakfast burritos every morning like they were going out of style, then it was smoothies.

Lately, it’s been muffins. Specifically, homemade muffins.

IMG_3344 copy

These muffins are not only delicious and require no fancy electric mixer, but they also freeze very well, meaning that you can make them in huge batches, freeze them, and reheat them in the mornings when you’re rushing out the door. What I have been doing is taking a few out to thaw out in the fridge overnight, then heating them up in the microwave the next morning.

IMG_3354 copy

IMG_3348 copy

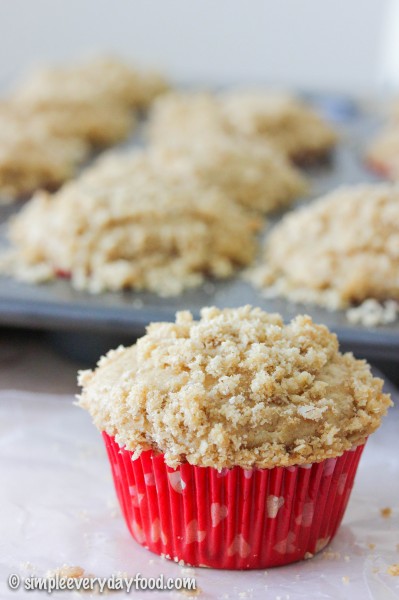
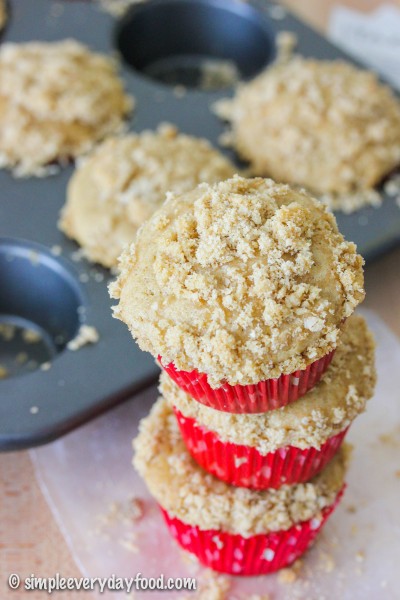
Reheating them doesn’t take away any of the textures of flavors! The insides remain moist while the muffin tops remain crunchy thanks to the sparkling sugar topping (the best part of a muffin!). Every bite is is citrusy and lemony, while the earthy poppy seeds pop in your mouth. The different textures create a delicate balance, like a well-rehearsed dance in your mouth… are you salivating yet?

IMG_3333 copy

One thing to note before making these is to make sure everything is at room temperature. Make sure your melted butter is not scorching hot and has cooled down prior to adding the eggs – unless you’re a fan of scrambled eggs in your lemon poppy seed muffins…. the batter will also be pretty thick, so roll up your sleeve and use those muscles! BUT – do not overmix! Overmixing will cause the muffins to be dense and dry and not as tasty.

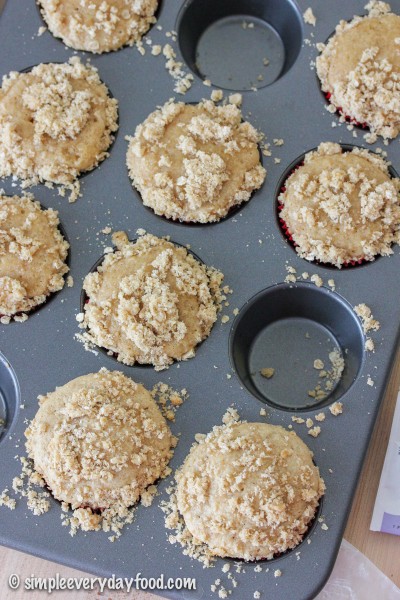
Fill the muffin tins about 3/4 full and generously sprinkle the tops with some sparkling sugar. If you do decide to freeze them, throw them in the microwave and heat until the insides are completely heated through prior to serving.

lemon poppy seed muffins
Print
Ingredients
  1. 2/3 cup granulated sugar
  2. Zest and juice of 1 lemon, separated
  3. 2 cups all-purpose flour
  4. 2 teaspoons baking powder
  5. 1/4 teaspoon baking soda
  6. 1/2 teaspoon salt
  7. 3/4 cup plain Greek yogurt
  8. 2 eggs, at room temperature
  9. 1 teaspoon pure vanilla extract
  10. 1/2 cup (1 stick) unsalted butter, melted and cooled
  11. 2 tablespoons poppy seeds
  12. sparkling sugar, optional
Instructions
  1. Preheat oven to 400 degrees. Line a muffin pan with liners and set aside.
  2. In a large mixing bowl, rub the sugar and lemon zest together with your fingertips until fragrant (or until the sugar granules are moist). Add in the flour, baking powder, baking soda, and salt. Mix until combined.
  3. In a separate bowl, thoroughly whisk the Greek yogurt, eggs, vanilla, lemon juice, and melted butter together. Pour the liquid mixture into the flour mixture and stir just until combined. DO NOT OVERMIX (the batter will be thick). Gently stir in the poppy seeds. Divide the batter evenly into the muffin cups, filling each about 3/4 full. Sprinkle tops with sparkling sugar, if desired.
  4. Bake for 16-18 minutes until the tops are just starting to brown, or until an inserted toothpick comes out clean. Remove from oven and let cool for 10 minutes before removing them onto a wired cooling rack to cool completely.
  5. Muffins can be stored in an airtight container for up to 5 days at room temperature, or frozen to be eaten at a later date.
  6. Yield ~15 muffins
Notes
  1. If reheating the frozen muffins, each microwave is different so the time it takes to reheat may differ.
Adapted from Two Peas and Their Pod
Simple Everyday Food https://www.simpleeverydayfood.com/
Recipe adapted from Two Peas and Their Pod

© Simple Everyday Food. All images & content are copyright protected. Please do not use any of my images without prior permission. If you want to republish this recipe, please re-write the recipe in your own words, or kindly link back to this post for the recipe.

Sharing is caring! Email this to someonePrint this pagePin on PinterestShare on YummlyShare on FacebookShare on Google+Tweet about this on Twitter

IMG_3514 copy

Has anyone else been sucked into the World Cup frenzy? Just like any other major international sporting event, the World Cup is one that I always look forward to, and this year was no exception.

My sister and I got into soccer way back in 2002. Unlike the U.S., every time the World Cup rolls around, it’s a big deal in Taiwan – all sorts of World Cup-related merchandise can be seen around every street corner. My sister and I’s favorite team (even til today) is Germany. I remember we’d set our alarms and wake up at 3 a.m. to watch them play. Because we lived in a small apartment, we’d tip toe around the house in the middle of the night, trying to rub the sleepiness away from our eyes, and muting the TV because we were afraid to risk waking up our parents and getting sent back to bed. We’d watch in silence, whispering to each other during the game, and silently cheer on our team. After the game was over, we’d put the remote right where we found it and sneak back into bed, waking up the next morning tired and exhausted (yeah, we had it down to a science).

Sounds crazy, but at that time, it was all so worth it.

For the past two World Cup games, I had to watch them by myself here in the U.S. while my sister caught the games back in Taiwan. We still watch the games, text each other about the results, and cheer on our team together. Some things just never change.

Now, onto this recipe..

IMG_3493 copy

Can I just say how good this loaf cake is? The cake itself is soft and moist, the lemons give it a sweet yet tangy flavor, and the poppy seeds inside almost pops in your mouth. None of the flavors are heavy and overpowering – every component does its part to make this a light, summery recipe. The glaze on top is really optional, although I do highly recommend it as it adds an extra punch of lemon flavor to it, and the fact that no on ever turns down a layer on yummy sugary glaze on top of any kind of dessert.

IMG_3506 copy

The best part? You can eat it for breakfast, as a afternoon (or mid-morning) snack, or even as a light dessert after dinner. I placed it under the “breakfast” category simply because I ate it more for breakfast as opposed to dessert, even though no one ever said you can’t eat cake for breakfast…..

IMG_3497 copy

lemon poppy seed loaf cake
Print
For the cake
  1. 2 cups all-purpose flour
  2. 2 tablespoons poppy seeds
  3. 1 and 1/2 tablespoons lemon zest
  4. 3/4 teaspoon baking powder
  5. 3/4 teaspoon baking soda
  6. 1/4 teaspoon salt
  7. 1 tablespoon vegetable oil
  8. 1 egg, at room temperature
  9. 1 tablespoon vanilla extract
  10. 2/3 cup granulated sugar
  11. 1/3 cup plain Greek yogurt
  12. 2 tablespoons fresh lemon juice
  13. 6 tablespoons milk
For the glaze
  1. 4 tablespoons powdered sugar
  2. 1/4 teaspoon almond extract
  3. 1 teaspoon milk
  4. 1/2 teaspoon lemon zest
Instructions
  1. Preheat oven to 350 degrees. Coat a 9x5" loaf pan with nonstick cooking spray and set aside.
  2. In a medium bowl, whisk together the flour, poppy seeds, lemon zest, baking powder, baking soda, and salt.
  3. In a large bowl, combine the oil, egg, and vanilla extract. Mix to combine. Then whisk in the sugar, yogurt, and lemon juice until thoroughly incorporated. Alternate between adding the flour mixture and the milk (I added 1/3 of the flour, 1/2 of the milk, 1/3 of the flour, 1/2 of the milk, then the remaining 1/3 of the flour).
  4. Pour the batter in the loaf pan and bake for 45-50 minutes, or until an inserted toothpick comes out clean. If you notice the top is browning too fast, cover the pan with a tented tin foil after the first 30-40 minutes.
  5. Cool the pan for at least 15 minutes, then turn onto a wired cooling rack to cool completely.
  6. While the cake is cooling, prepare the glaze by whisking all the glaze ingredients in a small bowl. Drizzle over the top of the cooled caked. Cake may be sliced and stored in an airtight container for up to 5 days.
Adapted from Amy's Healthy Baking
Simple Everyday Food https://www.simpleeverydayfood.com/
Recipe adapted from Amy’s Healthy Baking

© Simple Everyday Food. All images & content are copyright protected. Please do not use any of my images without prior permission. If you want to republish this recipe, please re-write the recipe in your own words, or kindly link back to this post for the recipe.

Sharing is caring! Email this to someonePrint this pagePin on PinterestShare on YummlyShare on FacebookShare on Google+Tweet about this on Twitter

IMG_3185 copy 

It’s funny how fast our body adjusts to a new routine. Just two months ago, I was used to going to bed at 2:30 a.m. and sleeping in until at least 10:30. By the time I finally get myself out of bed, it’s usually around 11. Back then, I didn’t have to work until 5 p.m. so on the days I actually eat breakfast (I had a bad habit of drinking coffee for breakfast), I took my time making something delicious and nutritious… usually some sort of an egg sandwich or scrambled eggs with a side of greens and some rice.

Just one month into my new job, the only time I get to spend my sweet time deciding on what to have (or not have) for breakfast now are the weekends. My new job requires me to be up at 4:00 a.m… keep in mind that before February 3rd, 2014, I have never gotten up at 4 a.m. for anything. This whole “getting up early in the morning” thing has been brand new for me. I have also realized that at 4 a.m., neither my mind nor my body are awake enough to even lift a frying pan to cook anything on the stove. This is why this past weekend, I decided to make a batch of easy breakfast muffins as a quick and easy breakfast option. These are especially helpful on the days where I end up hitting the snooze button 9 times, as it can easily be packed in my lunchbox for me to eat once I get to work.

IMG_3178 copy

Today I present to you: earl grey breakfast muffins with a streusel topping. That’s right, you’ve heard read correctly – on top of these spongy soft muffins lays a generous layer of crunchy, buttery, sweet streusel topping, because let’s face it – muffins are good, but muffins with streusel topping? Even better.

IMG_3193 copy

IMG_3176 copy

You know what’s even better? The fact that these muffins can easily be made without a mixer. Just a few bowls, a spatula/whisk, and some arm strength is all that’s required. Now I’m going to share a little secret: the key to making the batter is to make sure that all your ingredients are at room temperature... this includes your eggs and sour cream and everything else. I melted my butter and brewed my earl grey tea around the same time, and let both of them sit to cool for at least 20 minutes until it’s no longer warm to the touch. During this time, I occupied myself with catching up with my Instagram feed, picking up a dozen dog toys off the living room floor, vacuuming, and reading a few pages of my new book (The Goldfinch).

Once all the components are ready, the mixing and assembly literally only takes about 10-15 minutes, then bake these in the oven until an inserted toothpick comes out clean. This took 24 minutes in our oven, but every oven is different so start keeping an eye on it around the 20 minute mark.

IMG_3186 copy

Because these muffins freeze well, I divided these them into two batches – one for now and one for later. I kept about half on the counter and literally snacked on them all day, while the other half was stored in an airtight container in the freezer… you know, for mornings where you’d rather trade “time to eat breakfast on the couch” with “10 more minutes of sleep under some warm covers” (which for me, is almost everyday). If you’re anticipating a busy morning, take a few of these out to thaw overnight. Otherwise pop them in the microwave for half a minute or so, or until they’re warm and ready to eat.

The fact that there’s a slight hint of earl grey tea in it also makes me think it’ll keep me going in the morning since it technically contains a small amount of caffeine. It’s all mental, I tell ya.

IMG_3188 copy

earl grey breakfast muffins
Print
For the streusel
  1. 2/3 quick cooking oats
  2. 2/3 cup brown sugar
  3. 2/3 cup all-purpose flour
  4. 1/4 teaspoon salt
  5. 5 tablespoons cold butter, cut into cubes
For the muffin batter
  1. 2 cups all purpose flour
  2. 1 teaspoon baking powder
  3. 1/2 teaspoon cinnamon
  4. 1/2 teaspoon salt
  5. 1/4 teaspoon baking soda
  6. 3 large eggs, at room temperature
  7. 3/4 cup granulated sugar
  8. 1/2 cup (1 stick) butter, melted
  9. 3/4 cup sour cream
  10. 1/3 cup strongly brewed Earl grey tea
  11. 1 teaspoon vanilla extract
To make the streusel
  1. Combine the oats, brown sugar, flour, and salt in a medium sized bowl. Using a pastry cutter or two forks, work in the cold butter until the mixture resembles coarse crumbs (I found it easier to use my hands to mix everything together after initially incorporating the ingredients with a pastry cutter). Set aside.
To make the batter
  1. Preheat the oven to 350 degrees. Line approximately 16 muffin tins with liners.
  2. In a medium-sized bowl, combine the flour, baking powder, cinnamon, salt, and baking soda. Stir until combined.
  3. In another larger bowl, whisk the sugar and butter until mixed. Then add the eggs, one at a time, until combined. Then add in the sour cream, Earl grey tea, and vanilla extract. Stir some more. Then slowly add in the flour mixture and mix until everything is thoroughly incorporated.
  4. Scoop batter into muffin tins about 1/2-3/4 full. Top with a generous amount of the streusel topping. Bake for 22-24 minutes, or until an inserted toothpick comes out clean. Store an an airtight container for up to 5 days (or put them in a freezer and simply thaw out in room temperature for a later date).
  5. Makes 16 muffins
Adapted from Food Network Magazine
Simple Everyday Food https://www.simpleeverydayfood.com/
Recipe adapted from Food Network Magazine

© Simple Everyday Food. All images & content are copyright protected. Please do not use any of my images without prior permission. If you want to republish this recipe, please re-write the recipe in your own words, or kindly link back to this post for the recipe.

Sharing is caring! Email this to someonePrint this pagePin on PinterestShare on YummlyShare on FacebookShare on Google+Tweet about this on Twitter

Warning: if you’re not a big dog person, this post might not be for you…..

My baby boy turned TWO today! And I made him cupcakes to celebrate.

IMG_2904 copy

IMG_2929 copy

IMG_2941 copy

….please tell me I’m not the only one who makes cupcakes for their dog’s birthday…..

It really seemed like not that long ago we were making the trip to Hutchinson to bring our first ever puppy home… he was so tiny! Brian and I never owned a puppy before, so we weren’t really sure what we were getting ourselves into. Despite a few rough patches along the road, we are extremely pleased at how great of a dog we have raised together.

Bentley was only 7 weeks when we brought him home, and a few of his favorite things included sleeping…

sleeping 2

…sleeping, sleeping, and more sleeping.

sleeping

sleeping 3

And during the rare hours he would be awake, he’d be busy playing with his toys.

george

ring

Fast forward two years later, the little sleepy boxer puppy we once had has grown into a petite 55-lb dog with endless energy with a cheerful happy attitude, a protective instinct, endless curiosity, and the desire to play for hours.

rope

tire

pretzel

floppy ears

He does his best to be my little helper in the kitchen when I’m cooking and baking, so today I wanted to make something special for my little guy to celebrate another year of being part of our family.

IMG_2902 copy   IMG_2898 copy

IMG_2926 copy

IMG_2934 copy

IMG_2950 copy  IMG_2973 copy

These cupcakes are super easy to make – it only requires one bowl and a whisk. Add everything in the bowl in no particular order, whisk until combined, spoon into cupcake liners, bake in the oven, and you’re done. It’s that easy. This recipe only makes 5 decent sized cupcakes, which is great because 1. no dog in the world needs to eat that many cupcakes at once, and 2. it’ll be easier to store them later on. I usually just share the treats I make with Bentley’s puppy friends so there will be less of it sitting around the house.

Oh, and please please please don’t feed your dog all 5 cupcakes in one sitting – it can cause tummy upsets and can potentially make your dog very sick (just think of the last time you inhaled 5 cupcakes in a row… I bet you didn’t feel too good afterwards). And if your dog has certain dietary restrictions, please consult your veterinarian before making these :)

Bake these in the oven for about 15-17 minutes, and make the frosting while you’re waiting. It is important that the cupcakes and the frosting get stored separately. The frosting contains Greek yogurt, which cannot be left out in room temperature for long, so store it in the fridge, while the cupcakes can be stored at room temperature. Simply frost the cupcakes right before serving – your dog will love you forever…. I promise.

IMG_2943 copy

doggie cupcakes with peanut butter frosting
Print
For the cupcakes
  1. 1/2 cup all-purpose flour
  2. 1 teaspoon baking powder
  3. 1/3 cup no sugar added applesauce
  4. 1/3 cup canola oil
  5. 1 egg, at room temperature
  6. 1 tablespoon honey
  7. A pinch of cinnamon
For the frosting
  1. 3 tablespoons low-fat plain Greek yogurt
  2. 1 and 1/2 tablespoons peanut butter
Instructions
  1. Preheat the oven to 350 degrees. Line 5 cupcake wells with cupcake liners and set aside.
  2. In a medium bowl, combine all the ingredients and whisk until thoroughly mixed. Spoon cupcake batter into the cupcake liners, filling each well about 3/4 full.
  3. Bake for 15-17 minutes, or until an inserted toothpick comes out clean. Let cupcakes cool for at least 10 minutes, then remove onto wired cooling rack to cool completely.
  4. While the cupcakes are cooling, make the frosting by mixing the yogurt and the peanut butter together until smooth.
  5. Store cupcakes and frosting separately*, and frost cupcakes right before serving.
  6. Makes 5 cupcakes
  7. *store cupcakes in an airtight container in a dry cool place for up to 5 days. Store frosting in a separate airtight container in the refrigerator.
Adapted from The Scrumptious Pumpkin
Simple Everyday Food https://www.simpleeverydayfood.com/
The hardest part of this recipe is listening to your dog whine as these cupcakes cool. It’s seriously like they know these cupcakes were made specifically for him.

IMG_2916 copy

IMG_2918 copy

IMG_2920 copy

Happy birthday Bentley! Thank you for being such a great puppy the past two years – we sure are lucky to have you in our lives!

IMG_2947 copy

photo(1)

Recipe adapted from The Scrumptious Pumpkin

© Simple Everyday Food. All images & content are copyright protected. Please do not use any of my images without prior permission. If you want to republish this recipe, please re-write the recipe in your own words, or kindly link back to this post for the recipe.

Sharing is caring! Email this to someonePrint this pagePin on PinterestShare on YummlyShare on FacebookShare on Google+Tweet about this on Twitter