everyday food made simple

cheesy lasagna soup

A few months ago, it was brought to my attention by an ER doctor at work that he noticed something particular about Minnesotans’ grammar when it comes to a certain phrase, and after he mentioned it, I couldn’t help but notice it more and more.

QUESTION: when you’re asking someone if they would like to accompany you somewhere, what would you say?

Would you say: 1) “Would you like to come with me?”, or 2) “Would you like to come with?”

Did you pick 1)? I thought so. That’s how I say it too. And I’m pretty sure that’s how you’re supposed to say it. But apparently if you grew up in Minnesota, you would choose 2).

Now I’m not an English teacher, nor is my grammar the best in the world, but is anyone else with me when I say 2) doesn’t seem like a complete sentence whatsoever?? I mean, “come with me?” “come with us?” “come with us to go shopping?” “come with me to see a movie?”

The possibilities are endless. Next time someone asks me if I “would like to come with?”, I’m tempted to respond, “come with who?”

Seriously, if you’re from Minnesota or know someone from around the area, pay attention to how they word it next time and tell me I’m not the only one surrounded by people who talk like that.

[ahem Brian and Lori]

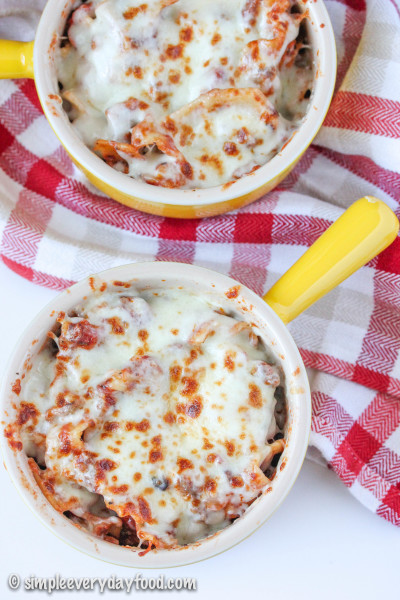
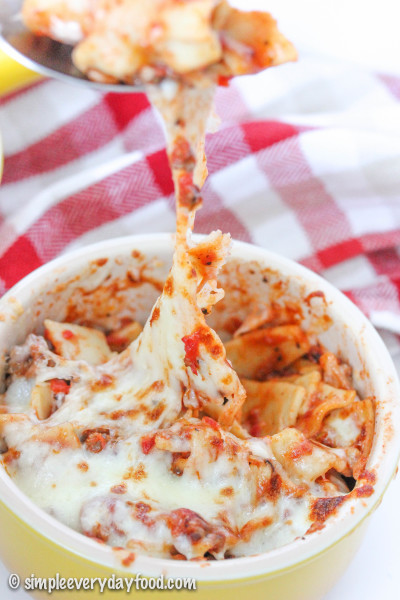
Now that we’ve got all that serious business out of the way, let’s move on to something better… like this cheesy, hearty, stick-to-your-bones lasagna soup with lots and lots of cheese.

cheesy lasagna soup

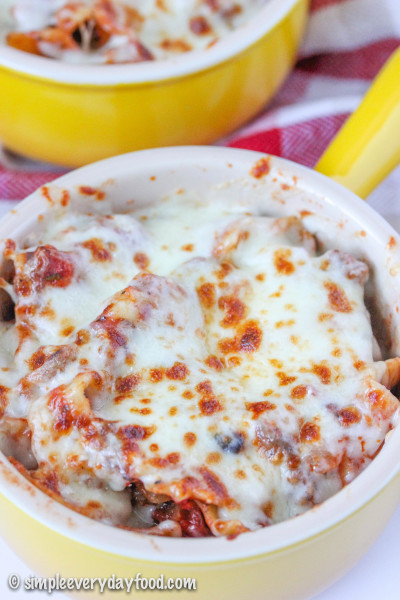
It tastes just like lasagna, minus all the work, and we’re definitely not sacrificing on any of the flavors either. There is no need to spend time layering everything; instead, just throw everything in a pot and let simmer. It’s so much easier and comes together much much quicker, and I mean just look at that cheese…!!

cheesy lasagna soup

cheesy lasagna soup

cheesy lasagna soup

Do you like cheese? I like cheese. I mean who doesn’t like cheese? And if you’re from Minnesota, there’s no excuse to not liking cheese.

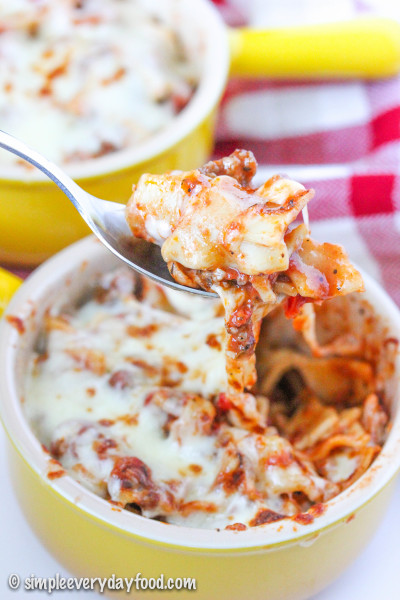
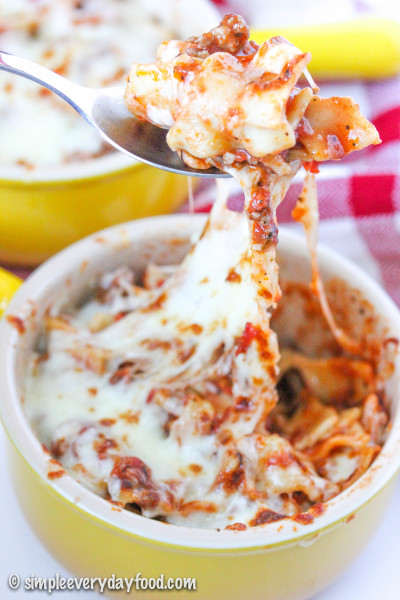
However, I don’t particularly care for cottage cheese or ricotta cheese (or any sort of crumbly lumpy cheese), so I only used mozzarella and Parmesan cheese. If you’re into the lumpy cheeses, you can definitely use a mixture of everything.

Also, I used lasagna noodles to make it resemble like actual lasagna, but you can always use other smaller pasta shapes if you like… or whatever you have on hand, especially if you’re trying to clean out your cupboards!

 cheesy lasagna soup 

cheesy lasagna soup
Print
Ingredients
  1. 1 tablespoon EVOO
  2. 12 oz ground Italian sausage
  3. 1/2 yellow onion, diced
  4. 2 cloves garlic, minced
  5. 1/2 teaspoon red pepper flakes
  6. 4 cups reduced sodium chicken broth
  7. 28 oz fire roasted diced tomatoes
  8. 3 tablespoons tomato paste
  9. 2 teaspoon dried oregano
  10. 1 teaspoon dried basil
  11. 1/2 teaspoon salt
  12. 1/2 teaspoon black pepper
  13. 8 oz lasagna noodles, broken up in small pieces, uncooked
  14. 2 and 1/2 cups shredded mozzarella cheese
  15. 1/2 cup shredded parmesan cheese
Instructions
  1. In a large Dutch oven, heat the oil over medium high heat and brown the sausage, breaking it up into small pieces with a wooden spoon until no longer pink. Transfer to a plate and set aside.
  2. Using the remaining oil/fat in the pot, sautee the onions over medium heat until translucent, about 3 minutes, then add in the garlic and red pepper flakes and cook for another minute or two. Add in the chicken broth, diced tomatoes, tomato paste, oregano, basil, salt, pepper, and broken lasagna noodle pieces. Return the sausage back into the pot. Bring the soup to a boil, stirring occasionally to make sure the noodles don't stick to the bottom of the pot. Once the soup boils, turn the heat down to medium low and let it simmer for about 30 minutes, or until the noodles are cooked through. Make sure to give the soup a few stirs every few minutes. Remove from heat.
  3. Combine both cheeses in a small bowl, mix it around with a spoon and set aside.
  4. Turn your oven's broiler on. Ladle soup into oven-safe bowls and generously sprinkle a good layer of cheese over the tops. Place until the broiler for just a few minutes, keeping an eye on it the entire time, and remove soup from the oven as soon as the cheese starts to turn brown and bubbly. Remove from oven, let rest for a minute or two, and serve immediately.
  5. Serves 4-6
Adapted from Center Cut Cook
Simple Everyday Food https://www.simpleeverydayfood.com/
 Recipe adapted from Center Cut Cook

© Simple Everyday Food. All images & content are copyright protected. Please do not use any of my images without prior permission. If you want to republish this recipe, please re-write the recipe in your own words, or kindly link back to this post for the recipe.

Sharing is caring! Email this to someonePrint this pagePin on PinterestShare on YummlyShare on FacebookShare on Google+Tweet about this on Twitter

I don’t know about you, but in our household, Thanksgiving planning started at the end of October (it’s a big deal!). We planned out our menu and everything we may need, and a few days ago I finished up a make-ahead timeline to make things go as smoothly as possible on the big day.

I don’t know about your timeline – if you’re nerdy enough like me to make one – but mine is filled with 2-3 things to prep and make every night leading up to Thanksgiving. And since this week I’ll already be doing lots of chopping, baking, cooking, and prepping after a long day of work, the last thing I need is to worry about the age old question of “what’s for dinner??“.

Enter today’s easy recipe…… *drum roll please*…..

I present to you: Pizza tator tot casserole!

IMG_3254 copy

My taco tator tot casserole is perhaps one of the most popular recipes in our house – we make it at least once very few weeks – it’s just that good. I remember the first few weeks when I started my new job back in February, we actually made a double batch of it in anticipation of being busy and giving me enough time to get settled into my new routine. Now we gave a new spin to our favorite comfort food – combining our favorite casserole dish with tons of pizza flavors! It’s hearty, meaty, and cheesy all at the same time. It’s got pizza sauce, basil, plenty of cheesy goodness, lean ground beef, onions and green peppers, and not to mention to crispy baked tator tots carefully arranged in OCD fashion on top. All the food groups balanced into one delicious meal, it’s guaranteed to be a hit at your dinner table!

Have I mentioned that it’s also super easy and painless to make?

IMG_3260 copy

Just like ordering pizza on a lazy Friday night, you can totally customize what goes into this casserole based on personal preference. We kept it simple by using plain ground beef and pizza sauce, but this dish totally has the potential to be dressed up based on what you like on your pizza..

IMG_3258 copy

Add in bacon bits, crumbled Italian sausage, and pepperoni slices for the meat lovers in your house.

Simply add in more cheese for extra cheesy goodness.

Or if you happen to like your pizza piled high with veggies, just throw in some sliced mushrooms, olives, extra peppers, spinach, or whatever happens to tickle your fancy at the moment.

See? I told you the possibilities are endless.

pizza tator tot casserole
Print
Ingredients
  1. 1 pound lean ground beef
  2. 1 medium green bell pepper, diced
  3. 1 medium onion, diced
  4. 15-oz pizza sauce
  5. 1 teaspoon dried basil
  6. 3 cups shredded mozzarella cheese
  7. 1 package frozen tator tots
  8. 1 cup shredded cheddar cheese
Instructions
  1. Preheat the oven to 400 degrees.
  2. In a large skillet, brown the beef over medium heat with the green peppers and onions until the beef is no longer pink. Add the pizza sauce and basil.
  3. Transfer the beef mixture into a 8x11" casserole dish. Top with mozzarella cheese and tator tots
  4. Bake uncovered for 30-40 minutes, or until the potatoes are crisp and brown. Sprinkle the shredded cheddar cheese, bake for an additional 5 minutes or until cheese is melted.
  5. Let cool for 5-10 minutes and serve.
  6. Serves 6
Adapted from Taste of Home - Ground Beef edition
Simple Everyday Food https://www.simpleeverydayfood.com/
Recipe adapted from Taste of Home – Ground Beef edition

© Simple Everyday Food. All images & content are copyright protected. Please do not use any of my images without prior permission. If you want to republish this recipe, please re-write the recipe in your own words, or kindly link back to this post for the recipe.

Sharing is caring! Email this to someonePrint this pagePin on PinterestShare on YummlyShare on FacebookShare on Google+Tweet about this on Twitter

If you follow me on Instagram, you’ll know that this past weekend, we made another trip out to Seattle to celebrate our anniversary. There’s just something about that wonderful city that calls my name – the weather, the city, the people, and don’t even get me started on the food. Oooooh… the food. The food is amazing in Seattle. It feels like home here. For all you people who already live there – I’m jealous.

We had plenty of seafood, plenty of Taiwanese food, experienced some drizzly weather, shopped and spent money, went to watch the Vikings play the Seahawks, got at least 9-10 hours of sleep every night, and experienced our first ever room service (because who doesn’t like to eat dinner in bed in front of the TV?). Unlike last time where I had our everyday planned out with places to go and things to eat, this time was more of a relaxing vacation. We lounged around in our hotel until we figured out what to do, then we would wander around the city finding new places to try, and we even went on a little adventure to Bellevue using public transportation.

As wonderful as vacation is, there’s always something about going home, being in the comfort of your own home, being able to cook food in your kitchen, and sleeping in your own bed (ooooh, king-sized Tempurpedic bed… how I missed you!). After eating out for 4 days straight, I just wanted to make something simple for dinner.

IMG_2265 copy

IMG_2269 copy

This quesadilla is a twist on the classic bacon cheeseburger. It has all the essential ingredients, toppings, and condiments on it. Minus the bun, it tastes just like a cheeseburger! Not the mention it’s totally customizable to what you normally put on your burger. Instead of adding ketchup while you’re assembling it, you add it into the beef as it’s browning in the skillet. This will prevent the tortilla from being overly soggy – you’ll want to trust me on this – you can thank me later. Brian, the carnivore in our house, requested only bacon, ground beef, and cheese on his. I, on the other hand, added additional lettuce and tomatoes on mine. If you like sliced pickles, onions, and mushrooms on your burger, feel free to add those in too! I also used a mix of shredded sharp cheddar and pepperjack cheese for a spicy kick on top of the classic cheese.

IMG_2249 copy

The hardest part of making this is flipping the quesadillas in the skillet. It actually took me a few tries to get it done right, so I’ll share my little trick with you: After the bottom tortilla is nicely browned, place a paper plate; face down, onto the quesadilla. In one swift motion, flip your skillet upside down so the quesadilla is now on the paper plate (with the browned side facing up). Then gently slide the whole quesadilla back into the skillet so the other tortilla can brown for a few minutes. Repeat above steps when transferring your quesadilla onto a plate when done.

bacon cheeseburger quesadillas
Print
Ingredients
  1. 1/2 lb bacon, diced and cooked
  2. 1 tablespoon EVOO
  3. 1 lb ground beef
  4. 3 tablespoons ketchup
  5. 6 8-inch flour tortillas
  6. 1.5 cups shredded sharp cheddar cheese
  7. 1.5 cups shredded pepperjack cheese
  8. Additional topping as desired: diced tomatoes, shredded lettuce, sour cream, etc.
Instructions
  1. In a medium skillet, heat up the EVOO over medium high heat. Brown the beef until cooked. Add in the ketchup (and mustard, if that's your kind of thing). Stir and drain off excess fat. Set aside.
  2. Place another large skillet over medium high-high heat. Plate a tortilla onto the surface and lay down a nice even layer of cheese. Then pile on your toppings - ground beef, bacon bits, lettuce, and tomatoes. Top it off with another even layer of cheese and top with another flour tortilla. Periodically check to see if the bottom tortilla has started to brown. Once slightly browned, it's time to flip your quesadillas.
  3. Place a paper plate; face down, onto the quesadilla. In one swift motion, flip your skillet upside down so the quesadilla is now on the paper plate (with the browned side facing up). Then gently slide the whole quesadilla back into the skillet so the other tortilla can brown for a few minutes. Repeat above steps when transferring your quesadilla onto a plate when done.
  4. Cut into quarters and serve immediately.
  5. Makes 3 quesadillas
Adapted from Taste and Tell
Simple Everyday Food https://www.simpleeverydayfood.com/
And just as a side note – the more toppings you add in, the heavier the quesadilla will be, and the more coordination the flipping might require…. It’s just a price we pay for a delicious flavorful burger.

IMG_2262 copy

Recipe adapted from Taste and Tell

© Simple Everyday Food. All images & content are copyright protected. Please do not use any of my images without prior permission. If you want to republish this recipe, please re-write the recipe in your own words, or kindly link back to this post for the recipe.

Sharing is caring! Email this to someonePrint this pagePin on PinterestShare on YummlyShare on FacebookShare on Google+Tweet about this on Twitter

Ooooh man. Life has been so busy lately. I need more hours in my day. Along with my new internship, classes, blogging, making food so I can blog about it, and trying to spend time with my family as much as I can, I don’t seem to have a life outside of all that anymore (not saying that I did have a life before anyway…). The Amazing Race and Survivor just started a few weeks ago, and I’m already behind on all my TV shows. I have about 30 episodes of Chopped, 13 episodes of The Incredible Dr. Pol, about 20+ episodes of Criminal Minds (that dates way back to last December), 15 some episodes of Cupcake Wars, along with a bunch of miscellaneous shows that are taking up space on our DVR…. good thing we’ve got two DVRs that can be used at the same time, otherwise we’ll for sure run out of space quickly!

…talk about First World Problems.

On a positive note – I’m truly enjoying this quarter. It’s exhausting and busy, but I feel like I’m learning a ton during my internship, and I absolutely love that everyday is different. Everyday is a surprise and I’m constantly challenging myself to do better.

Okay. Back to food. When I first set out to make this appetizer, I had every intention to bake it in the oven so it’s healthier than the deep-fried mozzarella sticks we usually get at restaurants. Well, that plan failed miserably… somehow the wonton wrappers didn’t brown nor did it crisp up in the oven, and cheese oozed out from all kinds of directions from the holes I managed to create during the wrapping process.

[sigh] It was a sad, sad sight. And needless to say, I was quite disappointed. I would’ve taken a picture of the horrible sad mess that laid there on my baking sheet, but it was just so bad that taking pictures of it seemed like a waste of energy..

Good thing I had a Plan B in mind. If baking didn’t work out, I could at least quickly fry it in a pan. That can’t be as bad as deep frying it, right?

IMG_2013 copy

This appetizer can be made within 15-20 minutes, so it’s perfect if you’re craving a quick little snack in the afternoon, or if you need something to munch on during a football game! You can make as many or as little as you need, and they turn out to be cute mini-sized mozzarella sticks, which makes them that much more fun to eat!

IMG_2017 copy

You know, just a mozzarella stick chillin’ in the marinara hot tub… no big deal.

IMG_2022 copy

Wait, you know what’s even better? Nowadays they make string cheese in different flavors, so you can customize your mozzarella sticks based on what kind of string cheese you buy! No more boring plain ol’ string cheese! In our house, we’re a big fan of anything that has a hint of jalapeno or black pepper, so we used string cheese with cracked black pepper to give it a subtle kick of flavor. They turned out to be amazing!

wonton wrapper wrapped mozzarella sticks
Print
Ingredients
  1. 3 sticks of string cheese of your flavor, cut in half
  2. 6 wonton wrappers
  3. 1 large egg, beaten
  4. 1/2 teaspoon water
  5. 1/3 cup vegetable oil
  6. Marinara sauce for dipping, if desired
Instructions
  1. In a small bowl, combine the egg and the water. Brush a wonton wrapper with the egg wash, then wrap the string cheese with the wrapper, making sure the the wrapper covers the string cheese entirely and there are no holes for the cheese to leak out of during the cooking process. Also make sure the edges of the wrapper are sealed nice and tight with the egg wash. Repeat process for all the string cheese sticks.
  2. In a medium pan, heat the oil over medium high heat. Place your uncooked mozzarella sticks in the pan, making sure they're not crowded. Using a pair of tongs, cook cheese sticks on each side for about a minute, or until the wrapper has turned golden brown and crispy.
  3. Transfer mozzarella sticks on a paper-towel lined plate to soak up all the excess oil. Serve immediately with marinara sauce while hot.
  4. Makes 6 mini mozzarella sticks.
Simple Everyday Food https://www.simpleeverydayfood.com/
Creamy, cheesy mozzarella cheese wrapped in a light, crispy wonton wrapper… who knew a healthier version of mozzarella sticks can be so delicious (and addicting)?!

IMG_2011 copy

IMG_2026 copy

Here’s a couple things to keep in mind while you make these golden crispy appetizers:

  • The egg wash serves as a glue to hold your wonton wrapper together. Don’t be shy when brushing it onto the wrappers – if you don’t put enough on, nothing’s going to stick and your mozzarella stick is going to fall apart.
  • Try to make sure that your cheese stick is wrapped nice and tight with the wrapper with no gaping holes. Gaping holes is how the cheese can leak out of the wrapper during the cooking process, leaving you with just an empty wonton wrapper shell…. not good.
  • These babies cook fast when you have a nice hot pan. I think mine took about 45-60 seconds for the first side to brown up. I then turned them three other times to make sure all four “sides” are nice and crispy. The whole cooking process took maybe less than 3 minutes.

© Simple Everyday Food. All images & content are copyright protected. Please do not use any of my images without prior permission. If you want to republish this recipe, please re-write the recipe in your own words, or kindly link back to this post for the recipe.

Sharing is caring! Email this to someonePrint this pagePin on PinterestShare on YummlyShare on FacebookShare on Google+Tweet about this on Twitter