everyday food made simple

Lately I’ve been thinking about getting a Fitbit Charge HR. I already own a FitBit Flex, but I’m really digging the additional functions the Charge HR provides (heart rate monitoring, time display, automatic sleep detection, etc). But as I added it into my shopping cart and typed in my credit card information one day, I suddenly remembered that the iWatch is scheduled to come out sometime this year, and that’s when the internal debate began…

I’m sort of an Apple geek – all my electronic toys have the little half-bitten apple logo on it. When I initially heard of this iWatch, I laughed and vowed I would never need a wrist gadget that did a lot of the things my phone could do. “Why do I need a watch like that when I can just use my Fitbit?” Buuuut… after reading all about its features, I’m kind of ashamed to admit that I have since changed my mind and I now want a iWatch, especially since it also contains a pretty cool health & fitness app within.

Question: Do any of you guys have the new Fitbit Charge HR? Do you recommend it? Are you planning on getting the iWatch when it comes out? Why or why not? I’d like to hear your opinions!

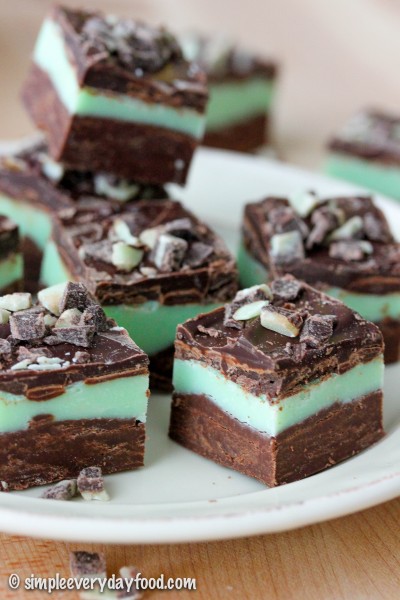
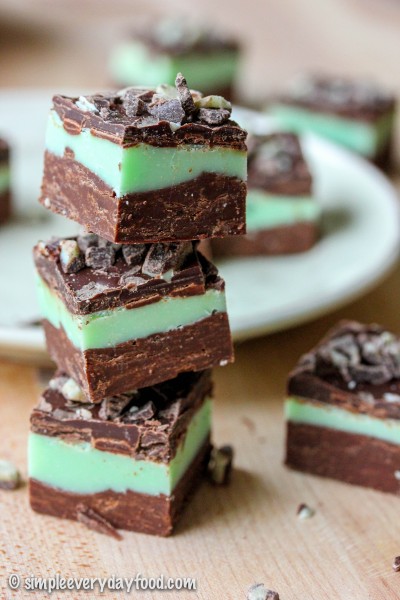
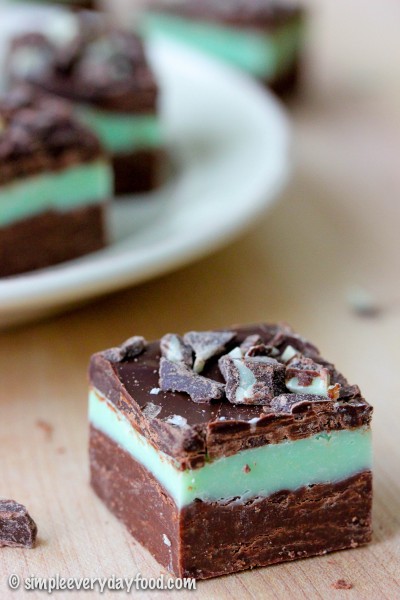
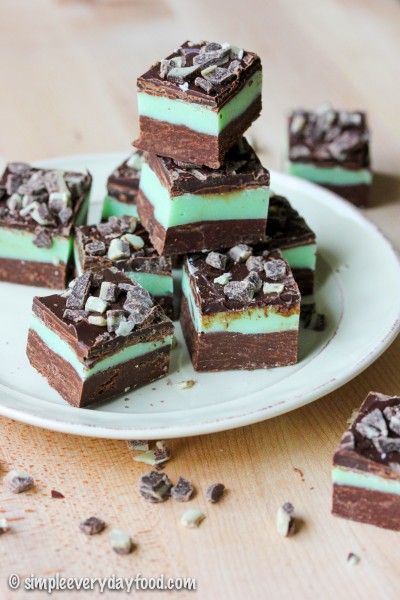
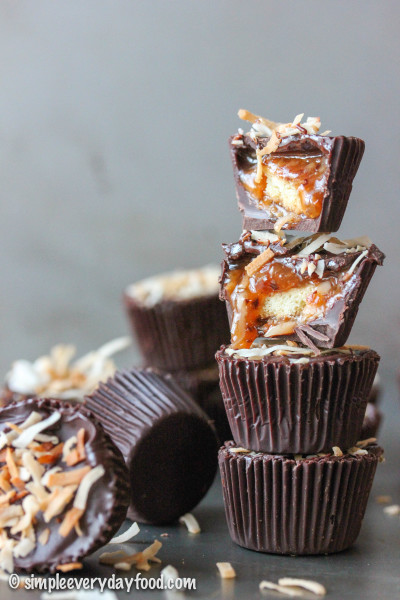
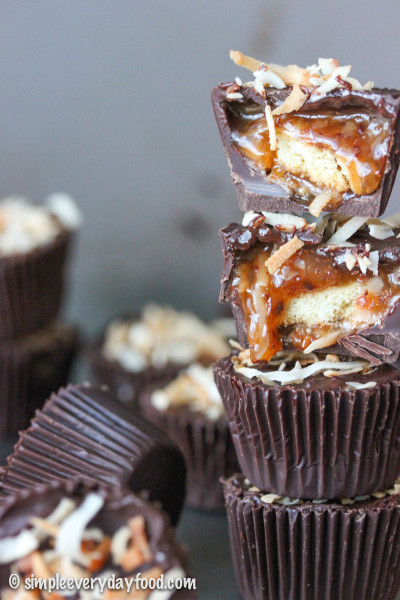
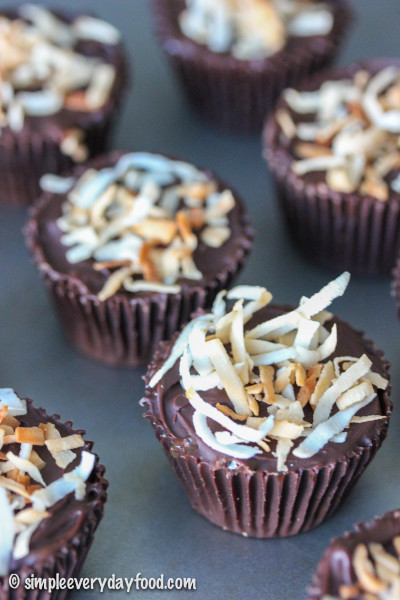
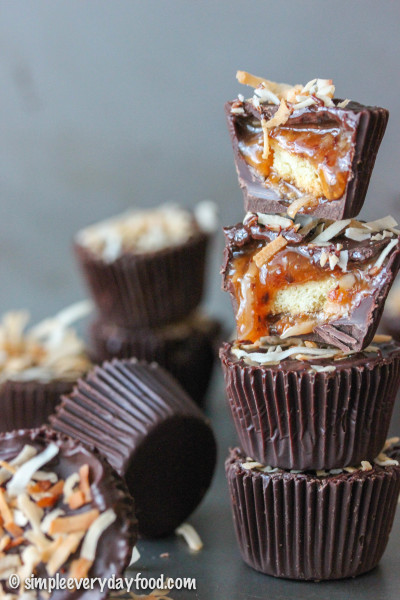
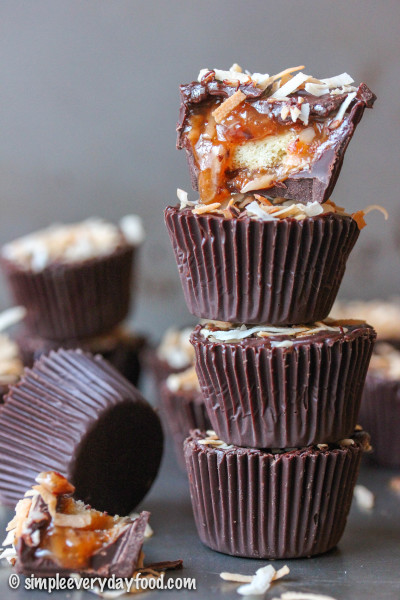
Maybe the reason why I’m thinking so much about activity trackers is because I may have accidentally ate a few too many of these Samoa cookie chocolate cups.. they’re little chocolate cups filled with gooey sweet and salty caramel coconut mixture and a bite-sized piece of shortbread cookie, all in this little chocolate cup… and oh boy are they dangerous!

IMG_5134 copy

IMG_5126 copy

IMG_5110 copy     

They don’t require any sort of mixer, and they don’t require any baking. It may seem like a long process to make them, but there’s a lot of waiting around in between steps, which is perfect for getting miscellaneous things done around the house… or spending some time on Pinterest…. or finding things to buy online… or taking a few of those silly BuzzFeed quizzes…

IMG_5079 copy

IMG_5115 copy

First you melt the chocolate and spread the chocolate around in the liners so it covers everysingleinch of it. Freeze those babies for half an hour (this would be the time to do those things we previously talked about). Then add a little bit of the caramel coconut mixture on the bottom of each cup and top with a little bite of the shortbread cookie.

Are you still following me?

IMG_5060 copy

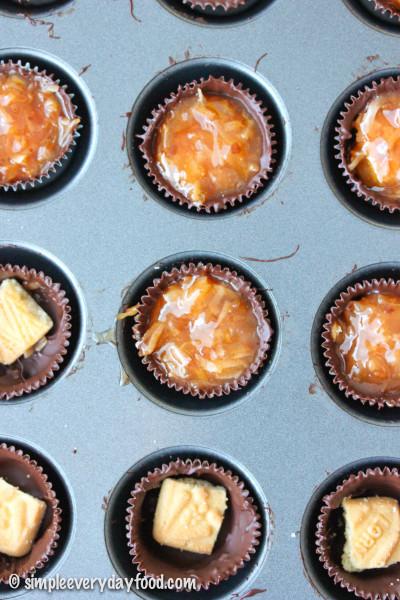
Top the cookies with more caramel coconut and sprinkle the tops with some sea salt, if the salty-sweet combo is your kind of thing. Freeze some more (patience, grasshopper!).

IMG_5063 copy

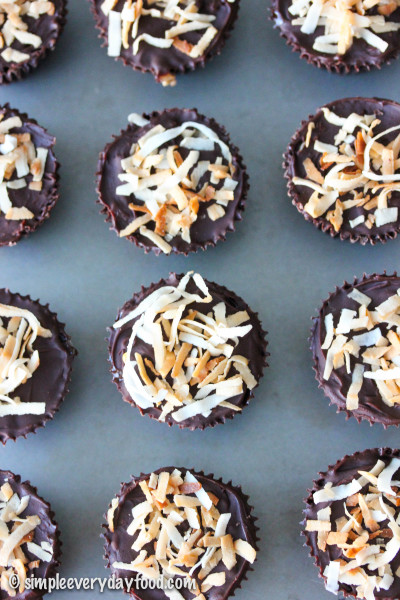
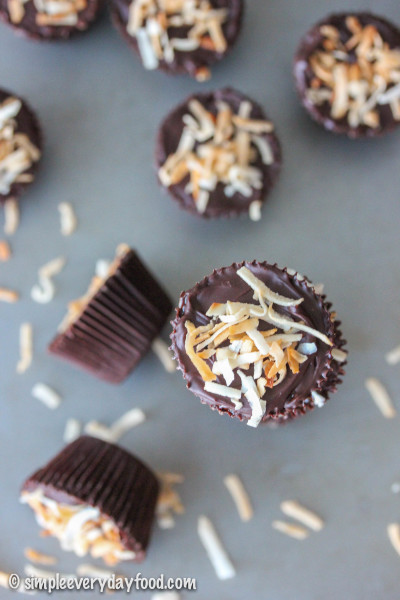
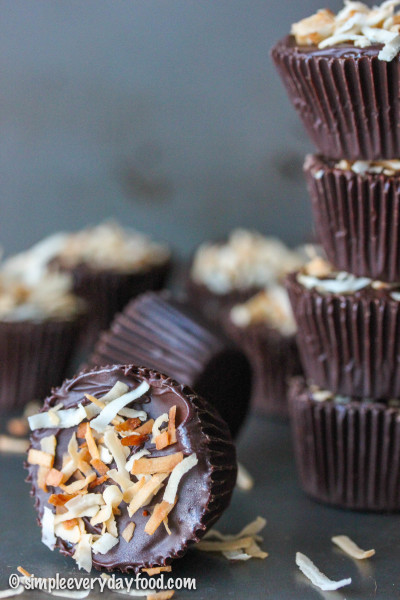
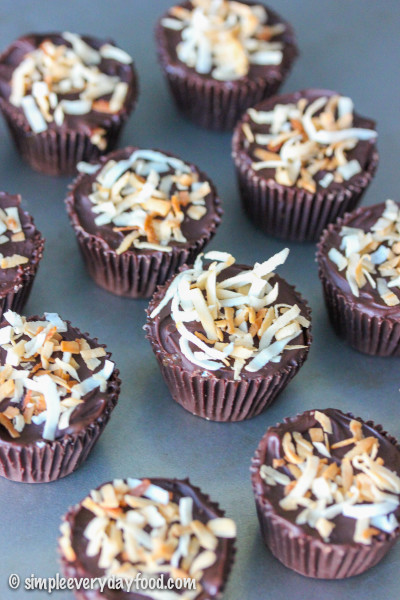
Then top it up with more melted chocolate and garnish with toasted coconut flakes. Freeze a little bit longer (almost there!), then EAT and DEVOUR!

IMG_5109 copy

IMG_5088 copy

I will not be responsible for the amount of chocolate cups you eat in one single sitting. Nor will I be responsible if you end up with a stomach ache after eating half the pan… just sayin’.

IMG_5085 copy

IMG_5090 copy

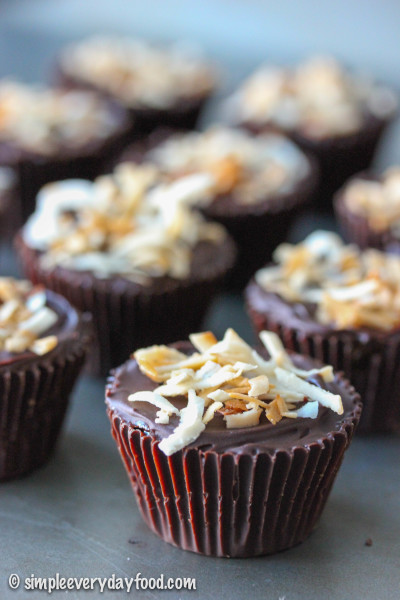
But just look at that ooey gooey caramel-y deliciousness! I mean, how can you resist?!

I apologize for the over abundance of pictures…

IMG_5124 copy

IMG_5146 copy

samoa cookie chocolate cups
Print
Ingredients
  1. 2 and 1/2 cups semi sweet chocolate chips
  2. 1 and 1/4 cups sweetened coconut flakes
  3. 1 cup caramel syrup
  4. 6 shortbread cookie squares, cut into quarters
  5. Sea salt, for sprinkling, if desired
Instructions
  1. Line a 24 mini muffin pan with liners and set aside.
  2. Using a double boiler, melt 2 cups of the chocolate chips, stirring occasionally until smooth. Drop 1-2 teaspoons of melted chocolate into each liner, spreading the chocolate up the sides of the liner using a pastry brush or a spoon. Make sure the sides are nicely coated. Freeze for 30 minutes.
  3. In the meantime, toast the coconut flakes in a nonstick pan over medium heat. Once you notice the flakes are starting to brown, stir constantly until most of the coconut flakes turn golden brown in color. Be careful not to burn them! Remove from heat and reserve 1/4 cup for garnish.
  4. Combine the caramel sauce and the remaining cup of coconut flakes in a medium bowl and mix well. Remove the frozen chocolate cups from the freezer and spoon ~1/2 teaspoon of the caramel/coconut mixture on the bottom of each cup, top with a quarter piece of the shortbread cookie, then top with ~1 teaspoon of the caramel mixture. Sprinkle tops with a little bit of sea salt (if desired). Freeze for another 30 minutes.
  5. Melt remaining 1/2 cup of chocolate chips over a double boiler (or in the microwave) until completely melted and smooth. Remove chocolate cups from freezer, and cover each cup with a thin layer of the melted chocolate, smoothing the tops with a spoon if needed. Garnish with the reserved toasted coconut flakes. Freeze for an additional 15 minutes. Chocolate cups can be stored either at room temperature, in the fridge, or in the freezer in an airtight container, depending on your preference!
  6. Makes 24 chocolate cups
Adapted from The Housewife In Training
Simple Everyday Food https://www.simpleeverydayfood.com/
Recipe adapted from The Housewife In Training

© Simple Everyday Food. All images & content are copyright protected. Please do not use any of my images without prior permission. If you want to republish this recipe, please re-write the recipe in your own words, or kindly link back to this post for the recipe.

Sharing is caring! Email this to someonePrint this pagePin on PinterestShare on YummlyShare on FacebookShare on Google+Tweet about this on Twitter

If you haven’t heard, I was offered a brand spankin’ new full time job about a month ago and just started it this week ! I’m super ecstatic about it, as I wasn’t really expecting to be able to find a job (at a place I really wanted to work at) this fast, just a few weeks after graduation. Of course, I wasn’t able to do it without the help of some wonderful people I listed as my references. As far as I know, a few of them were contacted by this employer, and they must’ve wrote a bunch of nice things about me, and I’m forever grateful about it :)

This will be my first ever full-time big girl job, and I took the entire process very seriously (more than usual) – from the initial submission of my resume and cover letter, to the actual interview, and the thank you letters thereafter – I applied everything I have learned in my career capstone class and meticulously read and reread everything prior to hitting the “submit” button. I’m glad a little bit of networking and hard work pays off… I love it so far!

This whole journey really made me realize that no matter where you go in life and what big milestones you have achieved, you really can’t get there without the help of people along the way – whether they are friends, family, coworkers, or even strangers… many people played a part in this job hunting process, and even now, I feel just as grateful as I did the day I was offered the position.

Ever since I was little, my mom had ingrained in my brain that it is important to express your gratitude towards those that have helped you in life. And that’s why the day after I got this new job, I decided to make some sweets for those people who took time out of their busy schedules to write recommendation letters for me. I figured if they were kind enough to take time to write nice things about me, the least I can do is take time out of my day to make a little something to show them how much I appreciate their efforts.

IMG_3006 copy

IMG_3012 copy

I would’ve made cookies, but one of my references happened to be gluten free, which is why I decided to make fudge instead. I’ve never made fudge in my entire life before, but since it’s a new year, and new years are all about trying new things, I decided to give it a whirl. And since I’m still on this mint chocolate craze, mint chocolate fudge it was (it’s only my favorite chocolate combination, if you haven’t figured that out already).

IMG_3009 copy

These little fudge squares are just like giant Andes mints and they’re so easy to make! The bottom layer consists of sweet chocolate chips with condensed milk, followed by another fudgey layer of white chocolate chips, a little bit more condensed milk, peppermint extract, and a few drops of food coloring. The thin top chocolate layer has a nice little crunch, which contrasts nicely with the bottom two smooth velvety fudgey layers. Heaven, I tell ya.

IMG_3027 copy

IMG_3028 copy

I have never had luck with melting chocolate in the microwave or directly over a heat source. It just somehow never works for me, so for all chocolate-melting recipes, I always always always melt my chocolates using a makeshift double boiler over low heat – it heats the chocolate up a lot slower, but it also gives me less anxiety. I take it as a fair trade off.

If you’ve never made fudge (like me) before, I just want to warn you that when you melt the chocolate chips with the condensed milk, the mixture is going to be thick. I was expecting the mixture to be nice and smooth and runny like melted chocolate, but nooooo… it was thick. So thick that the only good utensil to stir it with is with a sturdy wooden spoon.. and that if you stir it constantly, your arm is going to get tired. I initially thought my chocolate had seized up on me, and I started to get very frustrated. Mind you this was at 9:30 a.m. and I’m pretty sure Brian decided to stay the heck away from the kitchen for the rest of the morning.

Moral of the story: chocolate chips + condensed milk = thick mixture (read: don’t freak out).

IMG_3025 copy

mint chocolate fudge
Print
Ingredients
  1. 2.5 cups semi-sweet chocolate chips, divided
  2. One 14-oz can sweetened condensed milk, divided
  3. 1.5 cups white chocolate chips
  4. 1 teaspoon peppermint extract
  5. 2-3 drops green food coloring
  6. 1 teaspoon shortening
  7. 1/2 cups Andes Creme de Menthe Baking Chips
Instructions
  1. Line an 8x8" baking pan with aluminum foil and spray generously with nonstick cooking spray. Set aside.
  2. Using a double boiler, melt 1.5 cups of the semi-sweet chocolate chips with 3/4 cups of the sweetened condensed milk over low heat. Stir occasionally until smooth, then pour mixture into the baking pan. Spread mixture evenly (I used an offset spatula), and place in the fridge to chill.
  3. While the chocolate mixture is chilling in the fridge, melt the white chocolate chips with the remaining sweetened condensed milk over a double boiler over low heat, stirring until smooth. Remove from heat and add in the peppermint extract and green food coloring. Stir until the mixture is even in color, then pour mint layer evenly over chilled chocolate layer and place back into the refrigerator.
  4. Melt the remaining 1 cup of semi-sweet chocolate chips and the shortening over a double boiler. Stir until smooth. Pour evenly over the mint layer, top generously with Andes Creme de Menthe baking chips, and chill in fridge for at least 3-4 hours until set.
  5. Cut into small squares before serving and store in the refrigerator for up to two weeks.
  6. Makes about 36 small squares
Adapted from Sally's Baking Addiction
Simple Everyday Food https://www.simpleeverydayfood.com/
Even though I’m not a big fudge fanatic, everyone who were able to get their hands on a little piece of this decadent minty goodness all said it was phenomenal!

Recipe adapted from Sally’s Baking Addiction

© Simple Everyday Food. All images & content are copyright protected. Please do not use any of my images without prior permission. If you want to republish this recipe, please re-write the recipe in your own words, or kindly link back to this post for the recipe.

Sharing is caring! Email this to someonePrint this pagePin on PinterestShare on YummlyShare on FacebookShare on Google+Tweet about this on Twitter