everyday food made simple

You may have noticed the lack of posts the past few weeks. I have been super stressed about my national boards exam that’s coming up in three weeks, so I have been using all my free time to cram as much information into my little head as possible. As a result, SEF has been neglected for quite some time. I have decided that I’m going to wait until my exam is over to take better care of SEF and dedicate more time to writing more posts. I have already created a bunch of recipes (10, to be exact) and have photographed my creations; however, since I spend most of my time editing them and creating blog posts, I’m going to put them on hold until April 13th. I promise SEF will be updated on a more regular basis after that – there will be some pretty delicious blog posts coming in the near future!

So, as my gift to you until April 13th, I present to you this wonderfully easy recipe that involves one of everyone’s favorite kitchen gadget – the Crockpot.

My favorite soups of all time are as follows (in no particular order):

  1. baked potato soup
  2. Olive Garden’s zuppa toscana
  3. creamy chicken and wild rice soup

Throughout the past 10 months SEF has existed, I managed to recreate and blog about #1 and #2 on that list. Naturally, it was time for me to find a family-approved recipe for creamy chicken and wild rice soup.

IMG_2536 copy

IMG_2508 copy

And this recipe is definitely going to be recreated again (and again) throughout the year. Brian and I both agreed it was so delicious that we were calling dibs on leftovers for work. Good thing this recipe yielded an entire Crockpot of soup! Even then, it still didn’t last more than 3 days in our house…

Rewind to about a year ago: I attempted to make chicken and wild rice soup on the stove… And that attempt had failed miserably. It tasted weird, had a funny consistency, and ended up getting dumped in the trash. Needless to say, my confidence in making creamy chicken wild rice soup was a little shot after that, and we both had to scramble and find something else to eat that night.

I think Brian was also a little skeptical when he heard I was going to try to give our favorite soup another try in the Crockpot. I can’t lie, I think I was too. But it was freezing cold outside, I was feeling lazy, and comfort food in the Crockpot was all that I really wanted for dinner.

IMG_2530 copy

This soup is amazing! It’s incredibly creamy and it’s filled with hearty vegetables and tons of juicy shredded chicken. Have you ever had Panera’s chicken and wild rice soup? If you haven’t – try it. It’s delicious. It’s the only soup we ever get there, and this TASTES JUST LIKE IT.

I’m still in awe at how good this soup is, and even better – how easy it is to make!

The steps are pretty simple: throw the veggies, wild rice, chicken stock, and chicken into the Crockpot. Let them sit and hang out and get to know each other for 7 hours. When the chicken is fork tender, take it out and shred it with a fork. Put it back into the Crockpot to soak up more of the yummy juices. Meanwhile, you make the creamy base on the stove…. this is where you should pay attention, simply because it took me three tries to get it right. Trust me, you’ll thank me later :)

When making your creamy base on the stove, melt the butter over low heat. Then add in the flour, 1/4 cup at a time, whisking constantly throughout each addition. The milk must also be added only 1/2 cup at a time as well. This is suuuuuper important – the first few times I tried, I added all the flour in at once, whisked, and added all the milk in at once. Somehow it just doesn’t work that way – it became super lumpy and gross, and I contemplated whether we should just make it “chicken and wild rice soup” instead of “creamy chicken and wild rice soup”. The stubbornness in me wasn’t about to let some butter and flour stand in the way of me and my dinner, so 3 sticks of butter later, I finally got the results I wanted.

The trick is to whisk constantly on LOW heat. When I say constantly, I mean it – whisk that sucker the entire time. Don’t walk away from the stove. Don’t even go on Instagram or Facebook. It’ll seem like it’s taking forever for the mixture to start bubbling, but I promise patience pays off in the end.

IMG_2540 copy

crockpot creamy chicken wild rice soup
Print
Ingredients
  1. 1 cup uncooked wild rice
  2. 1 pound boneless skinless chicken breasts
  3. 3 medium carrots, peeled and diced
  4. 1 small onion, diced
  5. 2 celery sticks, diced
  6. 6 cups low sodium chicken broth
  7. 1 heaping teaspoon poultry seasoning
  8. 1/2 cup butter
  9. 3/4 cup flour
  10. 2 cups milk + 2 additional cups
  11. Salt and pepper
Instructions
  1. Place the diced carrots, onion, and celery in the crockpot, then place the chicken breast on top. Sprinkle poultry seasoning over the chicken.
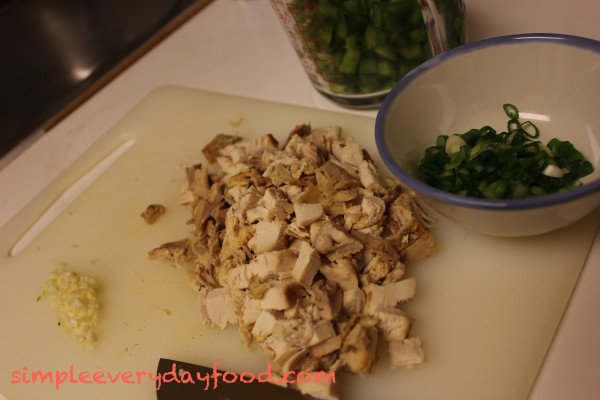
  2. Rinse the wild rice, and add to crockpot. Then add in the chicken broth. Cover and cook on low for 6-7 hours, until chicken is fork tender. Remove chicken onto a cutting board, let cool and shred with two forks. Add the shredded chicken back into the crockpot.
  3. In a saucepan, melt the butter, then add the flour, 1/4 cup at a time, and cook until it starts to bubble. Slowly whisk the milk in with the flour mixture, 1/2 cup at a time, just until it starts to thicken. Add this to the rice and chicken in the crockpot, stir to combine. If mixture is too thick, add additional milk (or water) until it reaches the desired consistency. Serve immediately.
  4. Serves 6
Adapted from Pinch of Yum
Simple Everyday Food https://www.simpleeverydayfood.com/
So there. Next time there’s a snowstorm in the forecast and all you want to do is snuggle on the couch in warm fuzzy blankets drinking hot peppermint cocoa in front of the fireplace, I’ve got dinner covered for you (trust me, I wouldn’t be surprised if we had a snowstorm in April here in Minnesota).

IMG_2533 copy

IMG_2506 copy

Recipe adapted from Pinch of Yum

© Simple Everyday Food. All images & content are copyright protected. Please do not use any of my images without prior permission. If you want to republish this recipe, please re-write the recipe in your own words, or kindly link back to this post for the recipe.

Sharing is caring! Email this to someonePrint this pagePin on PinterestShare on YummlyShare on FacebookShare on Google+Tweet about this on Twitter

Being Asian and growing up eating authentic Asian food, I’m always searching for good restaurants and recipes that bring back childhood memories.

Just a little background info: about 99% of Asian moms like my mother cook without using a recipe book. They don’t use measuring cups, they don’t use measuring spoons, and they don’t have recipe books. The next generation learns to cook from watching their mothers in the kitchen. Everything is cooked using the “guess-timate” technique. If something didn’t have enough salt, just add a little bit more in there and taste it again. Still not enough? Add some more until it tastes good.

How much salt total did that dish just take?

Yep, since everything is based on the “taste test”, I’ve never gotten any written recipes from my mom. Everything that I try to recreate is based on memories.

That being said, I love fried rice. And me being a fan of seafood, I’m a really big fan of shrimp fried rice. The flavors of fried rice in Taiwan is something that the Chinese-American restaurants just couldn’t recreate (at least I haven’t found a place here in the Twin Cities that can). I’m not saying this recipe is 100% authentic, but it’s pretty tasty, and I guess that’s all it matters.

Ingredients:

  • 2 eggs, beaten
  • A bunch of scallions, thinly sliced, white and green parts separated
  • Salt and pepper
  • 4 tablespoons olive oil
  • 1/2 pound medium shrimp, peeled and deveind
  • 1 cup shredded carrots
  • 3 cups cooked rice – I used brown rice to make it a little healthier
  • 1.5 tablespoons low-sodium soy sauce
  • 1 teaspoon sesame oil
  • 1 tablespoon water

Directions:

  • In a large skillet, scramble the eggs with the scallion whites with 1 tablespoon of olive oil. Transfer to a plate and set aside.
  • In the same skillet over medium heat, cook the shrimp with 1 tablespoon of olive oil. Sprinkle with salt and pepper, then transfer to the plate with the eggs and set aside.IMG_0625
  • In the same skillet (again), slightly cook the carrots with the scallion greens until it’s no longer crunchy – I like my carrots cooked well, not raw and crunchy.

IMG_0626

  • In a small bowl, combine the soy sauce, sesame oil, and water.
  • In the skillet (if you have a wok, a wok would be better), heat the remaining 2 tablespoons of oil over medium-high heat. Add the rice and soy sauce mixture and stir until warmed through. Then add the eggs, shrimp, and carrots. Toss until everything is evenly mixed.

IMG_0630

Enjoy!

Sharing is caring! Email this to someonePrint this pagePin on PinterestShare on YummlyShare on FacebookShare on Google+Tweet about this on Twitter

Well, the weekend’s coming to an end, and tomorrow’s everyone’s favorite day of the week: Monday. In our household, every other weekend are the only days my husband and I get to spend quality time with each other – this usually means doing homework together, running errands together, and cooking together (and making enough so we’ve got plenty of leftovers for tomorrow’s lunch). We like to try new recipes, and deciding whether we should add them to our “remake”or “meh I didn’t really care for it” recipe box.

The stacked enchiladas we made tonight are a twist on regular enchiladas. Instead of serving them like they traditionally do, we stacked them, turning them into a “enchilada lasagna”.

What else goes well with enchiladas?

Rice. Cilantro lime rice. The kind they have at Chipotle – my favorite Mexican joint. Next time I’m making some carnitas and making my own burrito!

First, enchiladas…

Ingredients:

  • 1 green pepper, chopped
  • 2 teaspoon olive oil
  • 1 garlic clove, minced
  • 1.5-2 cups shredded chicken – we roasted a chicken last night so we used the leftovers
  • 1/3 cup green onions, thinly sliced
  • 1/2 cup enchilada sauce
  • 1/2 cup picante sauce
  • 4 8″ corn tortillas
  • 1 cup shredded cheese
  • other toppings of your choice – sour cream, shredded lettuce…

IMG_0533

Note: if you like black beans in your enchiladas, you can also add one cup of canned black beans as well.

Directions:

  • Preheat oven at 350 degrees
  • Grease a 9″ pie plate, set aside.
  • In a large skillet, saute the green pepper in the oil for about 2-3 minutes. Add the garlic and cook for another 2-3 minutes, or until the green pepper is crisp-tender.
  • Stir in the chicken, green onions (and black beans if desired), cook for another minute. Transfer to a bowl and set aside.

IMG_0534

  • In the same skillet, combine the enchilada sauce and picante sauce. Coat both sides of a tortilla with the sauce mixture, then place it in the pie plate. Top with 1/3 of the chicken mixture and 1/4 cup of cheese.

IMG_0535

  • Repeat the layers twice. Top with remaining tortilla, sauce, and cheese.
  • Bake at 20-22 minutes or until heated through. Cut into wedges and serve with sour cream or lettuce if desired.

Now, for the rice….

Ingredients:

  • 1 cup basmati rice
  • 2 cups water
  • 1 bay leaf
  • 1/2 teaspoon salt
  • Juice of 1/2 a lime
  • 2 tablespoons cilantro, minced
  • 1 tablespoon oil

Directions:

  • In a large pot, saute the rice in the oil for about a minute. Add the water and bay leaf, bring to a boil.
  • Once the water boils, turn heat down, cover, and simmer for 15 minutes.
  • Remove from heat while still keeping the cover on the pot. Let stand for about 30 minutes. Remove bay leaf, then transfer rice to a large mixing bowl.
  • In the meantime, combine the salt and lime juice in a small bowl. Whisk until all the salt is dissolved, then add in the cilantro.

IMG_0537

  • Pour lime juice & cilantro mixture over rice. Toss until rice is evenly coated.

IMG_0540

IMG_0542

Enjoy!

Recipes adapted from: Taste of Home Magazine & Em Maliks Kitchen

Sharing is caring! Email this to someonePrint this pagePin on PinterestShare on YummlyShare on FacebookShare on Google+Tweet about this on Twitter