


Let’s all pause for a moment and discuss how important it is for you to make these for breakfast this weekend. I’ve made a few variations of breakfast rolls that I’ve shared with you in the past (you can find them here, here, here, and here), but today we’re ditching the rolls and making something I’ve never made before… pull-apart bread.
And before we get too crazy with the variations, let’s start with a simple and classic flavor: cinnamon + sugar with a vanilla glaze/dipping sauce.
The beauty of the pull-apart bread is its non-uniformity. No matter how exact you cut all your dough squares, not every piece of those squares is going to rise in the same exact way. The result is this beautiful vertically layered bread with pieces sticking out in every which way, making it that much more fun to peel away a piece, dunking it in the sticky sweet glaze, and shoving it in your mouth.

I’ll forewarn you that this post is a little bit lengthy, but please don’t let the number of steps intimidate you or hold you back from making this! I took step-by-step photos for you to go along with each step (located at the end of this post) to make the instructions easier to understand. I also added a few comments of my own (which I italicized) based on my own preference for you to use as a reference. There’s a lot of “making and waiting” involved, but once you get things started it goes by fast. Please trust me when I tell you that you need to make this bread because it’s actually pretty easy to make and it’s so fun to eat!

On a semi-related note: this was my very first time taking step-by-step photos for a recipe that required a few more steps than the usual posts that appear here on SEF, and it really made me appreciate all the talented food bloggers out there that include photos for each step in very post (my favorite is probably Simply Scratch – Laurie’s blog is beautiful and inspiring) – it really is a lot harder than it seems! It doesn’t help that my kitchen has zero natural lighting, so I had to run back and forth between the living room, dining room, and kitchen the entire time, trying to beat the sun and finding the best angle to shoot these photos.
Hats off to all the bloggers out there that take such wonderful step-by-step photos for people like me to admire and learn from.
- 2 cups skim milk
- 1/2 cup vegetable oil
- 1/2 cup granulated sugar
- 1 teaspoon vanilla extract
- 2 and1/4 teaspoons (1 packet) active dry yeast
- 4 and 1/2 cups all-purpose flour, divided
- 1/2 teaspoon baking powder
- 1/2 teaspoon baking soda
- 2 teaspoons salt
- 1/2 cup (1 stick) unsalted butter, melted and cooled
- 1 and 1/2 cups granulated sugar
- 3 tablespoons ground cinnamon
- 1/2 teaspoon ground nutmeg
- 1 and 1/2 cups powdered sugar
- 1/4 cup heavy whipping cream
- Pinch of salt
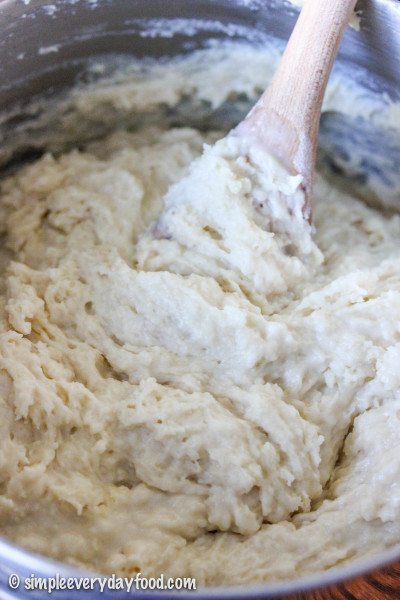
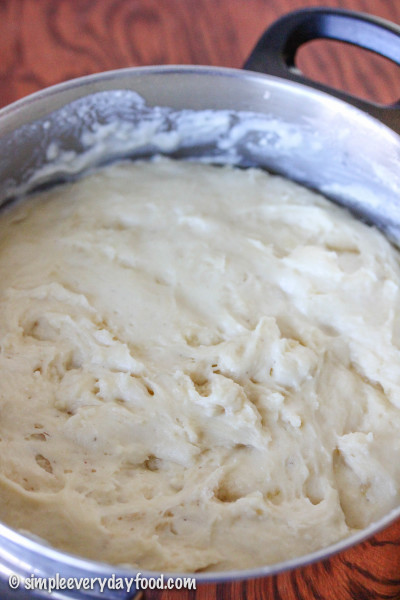
- To make the dough, combine milk, oil, vanilla extract, and 1/2 cup sugar in a large saucepan. Heat it until very hot but not boiling. Turn off heat and allow to cool slightly until it's just warm to the touch. Sprinkle in the yeast and add 4 cups of flour. Stir to combine, then put lid on the pot and allow to rise for 1 hour in a warm, draft-free area until doubled in size.
- During this time, generously coat a 9 x 5 x 3-inch loaf pan with the melted butter and set aside. In a medium bowl, combine the ingredients for the cinnamon sugar mixture and set that aside as well.
- After 1 hour, stir in additional 1/2 cup flour, along with the baking powder, baking soda, and salt. If dough is overly sticky, stir in up to an additional 1/2 cup of flour - I added in 1/4 cup increments. the dough should be slightly sticky but should not stick to your hands as you handle it.
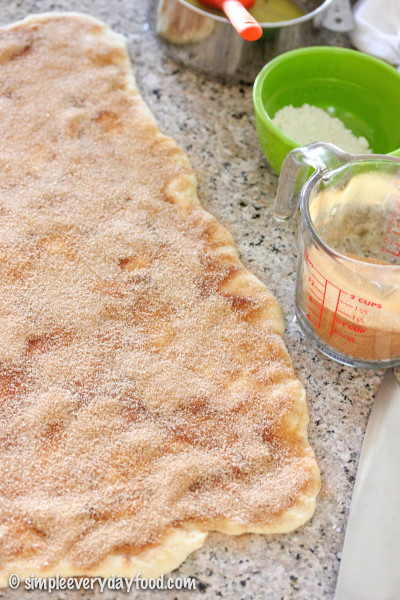
- Roll out dough onto a floured surface into a roughly 12 x 20" rectangle. Brush on melted butter so that it covers all the dough (I totally didn't skimp on this step - the butter is what makes the cinnamon sugar mixture stick to the dough!).
- Sprinkle a generous coating of the cinnamon sugar mixture onto the buttered dough... it may seem like a lot, but let's face it - there's no such thing as too much cinnamon sugar! Reserve about 2-3 tablespoons of the mixture.
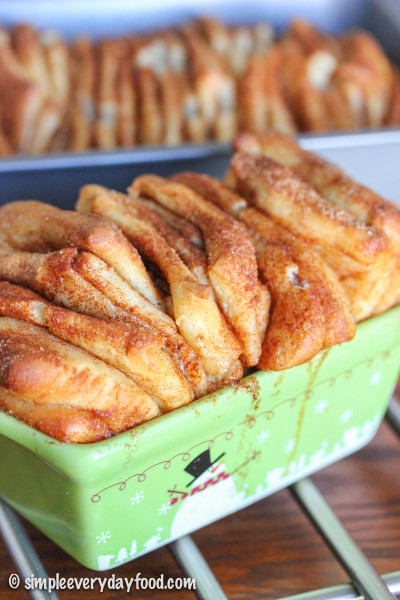
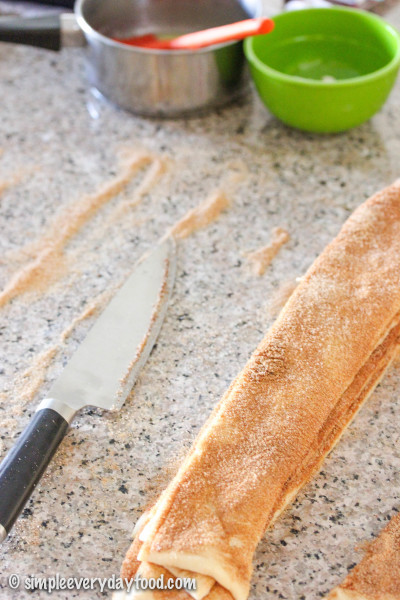
- Cut the dough vertically into approximately 2" wide strips (you'll get about 6-8 of 'em), then stack all the strips into one stack. Cut the stack of strips into 2" wide squares. Tilt your loaf pan vertically and start stacking your dough squares into your buttered loaf pan. Don't cram too many squares in your pan since you'll need to allow room for them to rise some more... you may have some squares leftover.
- Sprinkle the tops with more cinnamon sugar... because there's never enough of that stuff! Cover with a dish towel and allow to rise in a warm place for 30-45 minutes, or until dough have risen to double the size.
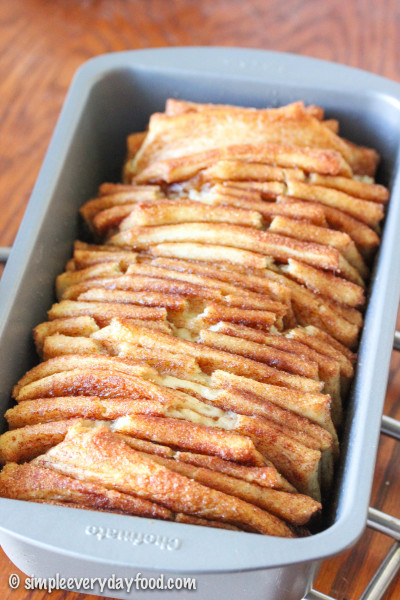
- In the meantime, preheat oven to 350 degrees. Place the pan in the oven and bake for 30-35 minutes or until the center is cooked through. Check dough at 20 minutes to make sure the top isn't browning too fast.. if it is, cover with aluminum foil for the remainder of the baking time.
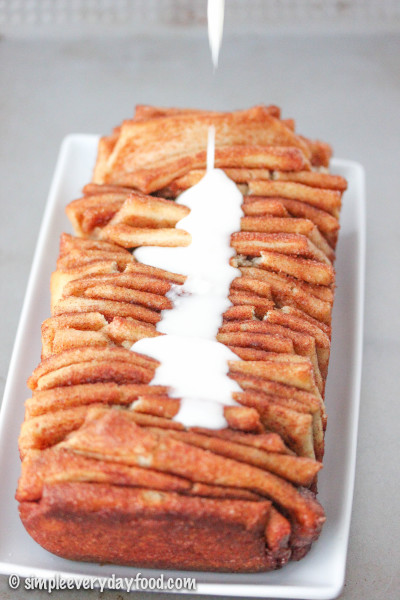
- Remove the pan from the oven when it's done and let cool for 20 minutes. Run a knife along the edges and take the bread out of the pan and transfer to a serving plate. Mix together the icing ingredients and drizzle over the top*. Serve warm and enjoy!
- * If desired, you can reserve about half of the glaze and use it as a dipping sauce.
2. During this time, generously coat a 9x5x3-inch loaf pan with the melted butter and set aside. In a medium bowl, combine the sugar, cinnamon, and nutmeg. mix, and set aside.
3. After 1 hour, stir in additional 1/2 cup flour, along with the baking powder, baking soda, and salt. If dough is overly sticky, stir in up to an additional 1/2 cup of flour – I added in 1/4 cup increments. the dough should be slightly sticky but should not stick to your hands as you handle it.
4. Roll out dough onto a floured surface into a roughly 12×20″ rectangle. Brush on melted butter so that it covers all the dough (I totally didn’t skimp on this step – the butter is what makes the cinnamon sugar mixture stick to the dough!).

5. Sprinkle a generous coating of the cinnamon sugar mixture onto the buttered dough… it may seem like a lot, but let’s face it – there’s no such thing as too much cinnamon sugar! Reserve about 2-3 tablespoons of the mixture.
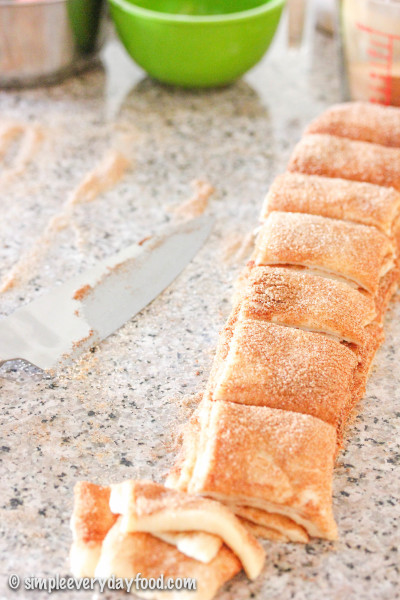
6. Cut the dough vertically into approximately 2″ wide strips (you’ll get about 6-8 of ’em)…
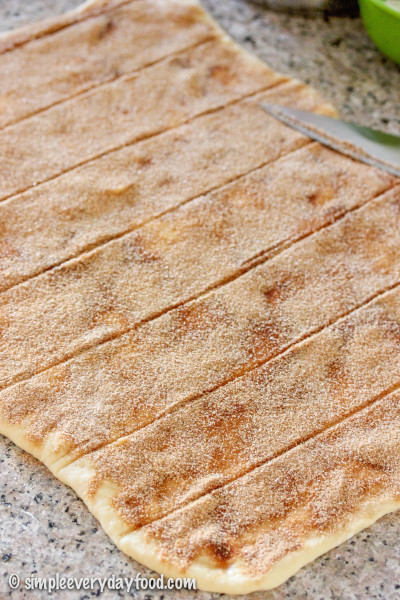
7. …Then stack all the strips into one stack.
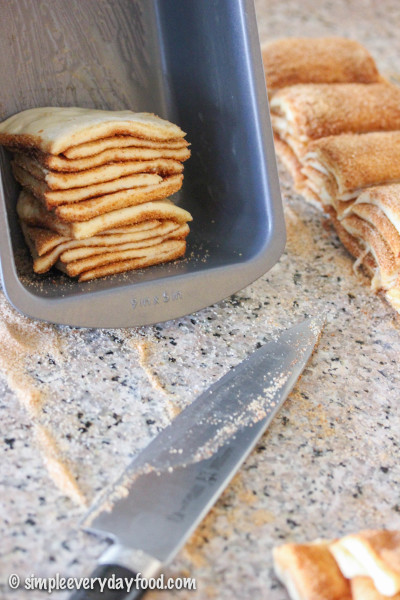
8. Cut the stack of strips into 2″ wide squares (if you’re OCD like me, you’d take a ruler and measure and score marks on your dough prior to cutting. I also trimmed off the edges so I’m left with nicely uniformed squares… because uniformity is what makes my world go round).
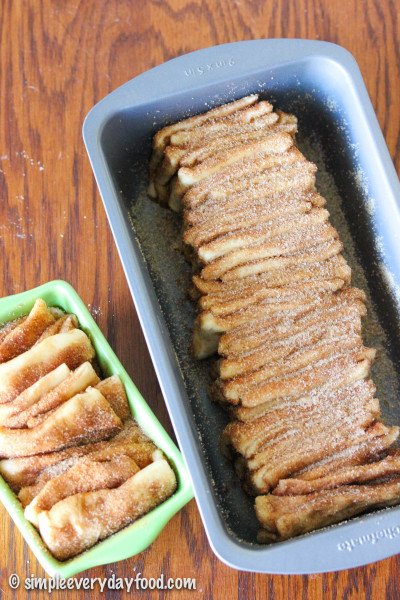
9. Tilt your loaf pan vertically and start stacking your dough squares into your buttered loaf pan. Don’t cram too many squares in your pan since you’ll need to allow room for them to rise some more… you may have some squares leftover (I used my leftover squares and some of the trimmed edge pieces to make a mini pull-apart loaf!).
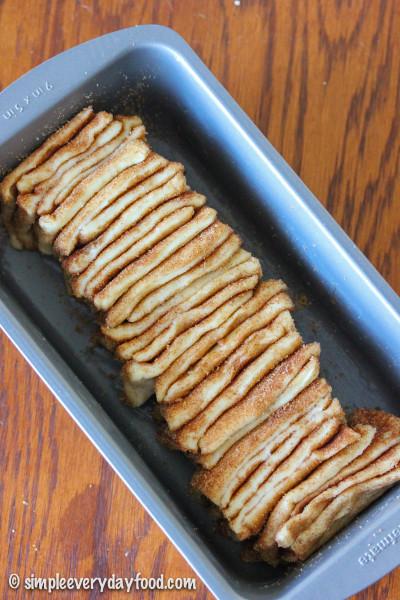
10. Sprinkle the tops with more cinnamon sugar… because there’s never enough of that stuff! Cover with a dish towel and allow to rise in a warm place for 30-45 minutes, or until dough have risen to double the size.
11. In the meantime, preheat oven to 350 degrees. Place the pan in the oven and bake for 30-35 minutes or until the center is cooked through. Check dough at 20 minutes to make sure the top isn’t browning too fast.. if it is, cover with aluminum foil for the remainder of the baking time.
12. Remove the pan from the oven when it’s done and let cool for 20 minutes. Run a knife along the edges and take the bread out of the pan and transfer to a serving plate. Mix together the icing ingredients and drizzle over the top. Serve warm and enjoy!
Recipe adapted from The Pioneer Woman
© Simple Everyday Food. All images & content are copyright protected. Please do not use any of my images without prior permission. If you want to republish this recipe, please re-write the recipe in your own words, or kindly link back to this post for the recipe.


