everyday food made simple

IMG_2656 copy 

Just because the holiday season was sooooo last year, doesn’t mean that we should wait another 11 months to start making anything involving peppermint and chocolate. I have stocked up enough Andes peppermint baking chips and Hershey’s mint chocolate chips to last for the next 3-4 months.. so don’t be surprised if you see a post or two (or three… or four) about mint chocolate desserts on SEF this spring!

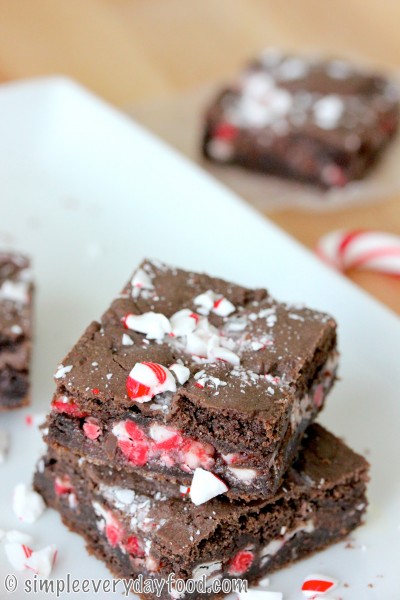
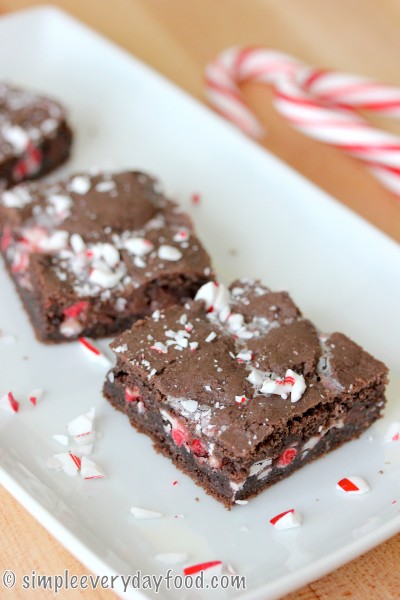
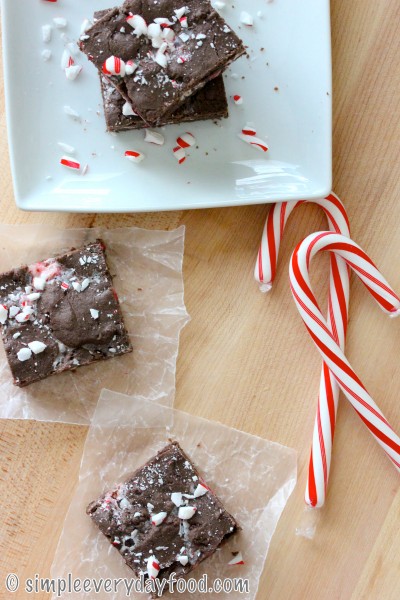
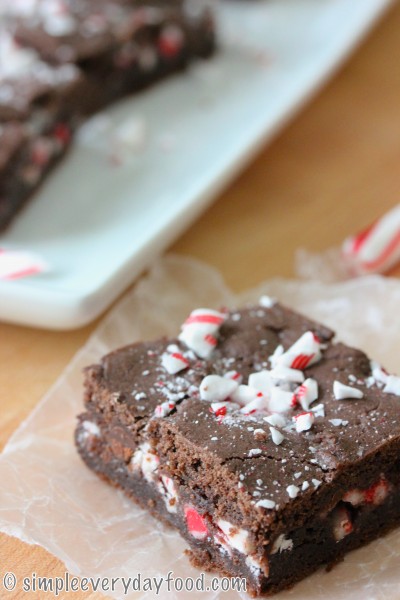
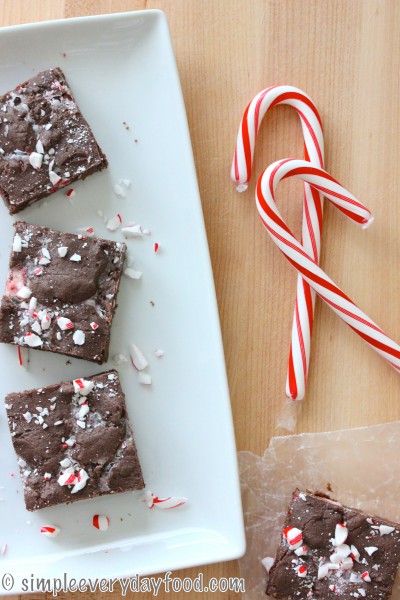
Remember these amazingly decadent gooey bars I made a while back? Well, today I have created a cookie version of those bars, and they’re equally as delicious! It’s a chocolate cookie base with tons of crunchy peppermint chips sprinkled throughout, so you’re guaranteed plenty of crunchy minty chocolatey goodness in each bite!

IMG_2660 copy

IMG_2658 copy

I also added extra semi-sweet chocolate chips into the batter simply because, well, you just can’t have too much chocolate in a cookie! Although it’s not required, it is highly recommended since it makes the chocolate flavor even more pronounced (read: even more amazing).

Soft, chewy chocolate cookies with bits of mint crunchiness in each bite – I bet you won’t be able to eat just one!

IMG_2674 copy

Just like all my other cookie recipes, I took these out 2 minutes prior to the regular recommended baking time, gently pressed the tops with the back of a fork, and put them back in the oven to cook for another 1-2 minutes. I do this a lot for cookies that don’t naturally spread out a whole lot during their time in the oven, just to achieve a nice crinkly cracked top in the end. I have tried just pressing them down after removing them from the oven completely, but I realized that they the end results aren’t as nice as taking them out after cooking them for 80% of the recommended time.

peppermint chocolate pudding cookies
Print
Ingredients
  1. 1 cup (2 sticks) unsalted butter, softened to room temperature
  2. 3/4 cup packed brown sugar
  3. 3/4 cup granulated sugar
  4. 2 eggs, at room temperature
  5. 2 teaspoon vanilla extract
  6. 1 teaspoon salt
  7. 1 teaspoons baking soda
  8. 1 tablespoon hot water
  9. 2 and 1/4 cups all-purpose flour
  10. 1/4 cup dark cocoa powder
  11. 3.9 oz instant chocolate pudding mix
  12. 1 cup Andes peppermint baking chips
  13. 1 cup semi-sweet chocolate chips
Instructions
  1. Preheat oven to 350 degrees. Line baking sheets with parchment paper or silicon baking mats.
  2. In a large bowl, combine the flour, salt, cocoa powder, and pudding mix. Gently mix with a spatula and set aside.
  3. Using an electric mixer, beat the butter on medium high speed until smooth. Add in the sugars and beat until light and fluffy. Add in the eggs, one at a time, mixing well in between additions.
  4. In a small bowl, dissolve the baking soda in the hot water. Add the baking soda mixture to the butter mixture. Then add in the vanilla. Mix well.
  5. Slowly add in the dry ingredients into the mixer bowl. Mix under medium speed until combined. Add in the baking chips and chocolate chips and mix some more.
  6. In heaping tablespoons, scoop the cookie dough on the baking sheets. Bake for 10 minutes, slightly press the tops with a spoon or a fork, and bake for another 1-2 minutes. Remove cookie sheets from oven and let cool for at least 5 minutes before transferring cookies to a wire cooling rack to cool completely. Store in an airtight container for up to 7 days.
  7. Makes about 40 cookies
Adapted from Something Swanky
Simple Everyday Food https://www.simpleeverydayfood.com/
IMG_2651 copy

I actually decided to freeze half the batch of cookie dough balls for later – not only would they be readily available when I’m craving cookies at a later date, I was hoping it will limit how many cookies I eat a day… note to self for next time: if Amy wants to eat 10 cookies a day, Amy will eat 10 cookies a day, regardless if there are 10 or 20 cookies laying around the house.

Well, at least I have enough peppermint baking chips for a few more batches!

Recipe adapted from Something Swanky

© Simple Everyday Food. All images & content are copyright protected. Please do not use any of my images without prior permission. If you want to republish this recipe, please re-write the recipe in your own words, or kindly link back to this post for the recipe.

Sharing is caring! Email this to someonePrint this pagePin on PinterestShare on YummlyShare on FacebookShare on Google+Tweet about this on Twitter

Merry Christmas everyone! I hope everyone is having a splendid holiday filled with love, laughter, relaxation, and spending time with friends and family. Since it’s Christmas, it only makes sense that I post something chocolate-and-peppermint-related, right?

On Cyber Monday, I finally broke down and bought myself Adobe Lightroom 5. I have actually been eying it for the last 6 months, but just couldn’t get myself to spend $100+ dollars on it…. so when I saw it was over 50% off, I went ahead and bought myself an early Christmas present :)

You know who else bought me an early Christmas present?

Brian.

He bought me a new Canon 60mm macro lens, had it shipped to the house when I was at work, wrapped it up and put it underneath the tree. Although he repeatedly said I would have to wait for Christmas to open my present, he just wasn’t able to wait that long. So my Christmas is basically over 3 weeks ago….. oh well. That boy couldn’t keep anything in when it comes to presents. I swear I’ve never opened a present on the actual day – he’s always so excited to give me the present or tell me what he got for me. I think the only way I’ll ever get anything on the actual day of a holiday is if he shops for it the night before…

So I’ve been super excited finding new things to make, just so I can take pictures with my new lens – it took some time to get used to, but I love it so far!

Before I try to talk your ear off about how decadent and delicious these bars are, let me just say one thing first: I’m sorry. This post contains a few more pictures than what I usually post, but I just couldn’t choose a couple because I was absolutely in love with a bunch of these pictures and wanted to share them all with you! (even though a few of them are very similar).

IMG_2488 copy

IMG_2480 copy

IMG_2460 copy

Okay, now about these bars: these bars are uh-mazing. Simply amazing, you guys. They’re soft, chewy, gooey, chocolate-y, and peppermint-y – it’s got everything I love in a dessert. If I could eat any kind of dessert for the rest of my life, these just might be it. The sweetened condensed milk keeps it gooey and moist. The chocolate chips and Andes peppermint baking chips are like a match made in heaven. The crushed candy canes on top gives an extra crunch, which is contrasted well with the soft and chewiness of the bars.

IMG_2490 copy

IMG_2491 copy

Ugh. So good.

gooey peppermint bars
Print
Ingredients
  1. One 15.25 oz box of chocolate fudge cake mix
  2. 1/2 cup unsalted butter, softened to room temperature
  3. 1 large egg
  4. 1/2 cup semi sweet chocolate chips
  5. 1 cup Andes Peppermint Crunch baking chips
  6. 1/2 cup sweetened condensed milk
  7. 2 regular sized candy canes, crushed (optional)
Instructions
  1. Preheat the oven to 350 degrees. Line a 9x9" pan with foil and spray generously with cooking spray.
  2. Using an electric mixer, combine the cake mix, butter, and egg. Beat on medium speed until the dough forms into a ball.
  3. Place about half of the dough in the bottom of the pan, press to form the crust, making sure all corners and sides are covered with dough.
  4. Sprinkle the chocolate chips and Andes baking chips over the top of the dough. Drizzle the sweetened condensed milk over the chips.
  5. Drop balls of remaining dough evenly over the top. Press lightly. Don't worry if the entire surface isn't covered by the dough balls - the dough will expand once cooked in the oven. Bake for 23-24 minutes, or until the edges slightly browned. Turn off oven and remove bars from the oven. Immediately sprinkle the crushed candy canes on top. Place the bars back into the cooling oven with the oven door cracked - this will help the candy canes to slightly melt and adhere to the bars.
  6. Cool completely and cut into bars. Store in airtight container for up to 7 days (if they even last that long).
  7. Makes about 16 squares.
Adapted from Crazy for Crust
Simple Everyday Food https://www.simpleeverydayfood.com/
IMG_2475 copy

IMG_2471 copy

I think I just found my new favorite dessert. Even Brian agreed that these has surpassed my gingersnap cookies that he claimed was his “favorite dessert item ever”.

Recipe adapted from Crazy for Crust

© Simple Everyday Food. All images & content are copyright protected. Please do not use any of my images without prior permission. If you want to republish this recipe, please re-write the recipe in your own words, or kindly link back to this post for the recipe.

Sharing is caring! Email this to someonePrint this pagePin on PinterestShare on YummlyShare on FacebookShare on Google+Tweet about this on Twitter

If you’re a fan of candy cane or anything involving mint and chocolate, you probably want to keep reading…. just sayin’.

These cute little truffle balls are a peppermint/candy cane lover’s dream dessert – they’re made with candy cane Oreos (my favorite!) coated with vanilla almond bark, topped with crushed candy canes. And let me tell you, THEY.ARE.AMAZING.

IMG_2424 copy

IMG_2450 copy

Brian came home one day from Target last month and surprised me with these. Instead of tearing them open and shoving them in my face right away, the food blogger in me racked my brain to think of something easy and delicious to make them with. And these little truffles were the first thing that came to mind.

You know you’re a food blogger when: the first thing that comes to mind when you see a food item is “what can I make with these?” And the second thing that comes to mind is “how can I style the food when I photograph it? What dishes and what props will I use?”

I don’t ever remember thinking this way about food a year ago….

IMG_2432 copy

candy cane oreo truffles
Print
Ingredients
  1. 1 package candy cane Oreos
  2. 6 oz low fat cream cheese
  3. 8 oz vanilla almond bark
  4. Crushed candy canes for topping, optional
Instructions
  1. Line a baking sheet with parchment paper. Set aside.
  2. Roughly break apart the Oreo cookies and place them in the food processor. Pulse until they turn into fine crumbs.
  3. Place Oreo crumbs into an electric mixer bowl. Using the paddle attachment and on medium speed, add in the cream cheese and mix until everything is well mixed.
  4. Roll the Oreo/cream cheese mixture into balls about 1" in diameter, place on baking sheet. Repeat until you have no "dough" left.
  5. Place the truffle balls into the freezer. Freeze for 1-2 hours, or until hardened.
  6. Using a double boiler, melt the candy melts. Using two forks, dip each truffle ball into the melted candy melts, making sure it's thoroughly covered. Remove truffle ball and place on the baking sheet for candy melt to harden. Sprinkle top with crushed candy canes, if desired. Keep truffles in refrigerator until ready to serve.
  7. Makes about 25 truffle balls.
Simple Everyday Food https://www.simpleeverydayfood.com/
Just like all my other truffle recipes, freezing the cookie balls is extremely important. Leave them in the freezer for at least an hour, but I do highly recommend freezing for at least 2 hours. This is because if they’re not hard and frozen, the cookie balls will start to crumble and fall apart when you place them in the warm candy melt mixture… and no one wants little brown specks of Oreo crumbs in the candy coating. I actually left my cookie balls in the freezer until the very last minute when my candy melts were completely smooth and melted.

IMG_2440 copy

If you’re like me and are a lover of anything and everything that has mint chocolate in it, then stay tuned this winter season because I already have a ton of recipes lined up for you guys!

© Simple Everyday Food. All images & content are copyright protected. Please do not use any of my images without prior permission. If you want to republish this recipe, please re-write the recipe in your own words, or kindly link back to this post for the recipe.

Sharing is caring! Email this to someonePrint this pagePin on PinterestShare on YummlyShare on FacebookShare on Google+Tweet about this on Twitter