everyday food made simple

Happy New Year, friends!

golden oreo cupcakes

To say that it’s been a while would be an understatement, so thank you for sticking with me and following along despite the fact that SEF has been on a long hiatus since May of 2015.

The main reason why it’s been a little quiet on the blogging front is because I’ve been a leeeetle preoccupied with something else in our life right now. Something that’s been taking up most of my energy..

IMG_6209 copy edited

Yep, we found out we were expecting a little bundle of joy (it’s a BOY!) not too long after we came back from our Taiwan trip last May, so instead of spending time blogging, I’ve been spending my energy shoving donuts and cinnamon rolls in my face and taking multiple naps on the couch for the past 9 months.

I can’t promise that there will be regular posts on SEF once the baby is born, but I’ll do my best to make an appearance on here every once in a while in between the messy hair, sleepless nights, and multiple diaper changes.

Now that we’ve got the big news out of the way, did everyone have a fabulous holiday season filled with family, friends, fun, and food? I hope so. Our holiday season this year was pretty low-key considering I’ve been achy, tired, and uncomfortable pretty much 24/7. Putting up Christmas decorations and planning a feast and making a few dozen Christmas cookies just seemed way too exhausting while carrying around a 6+ pound bowling ball.

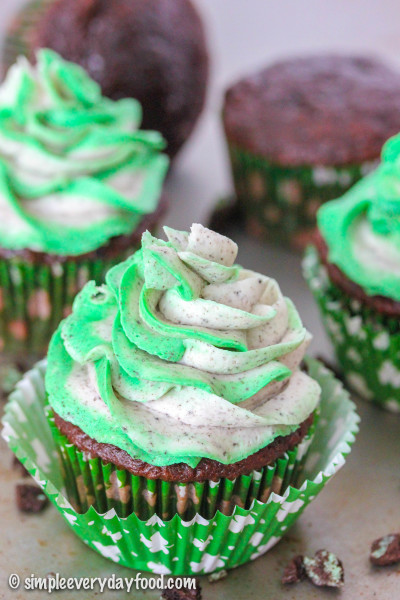
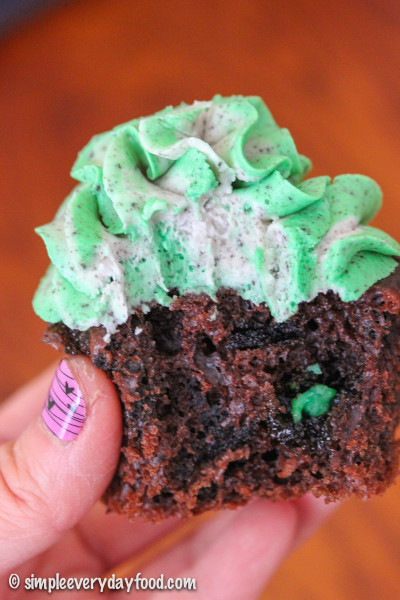
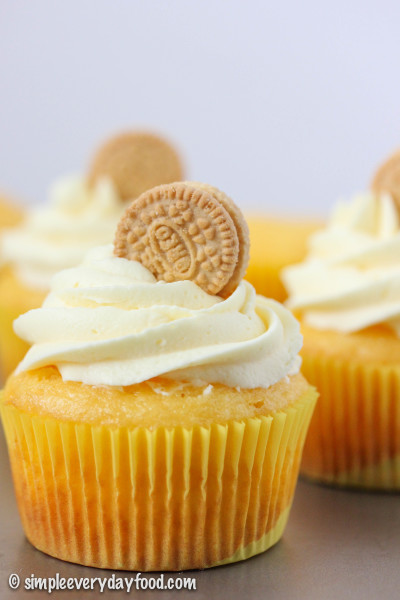
To celebrate the beginning of 2016, let’s start the year off on the right note – cupcakes!

Diet? Diet schm-iet. You can resume your healthy diet after you make these cupcakes!

golden oreo cupcakes

golden oreo cupcakes

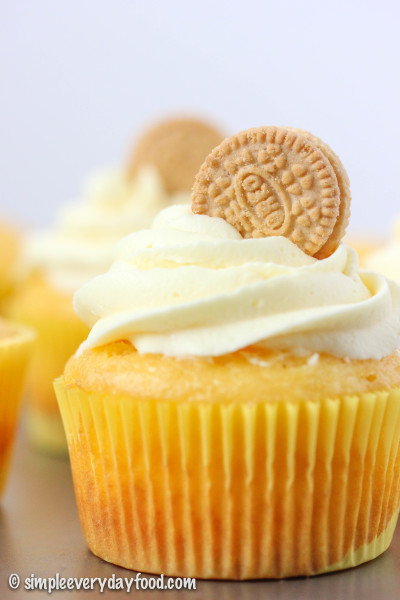
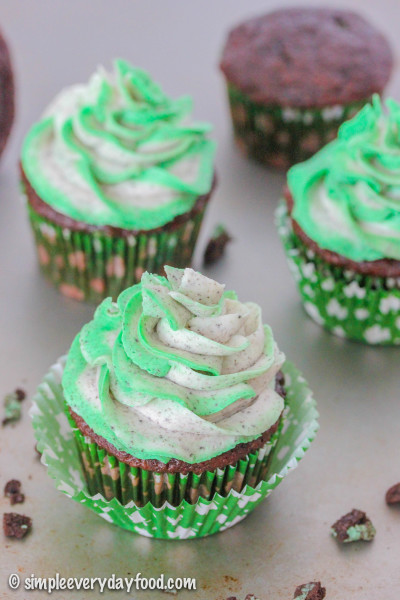
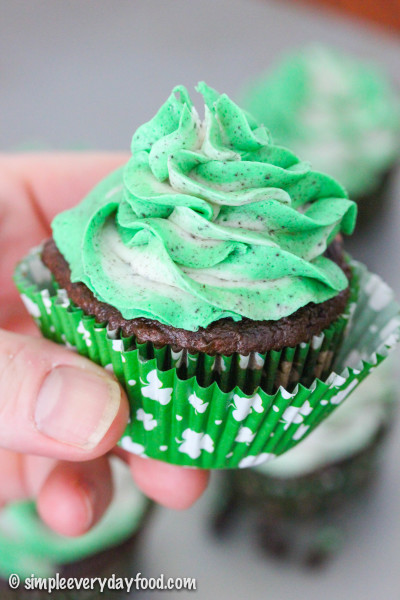
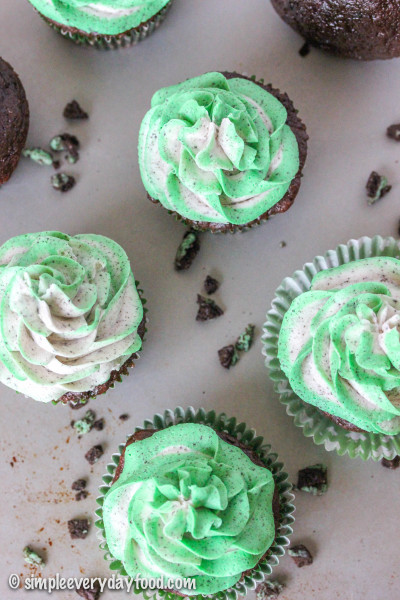
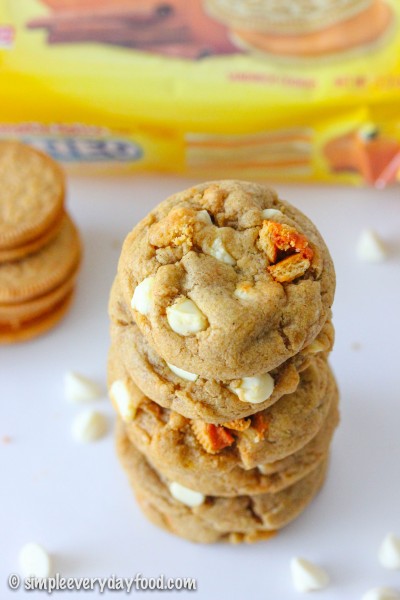
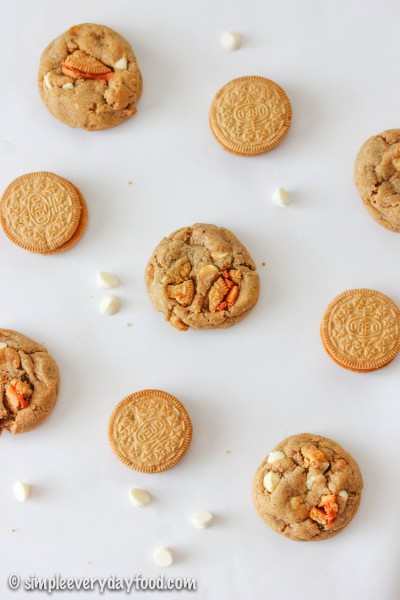
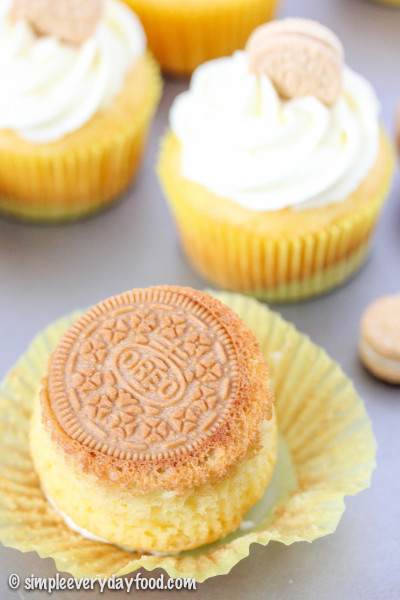
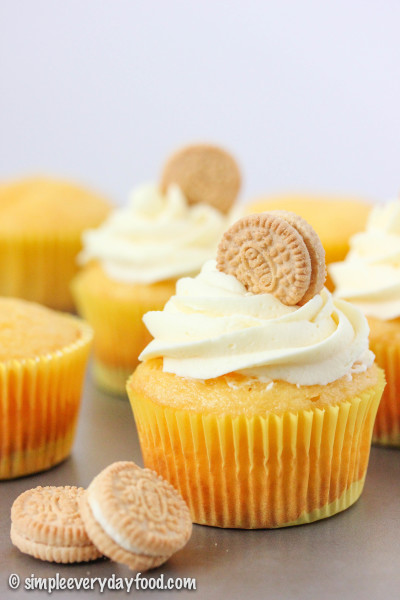
These golden Oreo cupcakes are made with a little help from a box of yellow cake mix. Each cupcake is lined with a golden Oreo on the bottom as a surprise, and is topped with homemade fresh whipped cream frosting.

golden oreo cupcakes

golden oreo cupcakes

IMPORTANT: Because the whipped cream frosting uses heavy cream as one of its main ingredients, I would recommend either making and piping the frosting right before serving. If you prefer to make the frosting ahead of time, transfer the frosting into a piping bag, store it in the refrigerator and pipe onto cupcakes when they’re ready to be served.

golden oreo cupcakes

golden oreo cupcakes

I brought these to work and they were a huge hit! Everyone loved the little Oreo surprise on the bottom and people raved about the fluffy frosting that had just the right amount of sweetness to it.

 golden oreo cupcakes

Thank you again for everyone’s support throughout the past few years and sticking with me even when posts have been scarce – let’s make 2016 a good one!

golden oreo cupakes with whipped cream frosting
Print
For the cupcakes
  1. 3 large eggs, at room temperature
  2. 1 teaspoon vanilla extract
  3. 1/2 cup sour cream
  4. 1 cup skim milk
  5. 1/3 cup vegetable oil
  6. 1 box yellow cake mix (I used a 15.25 oz box from Betty Crocker)
  7. 1 package (3.4 oz) instant vanilla pudding mix
  8. 24-26 Golden Oreos
For the frosting
  1. 2 cups heavy cream
  2. 1/2 cup powdered sugar
  3. 1/3 cup instant vanilla pudding mix
  4. 1 teaspoon vanilla extract
  5. 24-26 mini Golden Oreos, for garnish
Instructions
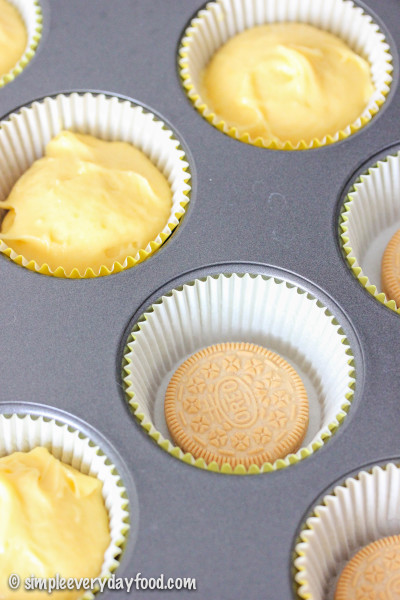
  1. Preheat oven to 375 degrees. Line cupcake pan with liners and place a Golden Oreo in each liner. Set aside.
  2. In a large mixing bowl, combine the eggs, vanilla, sour cream, milk, and oil. Beat over medium speed until combined. Then slowly add in the cake mix and pudding mix and beat until just combined. Spoon about 1 and 1/2 tablespoons worth of batter into each liner.
  3. Turn your oven down to 350 right before you place the cupcakes in. Bake for 20-22 minutes, or until an inserted toothpick comes out clean (mine took exactly 20 minutes). Remove from oven and cool for about 5 minutes before transferring them onto a wired cooling rack to cool completely.
  4. Right before you're ready to serve the cupcakes, make the frosting: beat the heavy cream over medium-high speed then gradually increase the speed to high (I used the splash guard that came with my mixer to prevent splatters all over my kitchen walls). Add in the powdered sugar, pudding mix, and vanilla extract, and continue to beat the mixture on high for about 5 minutes, or until frosting looks pale and fluffy. Pipe onto cupcakes prior to serving and top with a mini Oreo.
  5. Makes 24-26 cupcakes
Notes
  1. Because this frosting uses heavy whipping cream, the piped cupcakes cannot be stored at room temperature. I transferred the frosting into a piping bag, stored it in the refrigerator, then piped the cupcakes (as many as needed) right before serving.
  2. Otherwise the unpiped cupcakes can be stored in an airtight container at room temperature for up to 3 days.
Adapted from Living Better Together
Simple Everyday Food https://www.simpleeverydayfood.com/
Recipe adapted from Living Better Together

© Simple Everyday Food. All images & content are copyright protected. Please do not use any of my images without prior permission. If you want to republish this recipe, please re-write the recipe in your own words, or kindly link back to this post for the recipe.

Sharing is caring! Email this to someonePrint this pagePin on PinterestShare on YummlyShare on FacebookShare on Google+Tweet about this on Twitter

I wanted to title today’s post as “Because there are already 184,750,172,902 mint chocolate cupcakes out there on the Internet, so why not add another recipe to the mix”, but that title seemed a little too lengthy, plus I figured people would have a hard time remembering the name of it when I tell them about this wonderfully delicious and moist chocolate cupcake topped with some mint Oreo buttercream frosting.

IMG_3276 copy

So I settled with a concise, to-the-point title of “Mint Oreo Cupcakes”. Short and sweet, just like these cupcakes.

IMG_3275 copy

IMG_3303 copy

I’m typically not a fan of St. Patrick’s Day, because I’m not a fan of beer drinking, I’m not particularly fond of corned beef and cabbage, and I really don’t look good in green attire.

However, green = mint, which gives me an excuse to make all things mint chocolate. Like this mint chocolate fudge.

IMG_3012 copy

And these mint chocolate chip meringue cookies.

IMG_3411 copy

Oh, and have I mentioned my addiction to McDonald’s Shamrock Shakes? I don’t care what people say about them and how many calories and how many grams of sugar those things have, it’s the only thing I look forward to when St. Patrick’s Day starts rolling around the corner.

In celebration of the upcoming holiday, today I made you mint Oreo cupcakes – a light and fluffy chocolate cake studded with mint Oreo bits in every bite, topped with a mint Oreo buttercream with swirls of green for a festive look. It really is a mint-chocolate-lover’s perfect cupcake!

IMG_3321 copy

IMG_3292 copy

IMG_3288 copy

Now if you could excuse me, I’m going to go get myself a Shamrock Shake…

Shake in one hand, cupcake in the other, because that’s how everyone should celebrate St. Patty’s Day.

mint oreo cupcakes
Print
For the cupcakes
  1. 1 box Devil's Food cake mix
  2. 3 large eggs, at room temperature
  3. 1/2 cup vegetable oil
  4. 1 cup buttermilk
  5. 1/2 cup sour cream
  6. 2 teaspoon vanilla extract
  7. 20-24 mint Oreos, coarsely chopped
For the frosting
  1. 1/2 cup (1 stick) unsalted butter, at room temperature
  2. 8 oz cream cheese
  3. 1 and 1/2 teaspoon peppermint extract
  4. 1 tablespoon heavy whipping cream
  5. 3-4 cup powdered sugar
  6. Green food coloring
  7. 6-7 mint Oreo cookies, finely crushed and sifted to get rid of any large chunks
Instructions
  1. Preheat the oven to 350 degrees. Line cupcake tins with liners and set aside.
  2. Sift the cake mix over a medium bowl and set aside.
  3. In a large mixing bowl, combine the eggs, oil, buttermilk, sour cream, and vanilla extract. Whisk until smooth. Stir in the cake mix and mix until just combined. Gently fold in the chopped Oreos.
  4. Fill the cupcake liners ~3/4 fill and bake for 15-20 minutes, or until an inserted toothpick comes out clean. Remove from oven and let cool for 5 minutes before transferring them onto a wired cooling rack to cool completely.
  5. While the cupcakes are cooling, make the frosting: beat the butter and cream cheese over medium speed until smooth and fluffy. Add in the peppermint extract and heavy whipping cream. Slowly add in 3 cups of powdered sugar and beat until smooth. If the frosting is still too loose, add in 1/2 cup of powdered sugar until you reach your desired consistency. Add in the green food coloring, one drop at a time, until the color is to your liking. Gently fold in your crushed Oreos* and pipe over cooled cupcakes with your favorite piping tip.
Notes
  1. *Make sure not to overmix the crushed Oreos, otherwise your frosting will turn into a sickly, unappetizing (yet still delicious) shade of gray.
Adapted from Your Cup of Cake
Simple Everyday Food https://www.simpleeverydayfood.com/
Recipe adapted from Your Cup of Cake

© Simple Everyday Food. All images & content are copyright protected. Please do not use any of my images without prior permission. If you want to republish this recipe, please re-write the recipe in your own words, or kindly link back to this post for the recipe.

Sharing is caring! Email this to someonePrint this pagePin on PinterestShare on YummlyShare on FacebookShare on Google+Tweet about this on Twitter

I had originally planned on posting this recipe next week, but these cookies turned out so pretty (and delicious) that I couldn’t help but share it with you guys a week early!

IMG_4157 copy

IMG_4132 copy

Brian is a fan of the holiday Oreos. He swears that they taste better than the regular ones, and has tried convincing me that the Halloween ones are the best, despite the fact that I personally think they are the same thing and taste exactly the same (except for the different designs and different colored filling)… but I don’t think he believes me.

I think it’s all mental. I think somewhere in Oreo’s headquarters dwells researchers that have conducted market research that show people are more likely to buy “new” products if they change the look of the product and make them “limited edition”, even if they keep the recipe the same.

Do you think the Halloween Oreos taste better than the regular ones?

Since Halloween is just around the corner and my local grocery store has strategically placed all these tempting Oreos right by the checkout aisles, I caved and bought myself a pack of them. I knew they would make the perfect cookie with some of the Halloween sprinkles I bought at the craft store a few weeks back.

You know I’m a sucker for all things sprinkles!

IMG_4212 copy

IMG_4126 copy

I purposely made a big batch of these cookies earlier this week, knowing that I had my one-month post-LASIK checkup on Friday, and wanted to bring a couple dozen of these for the staff at the Whiting Clinic to show my appreciation of how wonderful they have been. I hope they liked them!

If you don’t want to make so many cookies at once, you can halve the recipe… although these cookies do freeze well and it never hurts to have frozen cookie dough in case of any late night cookie emergencies. Also, you can definitely use regular Oreos for this recipe (or any flavor for that matter). And it’s definitely not limited to just Halloween sprinkles either – use your favorite kind, none at all, or mix all your favorite sprinkles together to make it one colorful cookie – the possibilities are endless.

I decided to divide the batter in half since I had two different Halloween sprinkles I wanted to use – a spooky green/purple/orange one, and a candy corn colored one… the perfect pairing with some orange cream-filled Oreos! But dividing the batter into two also resulted in a lot of “transferring of the doughs”, which would’ve been a lot easier if I had two electric mixers…

IMG_4121 copy   IMG_4124 copy

IMG_4118 copy   IMG_4114 copy

Basically you’ll be making one basic cookie dough and mixing in the add-ins separately. And trust me when I tell you that your arms will thank you if you use an electric mixer – it saves time and muscle and mixes everything better since the batter will be pretty sticky. The chopped Oreos may come apart while you mix them in and that’s totally okay! You’ll get swirls of the orange filling throughout the dough which will give the cookies a beautiful festive look.

IMG_4196 copy

IMG_4150 copy

About 1.5 hours after you chill the dough, make sure to take it out and roll them into dough balls. If you chill them for too long, the dough gets hard, making it difficult to roll. Once they’re rolled into balls, you can refrigerate them up to 3 days if you don’t plan on making them right away.

I normally prefer a thick puffy cookie rather than a thin one, but these turned out so good! They’ll look slightly puffy when you take them out of the oven, but they’ll flatten out a bit as they cool. The outer edges are slightly crunchy, but the insides are oh so soft and chewy with tons of chopped Oreo cookies laced in between each bite.

IMG_4180 copy

IMG_4136 copy

So. Frickin’. Good.

halloween cake batter oreo cookies
Print
Ingredients
  1. 2 and 1/2 cups all-purpose flour
  2. 2 and 1/2 cups vanilla cake mix (I used Betty Crocker)
  3. 1 teaspoon baking soda
  4. A pinch of salt
  5. 1 and 1/2 cups unsalted butter, at room temperature
  6. 1 cup granulated sugar
  7. 1 cup dark brown sugar, packed
  8. 2 eggs, at room temperature
  9. 3 teaspoons vanilla extract
  10. 1 cup Halloween sprinkles*
  11. 20 Halloween Oreos, roughly chopped**
Instructions
  1. 1. In a large bowl, sift together flour, cake mix, baking soda, and salt. Set aside.
  2. 2. Using an electric stand mixer with the paddle attachment, cream the softened butter and sugars together on medium speed until creamy and smooth. Add in the eggs, one at a time, beating well in between each addition. Then add in the vanilla extract and mix until combined, scraping down the sides in between if needed.
  3. 3. Slowly stir in the dry ingredients to the wet ingredients and gradually increase the speed to low-medium until everything is combined.
  4. *** If you plan on using only one kind of sprinkles, go on to Step 4 ***
  5. *** If you plan on using two different kinds of sprinkles, skip to Step 5. ***
  6. 4. Add in the sprinkles and mix on low. Then add in the chopped Oreos and mix on low until everything is evenly distributed.
  7. 5. Divide the batter in half (approximately is fine), and place one half of the dough in a separate bowl (we'll call this Dough #2). Add in Sprinkle #1 to the dough that is still in the mixer bowl, mix on low and then add in the chopped Oreos until combined. Remove Dough #1 into a bowl and set aside. Put Dough #2 into mixer bowl, mix in Sprinkle #2 and chopped Oreos until combined.
  8. 6. Cover bowl(s) with plastic wrap and refrigerate dough for at least 1.5 hours. Roll dough into balls (I used a 1.5 tablespoon cookie scoop) and place in a tupperware, cover tightly, and refrigerate until ready to bake. Cookie dough can be refrigerated up to 3 days.
  9. 7. Preheat oven to 350 degrees and line baking sheets with silicone baking mats or parchment paper. Bake for 10-12 minutes and let cookies cool on the baking sheet for 5 minutes before removing them onto a wired cooling rack to cool completely. Store cookies at room temperature in an airtight container for up to 7 days.
  10. Makes 60 cookies
Notes
  1. *If you plan on using two different kinds of sprinkles like I did, you'll need 1/2 cup of each
  2. **If you plan on making two different batches, divide the roughly chopped Oreos into two separate bowls
Adapted from Sally's Baking Addiction
Simple Everyday Food https://www.simpleeverydayfood.com/
Recipe adapted from Sally’s Baking Addiction

© Simple Everyday Food. All images & content are copyright protected. Please do not use any of my images without prior permission. If you want to republish this recipe, please re-write the recipe in your own words, or kindly link back to this post for the recipe.

Sharing is caring! Email this to someonePrint this pagePin on PinterestShare on YummlyShare on FacebookShare on Google+Tweet about this on Twitter

IMG_4033 copy   

So while I’m sitting here at my local coffee shop writing today’s post, I contemplated about telling you guys the horrifying experience I had at this very same coffee shop just a few days ago, which involved two small birds flying into the glass window with a loud “thud!” right next to where I was sitting and landing on the sidewalk. And a phone call to a local emergency veterinary clinic regarding said collision that left me angry and frustrated. I started writing and then proceeded to deleted the two paragraphs I have written, because I figured this story is probably pretty dang unappetizing for a food blog, and the last thing I want to do is to turn you guys off.

So let’s start over…. despite the numerous pumpkin recipes I have posted here on SEF, would you believe me if I told you there once was a time where I hated pumpkin-flavored anything? I still don’t care for pumpkin pie to this day, but I do like some things that are pumpkin-spice-flavored. I have been seeing a lot of seasonal pumpkin flavor-related items on my Instagram feed lately and a lot of people stocking up on all things pumpkin (apparently Trader Joe’s have transformed itself into America’s pumpkin headquarters), but other than these pumpkin spice Oreo cookies, I have yet to stock up my pantry with any of these seasonal items.

I have to admit, these Oreos are pretty dang amazing. I had to hoard a stack of these babies and tuck them away in my cupboard for this recipe, just in case I didn’t have the self control to stop eating them.

IMG_3990 copy

IMG_3994 copy

These cookies are soft, puffy, and filled with pumpkin deliciousness! You may remember these ooey gooey pumpkin chocolate chip cookies I made last year. This time, I switched out the milk chocolate chips for white chocolate chips instead, and I think I actually like these better!

IMG_4034 copy

IMG_4022 copy

The white chocolate chips are a perfect complement to the golden Oreo cookies. All the flavors shine through and the ingredients don’t overpower one another. They are slightly crunchy on the outside, but so soft and chewy on the inside. And when you get a bite with the chopped Oreo cookies, it’s like a little bite of heaven.. so good!

IMG_4037 copy

IMG_4018 copy

IMG_4008 copy

soft and chewy pumpkin spice oreo cookies
Print
Ingredients
  1. 1/2 cup (1 stick) unsalted butter, melted and cooled
  2. 3/4 cup granulated sugar
  3. 1/4 cup dark brown sugar
  4. 2 teaspoons vanilla extract
  5. 1/4 pumpkin puree
  6. 2 cups all-purpose flour
  7. 1 teaspoon baking soda
  8. 2 teaspoons cornstarch
  9. 1/4 teaspoon salt
  10. 1 teaspoon ground cinnamon
  11. 1/8 teaspoon ground nutmeg
  12. 1/4 teaspoon ground cloves
  13. 1/4 teaspoon ground ginger
  14. 1/3 cup white chocolate chips
  15. 1/2 cup pumpkin spice oreos, coarsely chopped
Instructions
  1. In a medium sized bowl, combine the flour, baking soda, cornstarch, salt, cinnamon, nutmeg, cloves, and ginger. Set aside.
  2. Using an electric mixer with the paddle attachment, beat together the melted butter and both sugars. Add in the vanilla extract and pumpkin puree. Mix over medium speed until combined. Gently stir in the white chocolate chips and chopped Oreos.
  3. Cover and refrigerate for at least 30 minutes. Meanwhile, preheat the oven to 350 degrees and line two baking sheets with parchment paper and set aside.
  4. Using a medium cookie scoop (about 1.5 tablespoons), drop dough balls approximately 1" apart on the baking sheets. Bake for 8-10 minutes, rotating the pans halfway to ensure even baking. Remove from oven and gently press the tops with the back of a spoon if the cookies are too puffy for your liking (I did, because I love my cookies with slight cracks but yet still slightly puffy). Let cool on the baking sheet for 5-10 minutes before transferring them to a wired cooling rack to cool completely. Cookies can be stored in an airtight container for up to 5 days.
  5. Makes 2 dozen cookies
Adapted from The Domestic Rebel
Simple Everyday Food https://www.simpleeverydayfood.com/
Recipe adapted from The Domestic Rebel

© Simple Everyday Food. All images & content are copyright protected. Please do not use any of my images without prior permission. If you want to republish this recipe, please re-write the recipe in your own words, or kindly link back to this post for the recipe.

Sharing is caring! Email this to someonePrint this pagePin on PinterestShare on YummlyShare on FacebookShare on Google+Tweet about this on Twitter

I don’t know about the rest of the country, but the weather here in Minnesota has been nothing but gorgeous the past few weeks. Every day has been sunny with a few puffs of clouds in the sky, and somewhere between 75-85 degrees. After a long, brutal winter, I was more than ready to dust off the boxes where my summer shorts and tank tops have lived for the past 7 months and bring them back into my regular clothing “circulation”. It’s always a monumental day when I deem the weather warm (and stable) enough to pack up my winter boots, and put all my scarves, gloves, hats, and jackets away in the closet…. it signifies the arrival of warmer weather, longer days, shorts and flip flops, grilling, ice cold lemonade, and everything summer is about.

You know what else is a universal icon of summer? S’mores.

IMG_3522 copy

IMG_3516 copy

For someone who doesn’t care for camping, I really am a big fan of s’mores – I even have an entire section in my recipe book dedicated to all things s’mores! It’s without a doubt my second favorite flavor combination of all time. It lands in 2nd place because nothing – I mean nothing – can top mint + chocolate in my world. Whoever decided to sandwich a toasted gooey marshmallow with some chocolate in between graham crackers is a genius.

These truffles are super easy to make and requires no baking at all! All you really need is a food processor, which means they’re quick… and you won’t even have to make your house any hotter by turning on the oven. I modified the original recipe by adding several squares of graham crackers into the Oreo/cream cheese base, just to amplify the s’mores flavor, and let me tell you, everyone thought these were deeeelicious!

IMG_3531 copy

It even has a little mini marshmallow surprise inside when you take a bite out of it!

IMG_3519 copy

IMG_3521 copy

I have made several different kinds of truffles in the past, but these hands down take the crown – they are without a doubt the best tasting truffles I’ve ever made. It’s a bold statement, but that’s how good they were. They were so good that Brian alone ate 4 of them one day when I was at work, and I ended up having to make another batch of them to share with my coworkers!

IMG_3539 copy

IMG_3525 copy

Oreo s'more truffles
Print
Ingredients
  1. 15 original Oreo cookies
  2. 6 graham cracker squares, divided
  3. 2.5 oz low fat cream cheese
  4. ~11 mini marshmallows
  5. 8 oz chocolate CandiQuik
  6. ~2 tablespoons marshmallow bits (optional)
Instructions
  1. In a food processor, pulse 2 squares of graham cracker squares until it turns into fine crumbs. Place in a small bowl and set aside.
  2. In the same food processor, pulse the Oreo cookies and the remaining 4 graham cracker squares until roughly crumbled. Add in the cream cheese and pulse on HIGH until the mixture comes together. The mixture turns into a doughy consistency and should not be crumbly - you should easily to able to form them into balls without it falling apart in your hands.
  3. Roll the mixture into balls (about 1-1.5 tablespoon each) and place on a parchment paper-lined baking sheet. Take each ball and make an indentation in the middle with your thumb, and place a mini marshmallow in the center. Reform the truffle mixture back into a ball, making sure the mixture encases the mini marshmallow entirely. Repeat with the rest of the truffles. Place the truffles in the refrigerator to chill.
  4. While your truffles are chilling, make the candy coating: using a double boiler, melt the CandyQuik until smooth. Working one truffle at a time, place a ball in the CandyQuik while spooning the chocolate over the truffle with a spoon. Gently lift the ball up with a fork and gently tap off the excess candy coating.
  5. Place the truffle onto the baking sheet and immediately garnish with graham cracker crumbs and marshmallow bits. Repeat with the rest of the truffles. Return decorated truffles into refrigerator to chill. Store in an airtight container in a cool dry place for up to 5 days (if they even last that long).
  6. Makes 11 truffles
Adapted from Crazy for Crust
Simple Everyday Food https://www.simpleeverydayfood.com/
I personally love to use CandyQuik to coat all my truffles. You can also use the Wilton candy melts or Almond Bark if those are the kind you prefer. I also personally prefer to melt all my chocolates and candy coatings over a double boiler rather than throwing them in a microwave or directly over a heat source – I’ve tried microwaving them in the past, but they just never seemed to work as well for me as using a double boiler. However, if you have better luck than I do with a microwave or over a stove, feel free to do it that way – it’s probably faster anyway :)

Recipe adapted from Crazy for Crust

© Simple Everyday Food. All images & content are copyright protected. Please do not use any of my images without prior permission. If you want to republish this recipe, please re-write the recipe in your own words, or kindly link back to this post for the recipe.

Sharing is caring! Email this to someonePrint this pagePin on PinterestShare on YummlyShare on FacebookShare on Google+Tweet about this on Twitter