everyday food made simple

I wanted to title today’s post as “Because there are already 184,750,172,902 mint chocolate cupcakes out there on the Internet, so why not add another recipe to the mix”, but that title seemed a little too lengthy, plus I figured people would have a hard time remembering the name of it when I tell them about this wonderfully delicious and moist chocolate cupcake topped with some mint Oreo buttercream frosting.

IMG_3276 copy

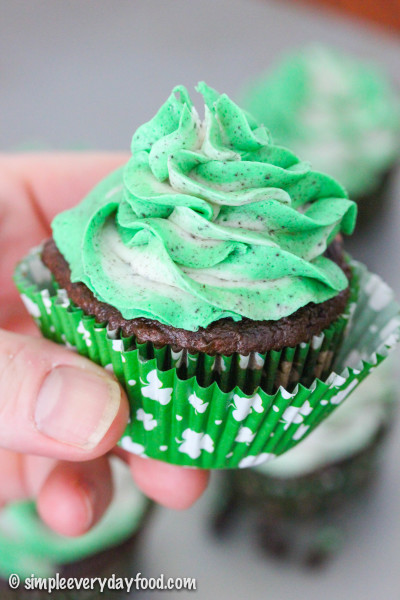
So I settled with a concise, to-the-point title of “Mint Oreo Cupcakes”. Short and sweet, just like these cupcakes.

IMG_3275 copy

IMG_3303 copy

I’m typically not a fan of St. Patrick’s Day, because I’m not a fan of beer drinking, I’m not particularly fond of corned beef and cabbage, and I really don’t look good in green attire.

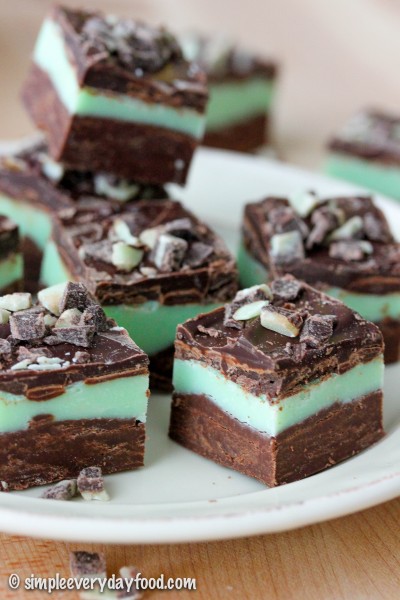
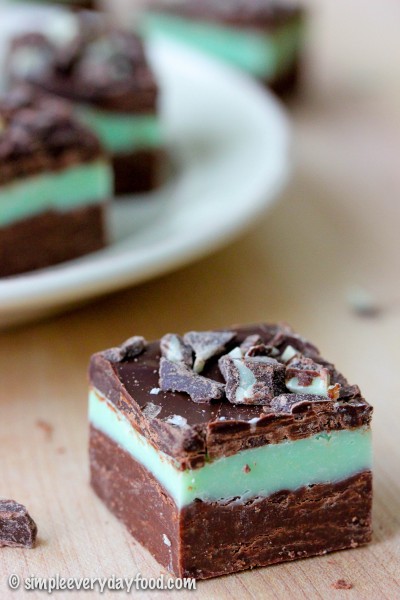
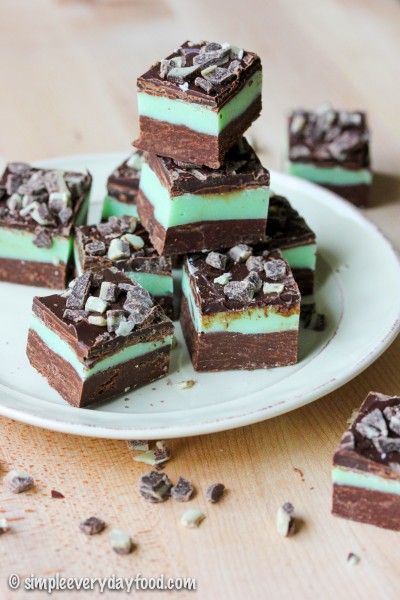
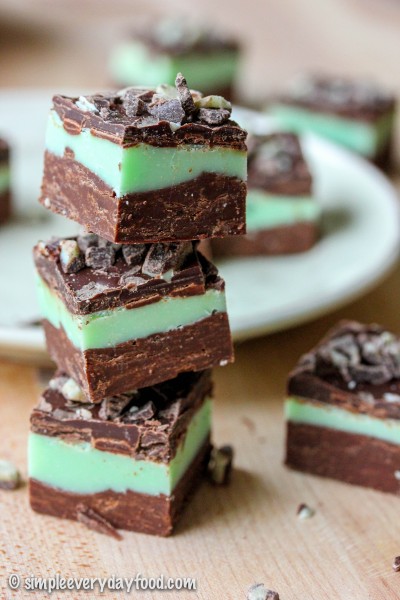
However, green = mint, which gives me an excuse to make all things mint chocolate. Like this mint chocolate fudge.

IMG_3012 copy

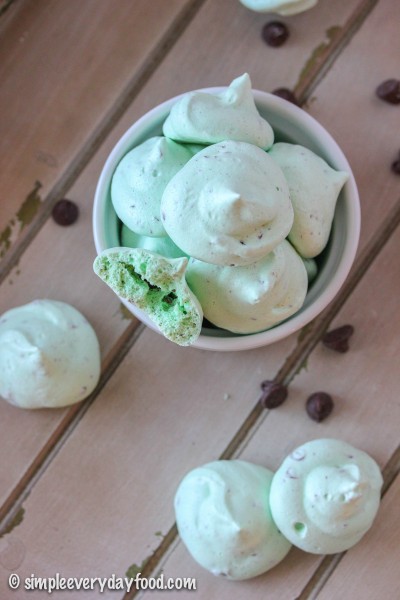
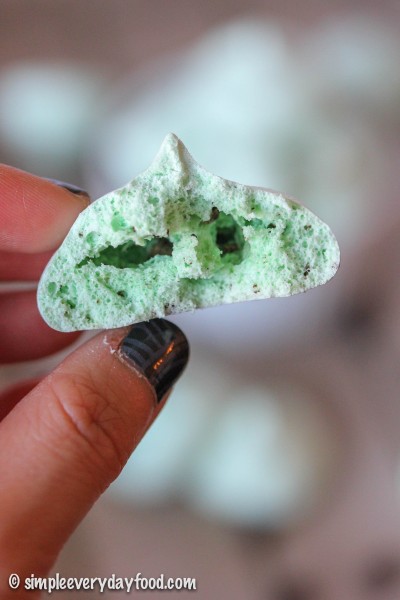
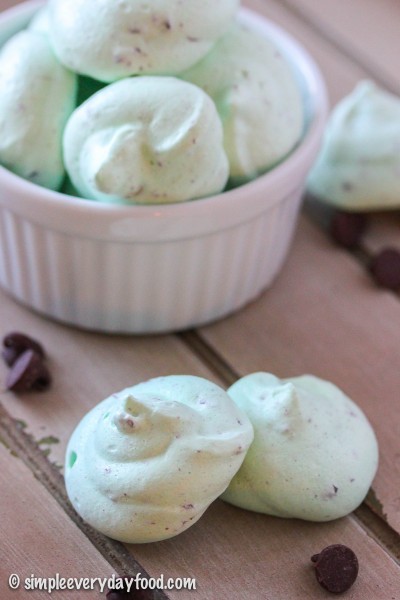
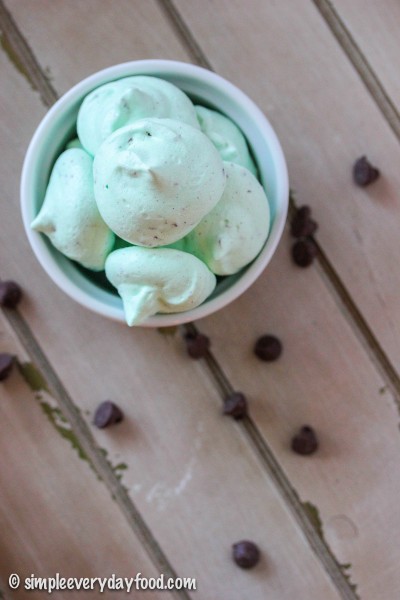
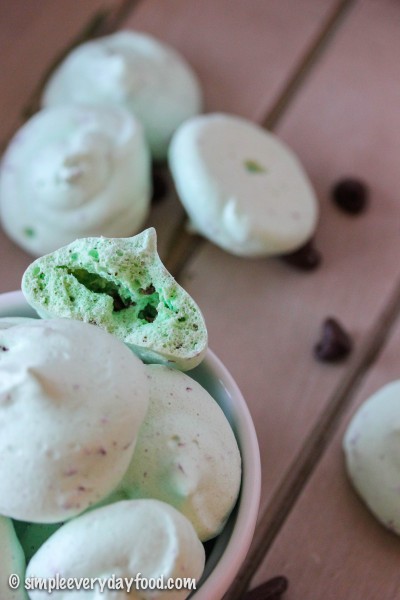
And these mint chocolate chip meringue cookies.

IMG_3411 copy

Oh, and have I mentioned my addiction to McDonald’s Shamrock Shakes? I don’t care what people say about them and how many calories and how many grams of sugar those things have, it’s the only thing I look forward to when St. Patrick’s Day starts rolling around the corner.

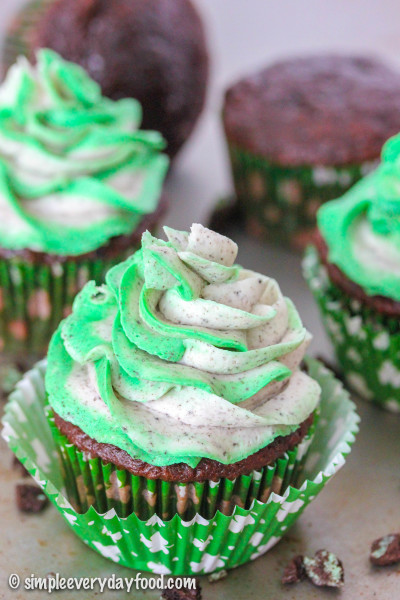
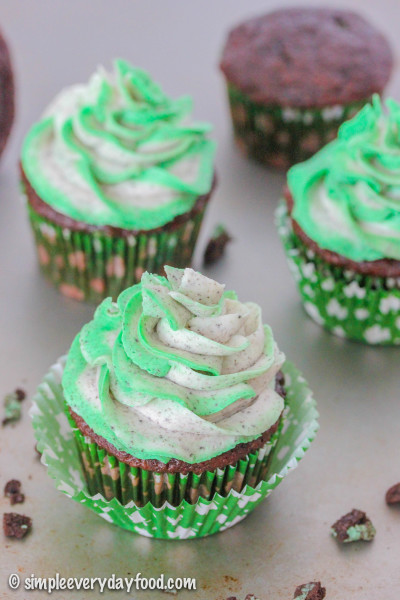
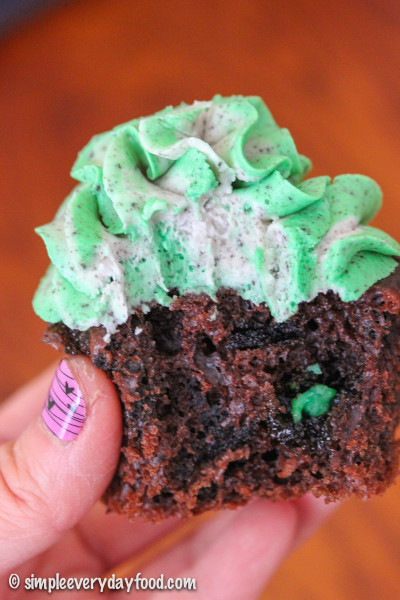
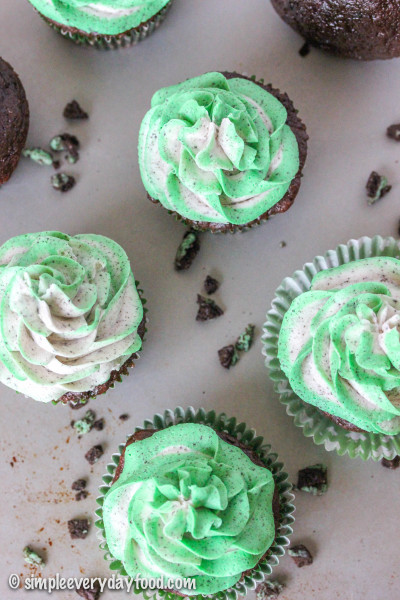
In celebration of the upcoming holiday, today I made you mint Oreo cupcakes – a light and fluffy chocolate cake studded with mint Oreo bits in every bite, topped with a mint Oreo buttercream with swirls of green for a festive look. It really is a mint-chocolate-lover’s perfect cupcake!

IMG_3321 copy

IMG_3292 copy

IMG_3288 copy

Now if you could excuse me, I’m going to go get myself a Shamrock Shake…

Shake in one hand, cupcake in the other, because that’s how everyone should celebrate St. Patty’s Day.

mint oreo cupcakes
Print
For the cupcakes
  1. 1 box Devil's Food cake mix
  2. 3 large eggs, at room temperature
  3. 1/2 cup vegetable oil
  4. 1 cup buttermilk
  5. 1/2 cup sour cream
  6. 2 teaspoon vanilla extract
  7. 20-24 mint Oreos, coarsely chopped
For the frosting
  1. 1/2 cup (1 stick) unsalted butter, at room temperature
  2. 8 oz cream cheese
  3. 1 and 1/2 teaspoon peppermint extract
  4. 1 tablespoon heavy whipping cream
  5. 3-4 cup powdered sugar
  6. Green food coloring
  7. 6-7 mint Oreo cookies, finely crushed and sifted to get rid of any large chunks
Instructions
  1. Preheat the oven to 350 degrees. Line cupcake tins with liners and set aside.
  2. Sift the cake mix over a medium bowl and set aside.
  3. In a large mixing bowl, combine the eggs, oil, buttermilk, sour cream, and vanilla extract. Whisk until smooth. Stir in the cake mix and mix until just combined. Gently fold in the chopped Oreos.
  4. Fill the cupcake liners ~3/4 fill and bake for 15-20 minutes, or until an inserted toothpick comes out clean. Remove from oven and let cool for 5 minutes before transferring them onto a wired cooling rack to cool completely.
  5. While the cupcakes are cooling, make the frosting: beat the butter and cream cheese over medium speed until smooth and fluffy. Add in the peppermint extract and heavy whipping cream. Slowly add in 3 cups of powdered sugar and beat until smooth. If the frosting is still too loose, add in 1/2 cup of powdered sugar until you reach your desired consistency. Add in the green food coloring, one drop at a time, until the color is to your liking. Gently fold in your crushed Oreos* and pipe over cooled cupcakes with your favorite piping tip.
Notes
  1. *Make sure not to overmix the crushed Oreos, otherwise your frosting will turn into a sickly, unappetizing (yet still delicious) shade of gray.
Adapted from Your Cup of Cake
Simple Everyday Food https://www.simpleeverydayfood.com/
Recipe adapted from Your Cup of Cake

© Simple Everyday Food. All images & content are copyright protected. Please do not use any of my images without prior permission. If you want to republish this recipe, please re-write the recipe in your own words, or kindly link back to this post for the recipe.

Sharing is caring! Email this to someonePrint this pagePin on PinterestShare on YummlyShare on FacebookShare on Google+Tweet about this on Twitter

IMG_3411 copy

Ever since I was little, I hated sharing food. This doesn’t mean I don’t like sharing food that I make (it’s quite the opposite, actually); I just simply hated sharing whatever food I had on my plate. If it’s on my plate, more often than not I would really prefer not to share it.

Let me give you an example: Back in elementary school, whenever my dad would take us to McDonald’s as a rare treat, he would always finish his meal first and patient watch us eat. Occasionally he would reach across the table and steal a few fries off my tray. Me being the selfish potato-loving child as I was, would always whine and tell him that it was mine and he wasn’t allowed to eat my fries. My poor father, who is always so accommodating and patient with us, would always just laugh and apologize, despite the fact he just spent his hard-earned money to take us out for a treat.

I can always laugh about it and refer back to a particular FRIENDS episode, which coincidentally also involved french fries.

I knew Joey had always been my favorite for a reason……

One good thing about these meringue cookies is that it makes so many that you won’t feel bad about sharing them!

IMG_3416 copy

After failing three miserable times trying to make meringue cookies in the past, I have finally picked up a few tips and tricks:

  1. Don’t cut corners. You may think using just egg whites is a waste of egg yolks, and decide to buy some “egg whites in a carton” at the store – DON’T. This may or may not have happened during one of my failed attempts…
  2. Be patient. Let the egg whites thoroughly come to room temperature. Find something to distract yourself, whether it’s Facebook, Instagram, Pinterest, cleaning, running errands, or enjoying the nice weather outside.
  3. Warm your mixing bowl and whisk right before you start beating the egg whites. I actually turned on our fireplace and stuck the mixing bowl right in front of it until it was warm to the touch – it worked really well!
  4. If you’re adding things to your meringue batter (in this case, mini chocolate chips), make sure the mix-ins are small enough to go through your decorative piping tips. I initially had the perfect idea of using the star tip for these to make them into cute little pretty shapes, but realized that the chocolate chips were clogging the tips and had to dump all my batter out, switch tips on my piping bag, and then start all over..

Bake these babies low and slow in the oven. Once the cooking time is up, turn the oven off and let the meringue cookies sit in the oven to cool overnight. They’ll turn nice and melt-in-your-mouth-crispy the next morning. Another thing I learned was to store these in a cool, dry place – if the temperature is too warm, they actually start to get a little sticky.

IMG_3407 copy

IMG_3385 copy

So go make a batch of these! They’re simple to make, but they look (and sound) fancy, and your friends will think you’re amazing for making these yummy delicate treats. And there will be more than plenty to go around for everyone :)

IMG_3384 copy

mint chocolate chip meringue cookies
Print
Ingredients
  1. 2 egg whites, at room temperature
  2. 1/4 teaspoon cream of tartar
  3. 1/4 teaspoon salt
  4. 2/3 cup granulated sugar
  5. 1/8 teaspoon mint extract
  6. ~7 drops of green food coloring (more or less depending on how green you want your meringues to be)
  7. 1/3 cups mini chocolate chips
Instructions
  1. Let egg whites come to room temperature and make sure your mixing bowl and whisk are just slightly warmer than room temperature (I placed mine in front of the fireplace for a few minutes).
  2. Preheat oven to 225 degrees. Line two baking sheets with parchment paper and set aside.
  3. Using an electric mixing bowl with the whisk attachment, beat egg whites, cream of tartar, and salt on high speed until soft peaks form*.
  4. Add in the sugar, about one tablespoon at a time, beating continuously until stiff peaks form**.
  5. Beat in the mint extract and green food coloring. Gently fold in the chocolate chips.
  6. Transfer the meringue to a pastry bag with a large round open tip. Pipe meringues about 1" apart and bake for 60 minutes. Turn off the oven and let the meringues stand in the closed oven overnight. Store in an airtight container in a cool dry place.
Notes
  1. *Soft peaks = tips curl when you lift the whisk straight up
  2. **Stiff peaks = tips stand straight up when you lift the whisk straight up
Adapted from Better Homes and Gardens
Simple Everyday Food https://www.simpleeverydayfood.com/
Recipe adapted from Better Homes and Gardens

© Simple Everyday Food. All images & content are copyright protected. Please do not use any of my images without prior permission. If you want to republish this recipe, please re-write the recipe in your own words, or kindly link back to this post for the recipe.

Sharing is caring! Email this to someonePrint this pagePin on PinterestShare on YummlyShare on FacebookShare on Google+Tweet about this on Twitter

If you haven’t heard, I was offered a brand spankin’ new full time job about a month ago and just started it this week ! I’m super ecstatic about it, as I wasn’t really expecting to be able to find a job (at a place I really wanted to work at) this fast, just a few weeks after graduation. Of course, I wasn’t able to do it without the help of some wonderful people I listed as my references. As far as I know, a few of them were contacted by this employer, and they must’ve wrote a bunch of nice things about me, and I’m forever grateful about it :)

This will be my first ever full-time big girl job, and I took the entire process very seriously (more than usual) – from the initial submission of my resume and cover letter, to the actual interview, and the thank you letters thereafter – I applied everything I have learned in my career capstone class and meticulously read and reread everything prior to hitting the “submit” button. I’m glad a little bit of networking and hard work pays off… I love it so far!

This whole journey really made me realize that no matter where you go in life and what big milestones you have achieved, you really can’t get there without the help of people along the way – whether they are friends, family, coworkers, or even strangers… many people played a part in this job hunting process, and even now, I feel just as grateful as I did the day I was offered the position.

Ever since I was little, my mom had ingrained in my brain that it is important to express your gratitude towards those that have helped you in life. And that’s why the day after I got this new job, I decided to make some sweets for those people who took time out of their busy schedules to write recommendation letters for me. I figured if they were kind enough to take time to write nice things about me, the least I can do is take time out of my day to make a little something to show them how much I appreciate their efforts.

IMG_3006 copy

IMG_3012 copy

I would’ve made cookies, but one of my references happened to be gluten free, which is why I decided to make fudge instead. I’ve never made fudge in my entire life before, but since it’s a new year, and new years are all about trying new things, I decided to give it a whirl. And since I’m still on this mint chocolate craze, mint chocolate fudge it was (it’s only my favorite chocolate combination, if you haven’t figured that out already).

IMG_3009 copy

These little fudge squares are just like giant Andes mints and they’re so easy to make! The bottom layer consists of sweet chocolate chips with condensed milk, followed by another fudgey layer of white chocolate chips, a little bit more condensed milk, peppermint extract, and a few drops of food coloring. The thin top chocolate layer has a nice little crunch, which contrasts nicely with the bottom two smooth velvety fudgey layers. Heaven, I tell ya.

IMG_3027 copy

IMG_3028 copy

I have never had luck with melting chocolate in the microwave or directly over a heat source. It just somehow never works for me, so for all chocolate-melting recipes, I always always always melt my chocolates using a makeshift double boiler over low heat – it heats the chocolate up a lot slower, but it also gives me less anxiety. I take it as a fair trade off.

If you’ve never made fudge (like me) before, I just want to warn you that when you melt the chocolate chips with the condensed milk, the mixture is going to be thick. I was expecting the mixture to be nice and smooth and runny like melted chocolate, but nooooo… it was thick. So thick that the only good utensil to stir it with is with a sturdy wooden spoon.. and that if you stir it constantly, your arm is going to get tired. I initially thought my chocolate had seized up on me, and I started to get very frustrated. Mind you this was at 9:30 a.m. and I’m pretty sure Brian decided to stay the heck away from the kitchen for the rest of the morning.

Moral of the story: chocolate chips + condensed milk = thick mixture (read: don’t freak out).

IMG_3025 copy

mint chocolate fudge
Print
Ingredients
  1. 2.5 cups semi-sweet chocolate chips, divided
  2. One 14-oz can sweetened condensed milk, divided
  3. 1.5 cups white chocolate chips
  4. 1 teaspoon peppermint extract
  5. 2-3 drops green food coloring
  6. 1 teaspoon shortening
  7. 1/2 cups Andes Creme de Menthe Baking Chips
Instructions
  1. Line an 8x8" baking pan with aluminum foil and spray generously with nonstick cooking spray. Set aside.
  2. Using a double boiler, melt 1.5 cups of the semi-sweet chocolate chips with 3/4 cups of the sweetened condensed milk over low heat. Stir occasionally until smooth, then pour mixture into the baking pan. Spread mixture evenly (I used an offset spatula), and place in the fridge to chill.
  3. While the chocolate mixture is chilling in the fridge, melt the white chocolate chips with the remaining sweetened condensed milk over a double boiler over low heat, stirring until smooth. Remove from heat and add in the peppermint extract and green food coloring. Stir until the mixture is even in color, then pour mint layer evenly over chilled chocolate layer and place back into the refrigerator.
  4. Melt the remaining 1 cup of semi-sweet chocolate chips and the shortening over a double boiler. Stir until smooth. Pour evenly over the mint layer, top generously with Andes Creme de Menthe baking chips, and chill in fridge for at least 3-4 hours until set.
  5. Cut into small squares before serving and store in the refrigerator for up to two weeks.
  6. Makes about 36 small squares
Adapted from Sally's Baking Addiction
Simple Everyday Food https://www.simpleeverydayfood.com/
Even though I’m not a big fudge fanatic, everyone who were able to get their hands on a little piece of this decadent minty goodness all said it was phenomenal!

Recipe adapted from Sally’s Baking Addiction

© Simple Everyday Food. All images & content are copyright protected. Please do not use any of my images without prior permission. If you want to republish this recipe, please re-write the recipe in your own words, or kindly link back to this post for the recipe.

Sharing is caring! Email this to someonePrint this pagePin on PinterestShare on YummlyShare on FacebookShare on Google+Tweet about this on Twitter

After a few months after it came out in theaters, yesterday I finally rented Monsters University on DVD. Has anyone else seen it? The first one was perhaps my favorite Pixar movie ever, so naturally I’ve been itching to watch the prequel to it ever since it came out. I absolutely loved it and thought little Mike Wozowski was the cutest thing ever. I swear I’m just a 12 year old kid in a 27-year-old body….

After lounging around in my PJs all day yesterday, I finally mustered enough energy to go to Kowalski’s to return it last night. You know you’re in the medical field when you say “let me go upstairs and change into something ‘normal’ real quick” before going to store, means changing into a pair of scrub pants. Not yoga pants, not jeans… scrubs. Apparently it’s what I now consider “normal” attire.

I didn’t even notice it until Brian laughed and pointed that out to me at the store. In my defense, I’ve been wearing scrubs 5-6 days a week for the past 8 weeks. I go to work, I wear scrubs. I go to class, I wear scrubs. I go run errands and grocery shop after work, I’m in scrubs. I don’t really go anywhere else so I don’t get to wear a whole lot of “normal people” clothes anymore. On my day off, I don’t really go places so I stay in my PJs.

[sigh]

Since it’s December and December marks the official start of the Christmas season, it’s only right for:

1. Hanging up Christmas decorations around the house…. (Bentley – @boxerbentley on Instagram – helped hang Christmas lights)

photo

and

2. The first post of December to be something that involved mint and chocolate.

News flash: I’m obsessed with anything that involved mint and chocolate. Every year when stores stock their shelves up with anything mint chocolate, I go crazy and start hoarding all things mint chocolate, enough to last me for the next 11 months. Candy cane coffee, mint M&Ms, peppermint M&Ms, candy cane Oreos, peppermint bark, Andes peppermint candies, all kinds of mint chocolate baking chips, Dove mint chocolates… you name it, I probably have it in my cupboard.

IMG_2379 copy

#mintchocolate4life

This recipe is made in the similar manner I made my pumpkin spice puppy chow back in November – seasonal Hershey’s Kisses mint truffles melted down, poured over gluten free chocolate Chex, coated with powdered sugar. It’s sweet, minty, and really addicting! They’re so addicting that I’m bringing some to work today to share so I don’t eat 5738293 grams of sugar in two days….

IMG_2388 copy

IMG_2390 copy

mint chocolate puppy chow
Print
Ingredients
  1. 1.5 bags of 10-oz Hershey's mint truffle Kisses, unwrapped
  2. One 14.25-oz box of chocolate Chex cereal
  3. 3 cups powdered sugar
Instructions
  1. Pour the Chex cereal into a large bowl and set aside.
  2. Using a double boiler, melt the unwrapped Hershey's Kisses until smooth, stirring occasionally. Pour chocolate mixture over the Chex cereal. Stir to make sure all the cereal is coated with chocolate.
  3. Pour the powdered sugar into the large bowl of cereal mixture. Toss and stir thoroughly to make sure everything is evenly coated with the powdered sugar.
  4. Store in an airtight container for up to 7 days.
  5. Makes about 8 cups
Simple Everyday Food https://www.simpleeverydayfood.com/
Along with being delicious, this recipe is also super easy to make. It only requires 3 ingredients! Three! And there are only about 3 steps to the whole thing as well. From start to finish, it took me less than 30 minutes to make. No baking, no cooling, and not a whole lot of measuring.

IMG_2394 copy

IMG_2385 copy

Yep, you’re welcome :)

If you’ve been following my blog since the beginning of time, you’ll know that I’m a fan of puppy chow… here are a few other versions for you to try!

pumpkin spice puppy chow

IMG_2075 copy

apple pie spice puppy chow

IMG_1768 copy

orange creamsicle puppy chow

IMG_1600

© Simple Everyday Food. All images & content are copyright protected. Please do not use any of my images without prior permission. If you want to republish this recipe, please re-write the recipe in your own words, or kindly link back to this post for the recipe.

Sharing is caring! Email this to someonePrint this pagePin on PinterestShare on YummlyShare on FacebookShare on Google+Tweet about this on Twitter