everyday food made simple

grapefruit poppyseed muffins  

So the other day we had a real life FRIENDS episode played out in our house.

For all you FRIENDS fanatics, remember the episode where Phoebe’s smoke detector started beeping so she thought taking the battery out would fix it but the stupid thing kept on beeping anyway? Then she got so mad she whacked that thing into pieces but the smoke detector still refused to die?

Yeaaaaaaah. That totally happened this week. Our smoke detector in the spare room started beeping one morning while we were getting ready for work, but after a half hour of beeping, it stopped. On the way back from the gym that day, I asked the mister if we should stop by the store to get batteries for it… he figured since it had stopped beeping, we should be fine… NOT.

PSA: If your smoke detector ever ever ever beeps, please please please for your own insanity’s sake, CHANGE THE BATTERIES. Seriously.

Because later that evening, the dang thing started beeping again. Brian ripped the thing off the ceiling and guess what? It kept beeping. We then decided that maybe taking the battery out would maybe fix the problem… except it didn’t. So we tossed it in the garage, hoping to be able to sleep in peace without getting woken up by the fire department (you know, like how they woke Phoebe up because she tossed hers down the trash chute?).

But wait, it gets better! Five minutes after we laid down, the smoke detector in the hallway started beeping… no joke. Seriously. It’s like they talk to each other…

“Hey hallway detector! I’m getting banished to the garage so keep the beeping going!” Ugh.

Needless to say, we had a terrible night’s sleep (we were just too lazy to get back out of  bed to rip the other one off), and we woke up super grouchy.

You know what would’ve made my morning a little bit more tolerable? These muffins.

grapefruit poppyseed muffins

grapefruit poppyseed muffins

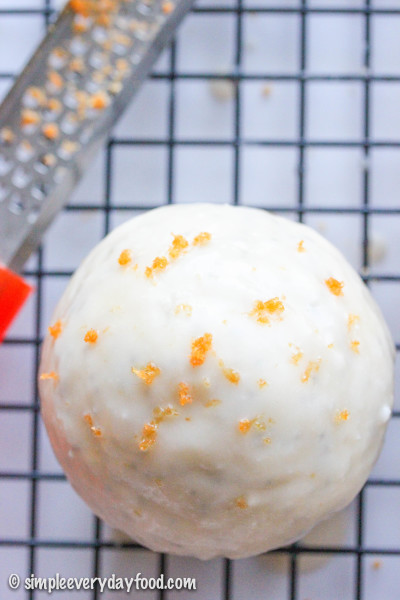
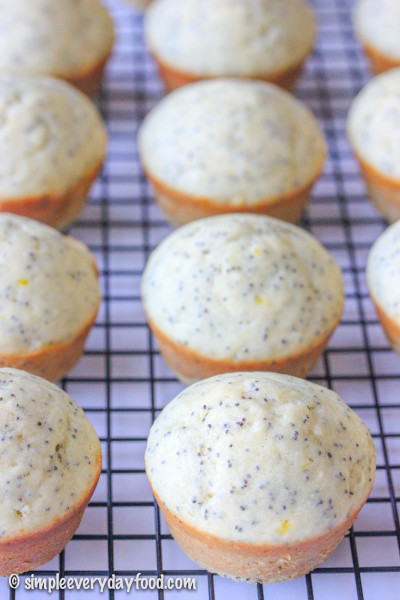
They’re so citrusy and so easy to make! Each bite you take is like taking a bite of summer – light, sweet, and tangy all rolled into one, each double dunked – yes! double dunked – into a sweet glaze that will make you want to lick the bowl clean.
grapefruit poppyseed muffins

grapefruit poppyseed muffins

So the moral of the story is this: either 1) always change your smoke detector’s batteries when daylight savings time comes around like you’re supposed to, or 2) always keep a spare battery around the house.

But if you don’t and your smoke detector beeps at you all night, I sure hope you have these on hand for the next morning… you’ll need it.

grapefruit poppyseed muffins

If you’re looking for other breakfast items, you can check out where I keep all my other breakfast recipes here.

grapefruit poppy seed muffins
Print
For the muffins
  1. 2/3 cup granulated sugar
  2. Zest from 1 large grapefruit (plus more for garnish, if desired)
  3. 1/3 cup vegetable oil
  4. 1/8 cup poppy seeds
  5. 2 teaspoons grapefruit juice
  6. 2 teaspoons vanilla extract
  7. 1 large egg, at room temperature
  8. 2 and 1/2 cups all-purpose flour
  9. 3 and 1/2 teaspoons baking powder
  10. 1 teaspoon salt
  11. 1 and 1/4 cups milk
For the glaze
  1. 4 tablespoons unsalted butter, melted and cooled
  2. 2 and 1/2 cups powdered sugar
  3. 1 teaspoon vanilla extract
  4. 4~5 tablespoons grapefruit juice
Instructions
  1. Preheat oven to 350 degrees. Thoroughly spray 15 muffin tins with cooking spray, set aside.
  2. In the bowl of an electric mixer, combine the sugar and grapefruit zest. Rub together with your fingers until fragrant. The texture should resemble somewhat like wet sand.
  3. In a medium bowl, combine the flour, baking powder, and salt. Set aside.
  4. Add in the oil, poppy seeds, grapefruit juice, vanilla, and egg. Mix on low speed until just combined. Alternately, add in the flour mixture and milk, starting and ending with the flour mixture until just combined. Do not overmix.
  5. Using a medium cookie scoop (about 1.5 tablespoons), fill each well with muffin batter, about 2/3 full. Bake for 17-20 minutes, or until an inserted toothpick comes out clean. Cool for 5 minutes before removing them onto a cooling rack to cool completely.
  6. While muffins are cooling, make the glaze: combine all the glaze ingredients in a medium bowl. Dip the tops of each cooled muffin in the glaze and return it to the cooling rack. Let glaze set for 10 minutes, then dip the muffins in the glaze again for a thicker coating of glaze. Top with additional grapefruit zest, if desired. Muffins can be stored in an airtight container for up to 5 days.
  7. Makes 15 muffins
Adapted from Girl Versus Dough
Simple Everyday Food https://www.simpleeverydayfood.com/
Recipe adapted from Girl Versus Dough

© Simple Everyday Food. All images & content are copyright protected. Please do not use any of my images without prior permission. If you want to republish this recipe, please re-write the recipe in your own words, or kindly link back to this post for the recipe.

Sharing is caring! Email this to someonePrint this pagePin on PinterestShare on YummlyShare on FacebookShare on Google+Tweet about this on Twitter

I hope everyone had a wonderful 4th that was celebrated by spending time with family, nice weather, and plenty of good food! It’s funny that in our family, we (and by “we”, I mean “I”) usually plan an excessively long list of things I want to make for the holidays despite the fact that it’s usually the two of us. It’s not one of those “oh these are the things I want to make, but I probably won’t make everything”.  Noooooo siree! I’m the one who plans and executes. If I want to make it, I will make it.

You should’ve seen the list I made for Thanksgiving last year – it was ridiculous. I think I had 8-9 things on the menu just to feed the two of us, from appetizers to side dishes to dessert – we were covered in the event of a zombie apocalypse and we couldn’t leave the house for 3 weeks. There was so much food that we barely had enough counter space to put everything!

The big holiday itself usually gets a lot of attention and planning ahead, but not everyone plans for breakfast the morning after when everyone wakes up from the food coma. In case you’re still looking for a easy breakfast option for tomorrow, I’ve got you covered!

IMG_3098 copy

These cinnamon rolls can be easily made the night before, so when you wake up and want breakfast, you only have to wait less than 30 minutes for a piping hot, fresh out-of-the-oven, mouth-watering, gooey, sweet cinnamon roll! And let me tell you, it’s totally worth the wait, because these are deeeelish!

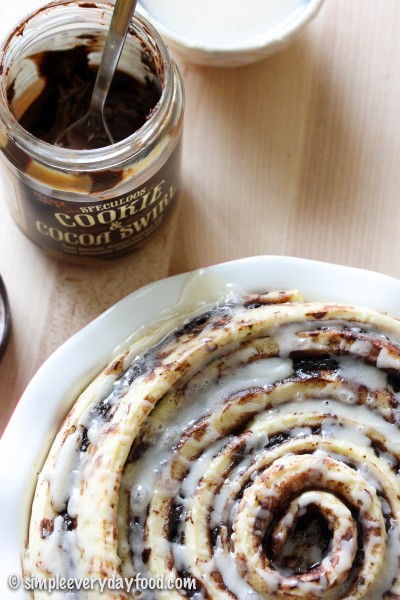
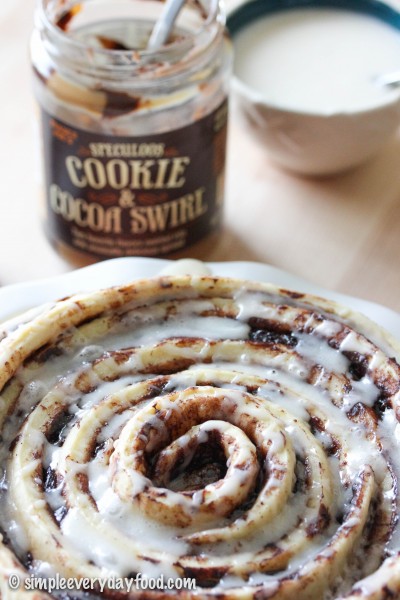
Chocolate + cookie butter + maple glaze + fluffy rolls = it’s practically heaven! I could eat this every weekend.

IMG_3103 copy

I’m personally a big fan of overnight cinnamon roll recipes, simply because I my stomach doesn’t have the patience to wait long for food in the morning. All the hard work is put in the night before, so all you have to do is throw it in the oven, make the glaze, wait, and enjoy the next morning – pretty easy, eh?

IMG_3095 copy

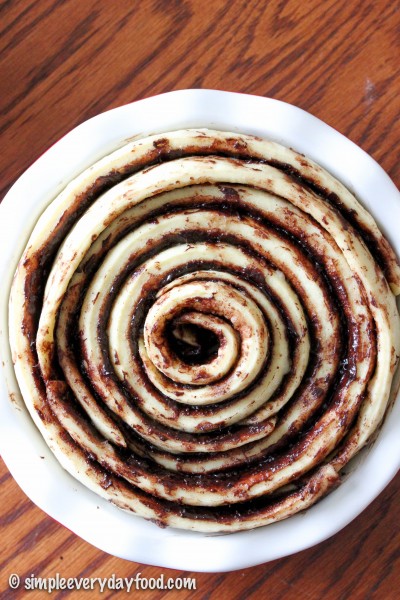
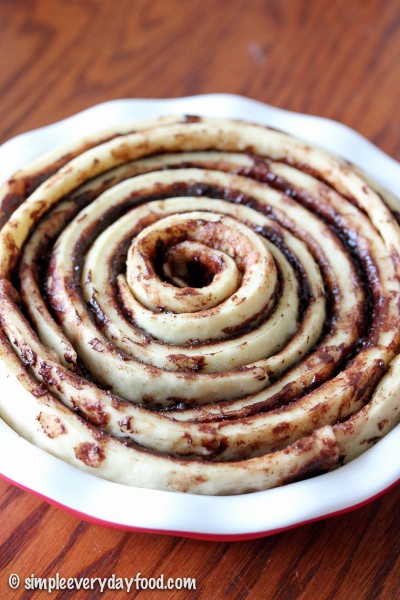
[loosely coil the strips to allow room for the dough to rise overnight]

IMG_3092 copy

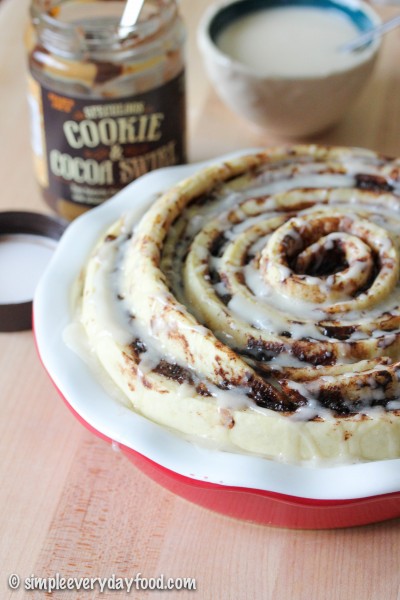
This giant spiral cinnamon roll is so pretty to look at, and even more fun to eat. You can either cut it into wedges and serve it like you would cake, or you can do what we did, and peel off the strips as you go. I highly recommend the latter, simply because it’s always fun when you get to eat with you hands, and eating it this way kind of reminds me of tearing off little pieces of bubble tape gum from when I was little (remember those? The gum whose flavor only lasts 5 seconds?).

IMG_3105 copy

giant spiral cinnamon roll with vanilla maple glaze
Print
For the roll
  1. 2 and 3/4 cup all-purpose flour
  2. 3 tablespoons granulated sugar
  3. 1 teaspoon salt
  4. 1 package instant yeast
  5. 1/2 cup water
  6. 1/4 cup skim milk
  7. 3 tablespoons unsalted butter
  8. 1 egg, at room temperature
For the filling
  1. 2/3 cup chocolate cookie butter (I used Speculoos chocolate cookie butter from Trader Joe's), softened slightly by microwaving it for 10-15 seconds
  2. 2 tablespoons ground cinnamon
For the glaze
  1. 1 cup powdered sugar
  2. 1 tablespoon heavy cream
  3. 1 tablespoon pure maple syrup
  4. 1 teaspoon pure vanilla extract
Instructions
  1. To make the dough, set aside 1/2 cup flour. In a large electric mixer bowl, combine the remainder of the flour, sugar, salt, and yeast together. Set aside.
  2. In a microwavable bowl, heat the water, milk, and butter together until the butter is melted and the mixture is hot to touch. Stir the butter mixture into the flour mixture over medium-low speed. Increase the speed to medium, add in the egg and just enough of the reserved flour until the dough is soft, pulls away from the sides of the bowl, and is no longer sticky (I used the entire 1/2 cup, but you may not have to use it all).
  3. Knead the dough for 3-4 minutes on a lightly floured surface. Form the dough into a ball and place in a lightly greased bowl. Cover and let sit for 30 minutes. In the meantime, spray a 9" pie pan with nonstick cooking spray and set aside.
  4. After 30 minutes, roll the dough out on a lightly floured surface into a 15x12" rectangle. Spread the slightly softened cookie butter over the top, then sprinkle the ground cinnamon.
  5. Using a pizza cutter, cut the dough into six 2" wide strips (cut the the long way). Loosely roll up one strip (kind of like a fruit roll-up) and place in the center of the pan. Wrap the remaining 5 strips loosely around the center one, starting each strip at the end of the previous one so the end product looks like a giant spiraled cake.
  6. Loosely cover the roll with aluminum foil and let rise in a warm, draft-free area overnight.
  7. The next morning, bake cinnamon roll at 350 degrees for 30-35 minutes or until lightly browned. I covered the top with aluminum foil 15 minutes into baking to prevent excessive browning on top.
  8. Remove the cake and let cool for 10 minutes. In the meantime, make the glaze by whisking all the glaze ingredients together until smooth. Drizzle over the rolls prior to serving.
  9. Serve immediately, or cover it tightly with foil and store up at room temperature for up to 3 days.
Adapted from Sally's Baking Addiction
Simple Everyday Food https://www.simpleeverydayfood.com/
Recipe adapted from Sally’s Baking Addiction

© Simple Everyday Food. All images & content are copyright protected. Please do not use any of my images without prior permission. If you want to republish this recipe, please re-write the recipe in your own words, or kindly link back to this post for the recipe.

Sharing is caring! Email this to someonePrint this pagePin on PinterestShare on YummlyShare on FacebookShare on Google+Tweet about this on Twitter

After close to a two-month hiatus from SEF, I’m glad to announce that I’ll start posting more on a regular basis! In the past few months, I’ve successfully passed my boards, settled into a nice routine on the new job, read a few books, and finally had some time to relax and not stress about anything. It was nice, but I’m excited to be back – SEF has been a little neglected and could really use a little TLC…

Last year, I conquered my fear of baking with yeast, and successfully made my first ever homemade cinnamon rolls! Ever since, I’ve made several different renditions of some sort of breakfast “rolls” on weekends both Brian and I have off together. These blueberry sweet rolls are perhaps one of my favorite ones I’ve made so far!

Yep, you’ve heard me correctly – juicy blueberries bursting with flavor, combined with a sweet tangy lemon glaze.. it’s practically heaven!

IMG_2819 copy

IMG_2838 copy

IMG_2844 copy

Just like the cinnamon rolls I’ve previously made, these are also overnight sweet rolls, meaning you won’t have to get up extra early for any type of prep work.

Now, onto a few technical things before you dive on in to make these this weekend:

  • When you toss the blueberries into the sugar/cornstarch mixture, it’ll seem like you’ll have a lot of sugar left on the bottom. Don’t panic! The blueberries will slowly absorb the sugar and cornstarch while you’re making the dough.
  • After you spread out the blueberries onto your dough, you’ll feel like there’s really not a lot of blueberry filling. The blueberry mixture will not completely cover the entire surface of the dough, and that’s totally okay. It’ll be plenty as you try to roll up the dough tightly – this really was the hardest part for me! They were harder to roll because the blueberries will seem like they have a mind of their own and would be rolling all over the place.
  • If you’re the impatient kind and can’t help but peek at how much your rolls have risen every two hours (ahem), don’t be alarmed if they don’t seem like they’re doing much after 4-6 hours. Because we’re using frozen blueberries in the filling, it’ll make the dough colder in temperature, therefore it’ll take a little bit longer for it to rise.

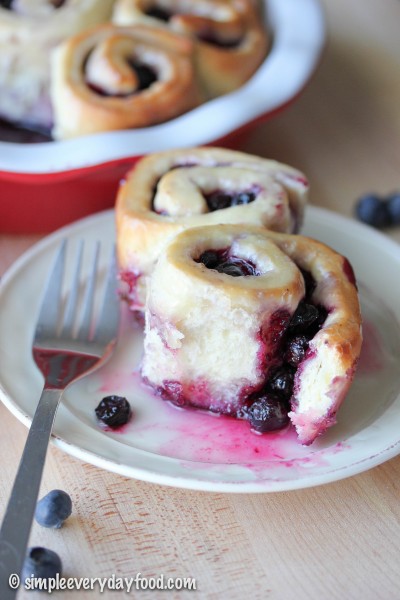
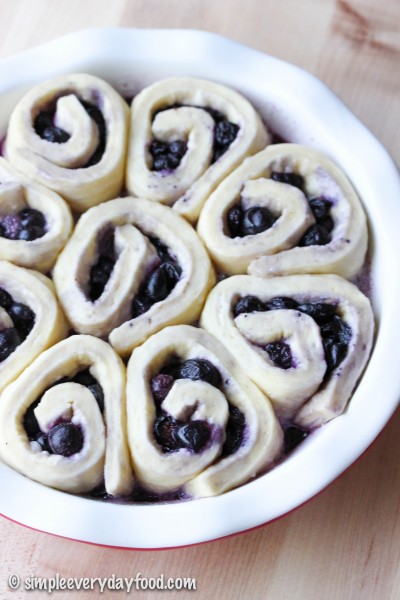
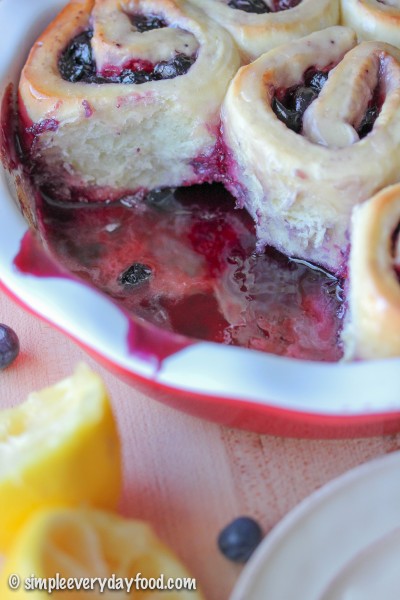
As the dough rises overnight, something magical happens: the frozen blueberries release their juices, and you get a delicious pool of blueberry juice on the bottom of the pan as a result. When you check on the rolls in the morning, you may notice the juices are practically half-overflowing to the top of the pan – this is okay! Because the juices will thicken as they bake, which is perfect if you like a little extra blueberry goo to go with your sweet rolls :)

IMG_2814 copy

IMG_2837 copy

IMG_2824 copy

overnight blueberry sweet rolls with lemon glaze
Print
For the rolls
  1. 2 and 3/4 cups all-purpose flour
  2. 3 tablespoons granulated sugar
  3. 1 teaspoon salt
  4. 1 package dry active yeast
  5. 1/2 cup water
  6. 1/4 cup milk
  7. 2.5 tablespoons unsalted butter
  8. 1 large egg, at room temperature
For the filling
  1. 1 and 1/3 cups frozen blueberries
  2. 1/4 cup granulated sugar
  3. 1 teaspoon cornstarch
For the glaze
  1. Juice from half a lemon
  2. 1 cup powdered sugar
  3. 1-2 tablespoons milk
Make the filling
  1. Combine the frozen blueberries, sugar, and cornstarch in a medium-sized bowl. Toss to coat and set aside. There might seem to be a lot of sugar on the bottom - don't worry!
Make the dough
  1. Set aside 1/2 cup flour. In the bowl for an electric mixer, combine the remaining flour, sugar, salt, and yeast together. Stir until combined. Attach the dough hook attachment onto your mixer.
  2. In a medium microwave-safe bowl, heat the water, milk, and butter together in the microwave until the mixture is hot to touch and the butter is melted. Pour the butter mixture into the flour mixture and stir on medium speed. Then add the egg and only enough of the reserved flour to make the dough. I used the entire 1/2 cup, but you may not use it all. You'll know you've added enough when the dough is soft, pulls away from the sides of the bowl, and is no longer sticky.
  3. On a lightly floured surface, knead the dough for 5 minutes. Place the dough ball in a lightly greased bowl, making sure all surfaces of the dough ball is lightly greased. Let sit for 10 minutes.
  4. While your dough rises, make the filling by tossing the ground cinnamon and sugar together in a small bowl.
  5. After the 10 minutes, roll out your dough into roughly a 14"x8" rectangle. Give the blueberry mixture a final toss, and spread them evenly across the dough. Roll up the dough tightly and cut into 9-10 even pieces, about 1.5" each. Place into a lightly greased 9" pie pan, making sure you leave enough room between each roll for it to rise.
  6. Loosely cover the pan with aluminum foil and let it sit overnight, up to 12 hours, at room temperature. The rolls should have doubled in size when you check on them the next morning.
  7. When you're ready to bake them the next morning, preheat the oven to 375 degrees. Bake for 25-27 minutes, covering the top with aluminum foil 15 minutes into baking to prevent excessive browning on top.
  8. While the rolls are baking, make the glaze by mixing the powdered sugar, 1 tablespoon of milk, and lemon juice in a small bowl. Add more milk if the glaze is too thick.
  9. When the rolls are done baking, remove from oven and drizzle them generously with the glaze. Rolls are best served warm and on the same day, even though they can be stored in an airtight container for up to 3 days.
  10. Makes 9-10 rolls
Adapted from Sally's Baking Addiction
Simple Everyday Food https://www.simpleeverydayfood.com/
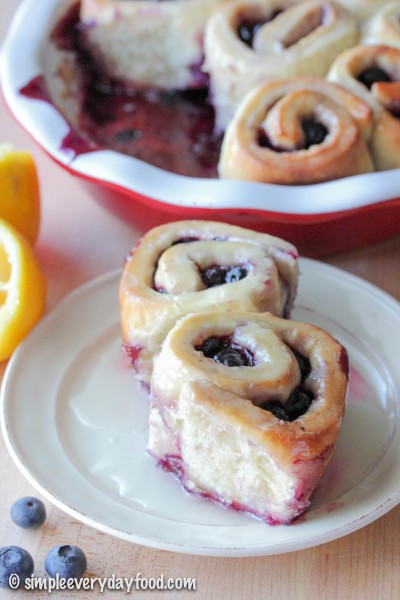
My oh my were these good! Sweet, fluffy rolls with blueberries that are just bursting in flavor, combined with a tangy, sweet, tart lemony glaze – I can’t think of a more perfect way to start a morning!

IMG_2817 copy

If you happen to have a few extra leftovers, place it in the microwave and heat it up for 10-20 seconds* until warm. The congealed blueberry juice on the bottom will liquefy again and the rolls will taste just as good as they were when they came out of the oven!

*the amount of time the rolls need to be microwaved may depend on the model and type of the microwave you have

Recipe adapted from Sally’s Baking Addiction

© Simple Everyday Food. All images & content are copyright protected. Please do not use any of my images without prior permission. If you want to republish this recipe, please re-write the recipe in your own words, or kindly link back to this post for the recipe.

Sharing is caring! Email this to someonePrint this pagePin on PinterestShare on YummlyShare on FacebookShare on Google+Tweet about this on Twitter