everyday food made simple

IMG_3411 copy

Ever since I was little, I hated sharing food. This doesn’t mean I don’t like sharing food that I make (it’s quite the opposite, actually); I just simply hated sharing whatever food I had on my plate. If it’s on my plate, more often than not I would really prefer not to share it.

Let me give you an example: Back in elementary school, whenever my dad would take us to McDonald’s as a rare treat, he would always finish his meal first and patient watch us eat. Occasionally he would reach across the table and steal a few fries off my tray. Me being the selfish potato-loving child as I was, would always whine and tell him that it was mine and he wasn’t allowed to eat my fries. My poor father, who is always so accommodating and patient with us, would always just laugh and apologize, despite the fact he just spent his hard-earned money to take us out for a treat.

I can always laugh about it and refer back to a particular FRIENDS episode, which coincidentally also involved french fries.

I knew Joey had always been my favorite for a reason……

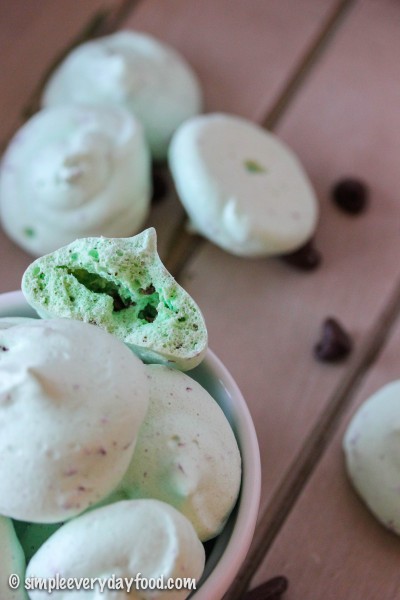
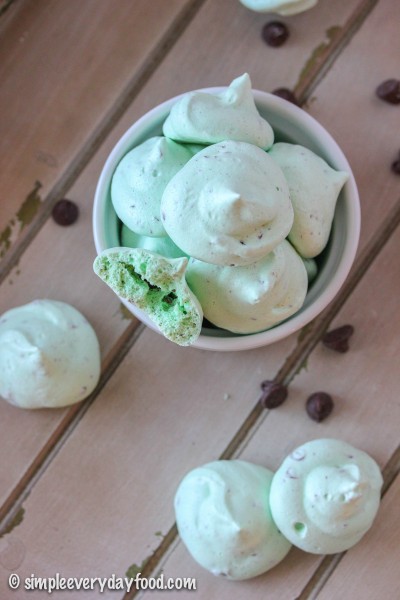
One good thing about these meringue cookies is that it makes so many that you won’t feel bad about sharing them!
IMG_3416 copy

After failing three miserable times trying to make meringue cookies in the past, I have finally picked up a few tips and tricks:

  1. Don’t cut corners. You may think using just egg whites is a waste of egg yolks, and decide to buy some “egg whites in a carton” at the store – DON’T. This may or may not have happened during one of my failed attempts…
  2. Be patient. Let the egg whites thoroughly come to room temperature. Find something to distract yourself, whether it’s Facebook, Instagram, Pinterest, cleaning, running errands, or enjoying the nice weather outside.
  3. Warm your mixing bowl and whisk right before you start beating the egg whites. I actually turned on our fireplace and stuck the mixing bowl right in front of it until it was warm to the touch – it worked really well!
  4. If you’re adding things to your meringue batter (in this case, mini chocolate chips), make sure the mix-ins are small enough to go through your decorative piping tips. I initially had the perfect idea of using the star tip for these to make them into cute little pretty shapes, but realized that the chocolate chips were clogging the tips and had to dump all my batter out, switch tips on my piping bag, and then start all over..

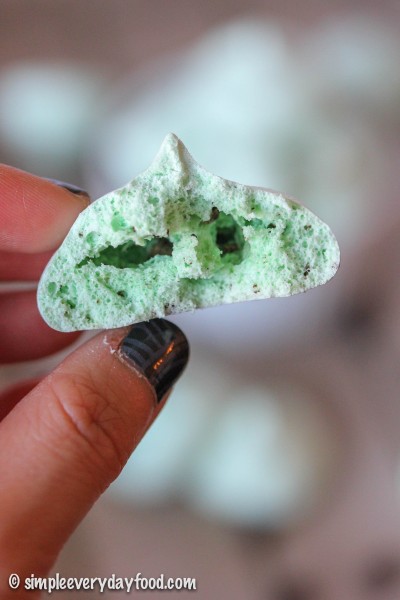
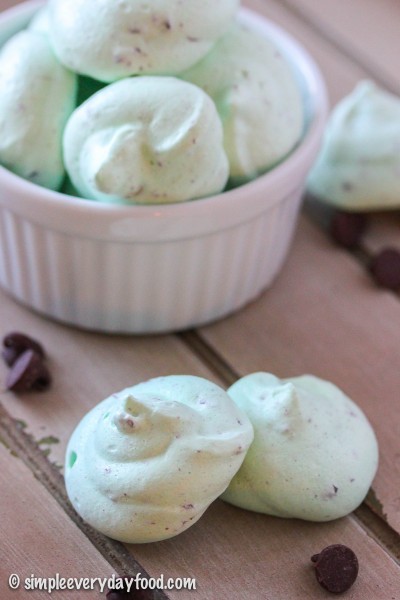
Bake these babies low and slow in the oven. Once the cooking time is up, turn the oven off and let the meringue cookies sit in the oven to cool overnight. They’ll turn nice and melt-in-your-mouth-crispy the next morning. Another thing I learned was to store these in a cool, dry place – if the temperature is too warm, they actually start to get a little sticky.
IMG_3407 copy

IMG_3385 copy

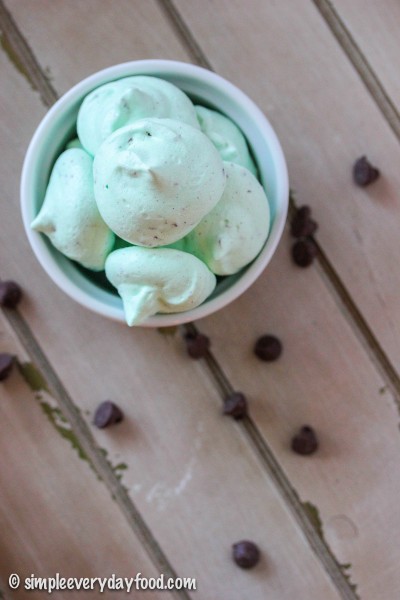
So go make a batch of these! They’re simple to make, but they look (and sound) fancy, and your friends will think you’re amazing for making these yummy delicate treats. And there will be more than plenty to go around for everyone :)
IMG_3384 copy

mint chocolate chip meringue cookies
Print
Ingredients
  1. 2 egg whites, at room temperature
  2. 1/4 teaspoon cream of tartar
  3. 1/4 teaspoon salt
  4. 2/3 cup granulated sugar
  5. 1/8 teaspoon mint extract
  6. ~7 drops of green food coloring (more or less depending on how green you want your meringues to be)
  7. 1/3 cups mini chocolate chips
Instructions
  1. Let egg whites come to room temperature and make sure your mixing bowl and whisk are just slightly warmer than room temperature (I placed mine in front of the fireplace for a few minutes).
  2. Preheat oven to 225 degrees. Line two baking sheets with parchment paper and set aside.
  3. Using an electric mixing bowl with the whisk attachment, beat egg whites, cream of tartar, and salt on high speed until soft peaks form*.
  4. Add in the sugar, about one tablespoon at a time, beating continuously until stiff peaks form**.
  5. Beat in the mint extract and green food coloring. Gently fold in the chocolate chips.
  6. Transfer the meringue to a pastry bag with a large round open tip. Pipe meringues about 1" apart and bake for 60 minutes. Turn off the oven and let the meringues stand in the closed oven overnight. Store in an airtight container in a cool dry place.
Notes
  1. *Soft peaks = tips curl when you lift the whisk straight up
  2. **Stiff peaks = tips stand straight up when you lift the whisk straight up
Adapted from Better Homes and Gardens
Simple Everyday Food https://www.simpleeverydayfood.com/
Recipe adapted from Better Homes and Gardens

© Simple Everyday Food. All images & content are copyright protected. Please do not use any of my images without prior permission. If you want to republish this recipe, please re-write the recipe in your own words, or kindly link back to this post for the recipe.

Sharing is caring! Email this to someonePrint this pagePin on PinterestShare on YummlyShare on FacebookShare on Google+Tweet about this on Twitter

IMG_2733 copy  

It’s no secret that I’m a sucker for chocolate. Not just a plain old boring milk chocolate bar, mind you, but fancy dark chocolate with different flavors infused in it – mint chocolate, dark chocolate cherry, chai chocolate, birthday cake chocolate, coconut chocolate…. The kind where you have to spend more than $3.50 for a small little chocolate bar. Yeah, I’m fancy.

I especially loooove dark chocolate with a hint of orange – dark chocolate with bits and pieces of candied orange peels throughout – it really is a match made in heaven! Since it’s hard for me to get my hands on certain fancy brands, Lindt’s chocolates are one of my go-tos when I’m in the mood to indulge.

photo 1

I see it as getting my daily vitamin C intake along with some antioxidants – it’s a win-win situation – no?

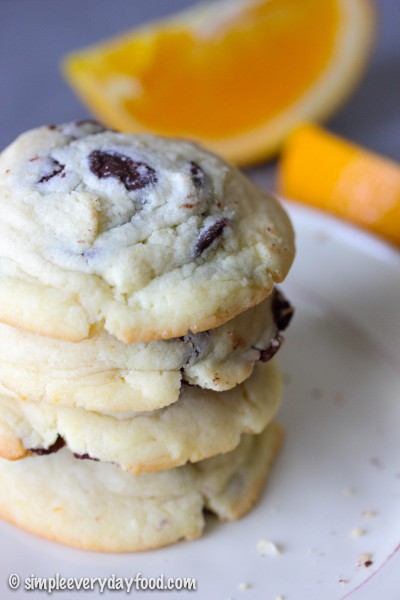
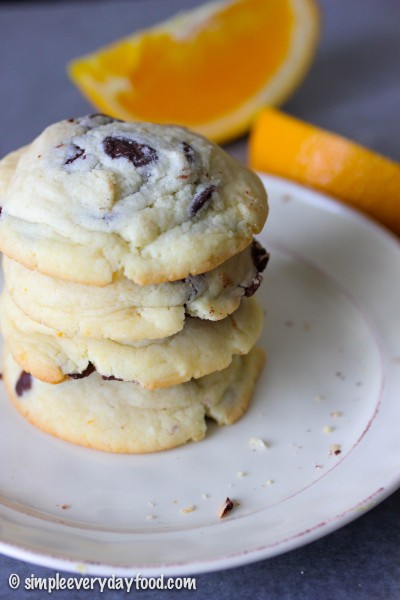
This cookie is kind of the opposite of what these candy bars are about. Instead of orange infused chocolate, it’s more of an orange cookie with a hint of chocolate. Instead of using regular chocolate chips, I used some 70% dark cacao chips instead to give the cookie a more intense dark chocolate flavor, that way you can eat a few without feeling like you’re going to slip into a sugar coma.

IMG_2720 copy

IMG_2727 copy

These cookies are soooo soft! They’re soft and moist. Not cakey, and not chewy either. Just soft. Like melt-in-your-mouth soft, thanks to the small amount of cream cheese added to the batter. One thing to note about these cookies is that when you mix everything together, the batter will be SUPER sticky. You’re probably going to think that something went wrong – nope! It’s just the way it is. And for that reason, I strongly suggest mixing everything together with a mixer… unless you’re trying to gain some arm strength – then more power to you, you overachievers.

orange chocolate chip cookies
Print
Ingredients
  1. 1/2 cup (1 stick) unsalted butter, softened to room temperature
  2. 3-oz low fat cream cheese, softened to room temperature
  3. 1/2 cup granulated sugar
  4. 1 egg, at room temperature
  5. 1 teaspoon vanilla extract
  6. 1 teaspoon grated orange zest
  7. 1 cup all-purpose flour
  8. 1/2 teaspoon salt
  9. 1 cup 60% dark cocoa chocolate chips
Instructions
  1. Preheat oven to 350 degrees. Line baking sheets with parchment paper or silicon baking mats.
  2. In a medium bowl, combine the flour and salt. Set aside.
  3. Using an electric mixer, cream together the butter, cream cheese, and sugar. Add in the egg an mix until smooth. Add in the orange zest and vanilla, stir until incorporated. Slowly add in the dry ingredients to the butter mixture. Mix until combined. Stir in the chocolate chips.
  4. Drop heaping tablespoonfuls of the dough onto the prepared baking sheets. The dough will be very sticky - this is normal! Bake for 12-14 minutes or until the edges just begin to brown slightly. Store in an airtight container for up to 7 days.
  5. Makes 16-18 cookies
Adapted from Taste and Tell Blog
Simple Everyday Food https://www.simpleeverydayfood.com/
IMG_2732 copy

Next time when I make these, I think I’m going to roughly chop up the dark chocolate chips prior to adding them into the batter. That way there will be more chocolate dispersed throughout the dough, and the chocolate will be nice and gooey and melty when you take them out of the oven.

Okay, I need to go find myself some chocolate now….

Recipe adapted from Taste and Tell Blog

© Simple Everyday Food. All images & content are copyright protected. Please do not use any of my images without prior permission. If you want to republish this recipe, please re-write the recipe in your own words, or kindly link back to this post for the recipe.

Sharing is caring! Email this to someonePrint this pagePin on PinterestShare on YummlyShare on FacebookShare on Google+Tweet about this on Twitter

IMG_2656 copy 

Just because the holiday season was sooooo last year, doesn’t mean that we should wait another 11 months to start making anything involving peppermint and chocolate. I have stocked up enough Andes peppermint baking chips and Hershey’s mint chocolate chips to last for the next 3-4 months.. so don’t be surprised if you see a post or two (or three… or four) about mint chocolate desserts on SEF this spring!

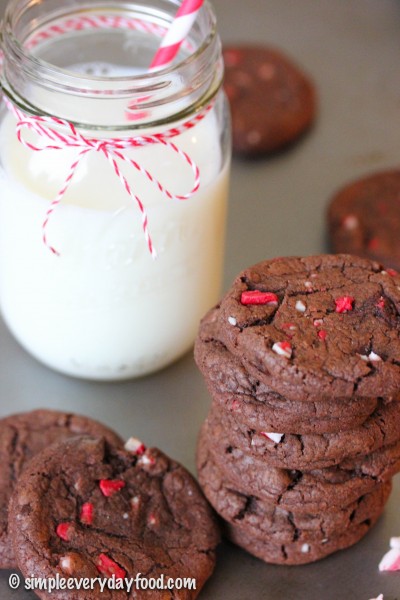
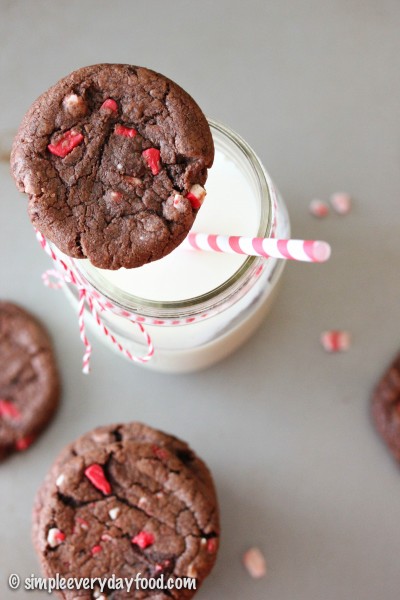
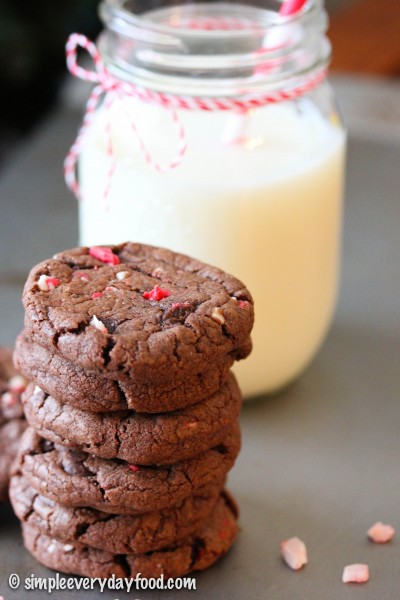
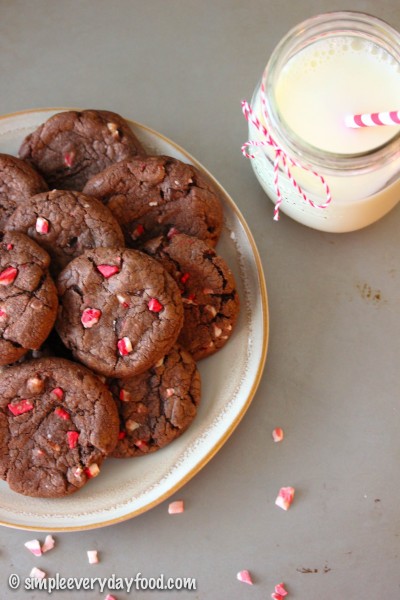
Remember these amazingly decadent gooey bars I made a while back? Well, today I have created a cookie version of those bars, and they’re equally as delicious! It’s a chocolate cookie base with tons of crunchy peppermint chips sprinkled throughout, so you’re guaranteed plenty of crunchy minty chocolatey goodness in each bite!

IMG_2660 copy

IMG_2658 copy

I also added extra semi-sweet chocolate chips into the batter simply because, well, you just can’t have too much chocolate in a cookie! Although it’s not required, it is highly recommended since it makes the chocolate flavor even more pronounced (read: even more amazing).

Soft, chewy chocolate cookies with bits of mint crunchiness in each bite – I bet you won’t be able to eat just one!

IMG_2674 copy

Just like all my other cookie recipes, I took these out 2 minutes prior to the regular recommended baking time, gently pressed the tops with the back of a fork, and put them back in the oven to cook for another 1-2 minutes. I do this a lot for cookies that don’t naturally spread out a whole lot during their time in the oven, just to achieve a nice crinkly cracked top in the end. I have tried just pressing them down after removing them from the oven completely, but I realized that they the end results aren’t as nice as taking them out after cooking them for 80% of the recommended time.

peppermint chocolate pudding cookies
Print
Ingredients
  1. 1 cup (2 sticks) unsalted butter, softened to room temperature
  2. 3/4 cup packed brown sugar
  3. 3/4 cup granulated sugar
  4. 2 eggs, at room temperature
  5. 2 teaspoon vanilla extract
  6. 1 teaspoon salt
  7. 1 teaspoons baking soda
  8. 1 tablespoon hot water
  9. 2 and 1/4 cups all-purpose flour
  10. 1/4 cup dark cocoa powder
  11. 3.9 oz instant chocolate pudding mix
  12. 1 cup Andes peppermint baking chips
  13. 1 cup semi-sweet chocolate chips
Instructions
  1. Preheat oven to 350 degrees. Line baking sheets with parchment paper or silicon baking mats.
  2. In a large bowl, combine the flour, salt, cocoa powder, and pudding mix. Gently mix with a spatula and set aside.
  3. Using an electric mixer, beat the butter on medium high speed until smooth. Add in the sugars and beat until light and fluffy. Add in the eggs, one at a time, mixing well in between additions.
  4. In a small bowl, dissolve the baking soda in the hot water. Add the baking soda mixture to the butter mixture. Then add in the vanilla. Mix well.
  5. Slowly add in the dry ingredients into the mixer bowl. Mix under medium speed until combined. Add in the baking chips and chocolate chips and mix some more.
  6. In heaping tablespoons, scoop the cookie dough on the baking sheets. Bake for 10 minutes, slightly press the tops with a spoon or a fork, and bake for another 1-2 minutes. Remove cookie sheets from oven and let cool for at least 5 minutes before transferring cookies to a wire cooling rack to cool completely. Store in an airtight container for up to 7 days.
  7. Makes about 40 cookies
Adapted from Something Swanky
Simple Everyday Food https://www.simpleeverydayfood.com/
IMG_2651 copy

I actually decided to freeze half the batch of cookie dough balls for later – not only would they be readily available when I’m craving cookies at a later date, I was hoping it will limit how many cookies I eat a day… note to self for next time: if Amy wants to eat 10 cookies a day, Amy will eat 10 cookies a day, regardless if there are 10 or 20 cookies laying around the house.

Well, at least I have enough peppermint baking chips for a few more batches!

Recipe adapted from Something Swanky

© Simple Everyday Food. All images & content are copyright protected. Please do not use any of my images without prior permission. If you want to republish this recipe, please re-write the recipe in your own words, or kindly link back to this post for the recipe.

Sharing is caring! Email this to someonePrint this pagePin on PinterestShare on YummlyShare on FacebookShare on Google+Tweet about this on Twitter

I was super excited to be participating in my first ever food blogger event this winter – The Great Food Blogger Cookie Swap!

The Great Food Blogger Cookie Swap 2013
This event has been made possible by two wonderful food bloggers, Julie from The Little Kitchen and Lindsay from Love & Olive Oil for the past three years. As a brand spanking new food blogger that just started less than 10 months ago, this seemed to me like the perfect way to get to know some amazing people in the food blogging circle.

It’s basically a “secret Santa”, with dozens of cookies instead. You mail out three dozen cookies to fellow food bloggers around the country (and the world), and you get three dozen different cookies from three different bloggers in return. I had so much fun this year that I’m definitely going to be participating in it again next year!

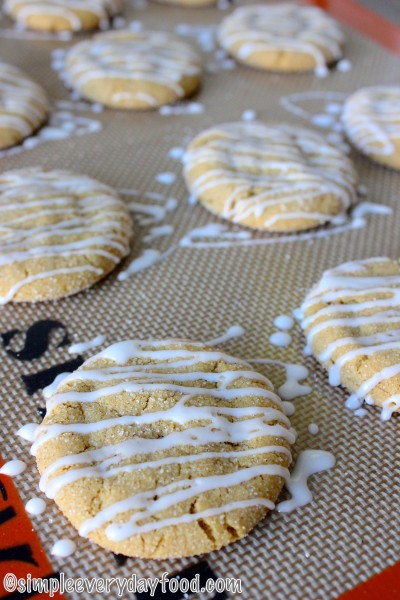
Now, on to the cookies I made this year. It’s a classic, and I haven’t met a single person that isn’t a fan of gingernsnaps.

According to my memory, these are the first ever cookies I remember making. Most people start out with something simple and classic – like chocolate chip, oatmeal raisin, or M & M cookies. For some reason, these were the ones I chose to make – I’m weird, I know. And now I’m going to make you think I’m even more weird – that was only a mere 5 years ago. That’s right, I don’t recall ever making cookies on my own up until 5 years ago. I guess I’ve lived a sheltered life up until then…

IMG_2316 copy

These cookies were also the ones that won Brian over. I remember making these one day before going to work a few years back and brought them to work one night. They worked like a magic love potion, because after he tasted how amazingly soft these spiced cookies were, he immediately fell in love with me and we lived happily ever after after that.

Okay okay, maybe that’s not exactly how it happened,  but I can promise you that these cookies are pretty dang good – so good in fact that it actually is Brian’s favorite dessert item out of everything I’ve ever made.

IMG_2296 copy

IMG_2287 copy

In our household, gingersnap cookies are considered one of the classic holiday cookies, along with beautifully decorated sugar cookies and anything with mint and chocolate. To me, it is what kick starts the Christmas holiday season – it smells like the holidays, reminds me of the holidays, and tastes just like the holidays…

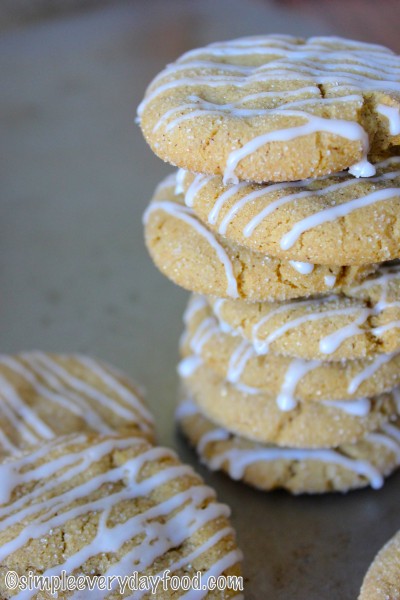
I like my cookies soft and chewy in the center while having a slight crispy exterior, which is why this cookie is so amazing. It is also why it’s one of the regular cookies in our cookie rotation. It’s rolled in sugar and slightly flattens out a bit after it cools from the oven. And even if it doesn’t seem like it has a whole lot of classic gingersnap crinkles when you take them out of the oven, those crinkles somehow magically appear after sitting out to cool for a while – see, they are magical little cookies.

IMG_2305 copy

soft and chewy gingersnap cookies
Print
Ingredients
  1. 3 sticks (1.5 cups) butter, at room temperature
  2. 2 cups granulated sugar, plus 1 cup for rolling
  3. 2 eggs
  4. 1/2 cup molasses
  5. 4.5 cups all-purpose flour
  6. 3 teaspoons baking soda
  7. 2 teaspoons ground cinnamon
  8. 1 teaspoon ground ginger
  9. 1 teaspoon ground cloves
  10. 1/2 teaspoon salt
  11. 1/2 teaspoon nutmeg
For the drizzle
  1. 1 cup powdered sugar
  2. 1-2 tablespoons milk
Instructions
  1. In a large bowl, combine the flour, baking soda, cinnamon, ginger, cloves, salt, and nutmeg. Stir and set aside.
  2. Using an electric mixer, cream the butter and 2 cups of sugar. Add eggs, one at a time, beating well after each addition. Add molasses and beat under medium speed for 2-3 minutes. Slowly add in the dry ingredients, beat for a few more minutes until thoroughly combined. You might have to stop the mixer and scrap the bottom and edges a bit with a rubber spatula, then mix some more to make sure everything on the bottom is combined.
  3. Cover and chill in the refrigerator for at least an hour.
  4. Preheat the oven to 350 degrees. Line two baking sheets with parchment paper or silicon baking mats.
  5. Place the remaining 1 cup of sugar in a shallow medium bowl. Roll cookie dough into 1" balls, roll in sugar, and place about 2" apart on your baking sheets. Bake for 8-10 minutes or until cookies are slightly puffy and lightly browned. Remove from oven and let cool for at least 5 minutes before moving them onto a wired cooling rack. Cool completely.
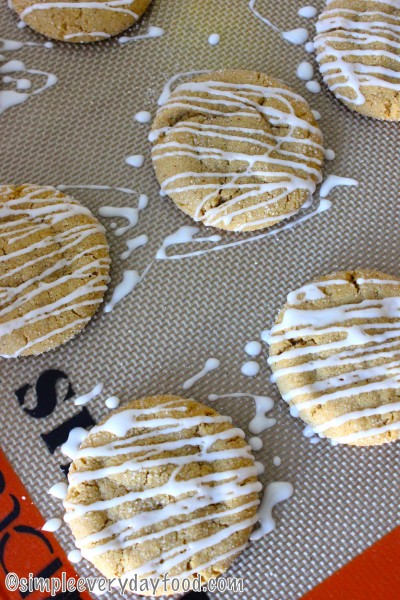
  6. Drizzling these cookies are completely optional. To make the drizzle, whisk the powdered sugar and milk in a medium bowl. Add more milk if mixture is too thick. Place the powdered sugar mixture in a Ziploc bag, cut a small hole on a corner of the bag, and drizzle over cookies.
  7. Makes 65-70 cookies
Simple Everyday Food https://www.simpleeverydayfood.com/
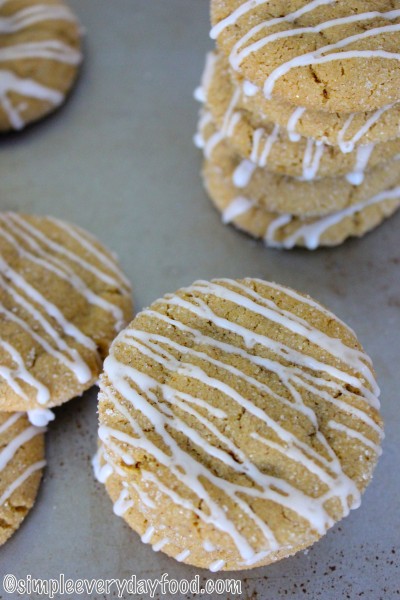
These cookies are crispy, sugary on the outside that is followed by soft, chewy cookie dough spiced with plenty of cinnamon, nutmeg, cloves, ginger, and molasses on the inside. Heavenly, I tell ya.

IMG_2290 copy

IMG_2319 copy

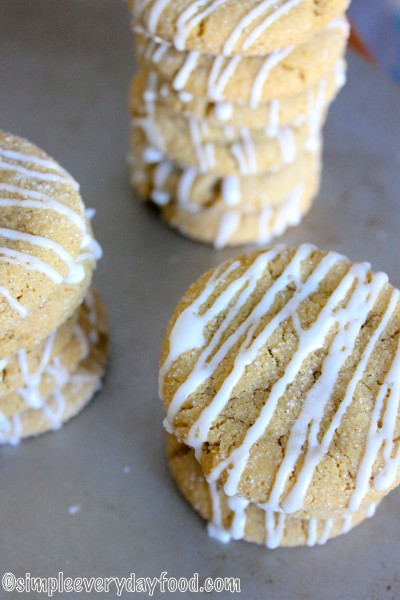
The drizzle on top of these are completely optional – I’ve never drizzled glaze over my gingersnaps up until this year. They turned out to be a nice addition though. If you’re a soft chewy cookie kind of person like me, these are definitely for you!

Have I sold you on these yet? I hope so, because these are definitely a must for the holiday season!

**Disclaimer: This recipe was actually adapted from someone else’s recipe I found online a few years ago. Unfortunately I never wrote down whose original recipe it was – if you happen to stumble upon my post and realize the recipe looks familiar, please let me know and I’ll give you credit for it!

© Simple Everyday Food. All images & content are copyright protected. Please do not use any of my images without prior permission. If you want to republish this recipe, please re-write the recipe in your own words, or kindly link back to this post for the recipe.

Sharing is caring! Email this to someonePrint this pagePin on PinterestShare on YummlyShare on FacebookShare on Google+Tweet about this on Twitter

A few weeks ago, I started my surgery and anesthesia rotation for my internship. As much as I love emergency medicine, there’s just something about surgery and anesthesia that is equally as exciting to me. There’s actually a lot of similarities between the two – they both require constant diligent observation of your patient, you need to be on your toes at all times, and you have to be able to quickly adapt treatments to the status of your patient. There’s no room for slacking and not paying attention to how your patient is acting or how they’re reacting to the treatments you gave them – vital signs can quickly change without warning and you are responsible for either fixing the problem, or notifying the veterinarian about the status of your patient.

I’ve been fortunate enough to work with a group of amazingly talented technicians that are very patient and knowledgeable and willing to teach. It truly has made my internship a great experience so far!

You know what else is great? This cookie.

IMG_2234 copy

IMG_2248 copy

IMG_2222 copy

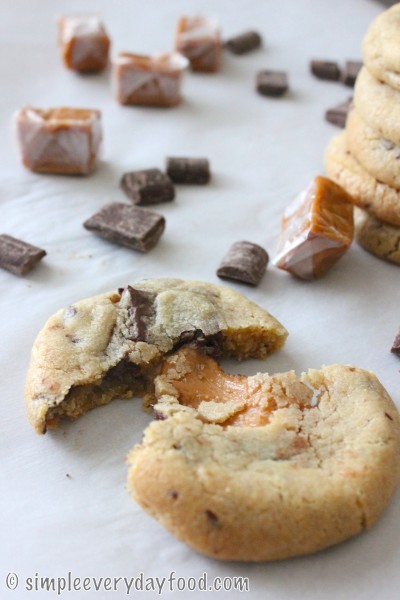
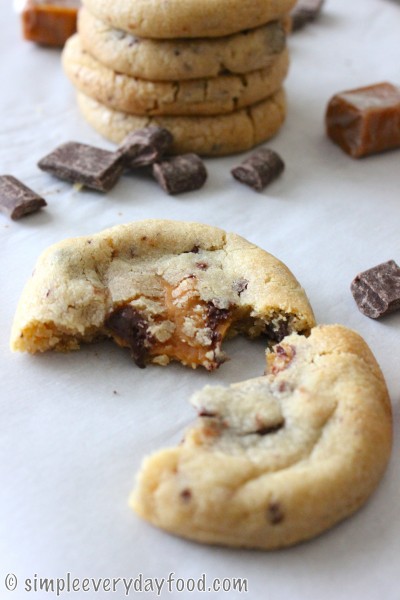
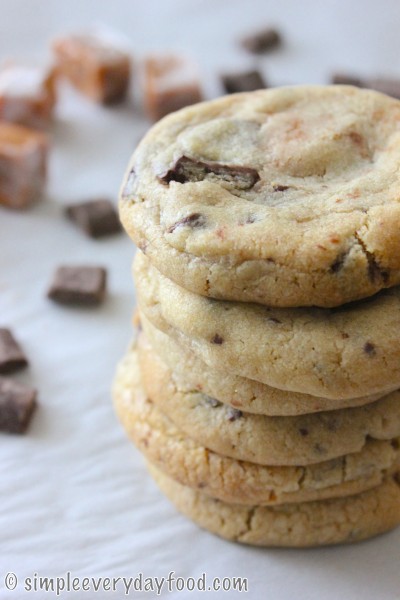
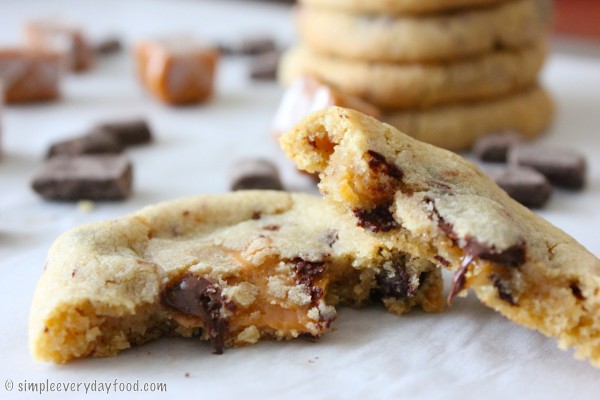
Soft chocolate chunk cookies with a gooey caramel-filled center that are super easy to make. Dark chocolate shavings are added in addition to chocolate chunks to make sure chocolate is tasted in every single bite. In my personal opinion, these cookies are the best straight out of the oven after they’ve had a chance to slightly cool down a little. That’s when the cookie is still warm and soft, and the caramel is still gooey on the inside. The caramel is the star of the show and is what surprises people when they first take a bite into it. Once the cookies completely cool, the caramel is going to harden a bit and lose its gooey texture, but I found out that throwing them in the microwave for 5-10 seconds is just enough to melt the caramel and transform them back into the warm, soft, gooey chocolate chunk cookie again.

IMG_2231 copy

IMG_2240 copy

chocolate chunk caramel cookies
Print
Ingredients
  1. 1 and 1/2 sticks of unsalted butter, softened to room temperature
  2. 1 and 1/2 cups brown sugar
  3. 1/2 cup granulated sugar
  4. 2 eggs
  5. 4 teaspoon vanilla extract
  6. 4 cups all-purpose flour
  7. 4 teaspoons cornstarch
  8. 2 teaspoons baking soda
  9. 1 teaspoon salt
  10. 1 and 1/2 cups semi-sweet chocolate chunks
  11. 1/2 cup dark chocolate, chopped
  12. 1 bag of caramel candies - unwrap about 20 of them and cut them in half
Instructions
  1. Preheat oven to 350 degrees. Line baking sheets with parchment paper or silicone baking mats and set aside.
  2. In a large bowl, combine the flour, cornstarch, baking soda, and salt. Gently stir to mix and set aside.
  3. Using a stand mixer, cream together butter and sugars until light and fluffy, about 2 minutes, then add in the eggs and vanilla extract and beat until combined.
  4. A little bit at a time, add in the flour mixture and mix until everything is thoroughly combined.
  5. Fold in the chocolate chunks and finely chopped dark chocolate with a spatula. I cheated and stirred them in by turning on my mixer onto the "stir" function.
  6. Scoop about 1.5 tablespoons worth of cookie dough, then make a slight indent in the middle by using your thumb and place one halved caramel candy in the center, then make sure the cookie dough is rolled up in a ball so the caramel candy isn't showing. Repeat until all dough has been used up. Cut up more caramel candies if needed.
  7. Before you put them in the oven, slightly flatten them a bit with the palm of your hand. Bake for 11-13 minutes.
  8. Remove from oven and let cool on the baking sheet before transferring them to a wired cooling rack.
  9. Bake for 11-13 minutes. They will look super soft but they continue cooking after you remove them from the oven. Store in an airtight container for up to 7 days.
  10. Makes about 48-50 cookies
Adapted from Table For Two
Simple Everyday Food https://www.simpleeverydayfood.com/
I was quite surprised that the recipe yielded almost 50 cookies. I was able to keep some at home, bring some to class to share, and bring some to work as well. Everybody loved them!

IMG_2246 copy

Also, if you have kids who are always eager to help in the kitchen, this is also a good recipe to get them involved! After the cookie dough is made and scooped into balls, you can have the kids help with stuffing the centers with caramels. There’s really no chance of “screwing” up, and it’ll also make them feel as if they contributed.

Happy baking!

Recipe from Table For Two

© Simple Everyday Food. All images & content are copyright protected. Please do not use any of my images without prior permission. If you want to republish this recipe, please re-write the recipe in your own words, or kindly link back to this post for the recipe.

Sharing is caring! Email this to someonePrint this pagePin on PinterestShare on YummlyShare on FacebookShare on Google+Tweet about this on Twitter