everyday food made simple

biscoff choco-cinnamon chip cookies

Yesterday was Little B’s due date. Which means in less than two weeks, we will have a ONE year old! Can you believe it? Can you also believe that in this entire year, Brian and I have never left Little B in the hands of a babysitter and gone out for a date? 

Just this past weekend, we started this new thing where we each leave the house for a few hours to go where ever we want and do whatever we want. Whether it’s to run errands in peace, to hang out with friends, to leisurely stroll up and down the aisle of Target (because let’s be honest, that can be a treat in itself sometimes), or to just sit at a coffee shop and read a book – I think it’s important to be able to get away and go something and not have to listen to the Paw Patrol theme song for them umpteenth time.

So what did I choose to do for my first two hours of scheduled freedom? I went to Starbucks, ordered myself a mocha, and read a book. It was heavenly. Part of me felt bad for enjoying that time away from Little B. I mean, I’m a mom, and shouldn’t moms want to spend as much time with their babies as possible? It’s called mom guilt, ya’ll.

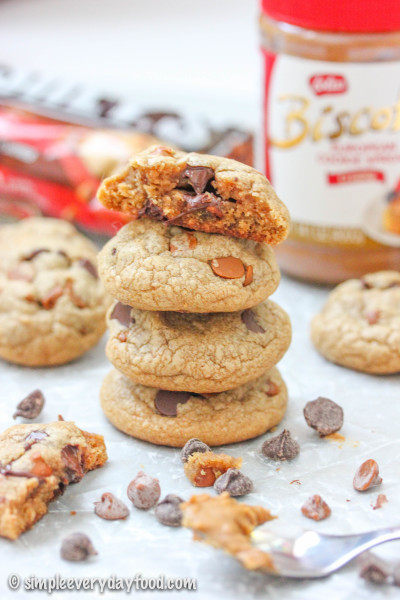
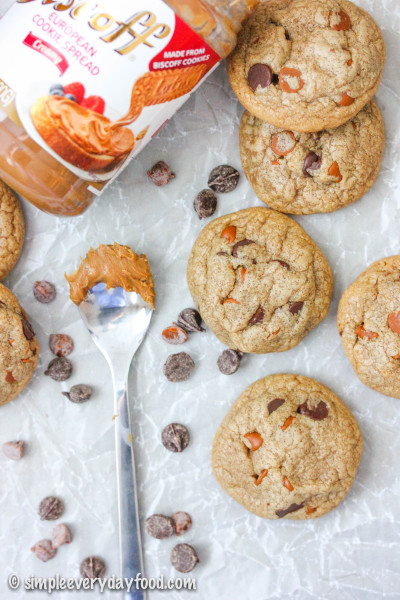
So I sat in a soft, plush sofa by the fireplace and read my book (I’m currently reading The Ladies’ Room), wishing I had some of these soft pillowy Biscoff cinnamon chip cookies to go with my coffee.

biscoff choco-cinnamon chip cookies biscoff choco-cinnamon chip cookies biscoff choco-cinnamon chip cookies

biscoff choco-cinnamon chip cookies
Print
Ingredients
  1. 1/2 cup (1 stick) unsalted butter, softened to room temperature
  2. 1/2 cup creamy Biscoff spread
  3. 1/2 cup dark brown sugar
  4. 1/4 cup granulated sugar
  5. 1 large egg, at room temperature
  6. 1 teaspoon vanilla extract
  7. 1 and 1/2 cups all-purpose flour
  8. 1/4 teaspoon baking soda
  9. 1/4 teaspoon baking powder
  10. 1/4 teaspoon salt
  11. 1/4 teaspoon cinnamon
  12. 1/2 cup semi-sweet chocolate chips
  13. 1/2 cup cinnamon chips
Instructions
  1. Using an electric mixer, cream together butter, Biscoff spread, and both sugars until light and fluffy. Add in the egg and vanilla extract and beat until combined, scraping the sides occasionally if needed.
  2. In a medium bowl, combine the flour, baking soda, baking powder, salt, and cinnamon.
  3. Add the dry ingredients to the wet ingredients and beat until thoroughly combined. Stir in the chocolate chips and cinnamon chips. Using a medium cookie scoop, drop 1.5 tablespoons worth of dough onto a lined baking sheet. Chill the dough balls for 30 minutes in the refrigerator.
  4. Preheat the oven to 350 degrees, and bake for 10-12 minutes or until golden brown - do not over bake!
  5. Makes 22-24 cookies
Adapted from Buns In My Oven
Simple Everyday Food https://www.simpleeverydayfood.com/
Recipe adapted from Buns In My Oven

© Simple Everyday Food. All images & content are copyright protected. Please do not use any of my images without prior permission. If you want to republish this recipe, please re-write the recipe in your own words, or kindly link back to this post for the recipe.

Sharing is caring! Email this to someonePrint this pagePin on PinterestShare on YummlyShare on FacebookShare on Google+Tweet about this on Twitter

IMG_6158 copy

A few weeks ago, I crossed one more thing off of my culinary bucket list: homemade pastry cream. I made some Boston cream pie cupcakes for a coworker’s birthday, and I was surprised at how easy it actually was to make pastry cream from scratch.

After it was all said and done, I was left with four egg whites sitting in a bowl on my kitchen counter. I had an internal conversation with myself regarding what to do with them: tossing them down the drain was out of the question. Maybe an egg white scramble for breakfast? Orrrrr…. I could make meringue cookies.

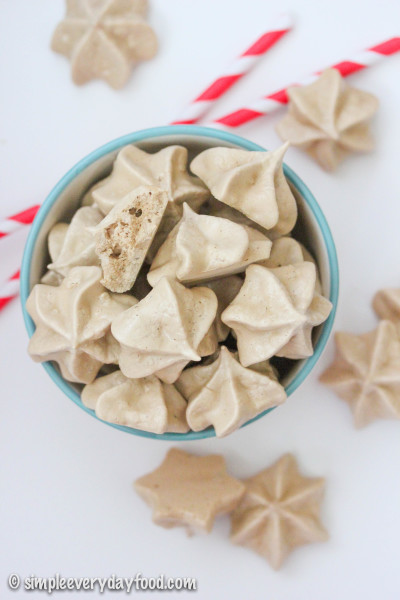
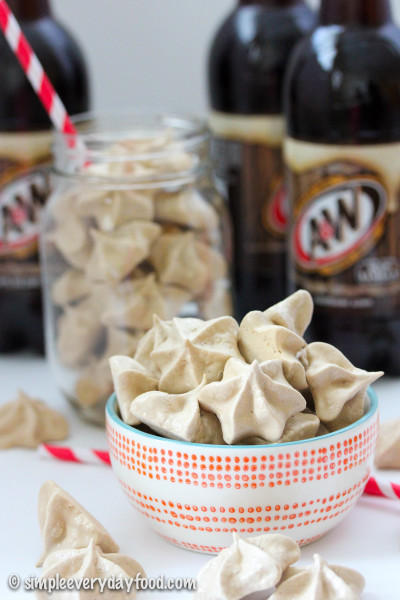
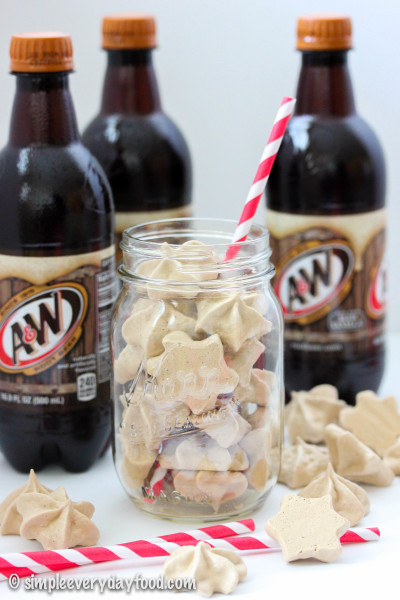
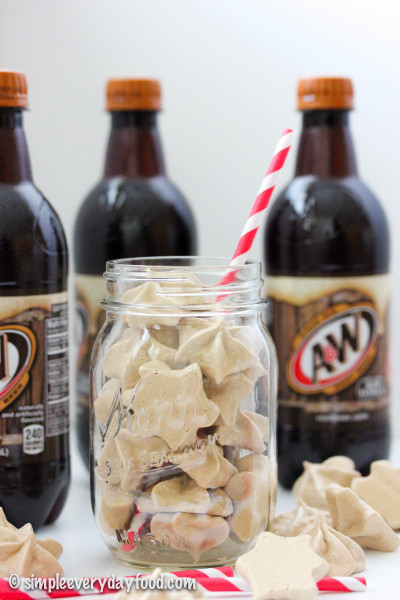
Yes! Meringue cookies. Now the big question: what kind of meringue cookies? Since Memorial Day is around the corner and summer is soon approaching, how about something that screams “summer”? That’s when I remembered that little bottle of root beer extract I bought last year, tucked all the way in the back of my “extracts” bin (yes, I have a bin just for extracts).

ROOT BEER MERINGUE COOKIES, you guys!

…Sorry, I’m yelling. But seriously, it can’t be any fancier and cooler than that, can it?

IMG_6140 copy

IMG_6126 copy

You know how there are certain things and smells that remind you of something? Well, as these babies were baking in the oven, my entire house smelled like root beer, which totally reminded me of sipping on an ice cold glass of root beer on a hot summer day and how much I wish it was 85 degrees and sunny outside at the time.

 IMG_6144 copy

IMG_6129 copy

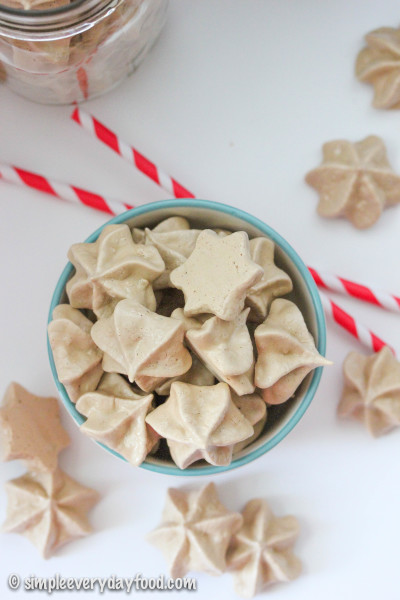
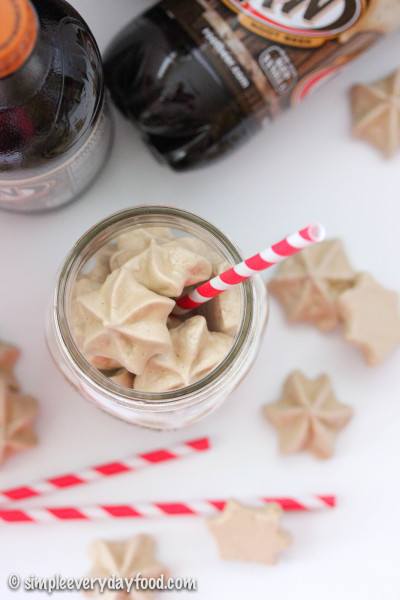
If you’re not familiar with making meringue cookies, I have a few tips that I’ve learned based on past personal experiences that I talk about here. And in case you’re not familiar with meringue cookies, they’re not the kind of “cookie” that comes to mind; instead, they’re light, slightly crunchy, and melt right in your mouth as soon as you bite into it. Think of it like a fancy cookie that fancy people eat, except it’s not at all difficult to make whatsoever.

IMG_6151 copy

IMG_6121 copy

Make these for your family and friends to impress them – each batch easily makes at least 60-80 of these cookies so there will be plenty to pass around, plus I swear you can never just eat one!

root beer meringue cookies
Print
Ingredients
  1. 4 egg whites, at room temperature
  2. 1/2 teaspoon cream of tartar
  3. Pinch of salt
  4. 1 cup granulated sugar
  5. 2 teaspoons root beer extract
Instructions
  1. Preheat oven to 225 degrees. Line two baking sheets with parchment paper and set aside.
  2. Using an electric mixer with the whisk attachment, beat the egg whites, cream of tartar, and salt starting on medium speed for a few seconds, then gradually increasing the speed to medium high. Beat for 1-2 minutes or until soft peaks form*.
  3. Turn your mixer to high and add in the granulated sugar into the egg white mixture, one spoonful at a time (about 1 tablespoon) until gone. Beat the mixture for 5 minutes until stiff peaks form**. Add in the root beer extract and beat until combined.
  4. Transfer the meringue to a pastry bag with a large open star. Pipe meringues about 1" apart and bake for 60 minutes. Turn off the oven and let the meringues stand in the closed oven overnight. Store in an airtight container in a cool dry place for up to 5 days.
Notes
  1. *Soft peaks = tips curl when you lift the whisk straight up
  2. **Stiff peaks = tips stand straight up when you lift the whisk straight up
Simple Everyday Food https://www.simpleeverydayfood.com/
© Simple Everyday Food. All images & content are copyright protected. Please do not use any of my images without prior permission. If you want to republish this recipe, please re-write the recipe in your own words, or kindly link back to this post for the recipe.

Sharing is caring! Email this to someonePrint this pagePin on PinterestShare on YummlyShare on FacebookShare on Google+Tweet about this on Twitter

If you are ever in need of a quick, easy cookie recipe that’s going to make you the most popular person at a potluck (or if you want to bribe your coworkers to like you – which is what I do all the time), you totally need to add this recipe to your list.

mississippi mud cookies

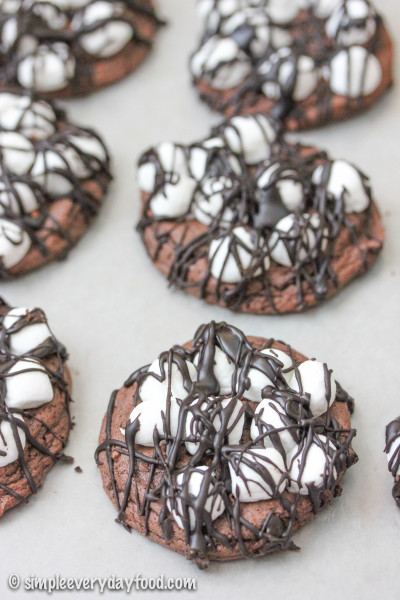
These cookies may be the easiest cookies I’ve made in a long time. How easy, you may ask? Well let me tell you the two main things that make up this cookie.

Hold on to the edge of your seats, my friends. Ready?

  1. Cake mix.
  2. Marshmallows.

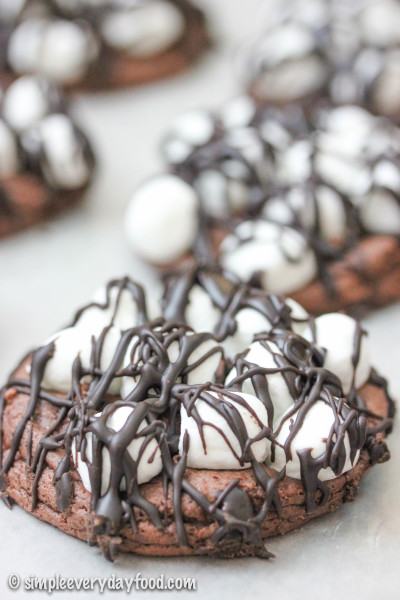
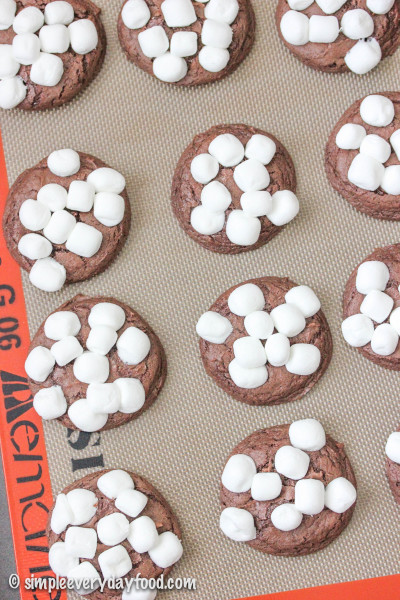
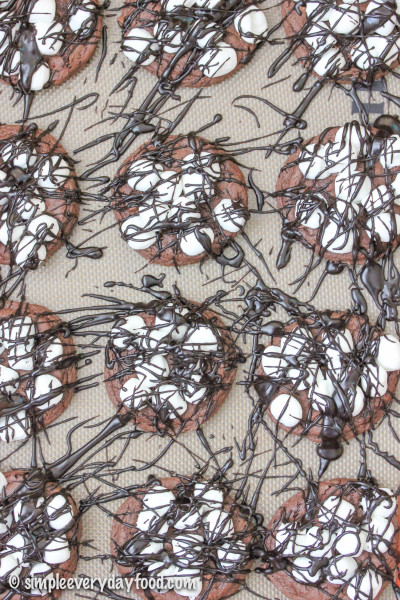
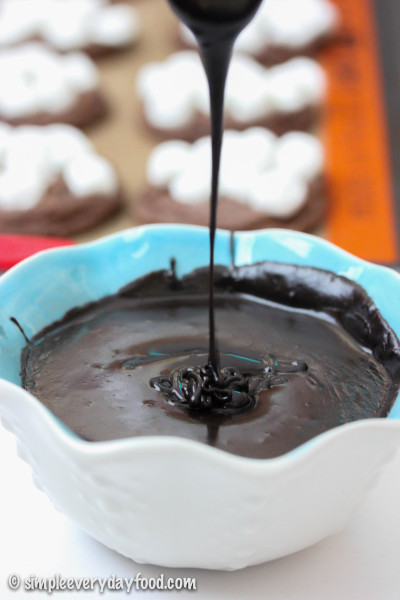
And that chocolate drizzle that goes on top? You bring butter and milk to a boil, throw all the other ingredients in the pot, whisk, and drizzle away.

See? Told you it was easy. There’s barely any prep work that goes into it. No waiting around for things to chill in the fridge or 12 different steps to follow just to make some cookies.

mississippi mud cookies

mississippi mud cookies

mississippi mud cookies

Although these are extremely simple to make, your coworkers or friends would never guess that the actual cookie was made out of a box of cake mix. Talk about a cookie tasting like it came from a gourmet bakery without all the effort and the price that goes into making or buying a gourmet cookie.

mississippi mud cookies

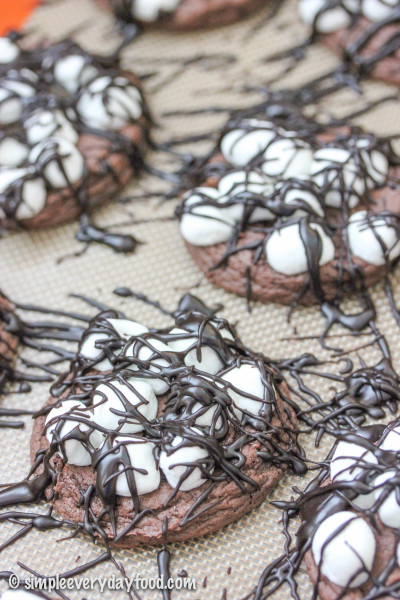
The cookie is soft and chewy. The marshmallows are sweet and gooey. The chocolate sauce? It’s there for a whole lotta fancy and a titch of sweetness.

mississippi mud cookies

mississippi mud cookies

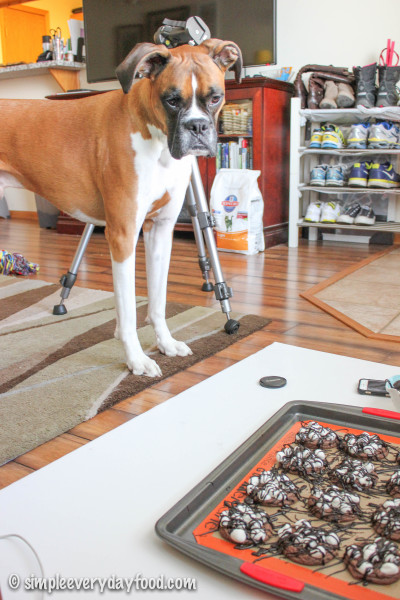
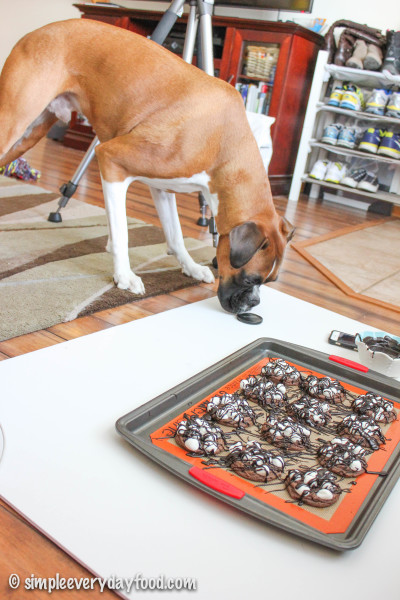
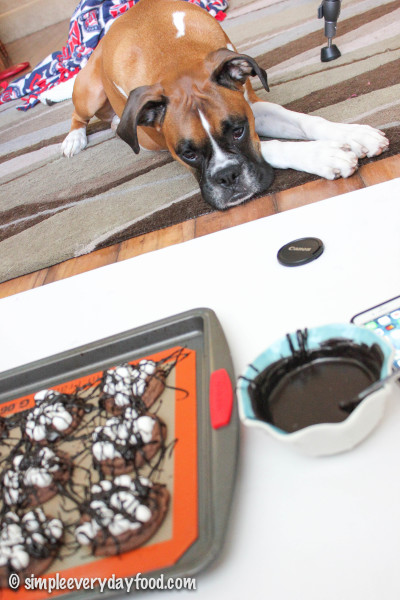
They look and smell so good that even your dog will be willing to stand guard for these cookies – you know, in case some crazy eagle swoops in through your window and snatches the entire pan with its long talons and flies away with it to a nearby tree…

Unless your dog is like my dog and likes to take naps while on guard duty.

mississippi mud cookies   mississippi mud cookies  mississippi mud cookies   mississippi mud cookies

….Well, then you’re on your own to defend that eagle…. :)

mississippi mud cookies
Print
For the cookies
  1. 1 box Devil's Food Cake mix, dry, not prepared (I used a 15.25 oz box of Betty Crocker)
  2. 1/2 cup (1 stick) unsalted butter, softened to room temperature
  3. 2 large eggs, at room temperature
  4. 3 cups mini marshmallows
For the chocolate drizzle
  1. 3 tablespoons cocoa powder
  2. 1/4 teaspoon salt
  3. 2 cups powdered sugar
  4. 1/4 cup (1/2 stick) unsalted butter
  5. 3 tablespoons skim milk
  6. 1/2 teaspoon vanilla extract
Instructions
  1. Preheat oven to 350 degrees. Line baking sheets with parchment paper or silicone baking mats.
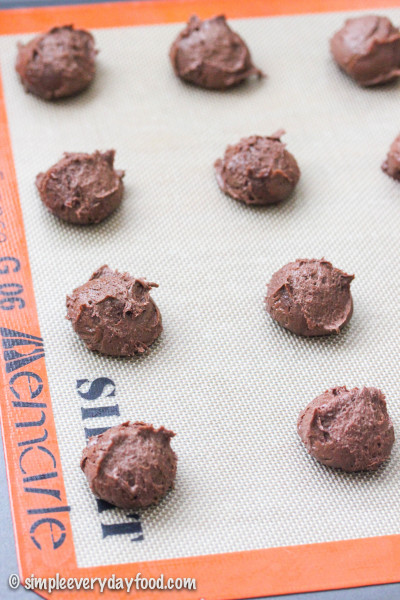
  2. In a large bowl, beat cake mix, butter and eggs until well combined. Drop about 1.5 tablespoons worth of dough on the prepared baking sheets, leaving at least 1-2" of space in between each dough ball.
  3. Bake for exactly 8 minutes. Remove cookies from oven (do not remove from cookie sheet) and top each cookie generously with mini marshmallows - press them down a bit if they keep rolling off the cookie. Return cookies back to oven and bake for an additional 2-3 minutes. Remove from oven and cool completely
  4. While the cookies are cooling, make the chocolate drizzle: In a medium bowl, combine the cocoa powder, salt, and powdered sugar and set aside.
  5. In a medium saucepan over medium heat, bring the butter and milk to a boil. Add in the vanilla extract and the powdered sugar mixture. Whisk vigorously until mixture is smooth. Drizzle over cookies*. Cookies can be stored in an airtight container at room temperature for up to 3 days.
  6. Makes 18-20 cookies
Notes
  1. * If your chocolate drizzle starts to harden, pop it in the microwave and heat in 15 second intervals until runny again.
Adapted from Chef In Training
Simple Everyday Food https://www.simpleeverydayfood.com/
Recipe adapted from Chef In Training

© Simple Everyday Food. All images & content are copyright protected. Please do not use any of my images without prior permission. If you want to republish this recipe, please re-write the recipe in your own words, or kindly link back to this post for the recipe.
Sharing is caring! Email this to someonePrint this pagePin on PinterestShare on YummlyShare on FacebookShare on Google+Tweet about this on Twitter

I had originally planned on posting this recipe next week, but these cookies turned out so pretty (and delicious) that I couldn’t help but share it with you guys a week early!


IMG_4157 copy

IMG_4132 copy

Brian is a fan of the holiday Oreos. He swears that they taste better than the regular ones, and has tried convincing me that the Halloween ones are the best, despite the fact that I personally think they are the same thing and taste exactly the same (except for the different designs and different colored filling)… but I don’t think he believes me.

I think it’s all mental. I think somewhere in Oreo’s headquarters dwells researchers that have conducted market research that show people are more likely to buy “new” products if they change the look of the product and make them “limited edition”, even if they keep the recipe the same.

Do you think the Halloween Oreos taste better than the regular ones?

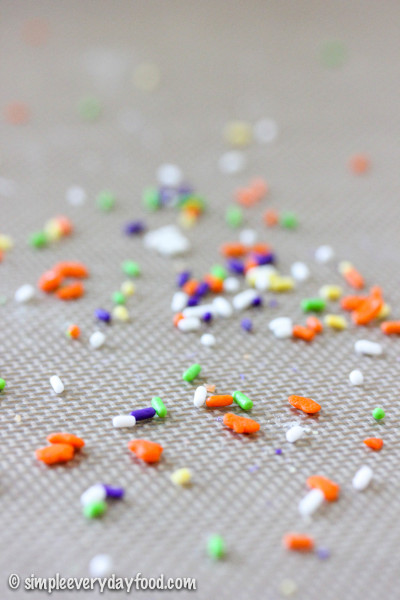
Since Halloween is just around the corner and my local grocery store has strategically placed all these tempting Oreos right by the checkout aisles, I caved and bought myself a pack of them. I knew they would make the perfect cookie with some of the Halloween sprinkles I bought at the craft store a few weeks back.

You know I’m a sucker for all things sprinkles!
IMG_4212 copy

IMG_4126 copy

I purposely made a big batch of these cookies earlier this week, knowing that I had my one-month post-LASIK checkup on Friday, and wanted to bring a couple dozen of these for the staff at the Whiting Clinic to show my appreciation of how wonderful they have been. I hope they liked them!

If you don’t want to make so many cookies at once, you can halve the recipe… although these cookies do freeze well and it never hurts to have frozen cookie dough in case of any late night cookie emergencies. Also, you can definitely use regular Oreos for this recipe (or any flavor for that matter). And it’s definitely not limited to just Halloween sprinkles either – use your favorite kind, none at all, or mix all your favorite sprinkles together to make it one colorful cookie – the possibilities are endless.

I decided to divide the batter in half since I had two different Halloween sprinkles I wanted to use – a spooky green/purple/orange one, and a candy corn colored one… the perfect pairing with some orange cream-filled Oreos! But dividing the batter into two also resulted in a lot of “transferring of the doughs”, which would’ve been a lot easier if I had two electric mixers…


IMG_4121 copy   IMG_4124 copy

IMG_4118 copy   IMG_4114 copy

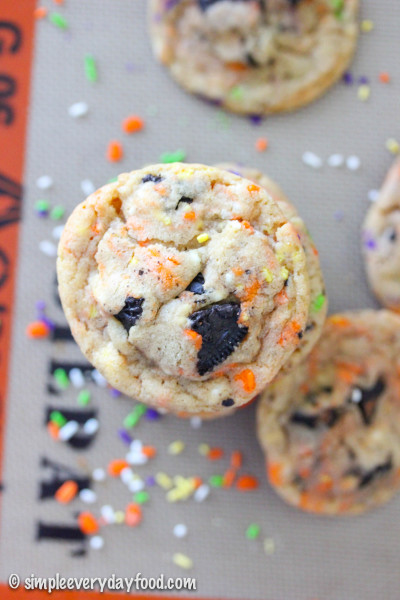
Basically you’ll be making one basic cookie dough and mixing in the add-ins separately. And trust me when I tell you that your arms will thank you if you use an electric mixer – it saves time and muscle and mixes everything better since the batter will be pretty sticky. The chopped Oreos may come apart while you mix them in and that’s totally okay! You’ll get swirls of the orange filling throughout the dough which will give the cookies a beautiful festive look.

IMG_4196 copy

IMG_4150 copy

About 1.5 hours after you chill the dough, make sure to take it out and roll them into dough balls. If you chill them for too long, the dough gets hard, making it difficult to roll. Once they’re rolled into balls, you can refrigerate them up to 3 days if you don’t plan on making them right away.

I normally prefer a thick puffy cookie rather than a thin one, but these turned out so good! They’ll look slightly puffy when you take them out of the oven, but they’ll flatten out a bit as they cool. The outer edges are slightly crunchy, but the insides are oh so soft and chewy with tons of chopped Oreo cookies laced in between each bite.


IMG_4180 copy

IMG_4136 copy

So. Frickin’. Good.

halloween cake batter oreo cookies
Print
Ingredients
  1. 2 and 1/2 cups all-purpose flour
  2. 2 and 1/2 cups vanilla cake mix (I used Betty Crocker)
  3. 1 teaspoon baking soda
  4. A pinch of salt
  5. 1 and 1/2 cups unsalted butter, at room temperature
  6. 1 cup granulated sugar
  7. 1 cup dark brown sugar, packed
  8. 2 eggs, at room temperature
  9. 3 teaspoons vanilla extract
  10. 1 cup Halloween sprinkles*
  11. 20 Halloween Oreos, roughly chopped**
Instructions
  1. 1. In a large bowl, sift together flour, cake mix, baking soda, and salt. Set aside.
  2. 2. Using an electric stand mixer with the paddle attachment, cream the softened butter and sugars together on medium speed until creamy and smooth. Add in the eggs, one at a time, beating well in between each addition. Then add in the vanilla extract and mix until combined, scraping down the sides in between if needed.
  3. 3. Slowly stir in the dry ingredients to the wet ingredients and gradually increase the speed to low-medium until everything is combined.
  4. *** If you plan on using only one kind of sprinkles, go on to Step 4 ***
  5. *** If you plan on using two different kinds of sprinkles, skip to Step 5. ***
  6. 4. Add in the sprinkles and mix on low. Then add in the chopped Oreos and mix on low until everything is evenly distributed.
  7. 5. Divide the batter in half (approximately is fine), and place one half of the dough in a separate bowl (we'll call this Dough #2). Add in Sprinkle #1 to the dough that is still in the mixer bowl, mix on low and then add in the chopped Oreos until combined. Remove Dough #1 into a bowl and set aside. Put Dough #2 into mixer bowl, mix in Sprinkle #2 and chopped Oreos until combined.
  8. 6. Cover bowl(s) with plastic wrap and refrigerate dough for at least 1.5 hours. Roll dough into balls (I used a 1.5 tablespoon cookie scoop) and place in a tupperware, cover tightly, and refrigerate until ready to bake. Cookie dough can be refrigerated up to 3 days.
  9. 7. Preheat oven to 350 degrees and line baking sheets with silicone baking mats or parchment paper. Bake for 10-12 minutes and let cookies cool on the baking sheet for 5 minutes before removing them onto a wired cooling rack to cool completely. Store cookies at room temperature in an airtight container for up to 7 days.
  10. Makes 60 cookies
Notes
  1. *If you plan on using two different kinds of sprinkles like I did, you'll need 1/2 cup of each
  2. **If you plan on making two different batches, divide the roughly chopped Oreos into two separate bowls
Adapted from Sally's Baking Addiction
Simple Everyday Food https://www.simpleeverydayfood.com/
Recipe adapted from Sally’s Baking Addiction

© Simple Everyday Food. All images & content are copyright protected. Please do not use any of my images without prior permission. If you want to republish this recipe, please re-write the recipe in your own words, or kindly link back to this post for the recipe.
Sharing is caring! Email this to someonePrint this pagePin on PinterestShare on YummlyShare on FacebookShare on Google+Tweet about this on Twitter

IMG_4033 copy   

So while I’m sitting here at my local coffee shop writing today’s post, I contemplated about telling you guys the horrifying experience I had at this very same coffee shop just a few days ago, which involved two small birds flying into the glass window with a loud “thud!” right next to where I was sitting and landing on the sidewalk. And a phone call to a local emergency veterinary clinic regarding said collision that left me angry and frustrated. I started writing and then proceeded to deleted the two paragraphs I have written, because I figured this story is probably pretty dang unappetizing for a food blog, and the last thing I want to do is to turn you guys off.

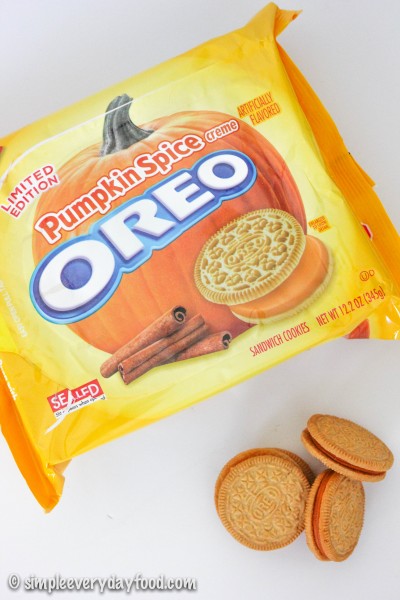
So let’s start over…. despite the numerous pumpkin recipes I have posted here on SEF, would you believe me if I told you there once was a time where I hated pumpkin-flavored anything? I still don’t care for pumpkin pie to this day, but I do like some things that are pumpkin-spice-flavored. I have been seeing a lot of seasonal pumpkin flavor-related items on my Instagram feed lately and a lot of people stocking up on all things pumpkin (apparently Trader Joe’s have transformed itself into America’s pumpkin headquarters), but other than these pumpkin spice Oreo cookies, I have yet to stock up my pantry with any of these seasonal items.

I have to admit, these Oreos are pretty dang amazing. I had to hoard a stack of these babies and tuck them away in my cupboard for this recipe, just in case I didn’t have the self control to stop eating them.

IMG_3990 copy

IMG_3994 copy

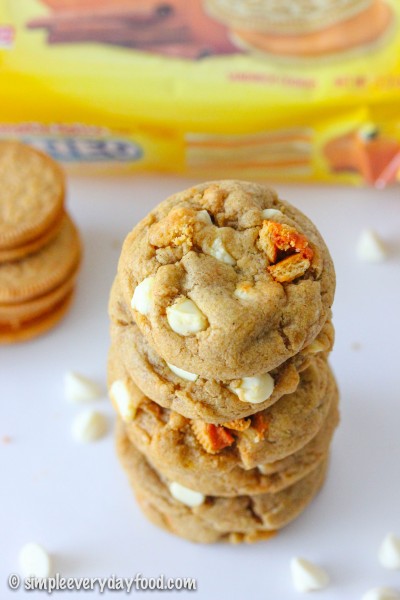
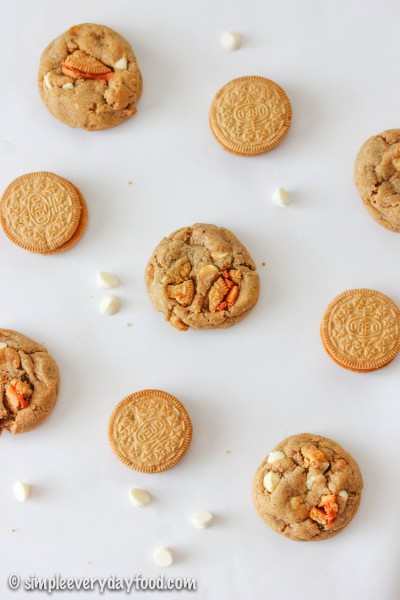
These cookies are soft, puffy, and filled with pumpkin deliciousness! You may remember these ooey gooey pumpkin chocolate chip cookies I made last year. This time, I switched out the milk chocolate chips for white chocolate chips instead, and I think I actually like these better!

IMG_4034 copy

IMG_4022 copy

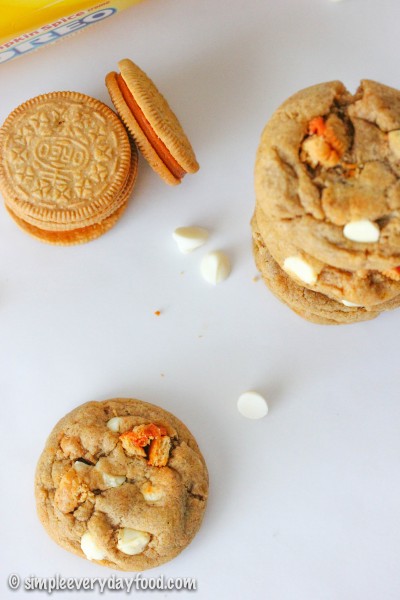
The white chocolate chips are a perfect complement to the golden Oreo cookies. All the flavors shine through and the ingredients don’t overpower one another. They are slightly crunchy on the outside, but so soft and chewy on the inside. And when you get a bite with the chopped Oreo cookies, it’s like a little bite of heaven.. so good!

IMG_4037 copy

IMG_4018 copy

IMG_4008 copy

soft and chewy pumpkin spice oreo cookies
Print
Ingredients
  1. 1/2 cup (1 stick) unsalted butter, melted and cooled
  2. 3/4 cup granulated sugar
  3. 1/4 cup dark brown sugar
  4. 2 teaspoons vanilla extract
  5. 1/4 pumpkin puree
  6. 2 cups all-purpose flour
  7. 1 teaspoon baking soda
  8. 2 teaspoons cornstarch
  9. 1/4 teaspoon salt
  10. 1 teaspoon ground cinnamon
  11. 1/8 teaspoon ground nutmeg
  12. 1/4 teaspoon ground cloves
  13. 1/4 teaspoon ground ginger
  14. 1/3 cup white chocolate chips
  15. 1/2 cup pumpkin spice oreos, coarsely chopped
Instructions
  1. In a medium sized bowl, combine the flour, baking soda, cornstarch, salt, cinnamon, nutmeg, cloves, and ginger. Set aside.
  2. Using an electric mixer with the paddle attachment, beat together the melted butter and both sugars. Add in the vanilla extract and pumpkin puree. Mix over medium speed until combined. Gently stir in the white chocolate chips and chopped Oreos.
  3. Cover and refrigerate for at least 30 minutes. Meanwhile, preheat the oven to 350 degrees and line two baking sheets with parchment paper and set aside.
  4. Using a medium cookie scoop (about 1.5 tablespoons), drop dough balls approximately 1" apart on the baking sheets. Bake for 8-10 minutes, rotating the pans halfway to ensure even baking. Remove from oven and gently press the tops with the back of a spoon if the cookies are too puffy for your liking (I did, because I love my cookies with slight cracks but yet still slightly puffy). Let cool on the baking sheet for 5-10 minutes before transferring them to a wired cooling rack to cool completely. Cookies can be stored in an airtight container for up to 5 days.
  5. Makes 2 dozen cookies
Adapted from The Domestic Rebel
Simple Everyday Food https://www.simpleeverydayfood.com/
Recipe adapted from The Domestic Rebel

© Simple Everyday Food. All images & content are copyright protected. Please do not use any of my images without prior permission. If you want to republish this recipe, please re-write the recipe in your own words, or kindly link back to this post for the recipe.

Sharing is caring! Email this to someonePrint this pagePin on PinterestShare on YummlyShare on FacebookShare on Google+Tweet about this on Twitter