everyday food made simple

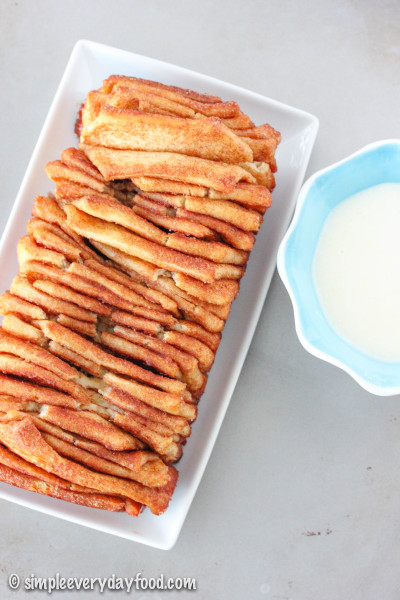
Let’s all pause for a moment and discuss how important it is for you to make these for breakfast this weekend. I’ve made a few variations of breakfast rolls that I’ve shared with you in the past (you can find them here, here, here, and here), but today we’re ditching the rolls and making something I’ve never made before… pull-apart bread.
IMG_4424 copy

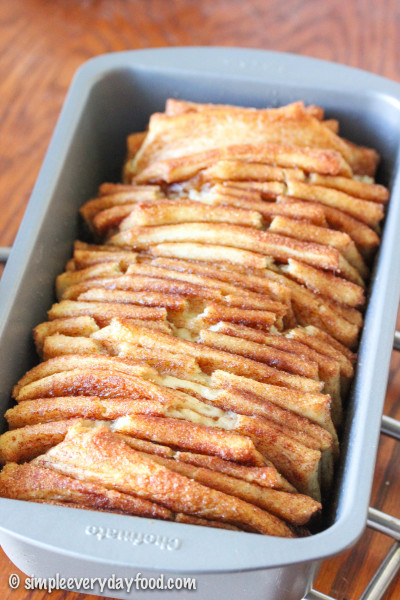
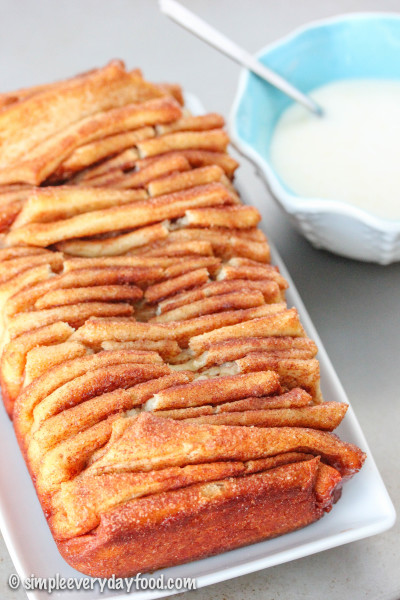
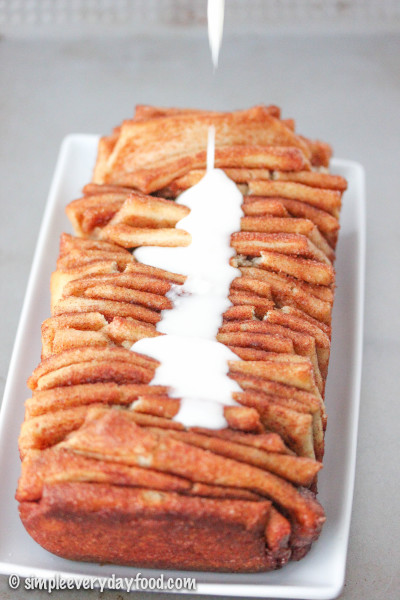
And before we get too crazy with the variations, let’s start with a simple and classic flavor: cinnamon + sugar with a vanilla glaze/dipping sauce.

The beauty of the pull-apart bread is its non-uniformity. No matter how exact you cut all your dough squares, not every piece of those squares is going to rise in the same exact way. The result is this beautiful vertically layered bread with pieces sticking out in every which way, making it that much more fun to peel away a piece, dunking it in the sticky sweet glaze, and shoving it in your mouth.
IMG_4444 copy

IMG_4458 copy

I’ll forewarn you that this post is a little bit lengthy, but please don’t let the number of steps intimidate you or hold you back from making this! I took step-by-step photos for you to go along with each step (located at the end of this post) to make the instructions easier to understand. I also added a few comments of my own (which I italicized) based on my own preference for you to use as a reference. There’s a lot of “making and waiting” involved, but once you get things started it goes by fast. Please trust me when I tell you that you need to make this bread because it’s actually pretty easy to make and it’s so fun to eat!
IMG_4400 copy

IMG_4437 copy

On a semi-related note: this was my very first time taking step-by-step photos for a recipe that  required a few more steps than the usual posts that appear here on SEF, and it really made me appreciate all the talented food bloggers out there that include photos for each step in very post (my favorite is probably Simply Scratch – Laurie’s blog is beautiful and inspiring) – it really is a lot harder than it seems! It doesn’t help that my kitchen has zero natural lighting, so I had to run back and forth between the living room, dining room, and kitchen the entire time, trying to beat the sun and finding the best angle to shoot these photos.

Hats off to all the bloggers out there that take such wonderful step-by-step photos for people like me to admire and learn from.

cinnamon pull-apart bread
Print
For the dough
  1. 2 cups skim milk
  2. 1/2 cup vegetable oil
  3. 1/2 cup granulated sugar
  4. 1 teaspoon vanilla extract
  5. 2 and1/4 teaspoons (1 packet) active dry yeast
  6. 4 and 1/2 cups all-purpose flour, divided
  7. 1/2 teaspoon baking powder
  8. 1/2 teaspoon baking soda
  9. 2 teaspoons salt
  10. 1/2 cup (1 stick) unsalted butter, melted and cooled
For the cinnamon sugar mixture
  1. 1 and 1/2 cups granulated sugar
  2. 3 tablespoons ground cinnamon
  3. 1/2 teaspoon ground nutmeg
For the icing
  1. 1 and 1/2 cups powdered sugar
  2. 1/4 cup heavy whipping cream
  3. Pinch of salt
Instructions
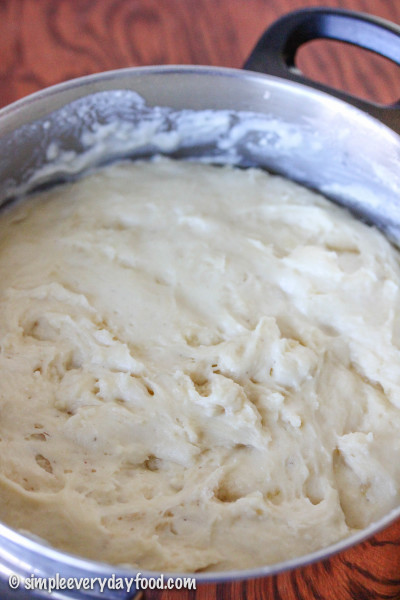
  1. To make the dough, combine milk, oil, vanilla extract, and 1/2 cup sugar in a large saucepan. Heat it until very hot but not boiling. Turn off heat and allow to cool slightly until it's just warm to the touch. Sprinkle in the yeast and add 4 cups of flour. Stir to combine, then put lid on the pot and allow to rise for 1 hour in a warm, draft-free area until doubled in size.
  2. During this time, generously coat a 9 x 5 x 3-inch loaf pan with the melted butter and set aside. In a medium bowl, combine the ingredients for the cinnamon sugar mixture and set that aside as well.
  3. After 1 hour, stir in additional 1/2 cup flour, along with the baking powder, baking soda, and salt. If dough is overly sticky, stir in up to an additional 1/2 cup of flour - I added in 1/4 cup increments. the dough should be slightly sticky but should not stick to your hands as you handle it.
  4. Roll out dough onto a floured surface into a roughly 12 x 20" rectangle. Brush on melted butter so that it covers all the dough (I totally didn't skimp on this step - the butter is what makes the cinnamon sugar mixture stick to the dough!).
  5. Sprinkle a generous coating of the cinnamon sugar mixture onto the buttered dough... it may seem like a lot, but let's face it - there's no such thing as too much cinnamon sugar! Reserve about 2-3 tablespoons of the mixture.
  6. Cut the dough vertically into approximately 2" wide strips (you'll get about 6-8 of 'em), then stack all the strips into one stack. Cut the stack of strips into 2" wide squares. Tilt your loaf pan vertically and start stacking your dough squares into your buttered loaf pan. Don't cram too many squares in your pan since you'll need to allow room for them to rise some more... you may have some squares leftover.
  7. Sprinkle the tops with more cinnamon sugar... because there's never enough of that stuff! Cover with a dish towel and allow to rise in a warm place for 30-45 minutes, or until dough have risen to double the size.
  8. In the meantime, preheat oven to 350 degrees. Place the pan in the oven and bake for 30-35 minutes or until the center is cooked through. Check dough at 20 minutes to make sure the top isn't browning too fast.. if it is, cover with aluminum foil for the remainder of the baking time.
  9. Remove the pan from the oven when it's done and let cool for 20 minutes. Run a knife along the edges and take the bread out of the pan and transfer to a serving plate. Mix together the icing ingredients and drizzle over the top*. Serve warm and enjoy!
Notes
  1. * If desired, you can reserve about half of the glaze and use it as a dipping sauce.
Adapted from The Pioneer Woman
Simple Everyday Food https://www.simpleeverydayfood.com/
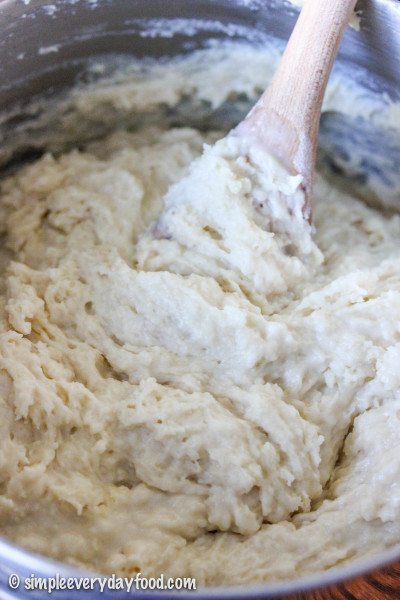
1. To make the dough, combine milk, oil, vanilla extract, and 1/2 cup sugar in a large saucepan. Heat it until very hot but not boiling. Turn off heat and allow to cool slightly (I made this before I purchased a candy thermometer and used the old-school touch-and-feel method. It’s “cool” enough when you can stick your hand in it without getting burned – think warm bath water). Sprinkle in the yeast and add 4 cups of flour. Stir to combine, then put lid on the pot and allow to rise for 1 hour in a warm, draft-free area until doubled in size (below are the Before and After shots).

IMG_4304 copy   IMG_4309 copy

2. During this time, generously coat a 9x5x3-inch loaf pan with the melted butter and set aside. In a medium bowl, combine the sugar, cinnamon, and nutmeg. mix, and set aside.

3. After 1 hour, stir in additional 1/2 cup flour, along with the baking powder, baking soda, and salt. If dough is overly sticky, stir in up to an additional 1/2 cup of flour – I added in 1/4 cup increments. the dough should be slightly sticky but should not stick to your hands as you handle it.

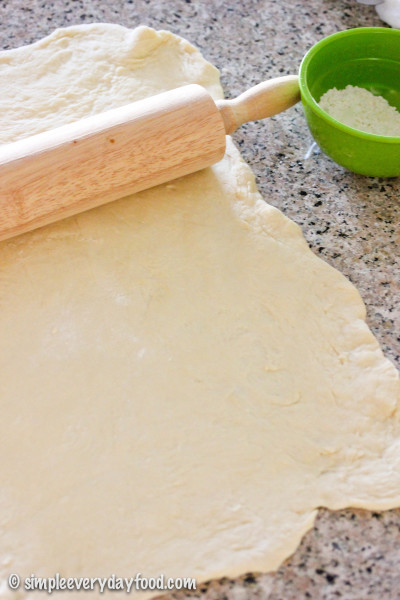
4. Roll out dough onto a floured surface into a roughly 12×20″ rectangle. Brush on melted butter so that it covers all the dough (I totally didn’t skimp on this step – the butter is what makes the cinnamon sugar mixture stick to the dough!).
IMG_4320 copy

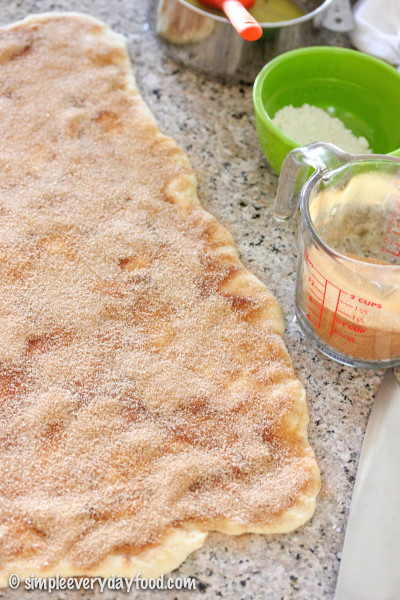
5. Sprinkle a generous coating of the cinnamon sugar mixture onto the buttered dough… it may seem like a lot, but let’s face it – there’s no such thing as too much cinnamon sugar! Reserve about 2-3 tablespoons of the mixture.
IMG_4331 copy

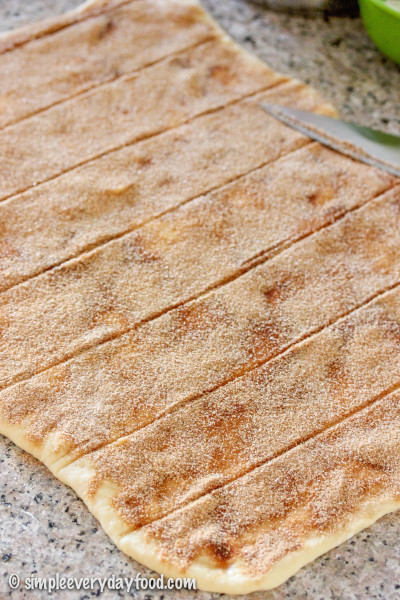
6. Cut the dough vertically into approximately 2″ wide strips (you’ll get about 6-8 of ’em)…
IMG_4339 copy

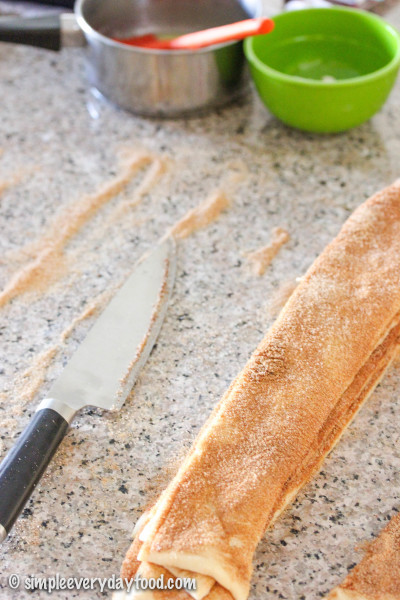
7. …Then stack all the strips into one stack.
IMG_4347 copy

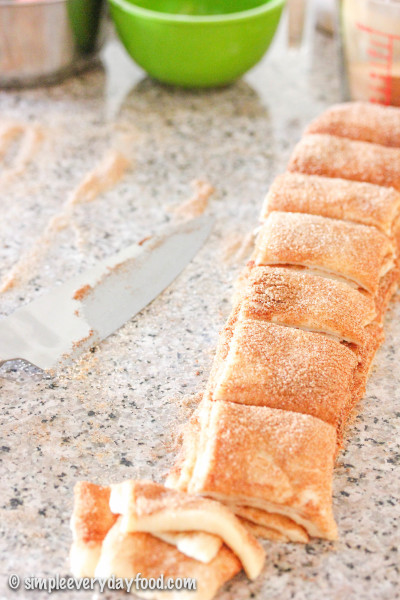
8. Cut the stack of strips into 2″ wide squares (if you’re OCD like me, you’d take a ruler and measure and score marks on your dough prior to cutting. I also trimmed off the edges so I’m left with nicely uniformed squares… because uniformity is what makes my world go round).
IMG_4354 copy

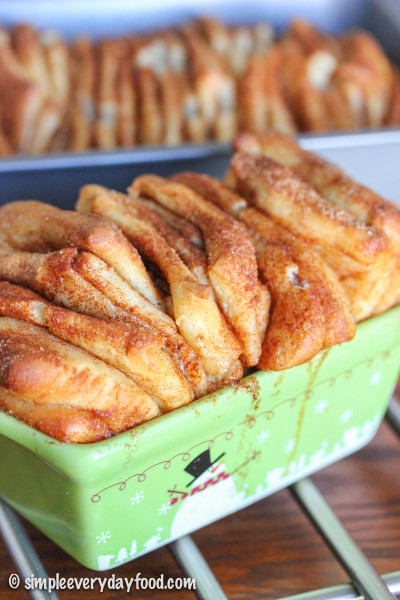
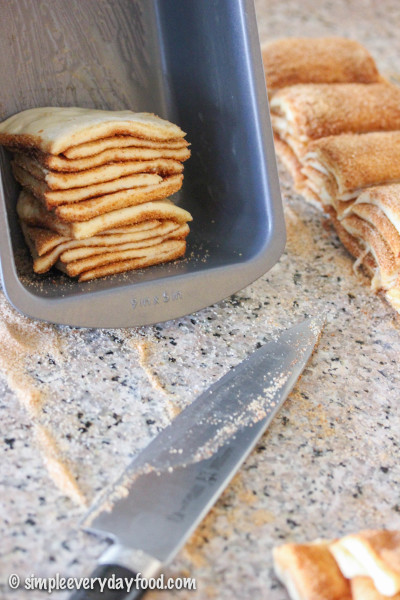
9. Tilt your loaf pan vertically and start stacking your dough squares into your buttered loaf pan. Don’t cram too many squares in your pan since you’ll need to allow room for them to rise some more… you may have some squares leftover (I used my leftover squares and some of the trimmed edge pieces to make a mini pull-apart loaf!).
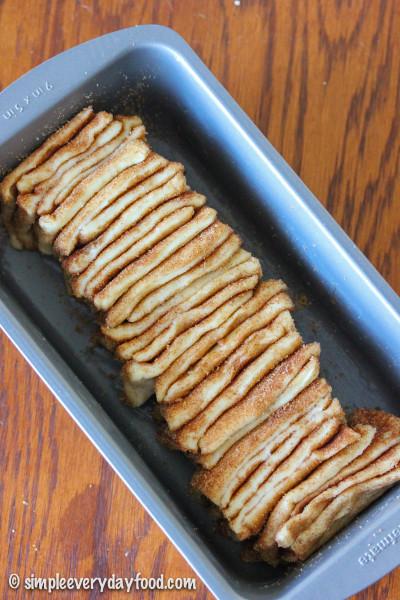
IMG_4358 copy   IMG_4378 copy

10. Sprinkle the tops with more cinnamon sugar… because there’s never enough of that stuff! Cover with a dish towel and allow to rise in a warm place for 30-45 minutes, or until dough have risen to double the size.
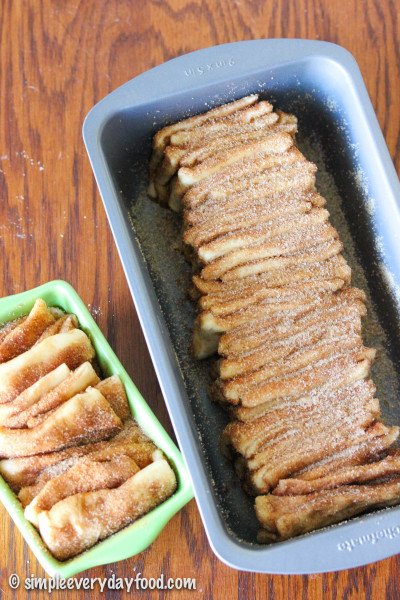
IMG_4388 copy

11. In the meantime, preheat oven to 350 degrees. Place the pan in the oven and bake for 30-35 minutes or until the center is cooked through. Check dough at 20 minutes to make sure the top isn’t browning too fast.. if it is, cover with aluminum foil for the remainder of the baking time.

12. Remove the pan from the oven when it’s done and let cool for 20 minutes. Run a knife along the edges and take the bread out of the pan and transfer to a serving plate. Mix together the icing ingredients and drizzle over the top. Serve warm and enjoy!

Recipe adapted from The Pioneer Woman

© Simple Everyday Food. All images & content are copyright protected. Please do not use any of my images without prior permission. If you want to republish this recipe, please re-write the recipe in your own words, or kindly link back to this post for the recipe.

Sharing is caring! Email this to someonePrint this pagePin on PinterestShare on YummlyShare on FacebookShare on Google+Tweet about this on Twitter

Hey guys! Guess what?

Today we’re celebrating a special day that’s coming up tomorrow and I’m quite excited about it.

IMG_5398 copy

I’ll give you a few hints:

  1. It’s going to be a two-year celebration
  2. It involves something that started out as an idea, which turned out to be a hobby
  3. It involves food (lots and lots of food), lots of time in the kitchen, hours of time spent on learning photography and techie things, and a little space I own here on the internet

That’s right, you guessed it! Tomorrow will be Simple Everyday Food’s 2nd blogiversary! Can I get a whoop whoop?!

IMG_5402 copy

IMG_5409 copy

This little site of mine started out as an idea, and after a few encouragements from the mister, I bit the bullet two years ago, signed up for my own domain name, and BOOM! SEF was born. Fast forward throughout the years, this little corner of mine here on the world wide web has slowly became my happy place where I get to temporarily run away from everyday stresses, let loose, and be creative. I still have so much to learn in regards to the food blogging business, but SEF wouldn’t be able to continue to grow without all my supporters and those that I constantly learn from every single day.

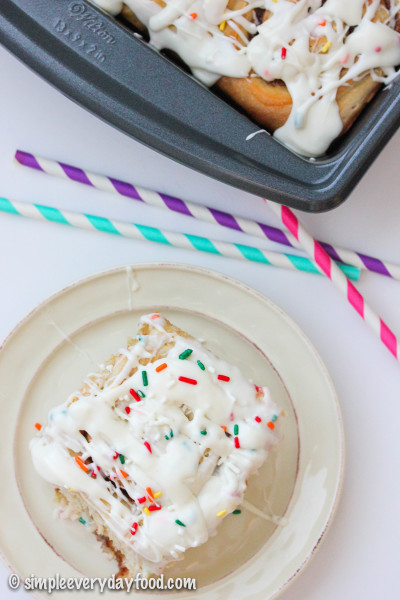
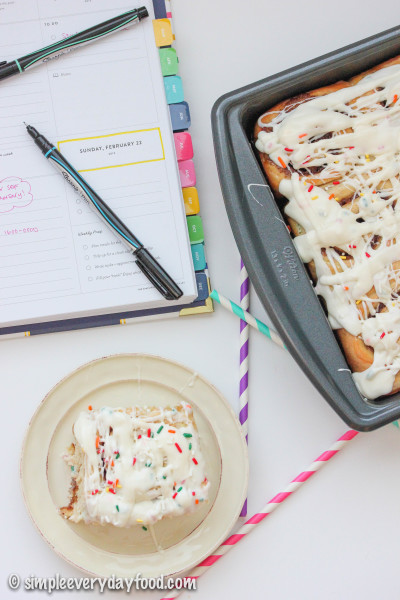
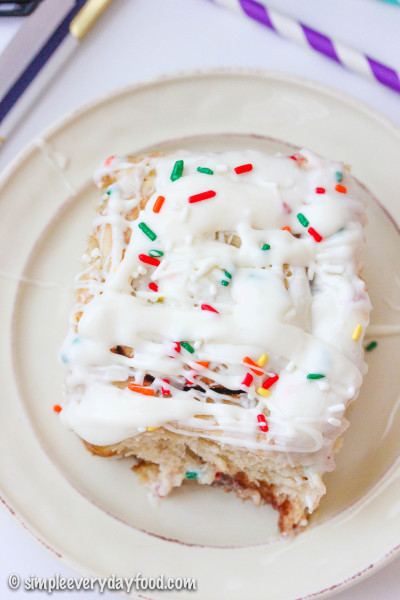
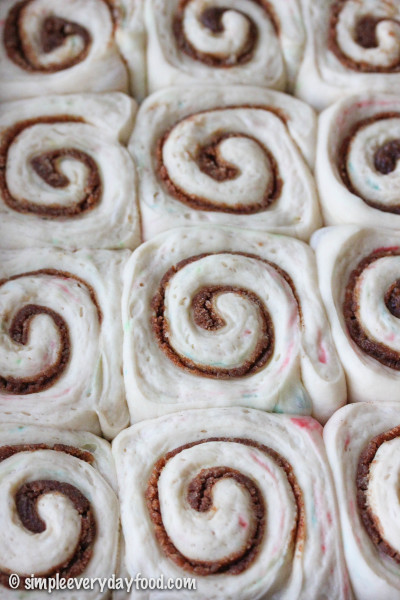
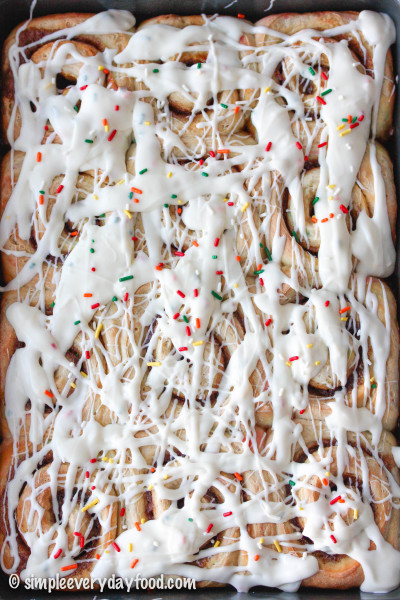
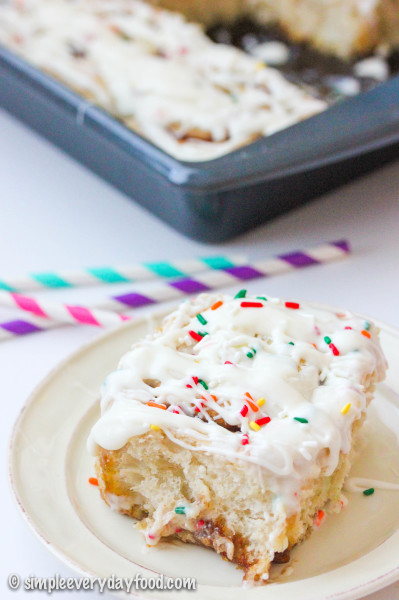
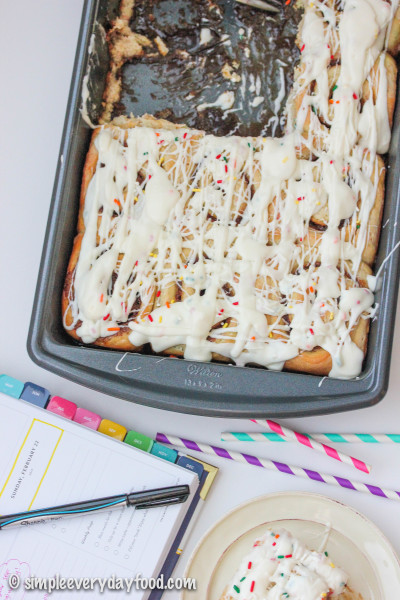
So it’s only appropriate that we celebrate this special occasion with sprinkles. Lots and lots and looooots of sprinkles. And instead of a cake, we’re celebrating with some soft and fluffy cinnamon rolls. Homemade cinnamon rolls dotted with plenty of sprinkles baked to melt-in-your-mouth perfection, generously drizzled with a sweet and creamy cream cheese frosting with sprinkles, to be exact.

IMG_5374 copy

IMG_5388 copy

IMG_5396 copy

A big thank you to all of you who have been part of this journey – I wouldn’t be here without you guys! xoxo

IMG_5415 copy

overnight funfetti cake batter cinnamon rolls
Print
For the rolls
  1. 2 and 1/2 cups water
  2. 1 tablespoon active dry yeast
  3. 1 teaspoon salt
  4. 1 box funfetti cake mix (I used Pillsbury)
  5. 5-6 cups all-purpose flour, plus more for dusting
  6. 1 teaspoon vanilla extract
For the filling
  1. 1 stick (8 tablespoons) unsalted butter, melted and cooled
  2. 2 and 1/2 cups dark brown sugar
  3. 2 tablespoons ground cinnamon
For the glaze
  1. 2 and 1/2 oz light cream cheese, softened to room temperature
  2. 3 tablespoons milk
  3. A splash of vanilla extract
  4. 1 and 1/2 cups powdered sugar
  5. rainbow sprinkles for garnish, if desired
Instructions
  1. Heat water in a microwave safe bowl until it reaches ~120-125 degrees F. Sprinkle in the yeast and salt and give it a good stir. Let sit for 5 minutes until foamy.
  2. In the bowl of an electric mixer, combine the cake mix and the 5 cups of flour, stir to combine. Using a dough hook attachment, slowly add in the yeast mixture and vanilla extract. Turn on the mixer and mix on low, gradually increasing the speed to medium-low. Knead the dough for about 5 minutes or until the dough is elastic and pulls away from the sides of the bowl. If the dough is still too sticky, add in additional flour, 1/4 cup at a time, until it no longer sticks to you hand (I only used about 1/2 cup of extra flour). Remove dough and place in a lightly greased bowl, cover and let rise until it doubles in size, about 1-2 hours.
  3. In the meantime, combine the brown sugar and cinnamon in a medium bowl and set aside. Grease two 9x13" baking pans and set those aside as well.*
  4. Once the dough has risen, divide the dough into two portions so it's easier to work with. Turn half of the dough onto a lightly floured surface and roll into a rectangle, approximately 11x15" (or in my case, my dough always turns out to be a large blob instead). Brush half of the melted butter onto the dough, covering every single inch if possible. Then generously sprinkle half of the brown sugar/cinnamon mixture evenly on top.
  5. Starting on the long end, tightly roll up the dough and cut dough into 10-11 slices, about 1.5-2" thick each. Place into prepared baking pan. Repeat with the other half of the dough.
  6. Cover baking pans and let rise overnight on your kitchen counter.
  7. The next morning, bake rolls in a 400 degree oven for 15-20 minutes or until golden brown (mine took exactly 15 minutes). Remove from oven and let cool.
  8. While the rolls are cooling, make the glaze: beat the cream cheese in an electric mixer until smooth and creamy. Add in the milk and vanilla extract and beat until incorporated. Slowly add in the powdered sugar and beat until smooth. Drizzle over rolls and sprinkle with additional rainbow sprinkles, if desired. Rolls taste best the same day, but can be stored in an airtight container at room temperature for up to 5 days**.
  9. Makes 20-22 rolls
Notes
  1. * If you only have one 9x13" baking pan like me, you can always use a 9" pie plate along with the baking pan.
  2. ** You can always freeze one pan of the rolls after they've cooled from the oven, then wrap well and freeze. Thaw out in the refrigerator or at room temperature, make the glaze, and heat rolls in microwave until warm.
Adapted from Something Swanky
Simple Everyday Food https://www.simpleeverydayfood.com/
Recipe adapted from Something Swanky; glaze recipe adapted from Well Plated

© Simple Everyday Food. All images & content are copyright protected. Please do not use any of my images without prior permission. If you want to republish this recipe, please re-write the recipe in your own words, or kindly link back to this post for the recipe.

Sharing is caring! Email this to someonePrint this pagePin on PinterestShare on YummlyShare on FacebookShare on Google+Tweet about this on Twitter

 IMG_3864 copy  

It’s been about a week since the new iPhone 6 launch – did you upgrade to the new phone? Did you decide on a 6 or 6 Plus? Or are you one of those silly Android lovers that are super anti-Apple?

I myself, being a huge Apple fanatic, just had to get the new iPhone. And of course I had to have it on launch day. I just couldn’t bear the idea of seeing everyone else posting pictures of their new phone and reading all about how awesome the new phone is without having one in my hand.

IMG_9434

So first thing in the morning on September 12th, we waited for almost an hour and pre-ordered our iPhone 6s at the AT&T store. Needless to say, I was beyond ecstatic when I heard the FedEx truck pull up to our door last Friday, delivering a little brown box with our brand new phones carefully tucked in it. Other than the fact that my phone now doesn’t fit in my scrub pants pocket or my wallet, I’m in love with everything else about it – the screen is larger, but not too large to where it doesn’t fit in my hand. It’s slim, sleek, and lightweight all at the same time. The camera is amazing and the retina display is incredible.

IMG_9435

Don’t worry, even if you are an Android user, we can still be friends… I promise.

However, if you’re not into snickerdoodles, I’m not sure if we can be friends anymore.

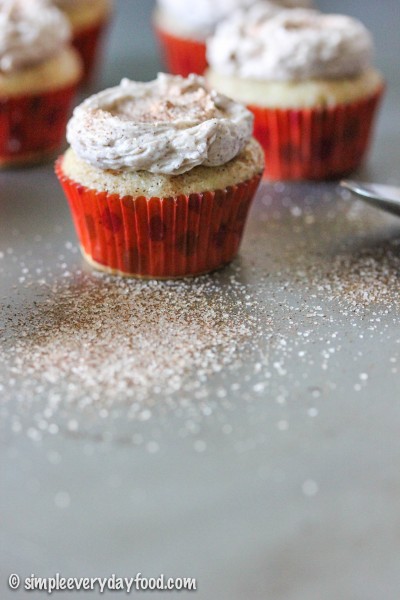
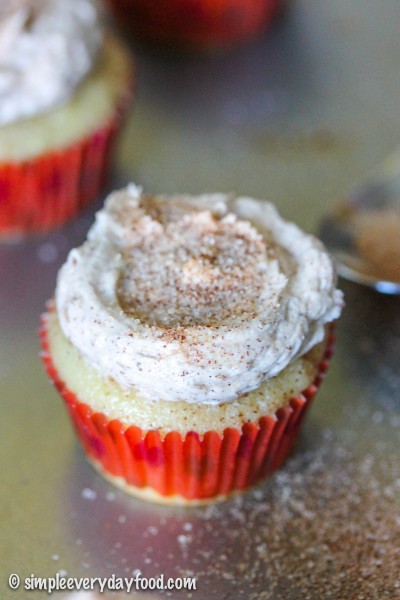
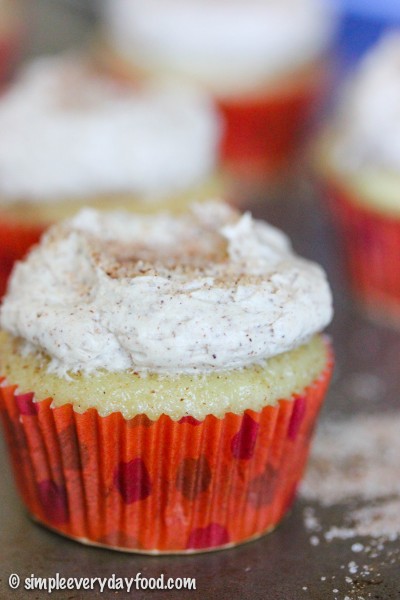
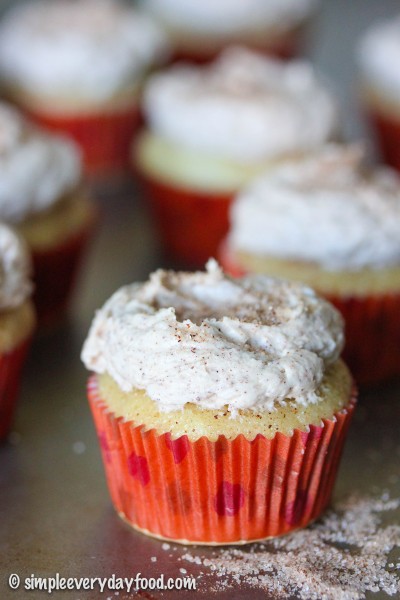
Okay, I’m totally kidding. We can still be friends, and I will totally force these snickerdoodle cupcakes on you, which I’m sure you’ll totally change your mind about snickerdoodles in general.

IMG_3870 copy

IMG_3872 copy

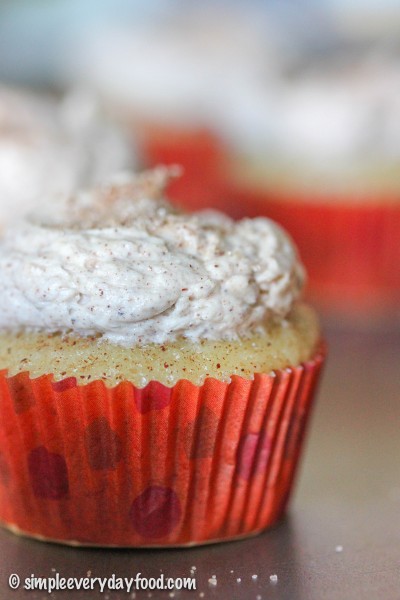
These cupcakes are a cinnamon lover’s dream – there’s so much cinnamon put into it! There’s cinnamon added into the batter, then a generous layer of cinnamon sugar sprinkled in between the batter, and two whole tablespoons of it in the frosting! Yep, you read that right: two tablespoons of cinnamon. Or if you’re like me, my two tablespoons sort of turned into two heaping tablespoons of it…

Because: “it’s too cinnamon-y”, said no one ever.

IMG_3834 copy

IMG_3841 copy

IMG_3875 copy

And to make these cupcakes even more adorable, I made them into “minis” – because everything is cuter when they’re minis, right?

IMG_3860 copy

Disclaimer: this food blog will not be responsible for how many cupcakes you end up eating in one sitting.

And because the batter yielded 40+ mini cupcakes, I brought some to work to share, and EVERYONE loooooooved it. Loved it, as in “these may be the best cupcakes you’ve brought so far”.

Must be rough being a food blogger’s coworker..

IMG_3880 copy

mini snickerdoodle cupcakes with cinnamon frosting
Print
For the cupcakes
  1. 1 and 2/3 cups all-purpose flour
  2. 1/2 teaspoon baking powder
  3. 1/4 teaspoon baking soda
  4. 1/2 teaspoon salt
  5. 1/2 cup (1 stick) unsalted butter, melted and cooled
  6. 1 and 1/3 cups granulated sugar, divided
  7. 1 large egg, at room temperature
  8. 1/4 cup low-fat vanilla yogurt
  9. 3/4 cup skim milk
  10. 1 tablespoon vanilla extract
  11. 2 rounded teaspoons ground cinnamon
For the frosting
  1. 1 cup (2 sticks) unsalted butter, at room temperature
  2. 3 cups powdered sugar
  3. 1/4 cup heavy whipping cream
  4. 2 teaspoons vanilla extract
  5. A pinch of salt
  6. 1.5-2 tablespoons ground cinnamon
Instructions
  1. Preheat oven to 350 degrees. Line mini muffin tins with cupcake liners and set aside.
  2. In a medium bowl, combine flour, baking powder, baking soda, and salt. Set aside.
  3. Whisk in 1 cup of granulated sugar into the melted butter, then stir in the egg, yogurt, milk, and vanilla extract until thoroughly combined. Add in the dry ingredients to the wet, and stir until there are no more lumps in the batter.
  4. In a small bowl, combine the ground cinnamon and the remaining 1/3 cup granulated sugar. Set aside.
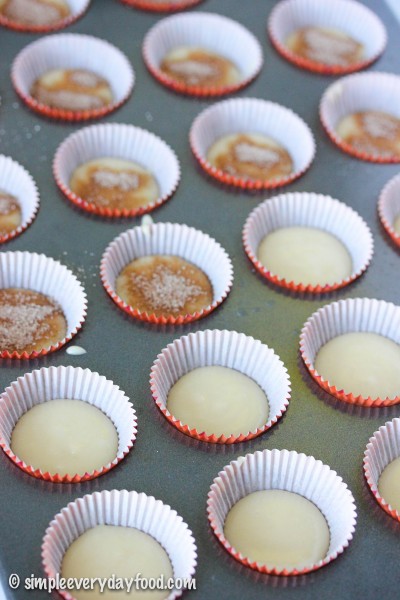
  5. Spoon about 1 teaspoon of the batter into the bottom of each of the cupcake liner, just enough to cover the bottom. Top with about 1/4-1/2 teaspoon of the cinnamon sugar mixture. Top with more batter, filling each well about 3/4 full, then top each mini cupcake with a generous sprinkle of the cinnamon sugar mixture.
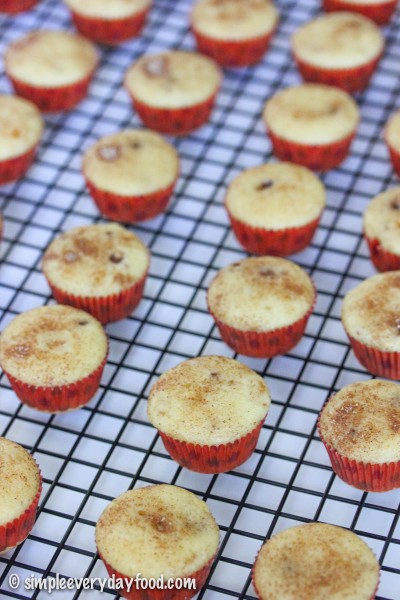
  6. Bake the cupcakes for about 13 minutes, or until an inserted toothpick comes out clean. Let cool for 5 minutes before removing the cupcakes onto a wired cooling rack to cool completely.
  7. While the cupcakes are cooling, make the frosting: using an electric stand mixer, beat the butter on medium speed until light and fluffy. Slowly add in the powdered sugar, heavy whipping cream, and vanilla extract. Gradually increase the speed to "high" and beat for 3-4 minutes. Add more powdered sugar/cream until you reach the desired consistency. Add in the ground cinnamon and beat until combined. Pipe frosting onto cupcakes with your favorite piping tip. Dust the tops with the the remaining cinnamon sugar mixture if desired. Cupcakes can be stored in an airtight container for up to 3 days.
  8. Makes 40-42 mini cupcakes
Adapted from Sally's Baking Addiction
Simple Everyday Food https://www.simpleeverydayfood.com/
Recipe adapted from Sally’s Baking Addiction

© Simple Everyday Food. All images & content are copyright protected. Please do not use any of my images without prior permission. If you want to republish this recipe, please re-write the recipe in your own words, or kindly link back to this post for the recipe.

Sharing is caring! Email this to someonePrint this pagePin on PinterestShare on YummlyShare on FacebookShare on Google+Tweet about this on Twitter

I hope everyone had a wonderful 4th that was celebrated by spending time with family, nice weather, and plenty of good food! It’s funny that in our family, we (and by “we”, I mean “I”) usually plan an excessively long list of things I want to make for the holidays despite the fact that it’s usually the two of us. It’s not one of those “oh these are the things I want to make, but I probably won’t make everything”.  Noooooo siree! I’m the one who plans and executes. If I want to make it, I will make it.

You should’ve seen the list I made for Thanksgiving last year – it was ridiculous. I think I had 8-9 things on the menu just to feed the two of us, from appetizers to side dishes to dessert – we were covered in the event of a zombie apocalypse and we couldn’t leave the house for 3 weeks. There was so much food that we barely had enough counter space to put everything!

The big holiday itself usually gets a lot of attention and planning ahead, but not everyone plans for breakfast the morning after when everyone wakes up from the food coma. In case you’re still looking for a easy breakfast option for tomorrow, I’ve got you covered!

IMG_3098 copy

These cinnamon rolls can be easily made the night before, so when you wake up and want breakfast, you only have to wait less than 30 minutes for a piping hot, fresh out-of-the-oven, mouth-watering, gooey, sweet cinnamon roll! And let me tell you, it’s totally worth the wait, because these are deeeelish!

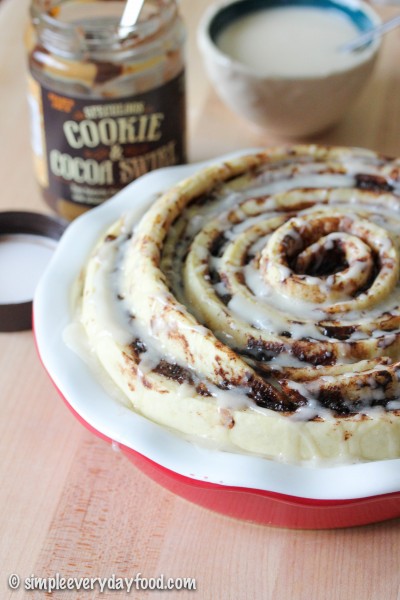
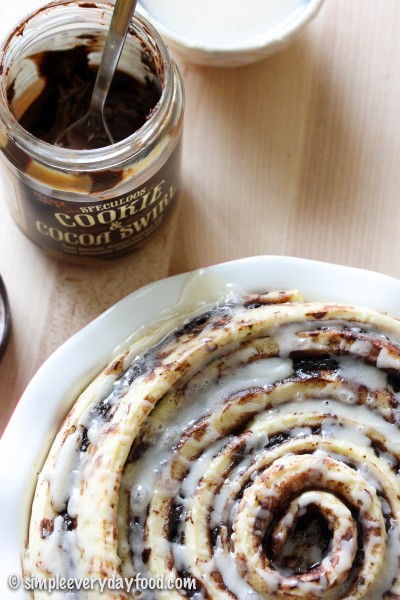
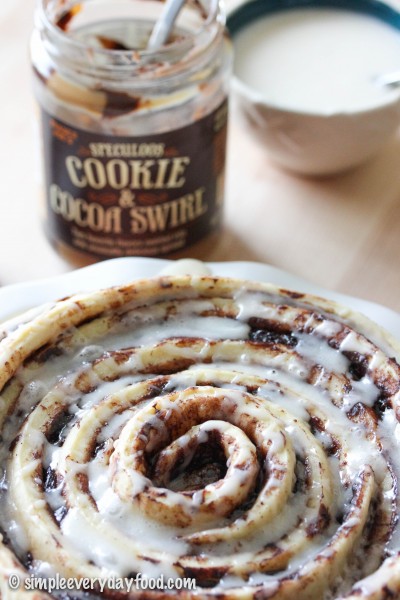
Chocolate + cookie butter + maple glaze + fluffy rolls = it’s practically heaven! I could eat this every weekend.

IMG_3103 copy

I’m personally a big fan of overnight cinnamon roll recipes, simply because I my stomach doesn’t have the patience to wait long for food in the morning. All the hard work is put in the night before, so all you have to do is throw it in the oven, make the glaze, wait, and enjoy the next morning – pretty easy, eh?

IMG_3095 copy

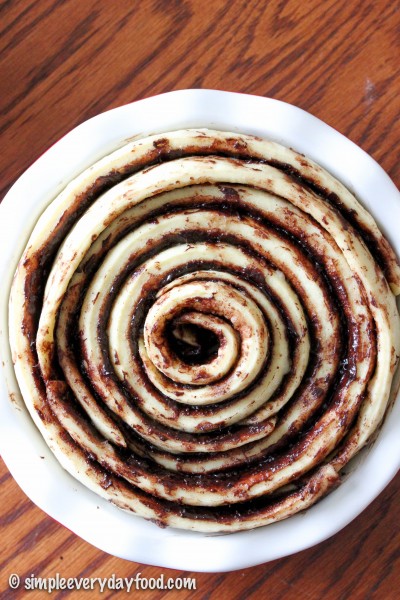
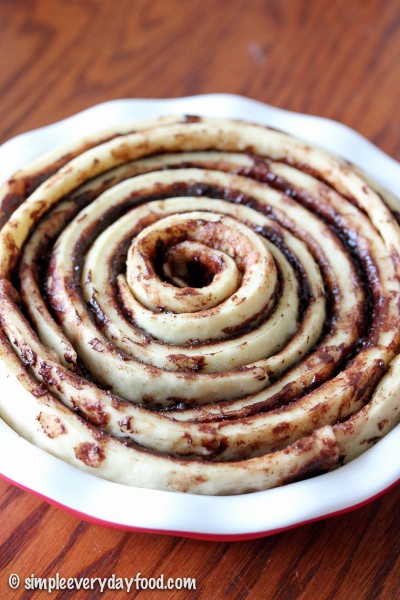
[loosely coil the strips to allow room for the dough to rise overnight]

IMG_3092 copy

This giant spiral cinnamon roll is so pretty to look at, and even more fun to eat. You can either cut it into wedges and serve it like you would cake, or you can do what we did, and peel off the strips as you go. I highly recommend the latter, simply because it’s always fun when you get to eat with you hands, and eating it this way kind of reminds me of tearing off little pieces of bubble tape gum from when I was little (remember those? The gum whose flavor only lasts 5 seconds?).

IMG_3105 copy

giant spiral cinnamon roll with vanilla maple glaze
Print
For the roll
  1. 2 and 3/4 cup all-purpose flour
  2. 3 tablespoons granulated sugar
  3. 1 teaspoon salt
  4. 1 package instant yeast
  5. 1/2 cup water
  6. 1/4 cup skim milk
  7. 3 tablespoons unsalted butter
  8. 1 egg, at room temperature
For the filling
  1. 2/3 cup chocolate cookie butter (I used Speculoos chocolate cookie butter from Trader Joe's), softened slightly by microwaving it for 10-15 seconds
  2. 2 tablespoons ground cinnamon
For the glaze
  1. 1 cup powdered sugar
  2. 1 tablespoon heavy cream
  3. 1 tablespoon pure maple syrup
  4. 1 teaspoon pure vanilla extract
Instructions
  1. To make the dough, set aside 1/2 cup flour. In a large electric mixer bowl, combine the remainder of the flour, sugar, salt, and yeast together. Set aside.
  2. In a microwavable bowl, heat the water, milk, and butter together until the butter is melted and the mixture is hot to touch. Stir the butter mixture into the flour mixture over medium-low speed. Increase the speed to medium, add in the egg and just enough of the reserved flour until the dough is soft, pulls away from the sides of the bowl, and is no longer sticky (I used the entire 1/2 cup, but you may not have to use it all).
  3. Knead the dough for 3-4 minutes on a lightly floured surface. Form the dough into a ball and place in a lightly greased bowl. Cover and let sit for 30 minutes. In the meantime, spray a 9" pie pan with nonstick cooking spray and set aside.
  4. After 30 minutes, roll the dough out on a lightly floured surface into a 15x12" rectangle. Spread the slightly softened cookie butter over the top, then sprinkle the ground cinnamon.
  5. Using a pizza cutter, cut the dough into six 2" wide strips (cut the the long way). Loosely roll up one strip (kind of like a fruit roll-up) and place in the center of the pan. Wrap the remaining 5 strips loosely around the center one, starting each strip at the end of the previous one so the end product looks like a giant spiraled cake.
  6. Loosely cover the roll with aluminum foil and let rise in a warm, draft-free area overnight.
  7. The next morning, bake cinnamon roll at 350 degrees for 30-35 minutes or until lightly browned. I covered the top with aluminum foil 15 minutes into baking to prevent excessive browning on top.
  8. Remove the cake and let cool for 10 minutes. In the meantime, make the glaze by whisking all the glaze ingredients together until smooth. Drizzle over the rolls prior to serving.
  9. Serve immediately, or cover it tightly with foil and store up at room temperature for up to 3 days.
Adapted from Sally's Baking Addiction
Simple Everyday Food https://www.simpleeverydayfood.com/
Recipe adapted from Sally’s Baking Addiction

© Simple Everyday Food. All images & content are copyright protected. Please do not use any of my images without prior permission. If you want to republish this recipe, please re-write the recipe in your own words, or kindly link back to this post for the recipe.

Sharing is caring! Email this to someonePrint this pagePin on PinterestShare on YummlyShare on FacebookShare on Google+Tweet about this on Twitter

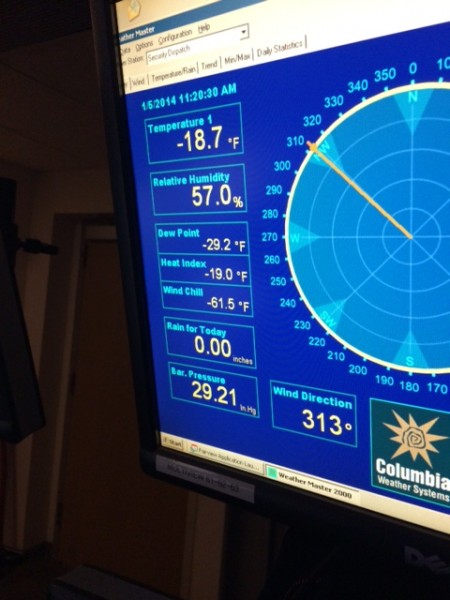
A few weeks ago, the temperature here in the Twin Cities Metro area dropped all the way down to -20 degrees (-35 with the windchill factor). If you follow me on Instagram, you were probably sick of seeing me post pictures of how cold it was.

photo 2

(note the -61 degree F wind chill factor)

Needless to say, I was not at all thrilled.

All I craved were something sweet and decadent for breakfast, hot steaming coffees throughout the day, and hearty soups and warm comforting casseroles for dinner. That’s when I decided cinnamon rolls sounded like the perfect breakfast idea for a cold snowy morning.

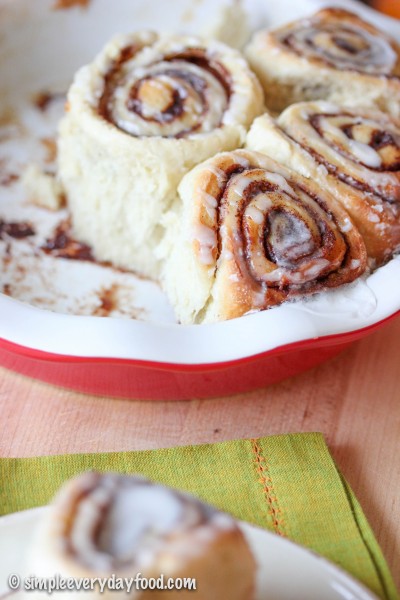
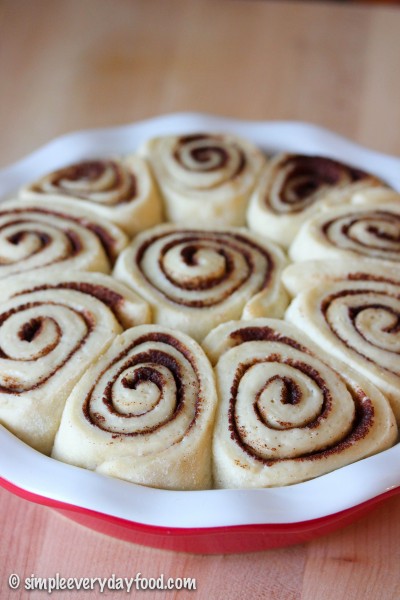
These cinnamon rolls can easily be make the night before. You let it sit on the counter to rise overnight, place it in the oven for 30 minutes the next morning, and voila! Warm steamy gooey cinnamon rolls drenched in a sweet sticky glaze, ready to be devoured. You can also make these the morning of, but let’s face it – why get up early to make breakfast when you can get it ready the night before and spend an extra hour or two curled up in warm blankets the next morning?!

IMG_2578 copy

IMG_2573 copy

I know a lot of people are afraid of working with yeast – I’ll admit it, I was too… until now. I’ve always felt like yeast is a tricky little thing to bake with. It just seemed like a very sensitive ingredient… if you don’t pay enough attention to it, your whole plan might fail. However, these cinnamon rolls are suuuuuper easy! Even I, a making-anything-with-yeast-rookie was able to successfully execute this recipe – which means that there’s not excuse you won’t be able to!

I think my favorite part of my first-ever-cinnamon-roll-making-experience was the smell of these rolls before and during the baking process. I absolutely loved waking up to the sweet smell of rising yeasty dough, and the fact that it made my house smell like a Cinnabon factory while they cooked in the oven.

IMG_2555 copy

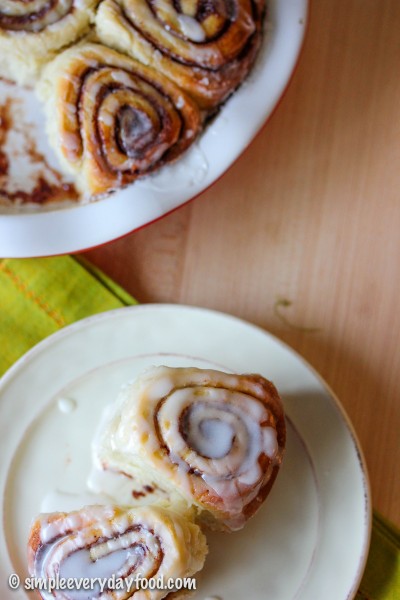
Hot, gooey, pillowy, soft, melt-in-your-mouth goodness, complete with a sweet vanilla glaze that will have you licking every single one of your fingers afterwards!

IMG_2591 copy

homemade overnight cinnamon rolls
Print
For the rolls
  1. 2 and 3/4 cups all-purpose flour
  2. 3 tablespoons granulated sugar
  3. 1 teaspoon salt
  4. 1 package of active dry yeast
  5. 1/2 cup water
  6. 1/4 cup milk
  7. 2 and 1/2 tablespoons unsalted butter
  8. 1 egg, at room temperature
For the filling
  1. 3 tablespoons unsalted butter, softened to room temperature
  2. 1 and 1/2 heaping tablespoons ground cinnamon
  3. 1/4 cup granulated sugar
For the glaze
  1. 1 cup powdered sugar
  2. 1-2 tablespoons milk
  3. 1 teaspoon vanilla extract
Instructions
  1. Set aside 1/2 cup flour. In the bowl for an electric mixer, combine the remaining flour, sugar, salt, and yeast together. Stir until combined. Attach the dough hook attachment onto your mixer.
  2. In a medium microwave-safe bowl, heat the water, milk, and butter together in the microwave until the mixture is hot to touch and the butter is melted. Pour the butter mixture into the flour mixture and stir on medium speed. Then add the egg and only enough of the reserved flour to make the dough. I used the entire 1/2 cup, but you may not use it all. You'll know you've added enough when the dough is soft, pulls away from the sides of the bowl, and is no longer sticky.
  3. On a lightly floured surface, knead the dough for 5 minutes. Place the dough ball in a lightly greased bowl, making sure all surfaces of the dough ball is lightly greased. Let sit for 10 minutes.
  4. While your dough rises, make the filling by tossing the ground cinnamon and sugar together in a small bowl.
  5. After the 10 minutes, roll out your dough into roughly a 14"x8" rectangle. Spread the softened butter all over. Sprinkle the cinnamon sugar mixture on top - be generous! Add more if needed.
  6. Roll up the dough tightly and cut into 10 even pieces, about 1.5" each. Place into a lightly greased 9" pie pan, making sure you leave enough room between each roll for it to rise.
  7. Loosely cover the pan with aluminum foil and let it sit overnight, up to 12 hours, at room temperature. The rolls should have doubled in size when you check on them the next morning.
  8. When you're ready to bake them the next morning, preheat the oven to 375 degrees. Bake for 25-27 minutes, covering the top with aluminum foil 15 minutes into baking to prevent excessive browning on top.
  9. While the rolls are baking, make the glaze by mixing the powdered sugar, 1 tablespoon of milk, and vanilla extract in a small bowl. Add more milk if the glaze is too thick.
  10. When the rolls are done baking, remove from oven and drizzle them generously with the glaze. Rolls are best served warm and on the same day, even though they can be stored in an airtight container for up to 3 days.
  11. Makes 10 rolls
Adapted from Sally's Baking Addiction
Simple Everyday Food https://www.simpleeverydayfood.com/
IMG_2563 copy

Now that I have conquered my fear of baking with yeast, don’t be surprised if you see more bread, pizza dough, and sweet rolls recipes on here in the future :)

Recipe adapted from Sally’s Baking Addiction

© Simple Everyday Food. All images & content are copyright protected. Please do not use any of my images without prior permission. If you want to republish this recipe, please re-write the recipe in your own words, or kindly link back to this post for the recipe.

Sharing is caring! Email this to someonePrint this pagePin on PinterestShare on YummlyShare on FacebookShare on Google+Tweet about this on Twitter