everyday food made simple

A few weeks ago, I started my surgery and anesthesia rotation for my internship. As much as I love emergency medicine, there’s just something about surgery and anesthesia that is equally as exciting to me. There’s actually a lot of similarities between the two – they both require constant diligent observation of your patient, you need to be on your toes at all times, and you have to be able to quickly adapt treatments to the status of your patient. There’s no room for slacking and not paying attention to how your patient is acting or how they’re reacting to the treatments you gave them – vital signs can quickly change without warning and you are responsible for either fixing the problem, or notifying the veterinarian about the status of your patient.

I’ve been fortunate enough to work with a group of amazingly talented technicians that are very patient and knowledgeable and willing to teach. It truly has made my internship a great experience so far!

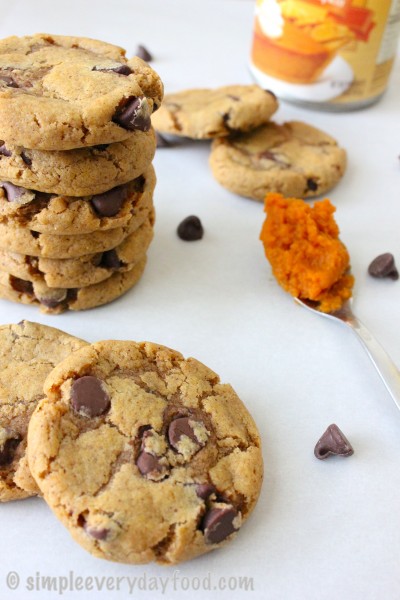
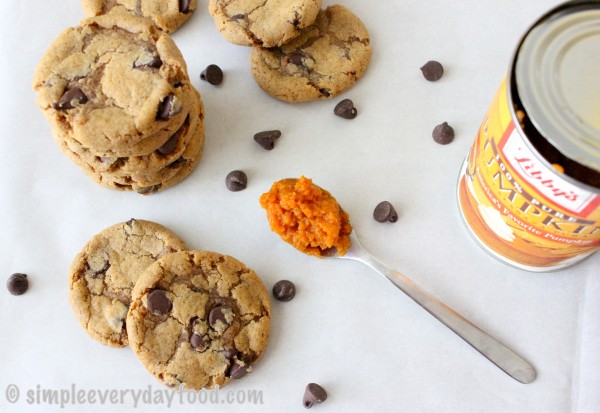
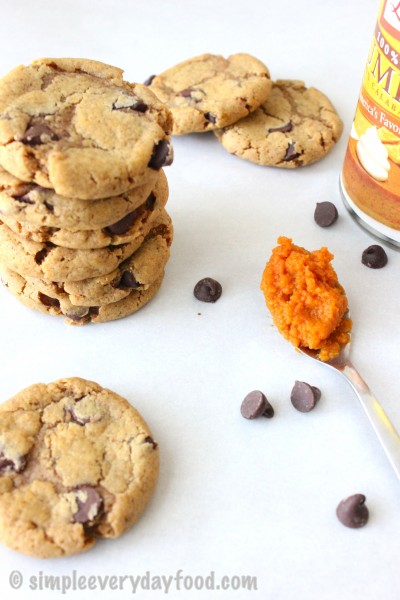
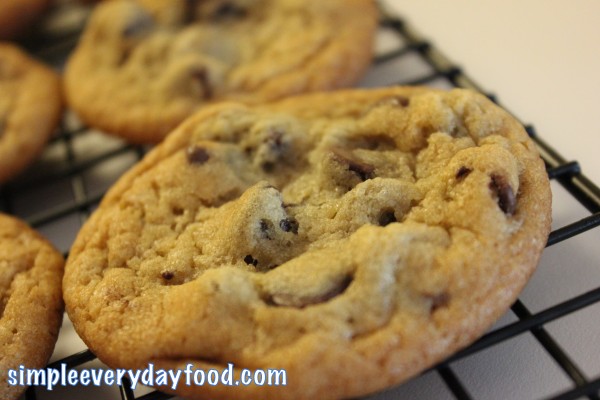
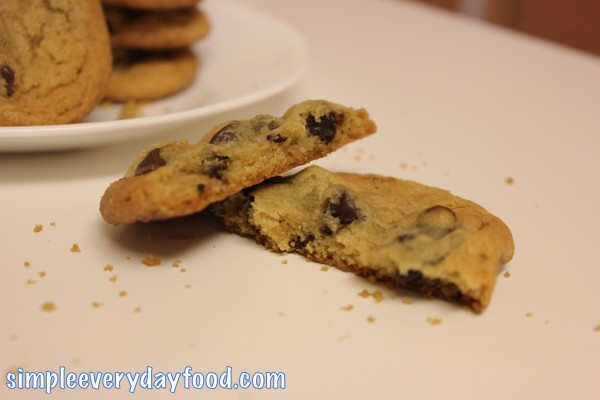
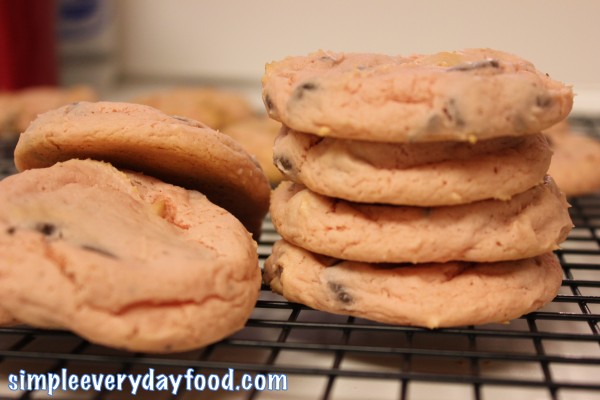
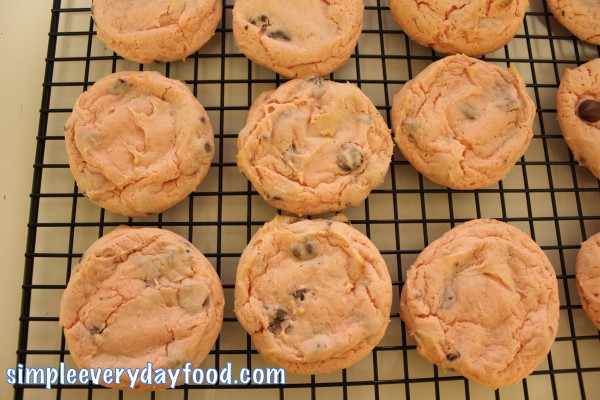
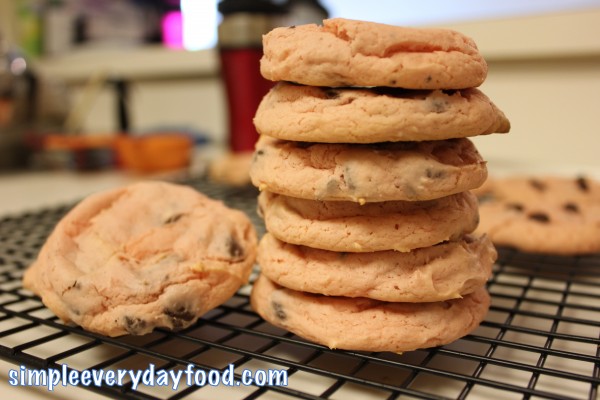
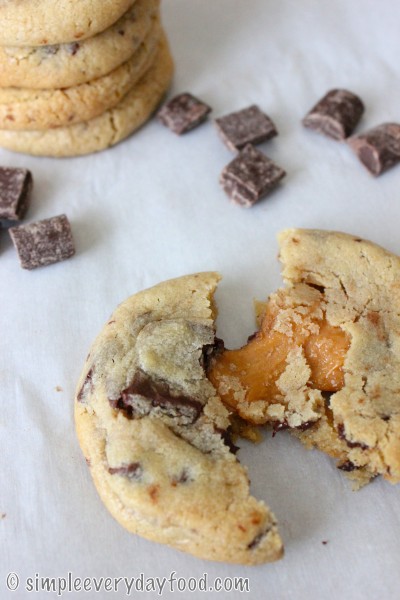
You know what else is great? This cookie.

IMG_2234 copy

IMG_2248 copy

IMG_2222 copy

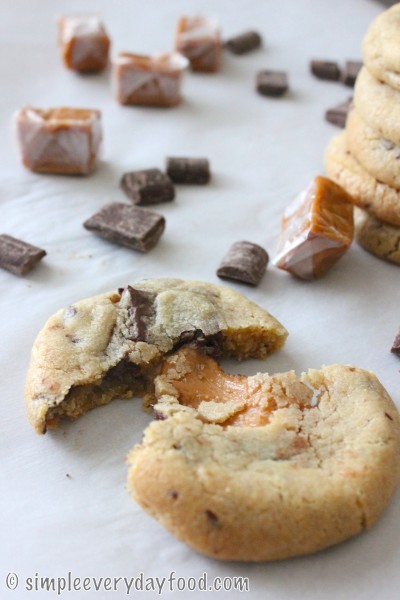
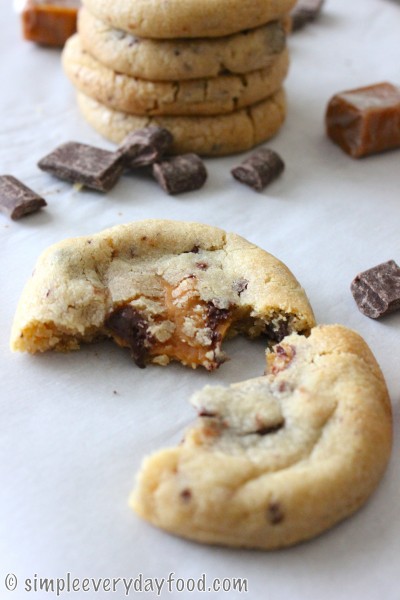
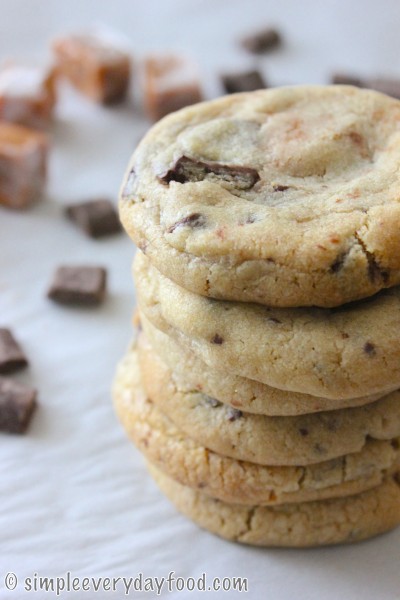
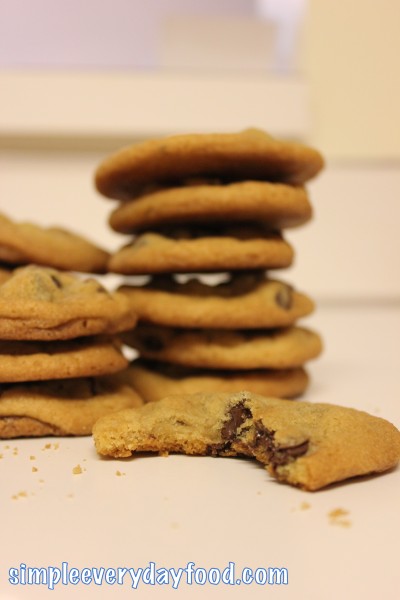
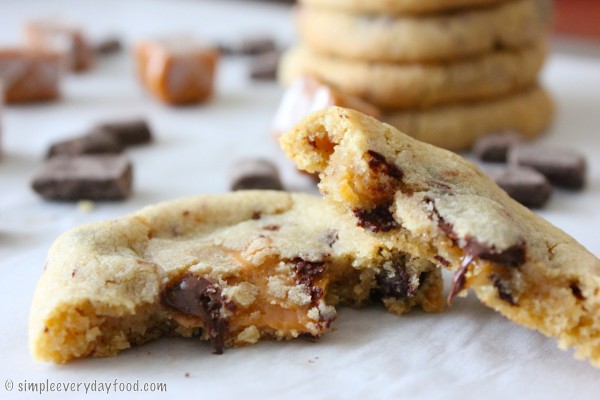
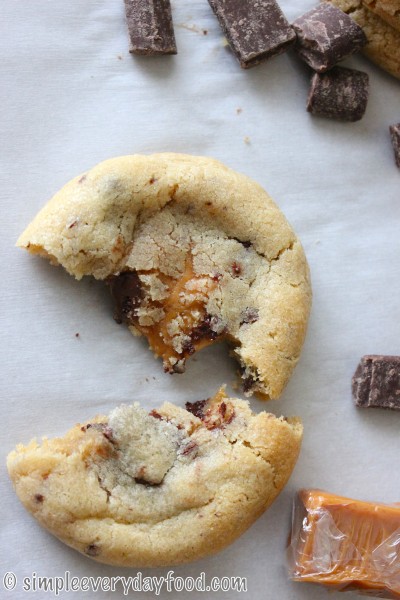
Soft chocolate chunk cookies with a gooey caramel-filled center that are super easy to make. Dark chocolate shavings are added in addition to chocolate chunks to make sure chocolate is tasted in every single bite. In my personal opinion, these cookies are the best straight out of the oven after they’ve had a chance to slightly cool down a little. That’s when the cookie is still warm and soft, and the caramel is still gooey on the inside. The caramel is the star of the show and is what surprises people when they first take a bite into it. Once the cookies completely cool, the caramel is going to harden a bit and lose its gooey texture, but I found out that throwing them in the microwave for 5-10 seconds is just enough to melt the caramel and transform them back into the warm, soft, gooey chocolate chunk cookie again.

IMG_2231 copy

IMG_2240 copy

chocolate chunk caramel cookies
Print
Ingredients
  1. 1 and 1/2 sticks of unsalted butter, softened to room temperature
  2. 1 and 1/2 cups brown sugar
  3. 1/2 cup granulated sugar
  4. 2 eggs
  5. 4 teaspoon vanilla extract
  6. 4 cups all-purpose flour
  7. 4 teaspoons cornstarch
  8. 2 teaspoons baking soda
  9. 1 teaspoon salt
  10. 1 and 1/2 cups semi-sweet chocolate chunks
  11. 1/2 cup dark chocolate, chopped
  12. 1 bag of caramel candies - unwrap about 20 of them and cut them in half
Instructions
  1. Preheat oven to 350 degrees. Line baking sheets with parchment paper or silicone baking mats and set aside.
  2. In a large bowl, combine the flour, cornstarch, baking soda, and salt. Gently stir to mix and set aside.
  3. Using a stand mixer, cream together butter and sugars until light and fluffy, about 2 minutes, then add in the eggs and vanilla extract and beat until combined.
  4. A little bit at a time, add in the flour mixture and mix until everything is thoroughly combined.
  5. Fold in the chocolate chunks and finely chopped dark chocolate with a spatula. I cheated and stirred them in by turning on my mixer onto the "stir" function.
  6. Scoop about 1.5 tablespoons worth of cookie dough, then make a slight indent in the middle by using your thumb and place one halved caramel candy in the center, then make sure the cookie dough is rolled up in a ball so the caramel candy isn't showing. Repeat until all dough has been used up. Cut up more caramel candies if needed.
  7. Before you put them in the oven, slightly flatten them a bit with the palm of your hand. Bake for 11-13 minutes.
  8. Remove from oven and let cool on the baking sheet before transferring them to a wired cooling rack.
  9. Bake for 11-13 minutes. They will look super soft but they continue cooking after you remove them from the oven. Store in an airtight container for up to 7 days.
  10. Makes about 48-50 cookies
Adapted from Table For Two
Simple Everyday Food https://www.simpleeverydayfood.com/
I was quite surprised that the recipe yielded almost 50 cookies. I was able to keep some at home, bring some to class to share, and bring some to work as well. Everybody loved them!

IMG_2246 copy

Also, if you have kids who are always eager to help in the kitchen, this is also a good recipe to get them involved! After the cookie dough is made and scooped into balls, you can have the kids help with stuffing the centers with caramels. There’s really no chance of “screwing” up, and it’ll also make them feel as if they contributed.

Happy baking!

Recipe from Table For Two

© Simple Everyday Food. All images & content are copyright protected. Please do not use any of my images without prior permission. If you want to republish this recipe, please re-write the recipe in your own words, or kindly link back to this post for the recipe.

Sharing is caring! Email this to someonePrint this pagePin on PinterestShare on YummlyShare on FacebookShare on Google+Tweet about this on Twitter

First of all, is that even how you spell “ooey“? Initially I started typing it as “ooy” but that didn’t look right. “Oo-y” would’ve worked too, but I don’t think that’s how people spell it either. Ooey will just have to suffice for now.

IMG_1785 copy

I’ve been boycotting posting anything pumpkin-related on here ever since I found out my local Caribou coffee decided to start promoting their pumpkin drinks at the end of August (that obviously changed today).

August – really?  Can’t we just enjoy one season at a time? It’s like a competition between chain coffee stores nowadays to see who can come out with fall drinks the earliest. Why are these stores rushing the months away? I want to enjoy my summer to the fullest, then I’ll savor the fall scents and flavors when the time comes. It only makes sense – that way there’s something to look forward to every month, right? Am I the only one who feels this way? I mean, summer’s not even over yet in August, for cryin’ out loud. The days are still (relatively) long, it’s still hot out, and if it’s still warm enough for me to be out in shorts and a t-shirt, it’s sure not the right time to be sipping pumpkin-anything just yet.

In my world, pumpkins are synonymous with Halloween, which occurs in October, therefore pumpkin drinks and desserts should be saved for the month of October only.

Hooooweveeerrr… I caved in. Yes, that’s right, I caved in and made these cookies before the month of October even arrived. Well, I guess it’s technically fall now, and October is just a few days away… so I’ll forgive myself for jumping the gun a little bit earlier this year.

IMG_1777 copy

I’m not as big of a fan of pumpkin as many of my other food blogger friends, but I don’t mind it I guess. I won’t go out and eat a whole slice of pumpkin pie, but an occasional bite or two of it is okay with me. I think I associate pumpkin desserts with pumpkin pie and pumpkin puree, and I’m not a fan of the texture of either of those. They’re mushy. I don’t like mushy. It’s also the reason why I don’t eat hummus or guacamole… yeah, I don’t like guacamole. I’m weird.

IMG_1790 copy

This recipe is simple and straight forward. You don’t even need an electric mixer for it! The cookies turn out to be super soft and bursts with plenty of pumpkin flavor and pumpkin spices. I think the cookies would’ve been delicious enough by itself, but then you add in chocolate chips and guess what – it becomes even more amazing. Bites of soft pumpkin cookie with chocolate chips… because chocolate chips always make cookies taste better!

IMG_1783 copy

These cookies don’t spread much when they’re in the oven, so you can either 1) bake them in the oven for 8 minutes, take them out, flatten them with the back of a spoon and bake for another minute; or 2) flatten them first and then bake them for 8-10 minutes. I chose the do the former simply because I loved the little cracks and crinkles that are created once you flatten out a semi-cooked cookie :)

ooey gooey pumpkin chocolate chip cookies
Print
Ingredients
  1. 1/2 cup unsalted butter
  2. 1/4 cup light brown sugar
  3. 1/2 cup granulated sugar
  4. 1 teaspoon vanilla extract
  5. 6 tablespoons pumpkin puree (not pumpkin pie filling) - use a little bit more if you want more pumpkin flavor
  6. 1 and 1/2 cups all-purpose flour
  7. 1/4 teaspoon salt
  8. 1/4 teaspoon baking powder
  9. 1/4 teaspoon baking soda
  10. 1 and 1/2 teaspoons ground cinnamon
  11. 1/2 teaspoon ground nutmeg
  12. 1/4 teaspoon ground cloves
  13. 1/4 teaspoon pumpkin pie spice, if desired
  14. 1/2 cup (90 grams) semi-sweet chocolate chips
Instructions
  1. In a medium bowl, combine the melted butter and the two sugars together, whisk until thoroughly combined. Whisk in the vanilla and pumpkin until smooth and set aside.
  2. In a large bowl, add in the flour, salt, baking powder, baking soda, cinnamon, nutmeg, and cloves. Slightly mix with a spatula. Pour the wet ingredients into the dry ingredients and mix well. Fold in 1/2 cup semi-sweet chocolate chips and mix some more. Cover the dough and chill for 30-60 minutes.
  3. Preheat the oven to 350 degrees. Line baking sheets with parchment paper or silicone baking mats and set aside.
  4. Roll about 1.5 tablespoons of cookie dough into balls. Bake for ~8 minutes. Take the baking sheet out and slightly flatten the dough balls with the back of a spoon until they're about 1/2" thick. Bake for another 1-2 minutes. Remove from oven and let the cookies cool on the baking sheet for 5-10 minutes, then transfer to a cooling rack. If the cookie dough still doesn't seem flattened enough, flatten them out a little bit more after you take them out to cool. Store in an airtight container for up to a week.
  5. Makes about 20 cookies
Adapted from Sally's Baking Addiction
Simple Everyday Food https://www.simpleeverydayfood.com/
The only complaint I have about these cookies is that they don’t make enough! I had to debate long and hard on how many to bring to school to share, and how many to keep at home for ourselves. Next time I’m totally making a double batch of these!

IMG_1793 copy

Now that I’ve gotten my first pumpkin dessert of the way, stay tuned for more yummy pumpkin-related desserts in the next few months!

I’m sure a certain someone would love to see more pumpkin puree used around the house!

IMG_1797 copy

IMG_1798 copy

I’m just glad I haven’t seen any Christmas decorations out on the shelves in September…. yet.

Enjoy!

Recipe adapted from Sally’s Baking Addiction

© Simple Everyday Food. All images & content are copyright protected. Please do not use any of my images without prior permission. If you want to republish this recipe, please re-write the recipe in your own words, or kindly link back to this post for the recipe.

Sharing is caring! Email this to someonePrint this pagePin on PinterestShare on YummlyShare on FacebookShare on Google+Tweet about this on Twitter

When it comes to desserts, I don’t do boring.

By “boring“, I mean traditional – like chocolate cake, vanilla cake, red velvet cupcakes, oatmeal raisin cookies, chocolate chip cookies…. you get the idea. I like making desserts that aren’t your everyday “boring” flavors….My reasoning is, if I want old fashioned dessert flavors, I’m sure I can find them at just about every bakery/grocery store in the neighborhood. If I’m spending the time to make something from scratch, it’d better be something I can’t find easily.

Wait, but isn’t this post about “plain”, “regular”, “boring” chocolate chip cookies?

IMG_1053

Yeah yeah… today I actually felt like making some traditional chocolate chip cookies. Actually, one of the reasons why I chose chocolate chip was simply because I didn’t feel like going to the store and buying a bunch of ingredients for cupcakes. I also didn’t feel like standing in the kitchen for hours making cupcakes either. Talk about laziness – I just wanted something sweet, something homemade, and something easy to make.

That’s when I decided to go back to the basics and make something simple.

I like my cookies chewy, and the high proportion of brown sugar kept these cookies soft and moist (sorry!) in the middle. Slightly golden crunchy edges with gooey soft chocolatey centers.

IMG_1056

IMG_1059

chewy chocolate chip cookies
Print
Ingredients
  1. 2 3/4 cups all-purpose flour
  2. 1 teaspoon salt
  3. 1 teaspoon baking powder
  4. 1 teaspoon baking soda
  5. 2 1/2 sticks butter, softened to room temperature
  6. 1 3/4 cups packed brown sugar
  7. 1/4 cup granulated sugar
  8. 2 large eggs, at room temperature
  9. 2 teaspoons vanilla extract
  10. 2 cups semi-sweet chocolate chips
Instructions
  1. In a large bowl, sift together flour, salt, baking powder, and baking soda. Set aside.
  2. Using an electric mixer, beat the butter, brown sugar, and granulated sugar on medium-high until pale and fluffy, about 3-4 minutes.
  3. Beat in the eggs, one at a time, then beat in the vanilla. Reduce the speed to low, then slowly incorporate the flour mixture into the egg mixture. Stir in the chocolate chips by hand.
  4. Cover with plastic wrap and chill in refrigerator for at least an hour, preferably overnight.
  5. Preheat the oven to 375 degrees. Line 2 baking sheets with parchment paper. Roll cookie dough into ~1" balls and place onto prepared cookie sheets. Bake for 10-12 minutes, or until edges begin to brown.
  6. Remove cookies from oven, cool on the baking sheet for 10 minutes, then remove and cool completely on a wired cooling rack.
  7. Makes about 48 cookies
Adapted from Food Network Magazine
Simple Everyday Food https://www.simpleeverydayfood.com/
So this recipe makes about 48 cookies. Of course we’re not going to eat all of them (although Brian would’ve polished off the whole bowl of raw cookie dough last night if I wasn’t guarding the bowl with my life), so it’s a good thing I’ll be swinging by work today to drop some off for my lucky coworkers!

IMG_1068

After putting some cookies in a Tupperware for work, there were about 20 left. We divided the rest amongst the two of us – I got five, and the hubs took the rest of the 15.

Somehow he thinks I won’t be touching his cookies if he placed them all the way up on the cupboards……

IMG_1077

Little does he know, there’s not a whole lot that can stand between a girl and her sweets…. I might be short, but I have my ways. MWAHAHAHAHAHAHA!!

Yep, that’s my evil laugh.

Enjoy!

Sharing is caring! Email this to someonePrint this pagePin on PinterestShare on YummlyShare on FacebookShare on Google+Tweet about this on Twitter

On Friday, I finally broke down and got myself my very first (ever) cookie scoop!

Yes, all these years of baking and I’ve never owned a cookie scoop of any kind. I have never been a fan of using fancy kitchen gadgets when I cook – I grew up cooking with a few simple equipment, so I always stuck to the old fashion way of cooking.

Seriously though, all my mom had in the kitchen growing up were a few knifes, a cutting board, a wok, a spatula, a ladle, and a few pots. No fancy garlic presses, mango slicers, or onion choppers…

To this day, I still don’t own a lot of those fancy kitchen gadgets. I’m not caving into getting a garlic press, a mango slicer, or a juicer just yet, but I do own an onion chopper only because it was given to us as a wedding gift (which, has saved me a lot of tears lol). It also took me a few years to finally get a rolling pin. Before the rolling pin joined our family, I created my own cheap version of a rolling pin by wrapping a bottle of cooking wine in plastic wrap…

Anyway, now that I finally own a cookie scoop, I was determined to find a cookie recipe that required scooping cookie dough out of my mixer bowl this past weekend.

I’m not particularly fond of making desserts with premade cake mixes, but this recipe intrigued me so much that I just had to give it a try (and I was feeling a little lazy…). Plus, strawberries and chocolate are like a match made in heaven – just like cookies and milk, peanut butter and jelly, peanut butter and chocolate, chips and salsa, mashed potatoes and gravy, burger and fries…. need I go on?

I made these for a family cookout and they were a big hit. I added a few minutes onto the original cooking time stated on the site that I got the recipe from and they turned out soft and chewy. Plus, they were pink and were pretty to look at.

IMG_1000

IMG_0993

strawberry chocolate chip cookies
Print
Ingredients
  1. 1 box strawberry cake mix
  2. 1 teaspoon baking powder
  3. 2 large eggs
  4. 1/3 cup vegetable oil
  5. 1/2 teaspoon vanilla extract
  6. 1 1/4 cup semi-sweet chocolate chips
Instructions
  1. Preheat oven to 350 degrees. Line baking sheets with parchment paper and set aside.
  2. In a large mixing bowl, combine the cake mix and baking powder. In a smaller bowl, whisk the eggs, oil, and vanilla extract. Add the egg mixture to the cake mixture. Gradually turn electric mixer to medium speed and thoroughly mix batter for about 3 minutes, or until all the ingredients are combined. Stir in chocolate chips.
  3. Drop rounded balls of cookie dough, about 1.5 tablespoons each, onto the prepared baking sheet.
  4. Bake for 10-12 minutes, making sure the cookies do not turn brown. Remove from oven and let cool. As the cookies cool, the tops may settle down a bit. If not, you can press them down gently with your fingers. Transfer cookies onto wired cooling rack and allow to cool completely.
Adapted from Sally's Baking Addiction
Simple Everyday Food https://www.simpleeverydayfood.com/
IMG_0994

Surprisingly enough, these turned out to be pretty good. They were gone within minutes at our family cookout, and I think I may just have to make them again sometime to bring to work. Maybe I’ll make a double batch next time.

IMG_1001

Who am I kidding, I just want to make more cookies just so I can use my new cookie scoop……

Enjoy!

Recipe adapted from Sally’s Baking Addiction

Sharing is caring! Email this to someonePrint this pagePin on PinterestShare on YummlyShare on FacebookShare on Google+Tweet about this on Twitter