everyday food made simple

biscoff choco-cinnamon chip cookies

Yesterday was Little B’s due date. Which means in less than two weeks, we will have a ONE year old! Can you believe it? Can you also believe that in this entire year, Brian and I have never left Little B in the hands of a babysitter and gone out for a date? 

Just this past weekend, we started this new thing where we each leave the house for a few hours to go where ever we want and do whatever we want. Whether it’s to run errands in peace, to hang out with friends, to leisurely stroll up and down the aisle of Target (because let’s be honest, that can be a treat in itself sometimes), or to just sit at a coffee shop and read a book – I think it’s important to be able to get away and go something and not have to listen to the Paw Patrol theme song for them umpteenth time.

So what did I choose to do for my first two hours of scheduled freedom? I went to Starbucks, ordered myself a mocha, and read a book. It was heavenly. Part of me felt bad for enjoying that time away from Little B. I mean, I’m a mom, and shouldn’t moms want to spend as much time with their babies as possible? It’s called mom guilt, ya’ll.

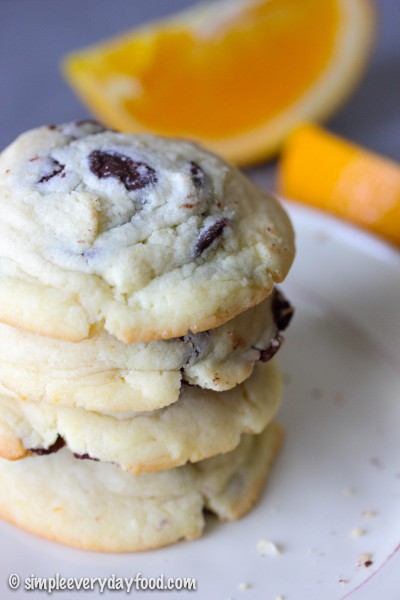
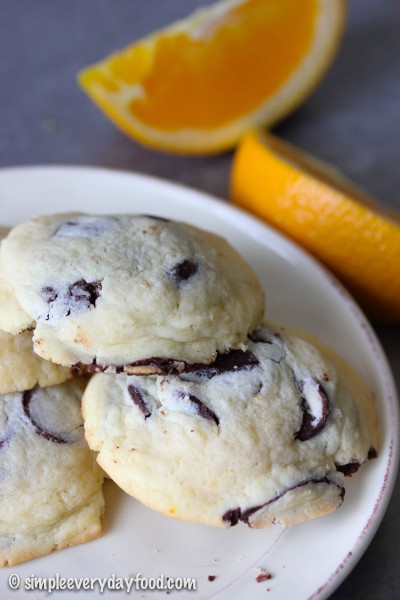
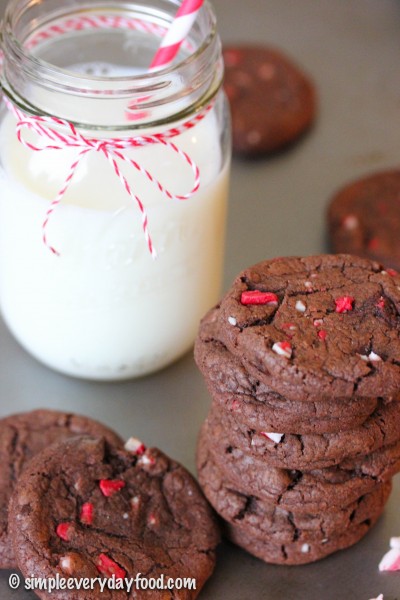
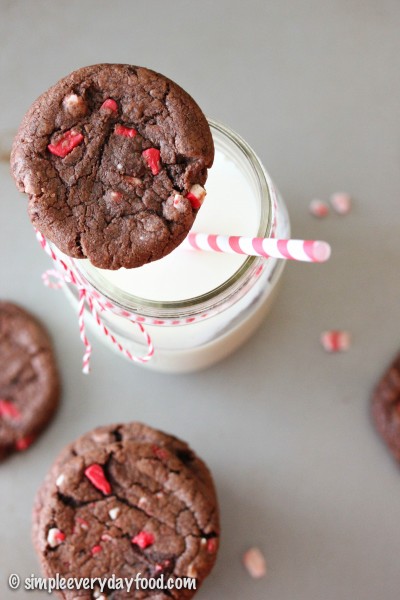
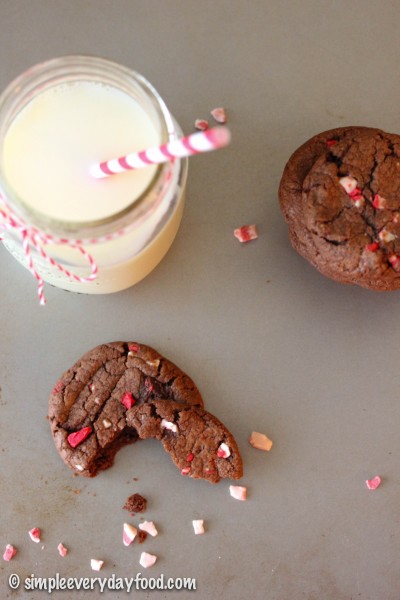
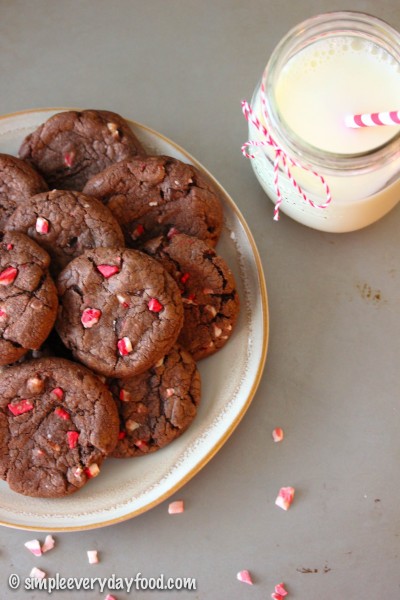
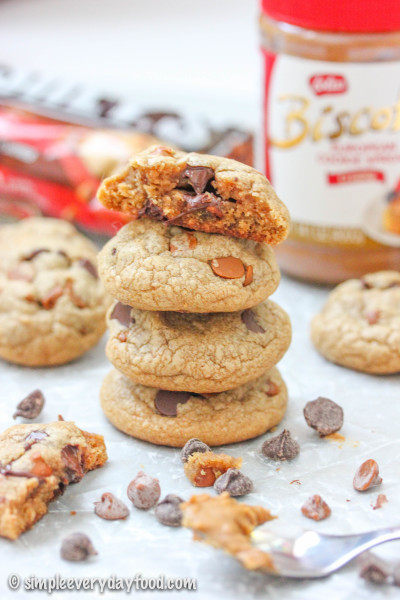
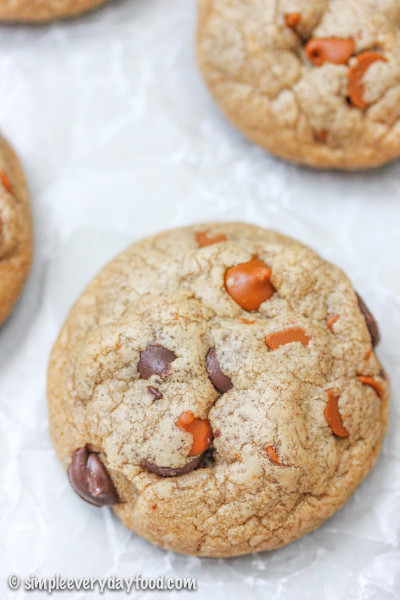
So I sat in a soft, plush sofa by the fireplace and read my book (I’m currently reading The Ladies’ Room), wishing I had some of these soft pillowy Biscoff cinnamon chip cookies to go with my coffee.

biscoff choco-cinnamon chip cookies biscoff choco-cinnamon chip cookies biscoff choco-cinnamon chip cookies

biscoff choco-cinnamon chip cookies
Print
Ingredients
  1. 1/2 cup (1 stick) unsalted butter, softened to room temperature
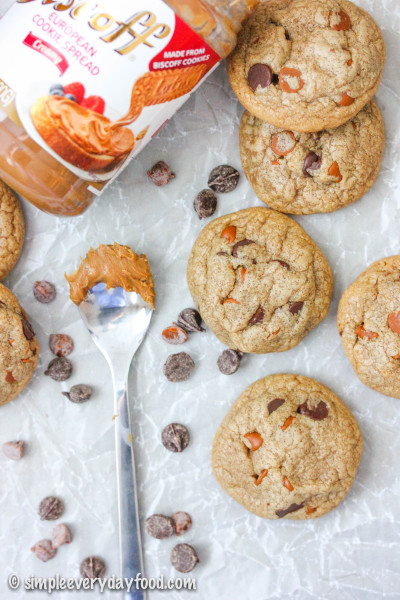
  2. 1/2 cup creamy Biscoff spread
  3. 1/2 cup dark brown sugar
  4. 1/4 cup granulated sugar
  5. 1 large egg, at room temperature
  6. 1 teaspoon vanilla extract
  7. 1 and 1/2 cups all-purpose flour
  8. 1/4 teaspoon baking soda
  9. 1/4 teaspoon baking powder
  10. 1/4 teaspoon salt
  11. 1/4 teaspoon cinnamon
  12. 1/2 cup semi-sweet chocolate chips
  13. 1/2 cup cinnamon chips
Instructions
  1. Using an electric mixer, cream together butter, Biscoff spread, and both sugars until light and fluffy. Add in the egg and vanilla extract and beat until combined, scraping the sides occasionally if needed.
  2. In a medium bowl, combine the flour, baking soda, baking powder, salt, and cinnamon.
  3. Add the dry ingredients to the wet ingredients and beat until thoroughly combined. Stir in the chocolate chips and cinnamon chips. Using a medium cookie scoop, drop 1.5 tablespoons worth of dough onto a lined baking sheet. Chill the dough balls for 30 minutes in the refrigerator.
  4. Preheat the oven to 350 degrees, and bake for 10-12 minutes or until golden brown - do not over bake!
  5. Makes 22-24 cookies
Adapted from Buns In My Oven
Simple Everyday Food https://www.simpleeverydayfood.com/
Recipe adapted from Buns In My Oven

© Simple Everyday Food. All images & content are copyright protected. Please do not use any of my images without prior permission. If you want to republish this recipe, please re-write the recipe in your own words, or kindly link back to this post for the recipe.

Sharing is caring! Email this to someonePrint this pagePin on PinterestShare on YummlyShare on FacebookShare on Google+Tweet about this on Twitter

Lately I’ve been thinking about getting a Fitbit Charge HR. I already own a FitBit Flex, but I’m really digging the additional functions the Charge HR provides (heart rate monitoring, time display, automatic sleep detection, etc). But as I added it into my shopping cart and typed in my credit card information one day, I suddenly remembered that the iWatch is scheduled to come out sometime this year, and that’s when the internal debate began…

I’m sort of an Apple geek – all my electronic toys have the little half-bitten apple logo on it. When I initially heard of this iWatch, I laughed and vowed I would never need a wrist gadget that did a lot of the things my phone could do. “Why do I need a watch like that when I can just use my Fitbit?” Buuuut… after reading all about its features, I’m kind of ashamed to admit that I have since changed my mind and I now want a iWatch, especially since it also contains a pretty cool health & fitness app within.

Question: Do any of you guys have the new Fitbit Charge HR? Do you recommend it? Are you planning on getting the iWatch when it comes out? Why or why not? I’d like to hear your opinions!

Maybe the reason why I’m thinking so much about activity trackers is because I may have accidentally ate a few too many of these Samoa cookie chocolate cups.. they’re little chocolate cups filled with gooey sweet and salty caramel coconut mixture and a bite-sized piece of shortbread cookie, all in this little chocolate cup… and oh boy are they dangerous!

IMG_5134 copy

IMG_5126 copy

IMG_5110 copy     

They don’t require any sort of mixer, and they don’t require any baking. It may seem like a long process to make them, but there’s a lot of waiting around in between steps, which is perfect for getting miscellaneous things done around the house… or spending some time on Pinterest…. or finding things to buy online… or taking a few of those silly BuzzFeed quizzes…

IMG_5079 copy

IMG_5115 copy

First you melt the chocolate and spread the chocolate around in the liners so it covers everysingleinch of it. Freeze those babies for half an hour (this would be the time to do those things we previously talked about). Then add a little bit of the caramel coconut mixture on the bottom of each cup and top with a little bite of the shortbread cookie.

Are you still following me?

IMG_5060 copy

Top the cookies with more caramel coconut and sprinkle the tops with some sea salt, if the salty-sweet combo is your kind of thing. Freeze some more (patience, grasshopper!).

IMG_5063 copy

Then top it up with more melted chocolate and garnish with toasted coconut flakes. Freeze a little bit longer (almost there!), then EAT and DEVOUR!

IMG_5109 copy

IMG_5088 copy

I will not be responsible for the amount of chocolate cups you eat in one single sitting. Nor will I be responsible if you end up with a stomach ache after eating half the pan… just sayin’.

IMG_5085 copy

IMG_5090 copy

But just look at that ooey gooey caramel-y deliciousness! I mean, how can you resist?!

I apologize for the over abundance of pictures…

IMG_5124 copy

IMG_5146 copy

samoa cookie chocolate cups
Print
Ingredients
  1. 2 and 1/2 cups semi sweet chocolate chips
  2. 1 and 1/4 cups sweetened coconut flakes
  3. 1 cup caramel syrup
  4. 6 shortbread cookie squares, cut into quarters
  5. Sea salt, for sprinkling, if desired
Instructions
  1. Line a 24 mini muffin pan with liners and set aside.
  2. Using a double boiler, melt 2 cups of the chocolate chips, stirring occasionally until smooth. Drop 1-2 teaspoons of melted chocolate into each liner, spreading the chocolate up the sides of the liner using a pastry brush or a spoon. Make sure the sides are nicely coated. Freeze for 30 minutes.
  3. In the meantime, toast the coconut flakes in a nonstick pan over medium heat. Once you notice the flakes are starting to brown, stir constantly until most of the coconut flakes turn golden brown in color. Be careful not to burn them! Remove from heat and reserve 1/4 cup for garnish.
  4. Combine the caramel sauce and the remaining cup of coconut flakes in a medium bowl and mix well. Remove the frozen chocolate cups from the freezer and spoon ~1/2 teaspoon of the caramel/coconut mixture on the bottom of each cup, top with a quarter piece of the shortbread cookie, then top with ~1 teaspoon of the caramel mixture. Sprinkle tops with a little bit of sea salt (if desired). Freeze for another 30 minutes.
  5. Melt remaining 1/2 cup of chocolate chips over a double boiler (or in the microwave) until completely melted and smooth. Remove chocolate cups from freezer, and cover each cup with a thin layer of the melted chocolate, smoothing the tops with a spoon if needed. Garnish with the reserved toasted coconut flakes. Freeze for an additional 15 minutes. Chocolate cups can be stored either at room temperature, in the fridge, or in the freezer in an airtight container, depending on your preference!
  6. Makes 24 chocolate cups
Adapted from The Housewife In Training
Simple Everyday Food https://www.simpleeverydayfood.com/
Recipe adapted from The Housewife In Training

© Simple Everyday Food. All images & content are copyright protected. Please do not use any of my images without prior permission. If you want to republish this recipe, please re-write the recipe in your own words, or kindly link back to this post for the recipe.

Sharing is caring! Email this to someonePrint this pagePin on PinterestShare on YummlyShare on FacebookShare on Google+Tweet about this on Twitter

IMG_3411 copy

Ever since I was little, I hated sharing food. This doesn’t mean I don’t like sharing food that I make (it’s quite the opposite, actually); I just simply hated sharing whatever food I had on my plate. If it’s on my plate, more often than not I would really prefer not to share it.

Let me give you an example: Back in elementary school, whenever my dad would take us to McDonald’s as a rare treat, he would always finish his meal first and patient watch us eat. Occasionally he would reach across the table and steal a few fries off my tray. Me being the selfish potato-loving child as I was, would always whine and tell him that it was mine and he wasn’t allowed to eat my fries. My poor father, who is always so accommodating and patient with us, would always just laugh and apologize, despite the fact he just spent his hard-earned money to take us out for a treat.

I can always laugh about it and refer back to a particular FRIENDS episode, which coincidentally also involved french fries.

I knew Joey had always been my favorite for a reason……

One good thing about these meringue cookies is that it makes so many that you won’t feel bad about sharing them!

IMG_3416 copy

After failing three miserable times trying to make meringue cookies in the past, I have finally picked up a few tips and tricks:

  1. Don’t cut corners. You may think using just egg whites is a waste of egg yolks, and decide to buy some “egg whites in a carton” at the store – DON’T. This may or may not have happened during one of my failed attempts…
  2. Be patient. Let the egg whites thoroughly come to room temperature. Find something to distract yourself, whether it’s Facebook, Instagram, Pinterest, cleaning, running errands, or enjoying the nice weather outside.
  3. Warm your mixing bowl and whisk right before you start beating the egg whites. I actually turned on our fireplace and stuck the mixing bowl right in front of it until it was warm to the touch – it worked really well!
  4. If you’re adding things to your meringue batter (in this case, mini chocolate chips), make sure the mix-ins are small enough to go through your decorative piping tips. I initially had the perfect idea of using the star tip for these to make them into cute little pretty shapes, but realized that the chocolate chips were clogging the tips and had to dump all my batter out, switch tips on my piping bag, and then start all over..

Bake these babies low and slow in the oven. Once the cooking time is up, turn the oven off and let the meringue cookies sit in the oven to cool overnight. They’ll turn nice and melt-in-your-mouth-crispy the next morning. Another thing I learned was to store these in a cool, dry place – if the temperature is too warm, they actually start to get a little sticky.

IMG_3407 copy

IMG_3385 copy

So go make a batch of these! They’re simple to make, but they look (and sound) fancy, and your friends will think you’re amazing for making these yummy delicate treats. And there will be more than plenty to go around for everyone :)

IMG_3384 copy

mint chocolate chip meringue cookies
Print
Ingredients
  1. 2 egg whites, at room temperature
  2. 1/4 teaspoon cream of tartar
  3. 1/4 teaspoon salt
  4. 2/3 cup granulated sugar
  5. 1/8 teaspoon mint extract
  6. ~7 drops of green food coloring (more or less depending on how green you want your meringues to be)
  7. 1/3 cups mini chocolate chips
Instructions
  1. Let egg whites come to room temperature and make sure your mixing bowl and whisk are just slightly warmer than room temperature (I placed mine in front of the fireplace for a few minutes).
  2. Preheat oven to 225 degrees. Line two baking sheets with parchment paper and set aside.
  3. Using an electric mixing bowl with the whisk attachment, beat egg whites, cream of tartar, and salt on high speed until soft peaks form*.
  4. Add in the sugar, about one tablespoon at a time, beating continuously until stiff peaks form**.
  5. Beat in the mint extract and green food coloring. Gently fold in the chocolate chips.
  6. Transfer the meringue to a pastry bag with a large round open tip. Pipe meringues about 1" apart and bake for 60 minutes. Turn off the oven and let the meringues stand in the closed oven overnight. Store in an airtight container in a cool dry place.
Notes
  1. *Soft peaks = tips curl when you lift the whisk straight up
  2. **Stiff peaks = tips stand straight up when you lift the whisk straight up
Adapted from Better Homes and Gardens
Simple Everyday Food https://www.simpleeverydayfood.com/
Recipe adapted from Better Homes and Gardens

© Simple Everyday Food. All images & content are copyright protected. Please do not use any of my images without prior permission. If you want to republish this recipe, please re-write the recipe in your own words, or kindly link back to this post for the recipe.

Sharing is caring! Email this to someonePrint this pagePin on PinterestShare on YummlyShare on FacebookShare on Google+Tweet about this on Twitter

IMG_2733 copy  

It’s no secret that I’m a sucker for chocolate. Not just a plain old boring milk chocolate bar, mind you, but fancy dark chocolate with different flavors infused in it – mint chocolate, dark chocolate cherry, chai chocolate, birthday cake chocolate, coconut chocolate…. The kind where you have to spend more than $3.50 for a small little chocolate bar. Yeah, I’m fancy.

I especially loooove dark chocolate with a hint of orange – dark chocolate with bits and pieces of candied orange peels throughout – it really is a match made in heaven! Since it’s hard for me to get my hands on certain fancy brands, Lindt’s chocolates are one of my go-tos when I’m in the mood to indulge.

photo 1

I see it as getting my daily vitamin C intake along with some antioxidants – it’s a win-win situation – no?

This cookie is kind of the opposite of what these candy bars are about. Instead of orange infused chocolate, it’s more of an orange cookie with a hint of chocolate. Instead of using regular chocolate chips, I used some 70% dark cacao chips instead to give the cookie a more intense dark chocolate flavor, that way you can eat a few without feeling like you’re going to slip into a sugar coma.

IMG_2720 copy

IMG_2727 copy

These cookies are soooo soft! They’re soft and moist. Not cakey, and not chewy either. Just soft. Like melt-in-your-mouth soft, thanks to the small amount of cream cheese added to the batter. One thing to note about these cookies is that when you mix everything together, the batter will be SUPER sticky. You’re probably going to think that something went wrong – nope! It’s just the way it is. And for that reason, I strongly suggest mixing everything together with a mixer… unless you’re trying to gain some arm strength – then more power to you, you overachievers.

orange chocolate chip cookies
Print
Ingredients
  1. 1/2 cup (1 stick) unsalted butter, softened to room temperature
  2. 3-oz low fat cream cheese, softened to room temperature
  3. 1/2 cup granulated sugar
  4. 1 egg, at room temperature
  5. 1 teaspoon vanilla extract
  6. 1 teaspoon grated orange zest
  7. 1 cup all-purpose flour
  8. 1/2 teaspoon salt
  9. 1 cup 60% dark cocoa chocolate chips
Instructions
  1. Preheat oven to 350 degrees. Line baking sheets with parchment paper or silicon baking mats.
  2. In a medium bowl, combine the flour and salt. Set aside.
  3. Using an electric mixer, cream together the butter, cream cheese, and sugar. Add in the egg an mix until smooth. Add in the orange zest and vanilla, stir until incorporated. Slowly add in the dry ingredients to the butter mixture. Mix until combined. Stir in the chocolate chips.
  4. Drop heaping tablespoonfuls of the dough onto the prepared baking sheets. The dough will be very sticky - this is normal! Bake for 12-14 minutes or until the edges just begin to brown slightly. Store in an airtight container for up to 7 days.
  5. Makes 16-18 cookies
Adapted from Taste and Tell Blog
Simple Everyday Food https://www.simpleeverydayfood.com/
IMG_2732 copy

Next time when I make these, I think I’m going to roughly chop up the dark chocolate chips prior to adding them into the batter. That way there will be more chocolate dispersed throughout the dough, and the chocolate will be nice and gooey and melty when you take them out of the oven.

Okay, I need to go find myself some chocolate now….

Recipe adapted from Taste and Tell Blog

© Simple Everyday Food. All images & content are copyright protected. Please do not use any of my images without prior permission. If you want to republish this recipe, please re-write the recipe in your own words, or kindly link back to this post for the recipe.

Sharing is caring! Email this to someonePrint this pagePin on PinterestShare on YummlyShare on FacebookShare on Google+Tweet about this on Twitter

IMG_2656 copy 

Just because the holiday season was sooooo last year, doesn’t mean that we should wait another 11 months to start making anything involving peppermint and chocolate. I have stocked up enough Andes peppermint baking chips and Hershey’s mint chocolate chips to last for the next 3-4 months.. so don’t be surprised if you see a post or two (or three… or four) about mint chocolate desserts on SEF this spring!

Remember these amazingly decadent gooey bars I made a while back? Well, today I have created a cookie version of those bars, and they’re equally as delicious! It’s a chocolate cookie base with tons of crunchy peppermint chips sprinkled throughout, so you’re guaranteed plenty of crunchy minty chocolatey goodness in each bite!

IMG_2660 copy

IMG_2658 copy

I also added extra semi-sweet chocolate chips into the batter simply because, well, you just can’t have too much chocolate in a cookie! Although it’s not required, it is highly recommended since it makes the chocolate flavor even more pronounced (read: even more amazing).

Soft, chewy chocolate cookies with bits of mint crunchiness in each bite – I bet you won’t be able to eat just one!

IMG_2674 copy

Just like all my other cookie recipes, I took these out 2 minutes prior to the regular recommended baking time, gently pressed the tops with the back of a fork, and put them back in the oven to cook for another 1-2 minutes. I do this a lot for cookies that don’t naturally spread out a whole lot during their time in the oven, just to achieve a nice crinkly cracked top in the end. I have tried just pressing them down after removing them from the oven completely, but I realized that they the end results aren’t as nice as taking them out after cooking them for 80% of the recommended time.

peppermint chocolate pudding cookies
Print
Ingredients
  1. 1 cup (2 sticks) unsalted butter, softened to room temperature
  2. 3/4 cup packed brown sugar
  3. 3/4 cup granulated sugar
  4. 2 eggs, at room temperature
  5. 2 teaspoon vanilla extract
  6. 1 teaspoon salt
  7. 1 teaspoons baking soda
  8. 1 tablespoon hot water
  9. 2 and 1/4 cups all-purpose flour
  10. 1/4 cup dark cocoa powder
  11. 3.9 oz instant chocolate pudding mix
  12. 1 cup Andes peppermint baking chips
  13. 1 cup semi-sweet chocolate chips
Instructions
  1. Preheat oven to 350 degrees. Line baking sheets with parchment paper or silicon baking mats.
  2. In a large bowl, combine the flour, salt, cocoa powder, and pudding mix. Gently mix with a spatula and set aside.
  3. Using an electric mixer, beat the butter on medium high speed until smooth. Add in the sugars and beat until light and fluffy. Add in the eggs, one at a time, mixing well in between additions.
  4. In a small bowl, dissolve the baking soda in the hot water. Add the baking soda mixture to the butter mixture. Then add in the vanilla. Mix well.
  5. Slowly add in the dry ingredients into the mixer bowl. Mix under medium speed until combined. Add in the baking chips and chocolate chips and mix some more.
  6. In heaping tablespoons, scoop the cookie dough on the baking sheets. Bake for 10 minutes, slightly press the tops with a spoon or a fork, and bake for another 1-2 minutes. Remove cookie sheets from oven and let cool for at least 5 minutes before transferring cookies to a wire cooling rack to cool completely. Store in an airtight container for up to 7 days.
  7. Makes about 40 cookies
Adapted from Something Swanky
Simple Everyday Food https://www.simpleeverydayfood.com/
IMG_2651 copy

I actually decided to freeze half the batch of cookie dough balls for later – not only would they be readily available when I’m craving cookies at a later date, I was hoping it will limit how many cookies I eat a day… note to self for next time: if Amy wants to eat 10 cookies a day, Amy will eat 10 cookies a day, regardless if there are 10 or 20 cookies laying around the house.

Well, at least I have enough peppermint baking chips for a few more batches!

Recipe adapted from Something Swanky

© Simple Everyday Food. All images & content are copyright protected. Please do not use any of my images without prior permission. If you want to republish this recipe, please re-write the recipe in your own words, or kindly link back to this post for the recipe.

Sharing is caring! Email this to someonePrint this pagePin on PinterestShare on YummlyShare on FacebookShare on Google+Tweet about this on Twitter