everyday food made simple

I don’t know about you, but in our household, Thanksgiving planning started at the end of October (it’s a big deal!). We planned out our menu and everything we may need, and a few days ago I finished up a make-ahead timeline to make things go as smoothly as possible on the big day.

I don’t know about your timeline – if you’re nerdy enough like me to make one – but mine is filled with 2-3 things to prep and make every night leading up to Thanksgiving. And since this week I’ll already be doing lots of chopping, baking, cooking, and prepping after a long day of work, the last thing I need is to worry about the age old question of “what’s for dinner??“.

Enter today’s easy recipe…… *drum roll please*…..

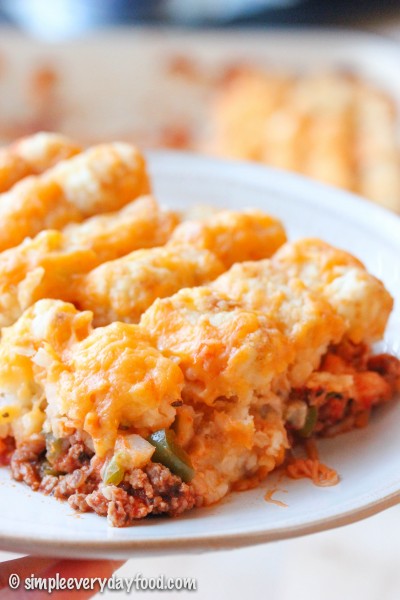
I present to you: Pizza tator tot casserole!

IMG_3254 copy

My taco tator tot casserole is perhaps one of the most popular recipes in our house – we make it at least once very few weeks – it’s just that good. I remember the first few weeks when I started my new job back in February, we actually made a double batch of it in anticipation of being busy and giving me enough time to get settled into my new routine. Now we gave a new spin to our favorite comfort food – combining our favorite casserole dish with tons of pizza flavors! It’s hearty, meaty, and cheesy all at the same time. It’s got pizza sauce, basil, plenty of cheesy goodness, lean ground beef, onions and green peppers, and not to mention to crispy baked tator tots carefully arranged in OCD fashion on top. All the food groups balanced into one delicious meal, it’s guaranteed to be a hit at your dinner table!

Have I mentioned that it’s also super easy and painless to make?

IMG_3260 copy

Just like ordering pizza on a lazy Friday night, you can totally customize what goes into this casserole based on personal preference. We kept it simple by using plain ground beef and pizza sauce, but this dish totally has the potential to be dressed up based on what you like on your pizza..

IMG_3258 copy

Add in bacon bits, crumbled Italian sausage, and pepperoni slices for the meat lovers in your house.

Simply add in more cheese for extra cheesy goodness.

Or if you happen to like your pizza piled high with veggies, just throw in some sliced mushrooms, olives, extra peppers, spinach, or whatever happens to tickle your fancy at the moment.

See? I told you the possibilities are endless.

pizza tator tot casserole
Print
Ingredients
  1. 1 pound lean ground beef
  2. 1 medium green bell pepper, diced
  3. 1 medium onion, diced
  4. 15-oz pizza sauce
  5. 1 teaspoon dried basil
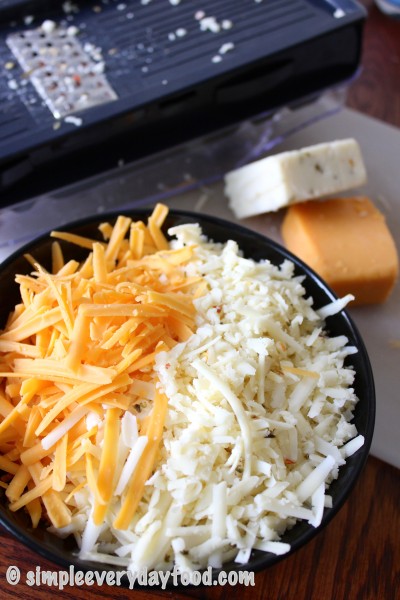
  6. 3 cups shredded mozzarella cheese
  7. 1 package frozen tator tots
  8. 1 cup shredded cheddar cheese
Instructions
  1. Preheat the oven to 400 degrees.
  2. In a large skillet, brown the beef over medium heat with the green peppers and onions until the beef is no longer pink. Add the pizza sauce and basil.
  3. Transfer the beef mixture into a 8x11" casserole dish. Top with mozzarella cheese and tator tots
  4. Bake uncovered for 30-40 minutes, or until the potatoes are crisp and brown. Sprinkle the shredded cheddar cheese, bake for an additional 5 minutes or until cheese is melted.
  5. Let cool for 5-10 minutes and serve.
  6. Serves 6
Adapted from Taste of Home - Ground Beef edition
Simple Everyday Food https://www.simpleeverydayfood.com/
Recipe adapted from Taste of Home – Ground Beef edition

© Simple Everyday Food. All images & content are copyright protected. Please do not use any of my images without prior permission. If you want to republish this recipe, please re-write the recipe in your own words, or kindly link back to this post for the recipe.

Sharing is caring! Email this to someonePrint this pagePin on PinterestShare on YummlyShare on FacebookShare on Google+Tweet about this on Twitter

Now that fall is in the air, all I crave for are comfort foods. Usually this means some sort of soup or casserole dish when it comes to dinner. Don’t even get me started on the numerous desserts that are on my comfort food list – you’d be here for a while, and I’m sure your time is valuable.

Mac & cheese in casserole form is perhaps one of the best comfort foods ever. What’s better than a ooey gooey spiced up mac & cheese with onions, peppers, and seasoned chicken?!

IMG_1920 copy

IMG_1917 copy

Okay, I know a warm brownie with a molten chocolate center served with a side of vanilla bean ice cream probably comes to mind, but stay with me here – right now we’re talking about dinner.

You’re going to laugh at me, but this is the first time I’ve ever bought a block of cheese and shredded it myself with a grater. Yep, first time. I’ve always been lazy and used pre-shredded cheese, but I was told those are usually coated with some sort of a flour-y substance that can change the texture of your dish. So this time I put my grater to use and shredded two blocks of cheese myself, and let me tell you what, I don’t think I’m ever going back to the bagged kind anymore. There’s something about fresh shredded cheese that tastes so much better!

IMG_1910 copy

The two cheeses we use for this dish are Wisconsin sharp cheddar and pepperjack cheese. Pepperjack is perhaps one of my favorite cheeses ever, and it gives the dish a nice little kick that pairs well with the paprika, cumin, and green chiles.

chicken fajita mac and cheese
Print
Ingredients
  1. 12 oz of your favorite pasta
  2. 2 tablespoons EVOO
  3. 1 rotisserie chicken, shredded
  4. 1 teaspoon cumin
  5. ½ teaspoon paprika
  6. A pinch of cayenne pepper, more if desired
  7. 1/4 teaspoon salt
  8. 1/4 teaspoon black pepper
  9. 1 green bell pepper, diced
  10. 1 small yellow onion, diced
  11. 3 cloves garlic, minced
  12. 1 (4 oz) can diced green chiles, drained
  13. ½ cup sour cream
  14. 6 oz shredded sharp cheddar cheese
  15. 6 oz shredded pepper jack cheese
  16. Toppings such as diced tomatoes and cilantro, if desired
Instructions
  1. Preheat oven to 400 degrees.
  2. Cook pasta according to package directions. Drain and set aside.
  3. In a large skillet, heat 1 tablespoon EVOO over medium high heat. Add the chicken, cumin, paprika, cayenne pepper, salt, and black pepper, stir until chicken is coated with the spice mixture. Transfer to a large bowl and set aside.
  4. In the same skillet, heat the remaining tablespoon of EVOO. Saute the garlic, green peppers, and onion over medium high heat until onions turn translucent. Season with salt and pepper to taste. Add in the green chiles and cook for another minute or two.
  5. Pour the vegetable mixture into the large bowl containing the chicken. Stir until combined. Add in the sour cream and the two cheese. Stir some more until everything is thoroughly mixed and there are no clumps of cheese.
  6. Transfer the chicken/vegetable mixture into a 3 quart baking dish. Bake for 15 minutes or until pasta is slightly brown and bubbly.
  7. Serve immediately. If desired, top with diced tomatoes, cilantro, or other garnishes.
  8. Serves 6
Adapted from Annie's Eats
Simple Everyday Food https://www.simpleeverydayfood.com/
If you’re a fan of bell peppers, you can also add in a red and yellow bell pepper to the mix. I’m not a big fan of the red and yellow peppers, so I chose to leave them out of the recipe. However, I do like fresh tomatoes with my fajitas, so I diced up some tomatoes and added them to my bowl. A little bit of chopped up cilantro is also highly recommended – it really brings out the Mexican flavors and it gives the dish a nice bright flavor.

IMG_1923 copy

IMG_1926 copy

I also chose to use rotisserie chicken to save some time – it’s a good way to get rid of leftover rotisserie chicken! If you prefer to cook your chicken yourself, just substitute the rotisserie chicken with two diced up chicken breasts instead.

On a totally different subject, I really shouldn’t have mentioned that warm brownie. Now I need to go make myself a brownie in a mug…

What’s your favorite comfort food?

Recipe adapted from Annie’s Eats

© Simple Everyday Food. All images & content are copyright protected. Please do not use any of my images without prior permission. If you want to republish this recipe, please re-write the recipe in your own words, or kindly link back to this post for the recipe.

Sharing is caring! Email this to someonePrint this pagePin on PinterestShare on YummlyShare on FacebookShare on Google+Tweet about this on Twitter

I’ve actually been making this for years now, but it wasn’t until a few weeks ago that my coworker Erika inspired me to make it again and share it with you guys!

IMG_1820 copy

You see, I’ve always had this thing where “old” recipes weren’t worth sharing and that only new things that I make (and that taste good) should be posted on here. But after today, successful recipes that have endured the test of time and multiple taste buds will start to make appearances on this blog, and I’m super excited about it!

This recipe is AWESOME – let me repeat, AWESOME – due to several reasons:

  1. it involves tator tots. Who doesn’t like tator tots?! If you, or someone you know, is/are not a fan of these little things, let me have a little talk with them.
  2. it’s completely customizable, and any dish that’s customizable is a win in my book. You can add different things in this dish any way you want. Exact measurements aren’t necessary either.
  3. it’s super easy to make. Prep time literally only took me 15-20 minutes.
  4. the leftovers taste just as good (if not better). Brian is not a big fan of leftovers, and this is one of the few dishes that we actually have to fight over leftovers the next day.

To start things out, you brown some turkey meat – it’s healthier that way. Using reduced sodium taco seasoning (or making your own) also bumps it up the healthy meter a little bit more. Add corn, cheese sauce/soup, then tator tots. Throw it in the oven for 45 minutes, and dinner’s ready. It’s that easy.

IMG_1814 copy

taco tator tot casserole
Print
Ingredients
  1. 1 pound ground turkey
  2. 1 package 40% reduced sodium taco seasoning
  3. 3/4 cup water
  4. 2-2.5 cups frozen corn
  5. One 10.75 oz canned cheese soup/sauce
  6. 1 bag frozen tator tots (you won't need the whole bag)
  7. Any other toppings you may like - salsa, diced tomatoes, shredded lettuce, sour cream...
Instructions
  1. Preheat the oven to 375 degrees.
  2. In a skillet over medium-high heat, brown the ground turkey until done. Add in the water and taco seasoning and stir until combined.
  3. Transfer the meat into a 8x11" casserole pan. Add in the corn and level it out with a spatula to make sure it covers the meat. If you'd like extra corn, feel free to add a little bit more.
  4. Next, pour/scoop the cheese soup on top, covering the corn. Layer the top with the tator tots.
  5. Bake for 45 minutes, or until tator tots are brown and crispy. Transfer to cooling rack and serve with desired toppings.
  6. Serves 3-4
Simple Everyday Food https://www.simpleeverydayfood.com/
Me, a little OCD? No way…

IMG_1810 copy

Yeah, who am I kidding, I totally am. Lining up those little tator tots perfectly in rows totally satisfies my inner OCDness. And it’s the only way you can get as many tator tots in the dish!

IMG_1811 copy

And just for the record, I hate making food with canned “soup”. If a recipe requires anything along the lines of “cream of…” I usually either don’t bother with it, or try to substitute it with something healthier. You probably won’t ever see me using any pre-packaged semi-gelantinous “soups” from a can other than this one.

I like my tacos with a little bit of salsa, so after I fill my bowl up with delicious goodness, I like to put a dollop or two of salsa on top of mine. I’ve also shared this recipe with a fellow coworker, and she added some black beans into the layers before throwing it in the oven. If you like sour cream, lettuce, cilantro, or anything else, definitely give it a whirl – I’m sure it’ll taste good!

IMG_1823 copy

IMG_1815 copy

After I add my salsa, I like to mix mine up – it doesn’t look the prettiest, but it sure is tasty! Every bite consists of a little bit of spicy salsa, crispy tator tots, taco meat, and corn. Next time I’m totally adding shredded lettuce (and maybe a Mexican blend shredded cheese) to it too.

Enjoy!

© Simple Everyday Food. All images & content are copyright protected. Please do not use any of my images without prior permission. If you want to republish this recipe, please re-write the recipe in your own words, or kindly link back to this post for the recipe.

Sharing is caring! Email this to someonePrint this pagePin on PinterestShare on YummlyShare on FacebookShare on Google+Tweet about this on Twitter