everyday food made simple

samoa cupcakes

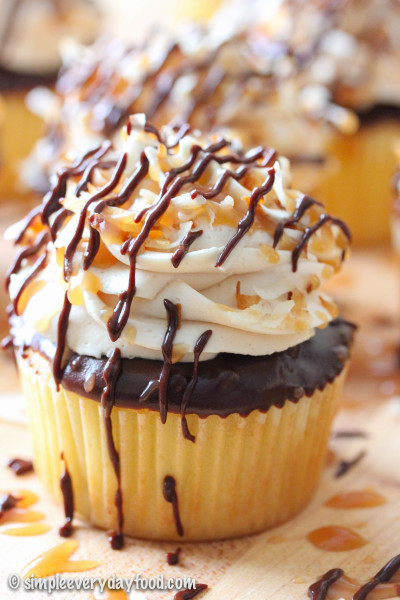
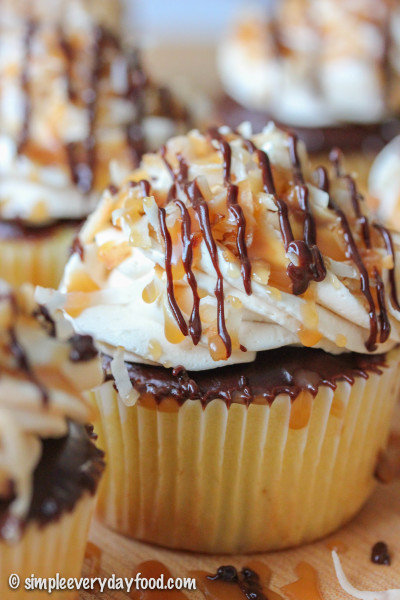
Before we go any further, don’t you just want to lick that caramel drizzle off your screen????

Those who know me know that I’m a sucker for sweets, especially when it’s anything that involves mint and chocolate. So when you see me choose anything over mint chocolate, you know it’s gotta be good. I don’t do it often, but when I do, you know Girl Scout cookie season is upon us

…(I would’ve made you a Dos Equis meme of myself, but I didn’t want to make a fool of myself).

As big of a Thin Mint lover as I am, the Samoas have traditionally been my favorite – the shortbread cookie, toasted coconut, and the sweet chocolate and caramel drizzles over the top are flavor combinations made in heaven.

And believe it or not, I actually still have an entire box of Samoas stashed in the back of my cookie cupboard from last month – it’s a miracle in itself that that box has survived this long!
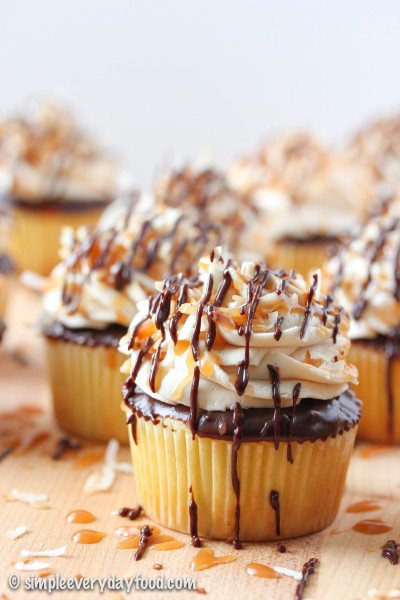
samoa cupcakes

And then there are these ridiculous cupcakes. The cupcakes with layers and layers of textures and flavors that makes it a sweet, decadent, indulgent treat – yellow cake dunked in rich dark chocolate, topped with a sweet fluffy caramel buttercream (made from scratch!), garnished with crunchy toasted coconut flakes and drizzled with more melted dark chocolate and caramel sauce.

Pardon me as I wipe the drool off of my keyboard.
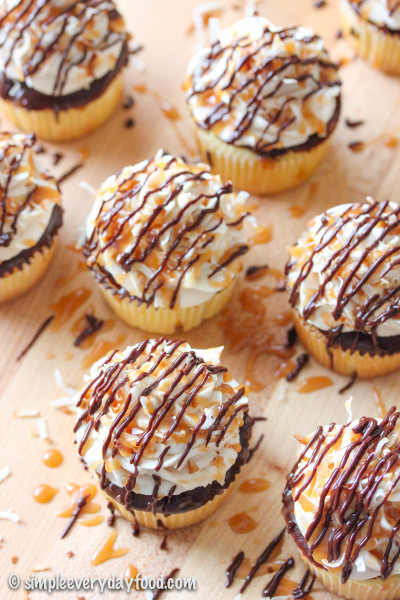
samoa cupcakes

samoa cupcakes

Pretty much everything in this recipe is made from scratch, except for the coconut flakes, because, well, I can’t seem to find coconuts anywhere around where I live, and shredding them myself seems a little time consuming…
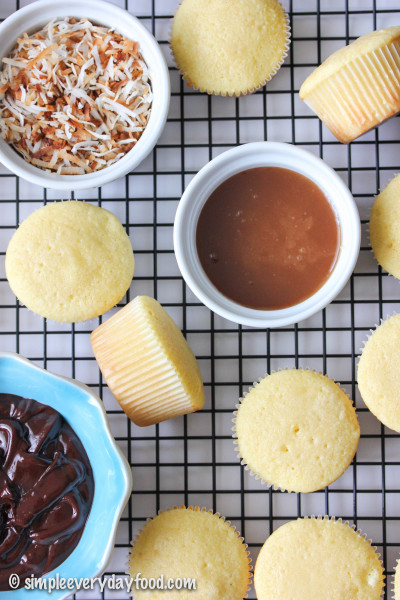
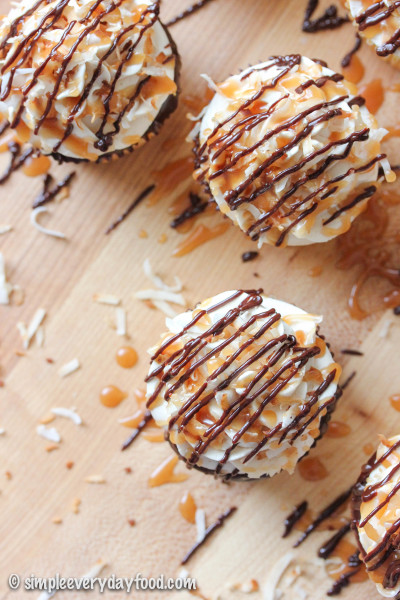
samoa cupcakes

samoa cupcakes

But can we first talk about this homemade cake?! It’s OMGIcanjusteatallthecakesbyitself good. It’s so soft, fluffy, moist, and super duper delicious!
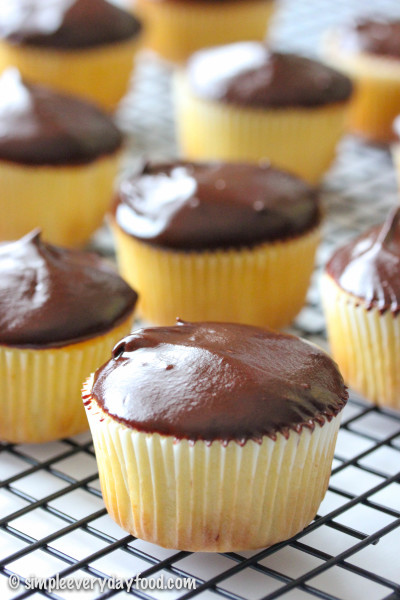
samoa cupcakes

Next up: the caramel sauce. It may seem easier to use store bought caramel sauce for this recipe, but please believe me when I tell you that you definitely need – NEED!!! – to make this homemade caramel sauce. It seriously only took me maaaybe 5 minutes to make and you can definitely taste the difference between the homemade version vs. the store-bought ones. The flavors are more pronounced – stronger, richer, and way more intense in flavor… I promise you totally won’t regret it!

So promise me you’ll make the caramel sauce? Pinky promise? I’ll even give you some tips!

  • Make sure you read all the instructions (preferably several times) prior to making the sauce… you want to know what you’re doing before you start the process rather than reading the instructions as you go. Get all the ingredients you need before starting: you want to have everything you need in arm’s reach, because once things start happening, it goes fast.
  • Although it only takes a few mere minutes out of your day to make this, it’s kind of a recipe that requires you to babysit it as you make it. That means if you’re a multi-tasker like I am, try to refrain from having five things going on all at once that all require your attention (ahem Pinterest, Instagram, changing the TV channel, trying to get the dog to stop harassing the cat…).
  • At the same time, be patient! It may take a few minutes for your boiling sugar-water mixture to start turning colors, but don’t forget to swirl your pan occasionally and have your whisk handy for when the mixture turns amber brown.
  • Once things start happening, whisk whisk and whisk some more! Make the whisk your best friend for these few minutes. Be one with the whisk.
  • Don’t be scared of making caramel! Seriously, it may seem like a daunting task but it’s really a lot easier than it seems. Plus as cliche as it sounds, it really does taste so much better (I just typed “butter” instead of “better”… hahaha!) than store-bought ones. Not to mention that it will also make your house smell like a caramel candy-making factory.
  • You’ll most likely end up with extra caramel sauce, but I’m sure you’ll be able to find things to do with it. I’m pretty sure I’ve ever heard of anyone complaining about extra caramel… have you?!

Add this homemade caramel sauce into some plain ol’ buttercream frosting, and you’ll end up with the a frosting that may just be the highlight of the entire cupcake.
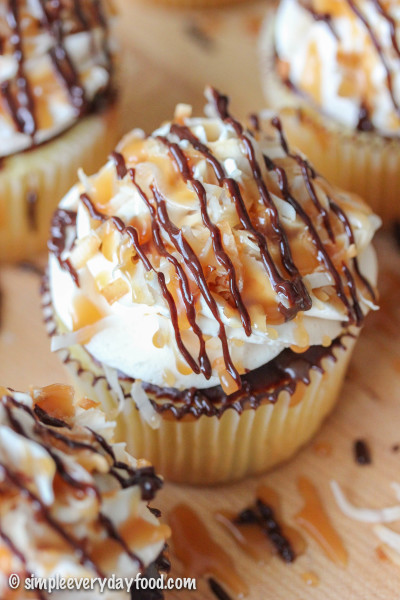
samoa cupcakes

samoa cupcakes with caramel buttercream frosting
Print
For the cakes
  1. 1 and 1/3 cups all-purpose flour
  2. 2 and 1/2 tablespoons cornstarch
  3. 1 teaspoon baking powder
  4. 1/8 teaspoon baking soda
  5. 1/4 teaspoon salt
  6. 1/3 cup unsalted butter, at room temperature
  7. 3/4 cup granulated sugar
  8. 3 tablespoon vegetable oil
  9. 2 large eggs, at room temperature
  10. 1 teaspoon vanilla extract
  11. 1/4 cup skim milk
  12. 1/4 cup buttermilk
For the caramel sauce
  1. 3/4 cup granulated sugar
  2. 3 tablespoons water
  3. 3 tablespoons butter (I used unsalted butter because that's what I had on hand - you can use salted butter or a combination of both unsalted + salted, if desired)
  4. 1/4 cup + 2 tablespoons heavy cream, combined in a small bowl
Caramel buttercream frosting
  1. 1/2 cup unsalted butter, at room temperature
  2. 2 cups powdered sugar
  3. 1/3 cup caramel sauce
  4. 1/2 teaspoon vanilla extract
  5. 1-2 tablespoons heavy whipping cream, if necessary
Optional toppings
  1. Chocolate sauce* (see Notes)
  2. 1/2 cup toasted coconut
For the cakes
  1. Preheat the oven to 350 degrees. Line 12 muffin tins with liners and set aside.
  2. In a medium mixing bowl, combine the flour, cornstarch, baking powder, baking soda, and salt. Stir to combine and set aside. In a separate small bowl, combine the milk and buttermilk, whisk together and set aside.
  3. In the bowl of an electric mixer, combine the butter and sugar and whip using the paddle attachment on medium-high until pale and fluffy, about 3-4 minutes, scraping the sides and bottom of the bowl if needed. Add in the vegetable oil and mix some more. Add in the eggs, one at a time, mixing on medium-low speed after each addition just until mixed. Add in the vanilla extract and mix some more.
  4. Add in the flour mixture and the milk mixture into the butter, alternating between the flour and the milk, starting and ending with the flour mixture, mixing until just combined after each addition (flour - milk - flour - milk - flour).
  5. Spoon cake batter into the lined muffin tins, filling each about 3/4 full. Bake for 16-18 minutes or until an inserted toothpick comes out clean (mine took exactly 17 minutes). Remove from oven and let cool for 5 minutes before transferring to a wired cooling rack to cool completely.
While the cupcakes are cooling, make the caramel sauce
  1. {Before starting this, read the instructions first - I have tips on how to make the caramel sauce in the post, and gather all your ingredients so you have them nearby}
  2. Using a heavy-bottomed saucepan, combine the sugar and water over medium-high heat, whisking constantly to make sure the sugar completely dissolves. Once the mixture starts to boil, stop whisking. Carefully swirl the pan every once in a while the mixture continues to boil. Once the mixture reaches a dark amber color, add in the butter and whisk vigorously until butter has melted and is incorporated. Remove from heat immediately, wait 3 seconds, then very carefully pour in the heavy cream while you're constantly whisking the mixture. Be very careful, as it may splatter as you add in the heavy cream. Whisk until smooth and let cool before transferring to a bowl/container to cool completely.
For the caramel buttercream
  1. Using an electric mixer fitted with the paddle attachment, whip the butter on medium-high speed for 4-5 minutes until pale and fluffy. Add in the powdered sugar and beat on medium speed until combined. Add in the caramel sauce and the vanilla extract and continue to beat on medium-high until frosting looks light and fluffy in texture. If the frosting looks too thick, whip in 1 tablespoon of heavy cream at a time until you reach desired consistency.
To assemble the cupcakes
  1. Dip the tops of the cooled cupcakes into the chocolate sauce, letting the excess run off and return cupcakes back to their upright positions. Let the chocolate have some time to harden prior to piping the frosting, about 10-15 minutes. Pipe the caramel buttercream frosting over the tops of the cupcakes with your favorite piping tip, top with toasted coconut flakes, and drizzle with extra chocolate and caramel sauce. Cupcakes can be stored in an airtight container at room temperature for up to 5 days.
  2. Makes 12 cupcakes
Notes
  1. * To make chocolate sauce: add 1 cup chocolate chips and 1/4 cup heavy whipping cream in a microwave-safe bowl. Heat in microwave in 30 second increments, stirring after each interval until chocolate is completely melted and mixture is smooth.
Adapted from Cooking Classy
Simple Everyday Food https://www.simpleeverydayfood.com/
Recipe adapted from Cooking Classy

© Simple Everyday Food. All images & content are copyright protected. Please do not use any of my images without prior permission. If you want to republish this recipe, please re-write the recipe in your own words, or kindly link back to this post for the recipe.

Sharing is caring! Email this to someonePrint this pagePin on PinterestShare on YummlyShare on FacebookShare on Google+Tweet about this on Twitter

Lately I’ve been thinking about getting a Fitbit Charge HR. I already own a FitBit Flex, but I’m really digging the additional functions the Charge HR provides (heart rate monitoring, time display, automatic sleep detection, etc). But as I added it into my shopping cart and typed in my credit card information one day, I suddenly remembered that the iWatch is scheduled to come out sometime this year, and that’s when the internal debate began…

I’m sort of an Apple geek – all my electronic toys have the little half-bitten apple logo on it. When I initially heard of this iWatch, I laughed and vowed I would never need a wrist gadget that did a lot of the things my phone could do. “Why do I need a watch like that when I can just use my Fitbit?” Buuuut… after reading all about its features, I’m kind of ashamed to admit that I have since changed my mind and I now want a iWatch, especially since it also contains a pretty cool health & fitness app within.

Question: Do any of you guys have the new Fitbit Charge HR? Do you recommend it? Are you planning on getting the iWatch when it comes out? Why or why not? I’d like to hear your opinions!

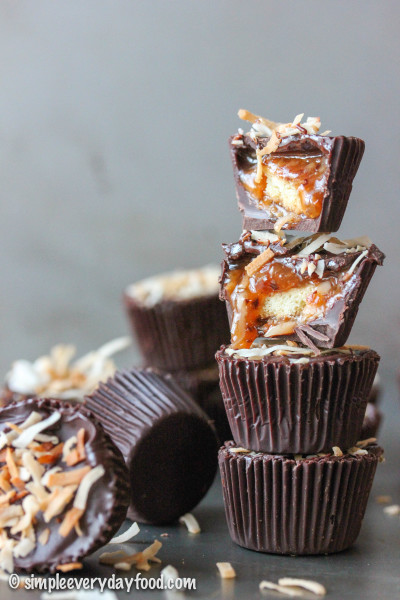
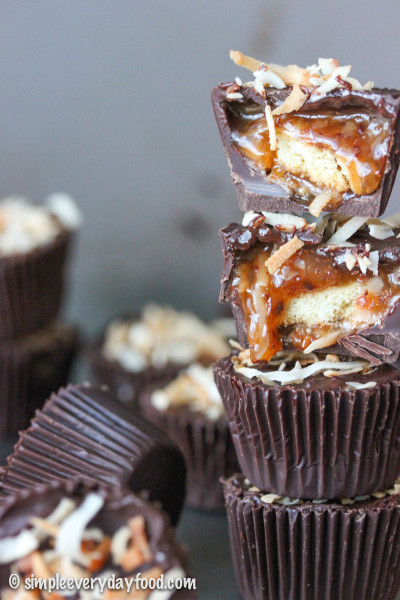
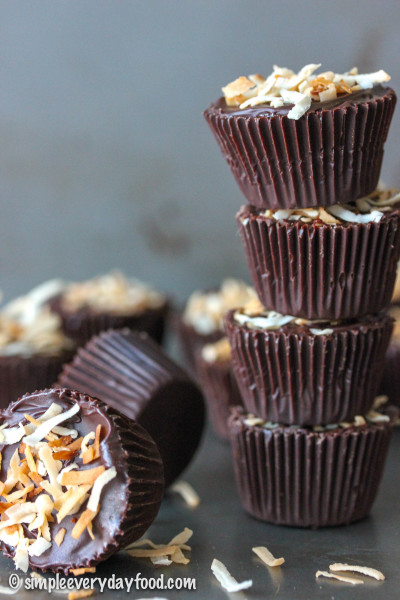
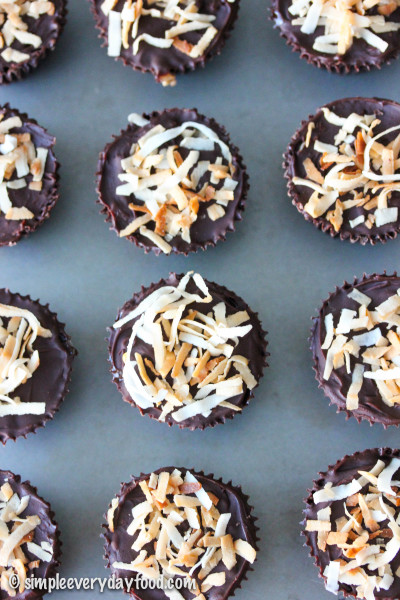
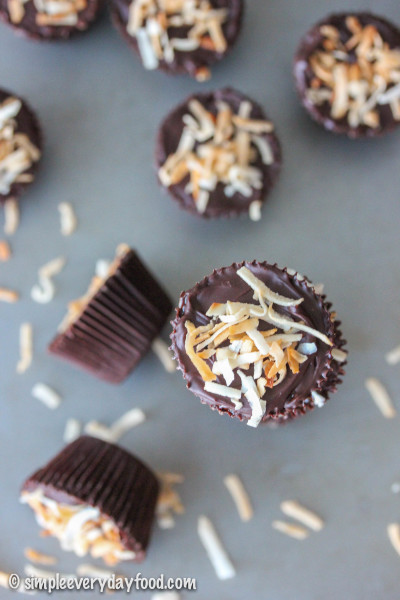
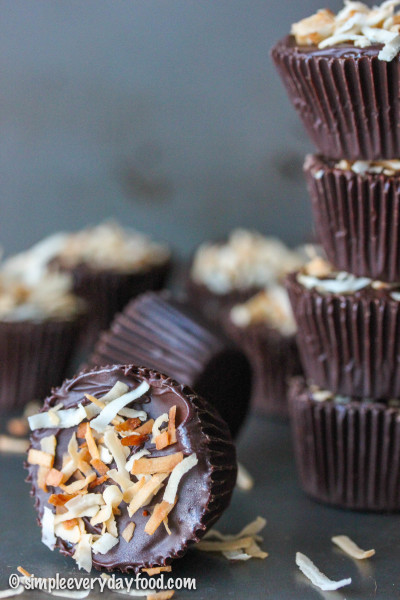
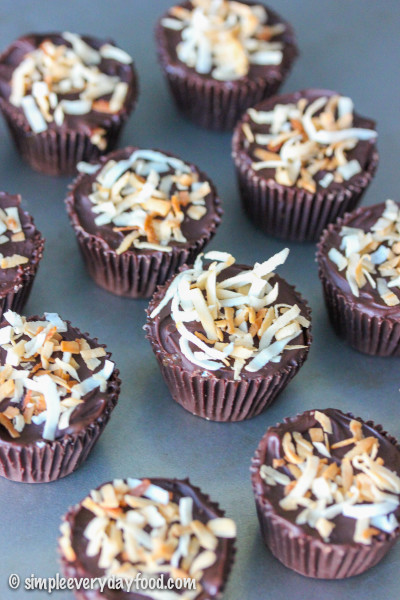
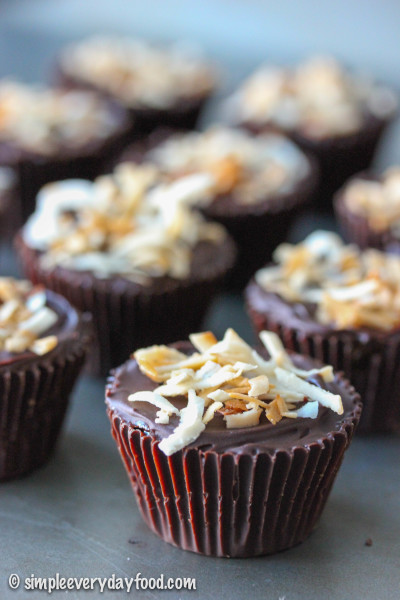
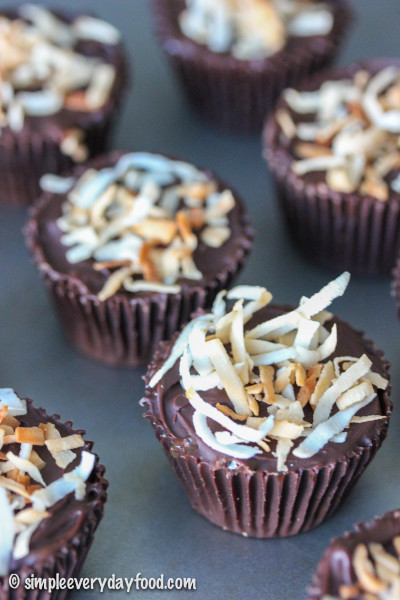
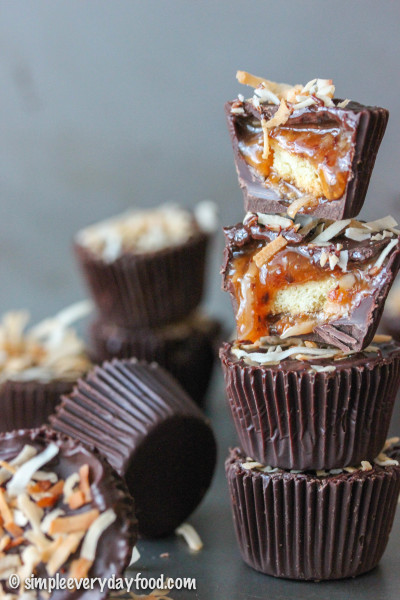
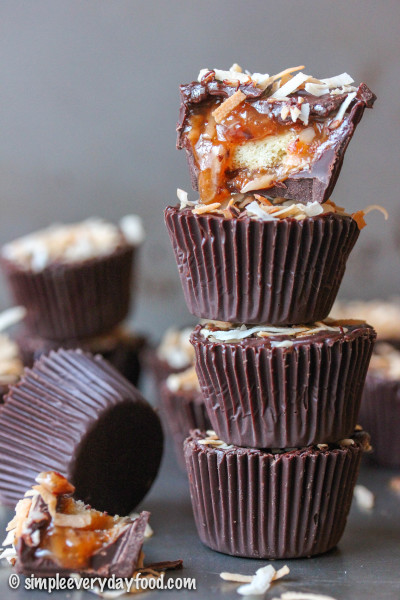
Maybe the reason why I’m thinking so much about activity trackers is because I may have accidentally ate a few too many of these Samoa cookie chocolate cups.. they’re little chocolate cups filled with gooey sweet and salty caramel coconut mixture and a bite-sized piece of shortbread cookie, all in this little chocolate cup… and oh boy are they dangerous!

IMG_5134 copy

IMG_5126 copy

IMG_5110 copy     

They don’t require any sort of mixer, and they don’t require any baking. It may seem like a long process to make them, but there’s a lot of waiting around in between steps, which is perfect for getting miscellaneous things done around the house… or spending some time on Pinterest…. or finding things to buy online… or taking a few of those silly BuzzFeed quizzes…

IMG_5079 copy

IMG_5115 copy

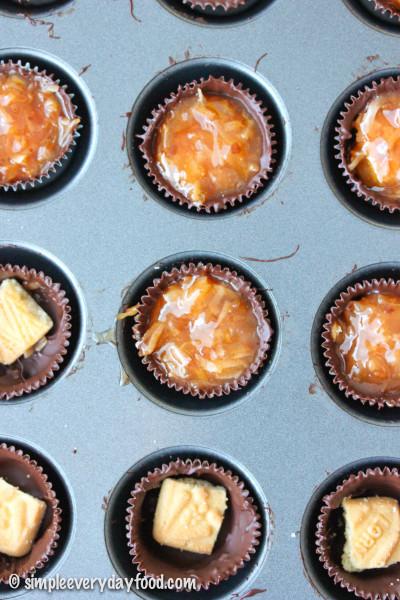
First you melt the chocolate and spread the chocolate around in the liners so it covers everysingleinch of it. Freeze those babies for half an hour (this would be the time to do those things we previously talked about). Then add a little bit of the caramel coconut mixture on the bottom of each cup and top with a little bite of the shortbread cookie.

Are you still following me?

IMG_5060 copy

Top the cookies with more caramel coconut and sprinkle the tops with some sea salt, if the salty-sweet combo is your kind of thing. Freeze some more (patience, grasshopper!).

IMG_5063 copy

Then top it up with more melted chocolate and garnish with toasted coconut flakes. Freeze a little bit longer (almost there!), then EAT and DEVOUR!

IMG_5109 copy

IMG_5088 copy

I will not be responsible for the amount of chocolate cups you eat in one single sitting. Nor will I be responsible if you end up with a stomach ache after eating half the pan… just sayin’.

IMG_5085 copy

IMG_5090 copy

But just look at that ooey gooey caramel-y deliciousness! I mean, how can you resist?!

I apologize for the over abundance of pictures…

IMG_5124 copy

IMG_5146 copy

samoa cookie chocolate cups
Print
Ingredients
  1. 2 and 1/2 cups semi sweet chocolate chips
  2. 1 and 1/4 cups sweetened coconut flakes
  3. 1 cup caramel syrup
  4. 6 shortbread cookie squares, cut into quarters
  5. Sea salt, for sprinkling, if desired
Instructions
  1. Line a 24 mini muffin pan with liners and set aside.
  2. Using a double boiler, melt 2 cups of the chocolate chips, stirring occasionally until smooth. Drop 1-2 teaspoons of melted chocolate into each liner, spreading the chocolate up the sides of the liner using a pastry brush or a spoon. Make sure the sides are nicely coated. Freeze for 30 minutes.
  3. In the meantime, toast the coconut flakes in a nonstick pan over medium heat. Once you notice the flakes are starting to brown, stir constantly until most of the coconut flakes turn golden brown in color. Be careful not to burn them! Remove from heat and reserve 1/4 cup for garnish.
  4. Combine the caramel sauce and the remaining cup of coconut flakes in a medium bowl and mix well. Remove the frozen chocolate cups from the freezer and spoon ~1/2 teaspoon of the caramel/coconut mixture on the bottom of each cup, top with a quarter piece of the shortbread cookie, then top with ~1 teaspoon of the caramel mixture. Sprinkle tops with a little bit of sea salt (if desired). Freeze for another 30 minutes.
  5. Melt remaining 1/2 cup of chocolate chips over a double boiler (or in the microwave) until completely melted and smooth. Remove chocolate cups from freezer, and cover each cup with a thin layer of the melted chocolate, smoothing the tops with a spoon if needed. Garnish with the reserved toasted coconut flakes. Freeze for an additional 15 minutes. Chocolate cups can be stored either at room temperature, in the fridge, or in the freezer in an airtight container, depending on your preference!
  6. Makes 24 chocolate cups
Adapted from The Housewife In Training
Simple Everyday Food https://www.simpleeverydayfood.com/
Recipe adapted from The Housewife In Training

© Simple Everyday Food. All images & content are copyright protected. Please do not use any of my images without prior permission. If you want to republish this recipe, please re-write the recipe in your own words, or kindly link back to this post for the recipe.

Sharing is caring! Email this to someonePrint this pagePin on PinterestShare on YummlyShare on FacebookShare on Google+Tweet about this on Twitter

A few weeks ago, I started my surgery and anesthesia rotation for my internship. As much as I love emergency medicine, there’s just something about surgery and anesthesia that is equally as exciting to me. There’s actually a lot of similarities between the two – they both require constant diligent observation of your patient, you need to be on your toes at all times, and you have to be able to quickly adapt treatments to the status of your patient. There’s no room for slacking and not paying attention to how your patient is acting or how they’re reacting to the treatments you gave them – vital signs can quickly change without warning and you are responsible for either fixing the problem, or notifying the veterinarian about the status of your patient.

I’ve been fortunate enough to work with a group of amazingly talented technicians that are very patient and knowledgeable and willing to teach. It truly has made my internship a great experience so far!

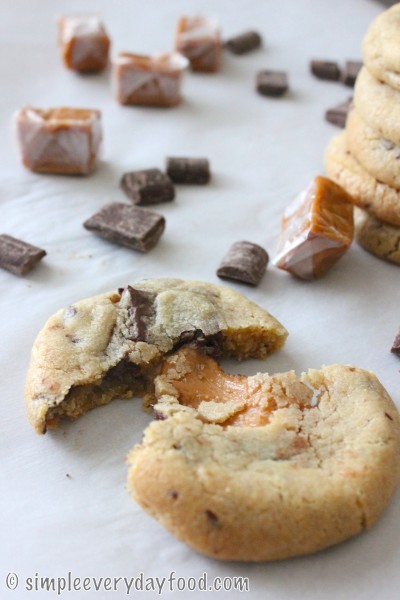
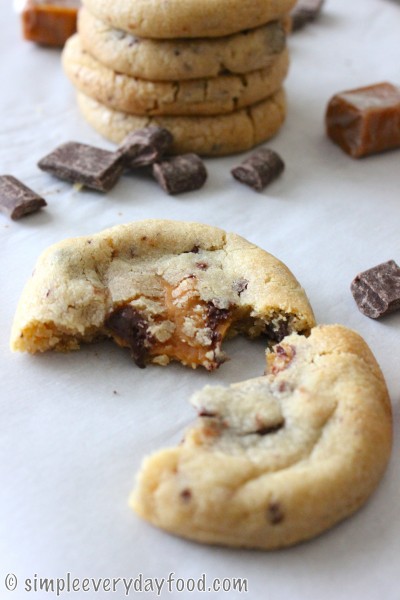
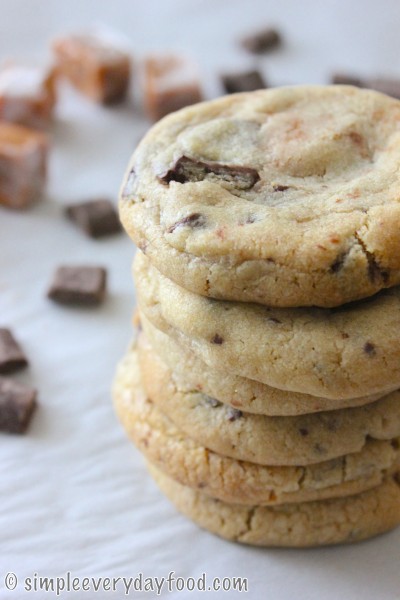
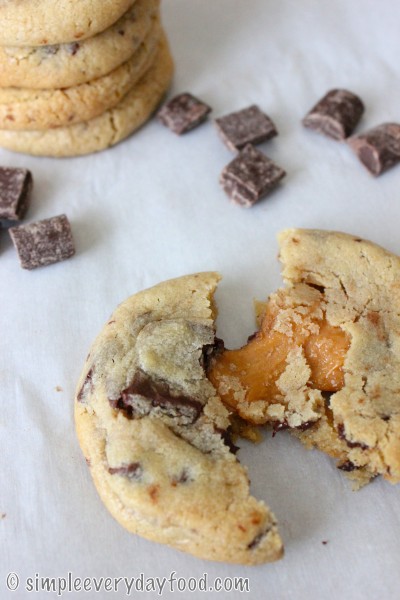
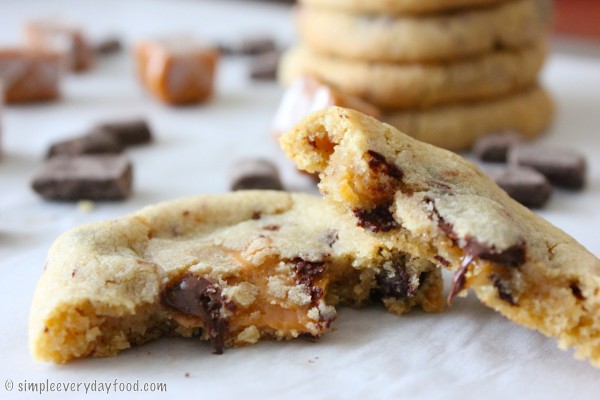
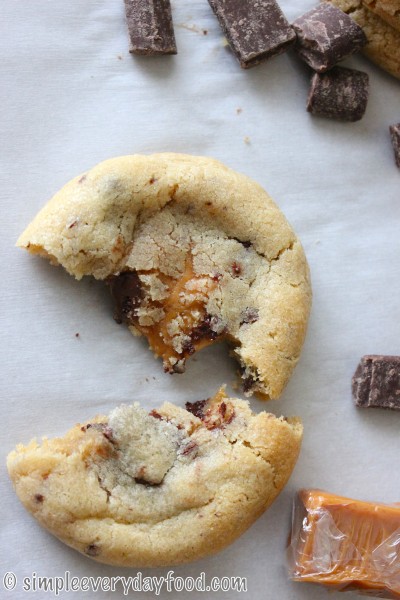
You know what else is great? This cookie.

IMG_2234 copy

IMG_2248 copy

IMG_2222 copy

Soft chocolate chunk cookies with a gooey caramel-filled center that are super easy to make. Dark chocolate shavings are added in addition to chocolate chunks to make sure chocolate is tasted in every single bite. In my personal opinion, these cookies are the best straight out of the oven after they’ve had a chance to slightly cool down a little. That’s when the cookie is still warm and soft, and the caramel is still gooey on the inside. The caramel is the star of the show and is what surprises people when they first take a bite into it. Once the cookies completely cool, the caramel is going to harden a bit and lose its gooey texture, but I found out that throwing them in the microwave for 5-10 seconds is just enough to melt the caramel and transform them back into the warm, soft, gooey chocolate chunk cookie again.

IMG_2231 copy

IMG_2240 copy

chocolate chunk caramel cookies
Print
Ingredients
  1. 1 and 1/2 sticks of unsalted butter, softened to room temperature
  2. 1 and 1/2 cups brown sugar
  3. 1/2 cup granulated sugar
  4. 2 eggs
  5. 4 teaspoon vanilla extract
  6. 4 cups all-purpose flour
  7. 4 teaspoons cornstarch
  8. 2 teaspoons baking soda
  9. 1 teaspoon salt
  10. 1 and 1/2 cups semi-sweet chocolate chunks
  11. 1/2 cup dark chocolate, chopped
  12. 1 bag of caramel candies - unwrap about 20 of them and cut them in half
Instructions
  1. Preheat oven to 350 degrees. Line baking sheets with parchment paper or silicone baking mats and set aside.
  2. In a large bowl, combine the flour, cornstarch, baking soda, and salt. Gently stir to mix and set aside.
  3. Using a stand mixer, cream together butter and sugars until light and fluffy, about 2 minutes, then add in the eggs and vanilla extract and beat until combined.
  4. A little bit at a time, add in the flour mixture and mix until everything is thoroughly combined.
  5. Fold in the chocolate chunks and finely chopped dark chocolate with a spatula. I cheated and stirred them in by turning on my mixer onto the "stir" function.
  6. Scoop about 1.5 tablespoons worth of cookie dough, then make a slight indent in the middle by using your thumb and place one halved caramel candy in the center, then make sure the cookie dough is rolled up in a ball so the caramel candy isn't showing. Repeat until all dough has been used up. Cut up more caramel candies if needed.
  7. Before you put them in the oven, slightly flatten them a bit with the palm of your hand. Bake for 11-13 minutes.
  8. Remove from oven and let cool on the baking sheet before transferring them to a wired cooling rack.
  9. Bake for 11-13 minutes. They will look super soft but they continue cooking after you remove them from the oven. Store in an airtight container for up to 7 days.
  10. Makes about 48-50 cookies
Adapted from Table For Two
Simple Everyday Food https://www.simpleeverydayfood.com/
I was quite surprised that the recipe yielded almost 50 cookies. I was able to keep some at home, bring some to class to share, and bring some to work as well. Everybody loved them!

IMG_2246 copy

Also, if you have kids who are always eager to help in the kitchen, this is also a good recipe to get them involved! After the cookie dough is made and scooped into balls, you can have the kids help with stuffing the centers with caramels. There’s really no chance of “screwing” up, and it’ll also make them feel as if they contributed.

Happy baking!

Recipe from Table For Two

© Simple Everyday Food. All images & content are copyright protected. Please do not use any of my images without prior permission. If you want to republish this recipe, please re-write the recipe in your own words, or kindly link back to this post for the recipe.

Sharing is caring! Email this to someonePrint this pagePin on PinterestShare on YummlyShare on FacebookShare on Google+Tweet about this on Twitter