everyday food made simple

IMG_4520 copy

In case any of you read up on my dilemma of Apple Watch vs. Fitbit from the previous post, I have eliminated one contender – I’ve decided that I’m going to wait on the Apple Watch until it’s market-tested and I have read up on a few reviews and recommendations on people’s opinions on them. Plus I’m sure as technology advances, its future generations will probably be more evolved and have more advanced features that I would want my ideal smart watch to have.

But in the meantime, I’m debating between the Fitbit Charge HR or the Fitbit Surge. I’m also thinking about getting a gym membership at my local 24/7 gym. Advice or suggestions are welcome as always!

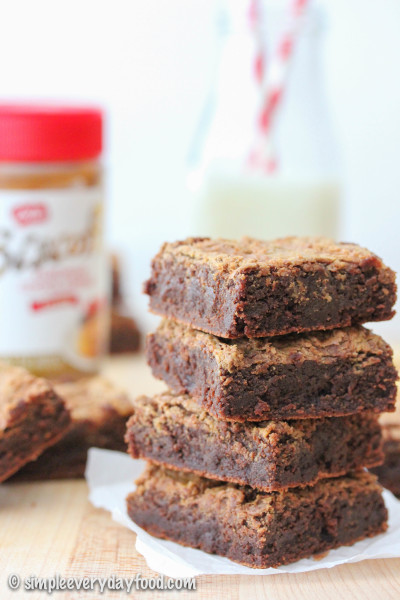
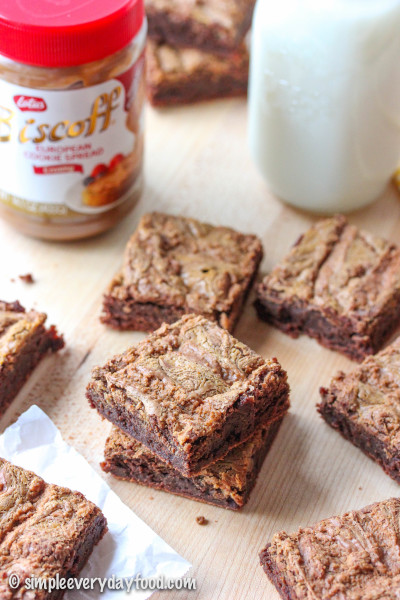
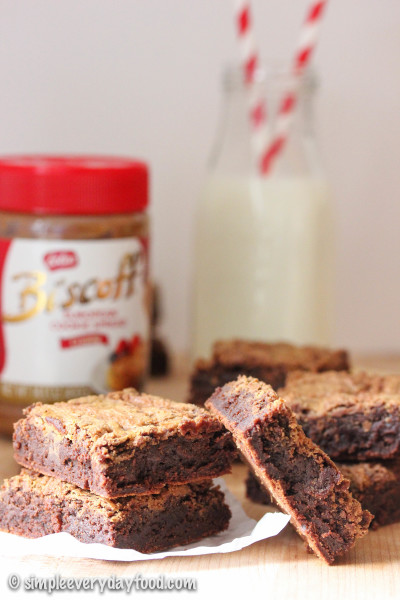
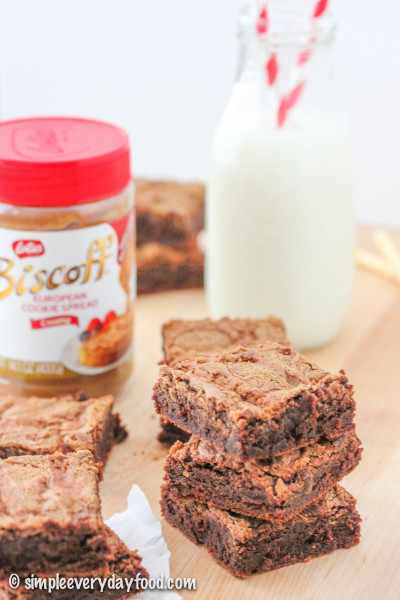
So about these brownies… They’re made with dark chocolate, which contain healthy antioxidants. And since antioxidants are known to lower risks of health problems, these brownies are therefore good for you. That correlation totally made sense, right? So you’re welcome – go ahead and have another brownie!

IMG_4501 copy

IMG_4497 copy


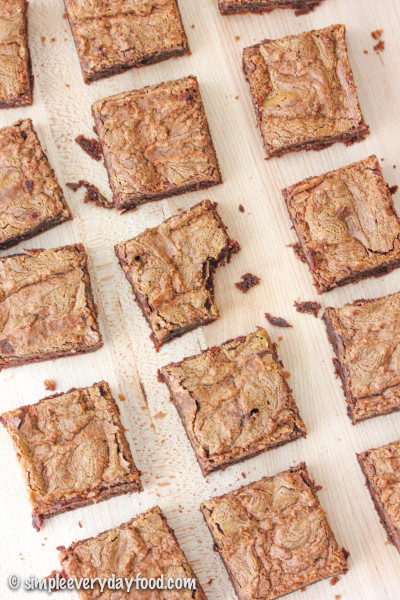
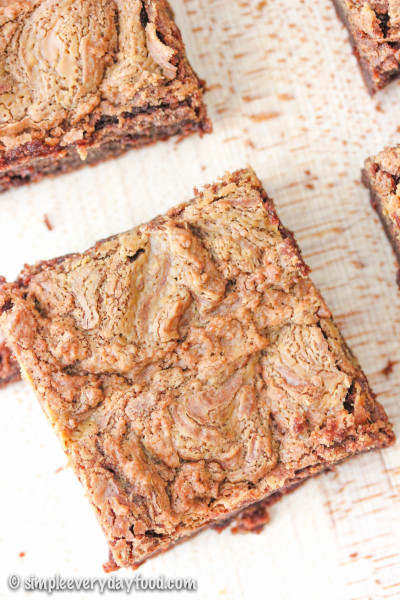
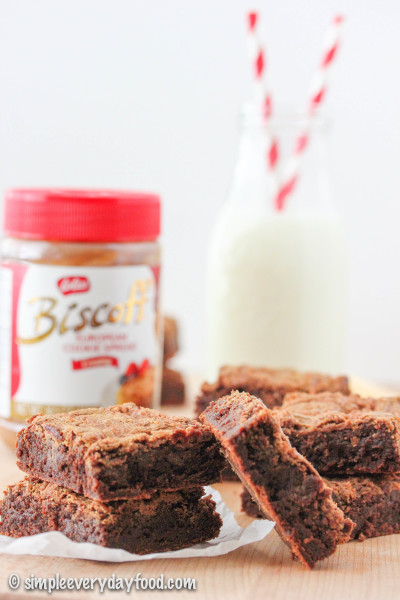
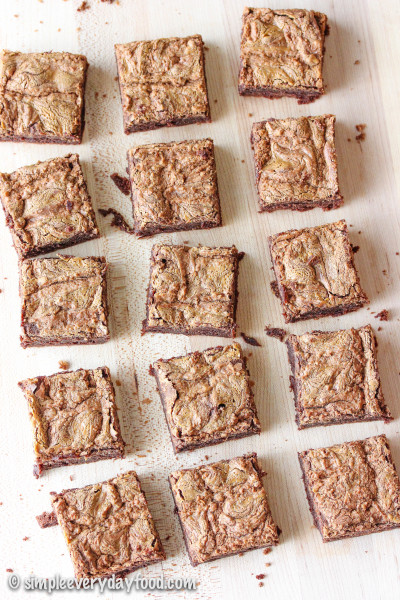
These brownies are so fudgy and delicious! They’re not dense in a it’s-stuck-to-the-roof-of-my-mouth-now-I-need-a-glass-of-milk kind of way, and they’re not light and airy like any ordinary brownie either. The tops are baked to crispy perfection. They still have just the right amount of denseness and chew to them, retaining the texture of a good ol’ fashioned brownie… with a nice thick layer of Biscoff swirls on top, of course. Because Biscoff makes everything taste better.

IMG_4545 copy

IMG_4532 copy

I only used 60% bittersweet dark chocolate for this recipe to offset the sweetness of the sugars and the spread, giving these brownies just the right amount of sweetness while not being overly sweet (read: you can eat more than one!). Don’t worry, although it’s “bittersweet” chocolate, you won’t taste a single hint of bitterness in these at all. I promise.

IMG_4529 copy

IMG_4508 copy

I was having a wonderful photography day, until tragedy struck. I had more plans for these brownies but I was flustered and upset and wanted to cry over spilled milk, so I decided it was time to clean up and put the camera away.

IMG_0369

Fret not, my friends! No brownies were harmed during this tragedy.

[sigh] the foodblogger life can be rough sometimes.

IMG_4482 copy

fudgy biscoff-swirled brownies
Print
Ingredients
  1. 1 cup dark brown sugar, packed
  2. 1/2 cup granulated sugar
  3. 2 cups dark chocolate chips (I used Ghirardelli's 60% bittersweet chocolate baking chips)
  4. 1/2 cup (1 stick) unsalted butter
  5. 4 eggs, at room temperature
  6. 2 teaspoons vanilla extract
  7. 1/2 teaspoon salt
  8. 1 cup all-purpose flour
  9. 1/2-1 cup creamy Biscoff spread
Instructions
  1. Preheat oven to 325 degrees and line a 9x13" baking pan with aluminum foil or parchment paper. Spray generously with cooking spray and set aside.
  2. Place sugars in your electric mixer's mixing bowl. Stir and set aside.
  3. In a small saucepan, melt butter and chocolate chips over low heat, stirring constantly. Remove from heat and pour into your mixing bowl with the sugars. Mix on low speed until combined. Add in the eggs, one at a time, and add in the vanilla and salt. Then add in the flour, 1/2 cup at a time, increasing the speed to low-medium until everything is thoroughly incorporated. Pour batter into the prepared pan and set aside.
  4. In another small saucepan, melt the Biscoff spread over low heat (or melt in a microwave in 15-30 second increments). Pour over the pan and create swirls by running a butter knife through the batter.
  5. Bake for 35-40 minutes, or until a toothpick inserted into the center comes out clean. Remove from oven and let cool completely.
  6. Brownies can be stored in an airtight container at room temperature for up to a week.
  7. Makes one 9x13" pan
Adapted from Biscoff
Simple Everyday Food https://www.simpleeverydayfood.com/
Recipe adapted from Biscoff

© Simple Everyday Food. All images & content are copyright protected. Please do not use any of my images without prior permission. If you want to republish this recipe, please re-write the recipe in your own words, or kindly link back to this post for the recipe.

Sharing is caring! Email this to someonePrint this pagePin on PinterestShare on YummlyShare on FacebookShare on Google+Tweet about this on Twitter

Whenever I tell people I’m a vet tech, it’s always inevitable that someone will say, “I’m so jealous! I wish I could play with puppies and kittens all day!”

I always smile at their response because:

  1. Contrary to public belief, vet techs do not play with puppies and kittens all day.
  2. As a matter of fact, I actually do not see puppies and kittens all that often.
  3. It’s really not all rainbows and unicorns – there’s actually quite a bit a lot (I mean A LOT) of poop, pee, vomit, and blood involved on a daily basis (that’s if you’re lucky).
  4. There’s also a lot of sadness and death that we see on a regular basis. However, at the end of the day, we love what we do and we wouldn’t trade it for anything in the world.

Screenshot 2014-07-08 18.26.30

The past few months, my coworkers and I have been taking care of a particular patient whom we have all grown attached to and fallen in love with. He stayed with us to get his medical condition under control while his loving parents dealt with some family issues themselves. They trusted us to take care of their baby boy, and we gave him all the love and attention he deserved: extra long walks, lots of ear and butt scratches, and lots of treats and cookies. He was such a happy dog that it was just too easy for us to fall in love with him. However, just earlier this week when I was about to go to bed, my coworker texted me and told me his family had ultimately decided to let him go, just a few hours after I said good-bye to him at the end of my shift.

I was devastated. I think we all were. I can’t speak for anyone else, but I realized I was attached to that boy more than I knew.

So how do we cope during times like this?

Well, some people curl up on the couch and cry into a pillow. [check]

Some people like to talk about it. [uh yeah no thank you]

Some people lay in bed and watch TV for hours on end.

Some people go for a run to temporarily forget the pain.

Some people reflect through writing. [check]

And some people sit down with a pint of ice cream and eat until they feel better. [check]

This peanut butter cup ice cream with brownie bits, to be exact.

IMG_3688 copy

IMG_3676 copy    

If we took a poll of America’s favorite flavor combo, peanut butter + chocolate has got to be in the top 3. That’s why this ice cream is the epitome of comfort food. Chucks of chopped peanut butter cups and brownie bits generously sprinkled throughout the ice cream – every bite is sweet, chocolatey, decadent, chewy, and crunchy. Oooooh yeah. It’s pure heaven, I tell ya.

IMG_3686 copy

IMG_3677 copy

What’s even better is that this doesn’t require tempering of eggs, which means no risk of getting scrambled eggs! Just blend, chill, churn, freeze (and wait for what seems like eternity), and enjoy! And let me tell you right now – waiting for the ice cream to freeze overnight is pure torture!

The peanut butter ice cream base is so good that I could’ve slurped it all with a straw! I had to refrain myself from pouring it into a glass, topping it off with the mix-ins, and drinking it like a milkshake…

So go do yourselves a favor guys, and go make this right now. I promise you won’t be disappointed!

IMG_3683 copy

peanut butter cup ice cream (with brownie bits)
Print
Ingredients
  1. 3/4 cup creamy peanut butter
  2. 1 cup plus 2 tablespoons sugar
  3. 2 and 2/3 cups half-and-half
  4. A pinch of salt
  5. A dash of pure vanilla extract
  6. 1 heaping cup (unwrapped) mini Reese’s cups, frozen and chopped
  7. 1 cup roughly chopped brownie bites (optional)
Instructions
  1. In a blender, combine the peanut butter, sugar, half-and-half, salt, and vanilla extract. Blend until smooth. Place in refrigerator and chill completely.
  2. Add mixture to ice cream maker and churn according to manufacture's instructions.
  3. Once churned, gently fold in the chopped peanut butter cups and chopped brownie bites with a spatula. Transfer to storage container and freeze overnight.
  4. Makes 1 quart
Adapted from Annie's Eats
Simple Everyday Food https://www.simpleeverydayfood.com/
Recipe adapted from Annie’s Eats

© Simple Everyday Food. All images & content are copyright protected. Please do not use any of my images without prior permission. If you want to republish this recipe, please re-write the recipe in your own words, or kindly link back to this post for the recipe.

Sharing is caring! Email this to someonePrint this pagePin on PinterestShare on YummlyShare on FacebookShare on Google+Tweet about this on Twitter