everyday food made simple

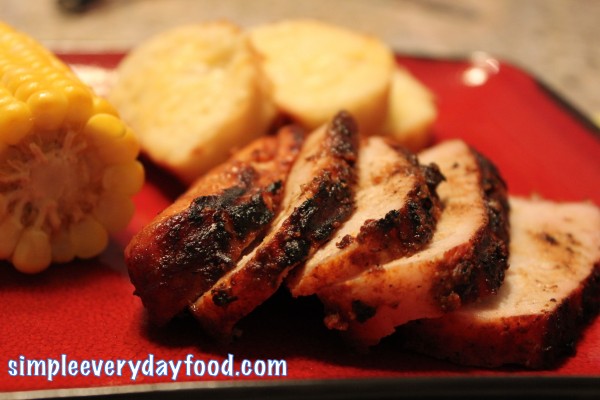
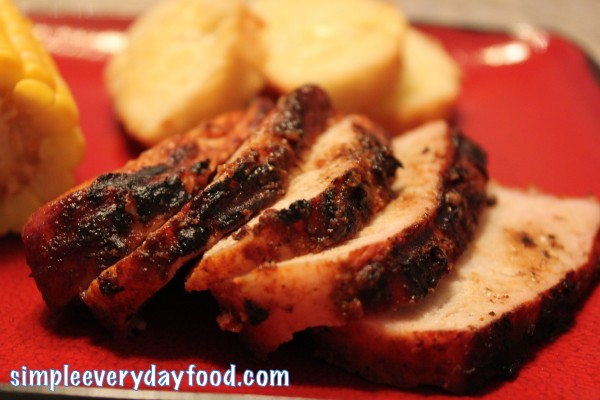
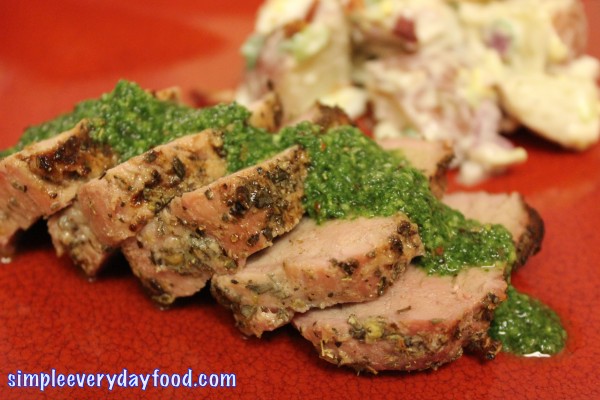
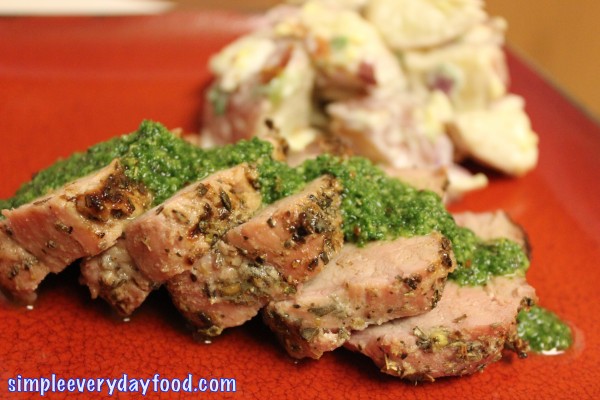
As I promised, here’s the second recipe of last night’s dishes – a very simply seasoned tenderloin with a garlicky sauce.

IMG_1152

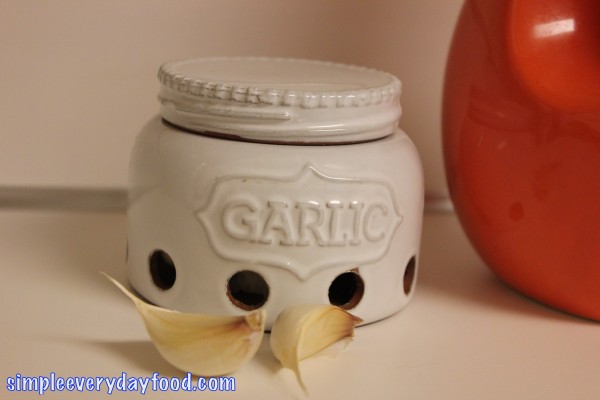
I partially wanted to make something that involved garlic because I found this cute little thing at the store yesterday! It’s a way better (and more eye appealing) than our old “Philadelphia cream cheese garlic storage container“! And we can actually proudly display it on our counter now!

IMG_1127

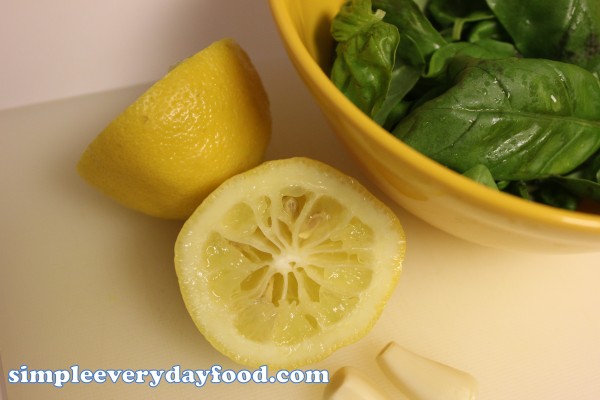
Although this tenderloin is juicy and tender by itself, the sauce kicks the whole dish up a few notches. Green sauces, unlike other colored sauces, are usually associated with words like “fresh” and “healthy“. And why wouldn’t they? They’re usually made with some sort of an herb, garlic, light seasoning (salt and pepper), with little sugar and other processed condiments.

IMG_1125

IMG_1148

pork tenderloin with garlic herb sauce
Print
Ingredients
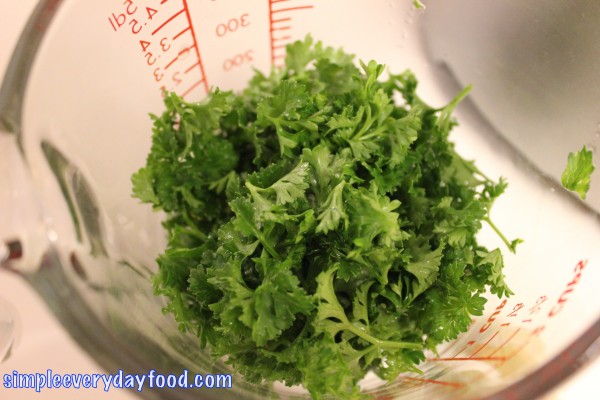
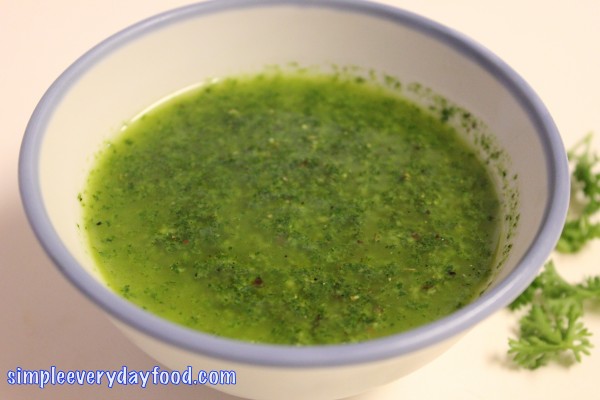
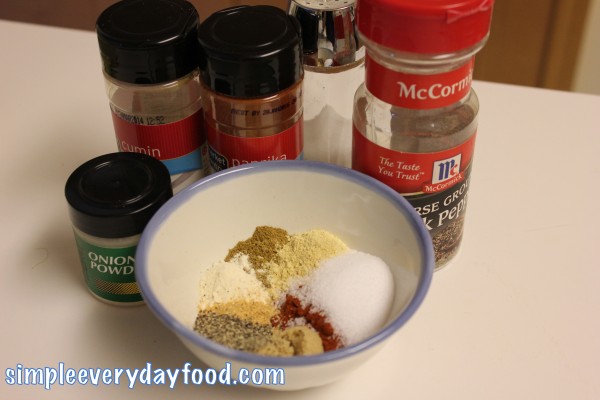
  1. 1 cup packed flat leaf parsley
  2. 2 cloves garlic
  3. 1/2 cups EVOO, plus more for brushing
  4. 3 1/2 teaspoon dried oregano
  5. 1 tablespoon red wine vinegar
  6. A dash of crushed red pepper (omit if you're not a fan of spiciness)
  7. 1 1.5-pound pork tenderloin
  8. 1/2 teaspoons garlic powder
  9. Salt and pepper
Instructions
  1. Using a food processor, pulse the parsley and garlic. Then add in the EVOO, 1/2 teaspoon dried oregano, vinegar, red pepper, 1/2 teaspoon salt, and a pinch of black pepper. Transfer to a bowl and set aside.
  2. Prepare a charcoal grill so it's nice and hot.
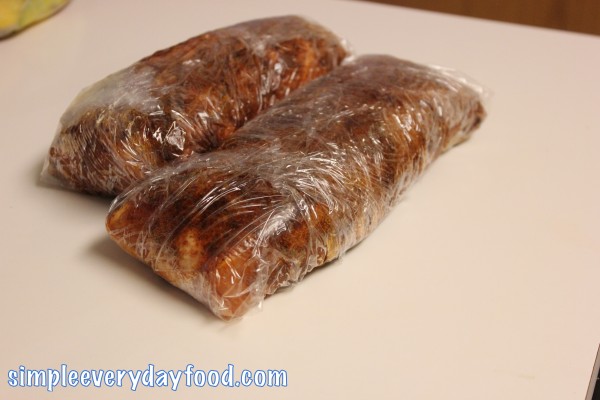
  3. Brush the pork with some EVOO and rub with 1 teaspoon salt, 3 teaspoons dried oregano, and the garlic powder.
  4. Place tenderloin on the grill, turning often, and cook until the meat thermometer registers 145 degrees, about 25-30 minutes.
  5. Remove from grill and let rest for 20 minutes. Thinly slice and drizzle with the herb sauce.
Adapted from Rachel Ray Magazine
Simple Everyday Food https://www.simpleeverydayfood.com/
Not only does this green garlic sauce taste good, it also makes the whole dish look like something you can order at a restaurant.

IMG_1155   

After we both had our share last night, there were a few pieces left, and I wasted no time on calling dibs on them for lunch today!

And yes, I’m still working on that gigantic bowl of potato salad… I had to try my hardest to pull myself away from that bowl so I can have some room for coffee later.

….”just one more bite!

[five bites later….]

“Okay, just one last bite! This is going to be my last bite!”

Enjoy!

Sharing is caring! Email this to someonePrint this pagePin on PinterestShare on YummlyShare on FacebookShare on Google+Tweet about this on Twitter

You know, why do they call a piece of breaded steak “chicken-fried steak”? You know how confusing that is to a teenager that just came to the U.S. from a country that doesn’t even really eat steak?!

For the longest time I didn’t know if it was actually chicken or steak. I would always wonder who came up with this silly name… is it chicken, or is it steak? I’m not sure who told me or if I just came to the conclusion that chicken-fried steak is actually “steak”, but to this day I still think it’s funny when I see something called “chicken-fried xxx” when it has nothing to do with chicken lol.

I’ve never had chicken-fried anything before, but once in a while when we’d go to Perkins for breakfast, the hubs will order their chicken-fried steak as his “dinner” after getting off work on nights.

If he likes it, it’s probably pretty good… which means that I’ll probably like it.

Yep, that’s how I determined what we should have for dinner this weekend. I figured we’d try something new and adventurous, something we’ve never made before.

IMG_0912

Well, this recipe sure didn’t disappoint me, because the breading was suuuuper flavorful and the meat was actually quite tender. It’s healthier than the traditional chicken fried steak since we made it in the oven instead of frying it in a frying pan, and if I can make something that’s just as tasty but healthier, I’m all for it.

IMG_0903

IMG_0905

IMG_0907

healthy chicken-fried steak with cream gravy
Print
Ingredients
  1. 1/4 cup all-purpose flour
  2. 1/4 cup skim milk
  3. 1 large egg, beaten
  4. Cooking spray
  5. Hot chili pepper sauce, to taste
  6. 3 cups cornflakes, crushed
  7. 2 teaspoons Lowry's seasoning
  8. 3-4 cube steaks, about 16 oz total
  9. 1 tablespoon cornstarch
  10. 1/2 cup low-sodium beef broth
  11. 1/4 fat-free half-and-half
  12. Salt and pepper
Instructions
  1. Preheat the oven to 400 degrees. Line a baking sheet with foil and spray generously with cooking spray.
  2. Tenderize the meat with a meat tenderizer while making sure the steaks are uniform in thickness.
  3. Using three shallow bowls, place the flour in one bowl. In the other, whisk together the milk, egg, and hot sauce. In the last bowl, combine the cornflakes and 1 teaspoon of the Lowry's.
  4. Season the steaks with the remaining Lowry's seasoning. Dredge the steaks in the flour, patting off the excess. Then dip them into the egg mixture, letting any excess drip off. Finally, dredge them in the crushed cornflakes, slightly pressing on them to help the flakes stick to the steaks.
  5. Place the steaks on the prepared baking sheet. Spray the top of the steaks lightly with more cooking spray. Bake for 13-15 minutes, or until cooked through.
While the steaks are cooking, make the gravy
  1. In a small bowl, combine the cornstarch with 1 tablespoon of beef broth. Whisk until thoroughly combined. In a small saucepan, combine the cornstarch mixture with the remaining beef broth and half-and-half. Bring to a boil over medium heat. Turn the heat down to medium-low and let simmer until thickened while stirring constantly. Season generously with black pepper.
  2. Serve the steaks with the cream gravy.
Adapted from Food Network Magazine
Simple Everyday Food https://www.simpleeverydayfood.com/
We served ours with some homemade mashed potatoes and a side salad – I know I’ll be fighting the hubs for that last steak tomorrow for lunch!

IMG_0909

Enjoy!

Sharing is caring! Email this to someonePrint this pagePin on PinterestShare on YummlyShare on FacebookShare on Google+Tweet about this on Twitter

Since last time I tried a dry rub recipe on some ribeyes and they turned out to be super amazing, I figured I’d try a different dry rub recipe for pork tenderloins today.

IMG_0864

Despite the fact that it rained all day here in the Twin Cities, it was almost as if Mother Nature knew we had plans to grill out tonight and gave us some nice (but chilly) weather in the end :)

Thank goodness the skies cleared up – if it would’ve kept on raining, we would’ve had to quickly find a Plan B for dinner. And being the strong Type A person that I am, a last-minute Plan B would not bode well with me (especially when I’ve already gotten everything ready to go). Type A people like to make plans, and stick to their plans. They don’t do well when plans do not go as planned…. in the end, everything ended up going as planned, so I I’m a happy camper.

IMG_0852

IMG_0856

IMG_0859

grilled pork tenderloin
Print
Ingredients
  1. Pork tenderloin, about 1.5 pounds
  2. 2 teaspoons EVOO
  3. 1 tablespoon paprika
  4. 2 teaspoons salt
  5. 1/2 teaspoons black pepper
  6. 1 teaspoon brown sugar
  7. 1 teaspoon ground cumin
  8. 1 teaspoon mustard powder
  9. 1/2 teaspoon garlic powder
  10. 1/2 teaspoon onion powder
Instructions
  1. In a small bowl, combine the paprika, salt, pepper, brown sugar, ground cumin, mustard powder, garlic powder, and onion powder.
  2. Rub the EVOO over the pork tenderloin, then generously coat with the spice rub. Wrap the pork tenderloin in plastic wrap and place in the fridge for 3-6 hours.
  3. Remove the pork from the fridge about 30 minutes before grilling.
  4. Using a charcoal grill, set it up so the coals are nice and hot.
  5. Place the pork over direct heat. Cook for about 20-30 minutes (depending on the size of the pork), turning once halfway, or until a thermometer inserted into the thickest part registers 140-145 degrees.
  6. Transfer to cutting board and let rest for 15 minutes.
  7. Slice the pork and serve.
Adapted from Food Network Magazine
Simple Everyday Food https://www.simpleeverydayfood.com/
Anyway… what’s not to like about pork tenderloin? These babies were so juicy, tender, and full of flavor. The dry rub gave it a crusty crust on the outside, and the charcoals gave it a nice smoky flavor on the inside. Along with the corn on the cob and cheesy bread to go along with it, who says you can’t have restaurant-quality meals at home?!

IMG_0863

Yep, it was good – definitely a repeat for whenever summer decides to show up in Minnesota. I’m glad we decided to buy two tenderloins, so now we’ve got plenty of yummy meals for the next few days. Next time, I’m going to be sitting on the patio soaking up some sun with some lemonade while the hubs makes me dinner :)

Enjoy!

Recipe adapted from Food Network Magazine

Sharing is caring! Email this to someonePrint this pagePin on PinterestShare on YummlyShare on FacebookShare on Google+Tweet about this on Twitter

Now, before I go any further, let me make a disclaimer: I like to give sites credit when I tweak my recipes from their original ones. However, today when I went on Pinterest to find where exactly this recipe came from, it redirected me to a page “that no longer exists”…. so whoever came up with this recipe in the first place, let me know and I will gladly put your name/website on here :)

There has been a “pin” on Pinterest that both the hubs and I have pinned on separate occasions a while back that claims it’s supposedly “the best steak marinade in existence”. Since summer is slooooowly approaching and grilling season is upon us, we figured we’d try it out and see exactly how good it is.

It turned out to be something like this:

IMG_0850

Looks pretty tasty huh?

steak marinade
Print
Ingredients
  1. 2-10 oz ribeye steaks (or any other cuts of steak of your liking)
  2. 1/3 cup low-sodium soy sauce
  3. 1/2 cup EVOO
  4. Juice of 1 lemon
  5. 1/4 Worcestershire sauce
  6. 1.5 tablespoons garlic powder
  7. 3 tablespoons dried basil
  8. 1.5 tablespoons dried parsley flakes
  9. 1 teaspoon black pepper
  10. 2 cloves garlic, minced
Instructions
  1. Add all the ingredients (except the steaks) into a large Ziploc bag. Stir to combine.
  2. Add the steaks. Squeeze out all the excess air, seal the bag, and make sure the steaks are covered completely by the marinade. Marinate the steaks in the fridge for up to 8 hours.
  3. About 30 minutes before you put the steaks on the grill, take the steaks out to room temperature.
  4. Using a charcoal grill, set the grill up so the coals are nice and hot.
  5. Place steaks over direct heat and cook for about 14 minutes, flipping once halfway through, or until it's done the way your like it.
Adapted from Unknown
Simple Everyday Food https://www.simpleeverydayfood.com/
We served our steaks with garlicky green beans and couscous (can you tell it’s our new favorite form of carbs? lol).

IMG_0851

My conclusion: it’s not bad.

Just “not bad”?

Yeah. It was good, tasty, but nothing “amazing” (in my opinion). Lets just say that I’ll be sticking to my dry rub recipe next time. However, it did keep the steak pretty juicy and the Worcestershire and lemon flavor was pretty pronounced. Other than that, I wasn’t really able to taste any of the dry herbs that was in it.

Let me just quote something the hubs said: “if it claims it’s the ‘best marinade in existence’, it better be so amazing that I fall out of my chair.”

Maybe my project for the summer is to perfect this recipe and make it into my own version of “the best steak marinade ever” :)

Enjoy!

Sharing is caring! Email this to someonePrint this pagePin on PinterestShare on YummlyShare on FacebookShare on Google+Tweet about this on Twitter

Just when I thought spring was right around the corner, I checked the forecast for the next 5 days and saw this:

forecast

Ugh. I need to move. I guess today would be the last day to get to use the grill for the next few days (they’re calling for rain for the entire weekend as well). Good thing we planned ahead and decided to throw some chops on the grill for a quick dinner. Yay for planning ahead!

IMG_0770

IMG_0773

I have a few rub recipes I’ve been itching to try all winter, waiting for some nice sunny days to grill out. Since I didn’t get to enjoy the nice warm weather we had this past weekend, today seemed to be the perfect day to try a new recipe out, and I sure didn’t have to ask the hubs twice if he wanted to fire up the grill….

IMG_0774

Disregard the teriyaki marinated chicken that’s on the other side of the grill the hubs was making for his work lunches….

Ever since the hubs found out that sometimes trying new things really isn’t that bad (see my post about how he bravely tried my roasted red pepper & pesto penne and liked it), I’m hoping that this summer we’ll be “diversifying” his palate and trying things he’s never even wanted to try before. Since the pesto was a success, I figured we can try a rub that contained similar ingredients to it…

IMG_0780

grilled pork chops with basil garlic rub
Print
Ingredients
  1. 2 thin bone-in pork chops, about 1/2" thick
  2. 2 garlic cloves, peeled
  3. 1 cup fresh basil leaves
  4. 2 tablespoons EVOO
  5. Juice of one lemon
  6. 1 teaspoon salt
  7. 1/2 teaspoon black pepper
Instructions
  1. Using a charcoal grill, set the grill up so the coals are nice and hot.
  2. Meanwhile, with the food processor running, drop the garlic cloves through the feeding tube and mince. Stop and add the basil leaves, pulse on high until thoroughly chopped.
  3. Add the EVOO, lemon juice, salt, and pepper. Pulse until everything is mixed well and it turns into a thin, wet rub.
  4. Generously spread basil mixture on both sides of the pork chops. Let sit for 15-30 minutes.
  5. Place chops on grill over direct heat, cook for about 6-8 minutes, turning once halfway through, or until internal temperature reaches 145 degrees.
  6. Remove pork chops from grill and let rest for 3-5 minutes.
Notes
  1. Cooking times may vary based on how hot your coals are and the thickness of your pork chops. If you're unsure if they're done, it's always best to use a meat thermometer.
Simple Everyday Food https://www.simpleeverydayfood.com/
Since we made regular plain whole wheat couscous this time, the juices from the chops gave our otherwise boring couscous a really good flavor. The hubs thought the rub was so good that he said, “I think I like basil!”

It’s almost just as rewarding as hearing your picky 5-year-old say they think your food is amazing. :)

Enjoy!

Sharing is caring! Email this to someonePrint this pagePin on PinterestShare on YummlyShare on FacebookShare on Google+Tweet about this on Twitter