everyday food made simple

For the longest time ever, I didn’t know apple butter didn’t actually involve “butter”. Why couldn’t they call it something like “apple jam” or “apple spread”?

IMG_4250 copy

IMG_4267 copy

But then again, peanut butter doesn’t involve “butter” either, and I don’t hear people calling it “peanut spread”…

BUT! They do call the popular Nutella a “hazelnut spread”, not a “hazelnut butter”, even though its consistency is just like peanut butter..

So what qualifies a condiment as a “butter”? Is it its consistency? Like it’s so smooth it spreads just like butter? Or is it just the way people are used to calling it? Maybe I’ll start a new trend and call my apple butter an apple “spread” instead.

IMG_4236 copy

Ugh. Technicalities.

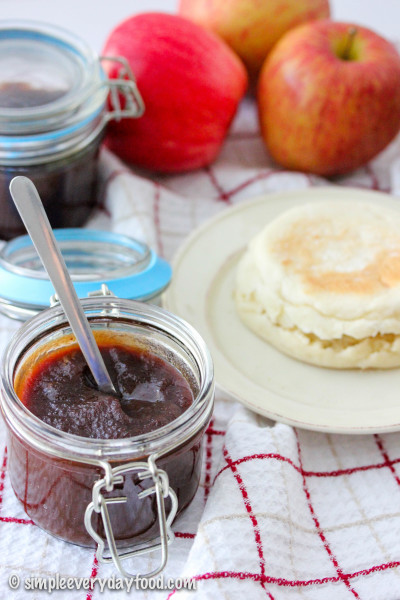
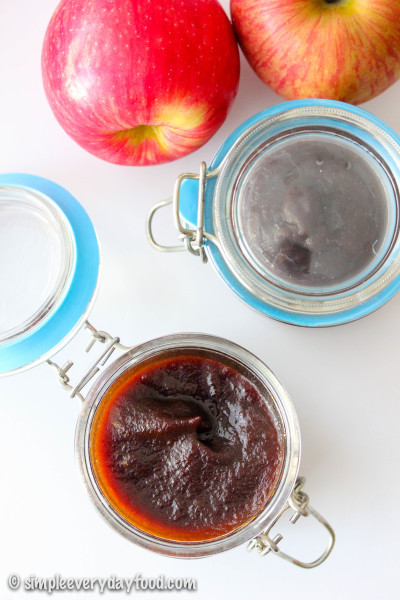
So anyway. I’ve been wanting to make Crockpot apple butter for years now, and I’m so glad I finally did! It’s soooooo easy and so ridiculously delicious that I can’t believe it took me so long to try it! I used a mixture of Fuji, Honeycrisp, and Granny Smith apples for my apple butter. The Fuji and Honeycrisp apples are sweet, and the Granny Smiths give it a hint of tangy tartness that wonderfully balances out the sweetness of the sugar and apples.

The best part about all this is that you throw all your ingredients in a Crockpot and let it slowly cook overnight, and you’ll wake up to the delicious mouth-watering smell of cinnamon apples. Add a splash of vanilla extract, break up any large pieces with a wooden spoon, and let it cook another 1-2 hours the next morning as you slowly sip on your coffee and read the morning newspaper.

If you own an immersion blender, this would be a good time to use that nifty gadget. If you’re like me and don’t own one of those cool gadgets, then simply puree the apple mixture in a blender in batches (I filled my blender about half full and only had to puree two batches of it).

IMG_4247 copy

IMG_4255 copy

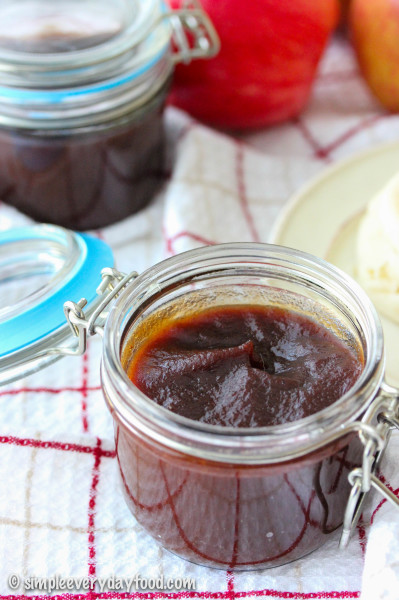
If you’re satisfied with the consistency of your apple butter, then simply let it cool completely prior to transferring them into jars. I personally prefer a thicker apple butter, so if you’re like me, then place the pureed apple butter back into the Crockpot with the lid ajar and cook on low for another hour or two, or until it has reached your desired consistency.

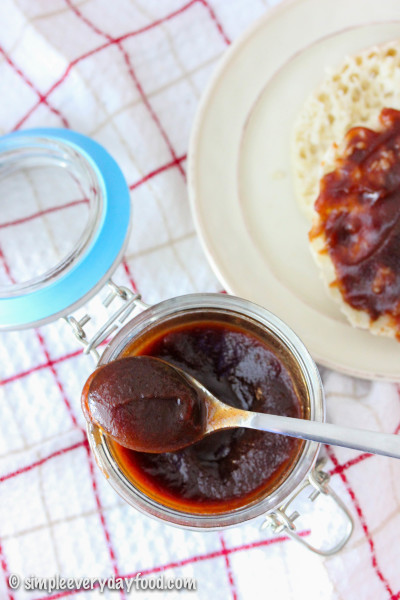
If you know how to can things, can this baby up and save it for the dead of winter when you’re craving a taste of fall. Otherwise place it in the fridge and spread it on toast, on an English muffin, on crackers, or just eat it with a spoon.

Or if you’re feeling generous, give away a few jars to friends and family – they’ll love you forever.

IMG_4289 copy

IMG_4277 copy

overnight crockpot apple butter
Print
Ingredients
  1. 3-3.5 pounds apples, peeled, cored, and sliced (about 7-8 apples; I used a combination of Fuji, Honeycrisp, and Granny Smith)
  2. 1/2 cup granulated sugar
  3. 1/2 cup dark brown sugar, packed
  4. 2 teaspoons ground cinnamon
  5. 1/4 teaspoon ground nutmeg
  6. 1/8 teaspoon ground cloves
  7. 1/8 teaspoon ground allspice
  8. A pinch of salt
  9. 1 and 1/2 teaspoons vanilla extract
Instructions
  1. Place apples in a slow cooker. In a medium bowl, combine the sugars, cinnamon, nutmeg, cloves, allspice, and salt. Sprinkle over the apples and stir it around until the apples are generously coated with the sugar mixture. Cover and cook on low for 10-12 hours overnight.
  2. The next morning, add in the vanilla extract. Stir the mixture around, breaking up any large pieces with a wooden spoon. Cover and cook for another 2 hours.
  3. In batches, pour the mixture into a blender and puree until smooth (this would be a time where an immersion blender would come in handy). For a thicker consistency, continue to cook the pureed apple butter on low with the slow cooker cover ajar for another hour, or until it's to the consistency of your liking.
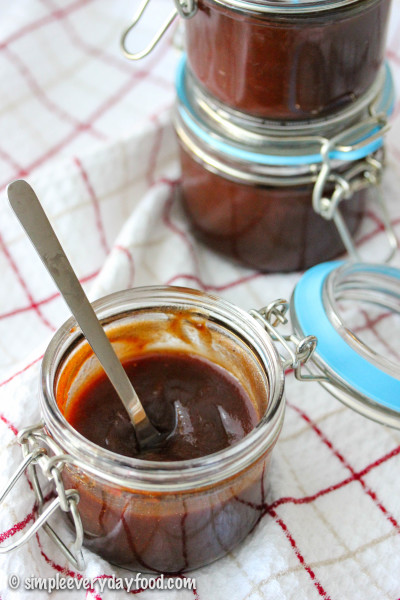
  4. Let cool completely and transfer into jars. Refrigerate apple butter for up to 2 weeks.
  5. Makes about 1.5 pints
Adapted from Brown Eyed Baker
Simple Everyday Food https://www.simpleeverydayfood.com/
Recipe adapted from Brown Eyed Baker

© Simple Everyday Food. All images & content are copyright protected. Please do not use any of my images without prior permission. If you want to republish this recipe, please re-write the recipe in your own words, or kindly link back to this post for the recipe.

Sharing is caring! Email this to someonePrint this pagePin on PinterestShare on YummlyShare on FacebookShare on Google+Tweet about this on Twitter

You may have noticed the lack of posts the past few weeks. I have been super stressed about my national boards exam that’s coming up in three weeks, so I have been using all my free time to cram as much information into my little head as possible. As a result, SEF has been neglected for quite some time. I have decided that I’m going to wait until my exam is over to take better care of SEF and dedicate more time to writing more posts. I have already created a bunch of recipes (10, to be exact) and have photographed my creations; however, since I spend most of my time editing them and creating blog posts, I’m going to put them on hold until April 13th. I promise SEF will be updated on a more regular basis after that – there will be some pretty delicious blog posts coming in the near future!

So, as my gift to you until April 13th, I present to you this wonderfully easy recipe that involves one of everyone’s favorite kitchen gadget – the Crockpot.

My favorite soups of all time are as follows (in no particular order):

  1. baked potato soup
  2. Olive Garden’s zuppa toscana
  3. creamy chicken and wild rice soup

Throughout the past 10 months SEF has existed, I managed to recreate and blog about #1 and #2 on that list. Naturally, it was time for me to find a family-approved recipe for creamy chicken and wild rice soup.

IMG_2536 copy

IMG_2508 copy

And this recipe is definitely going to be recreated again (and again) throughout the year. Brian and I both agreed it was so delicious that we were calling dibs on leftovers for work. Good thing this recipe yielded an entire Crockpot of soup! Even then, it still didn’t last more than 3 days in our house…

Rewind to about a year ago: I attempted to make chicken and wild rice soup on the stove… And that attempt had failed miserably. It tasted weird, had a funny consistency, and ended up getting dumped in the trash. Needless to say, my confidence in making creamy chicken wild rice soup was a little shot after that, and we both had to scramble and find something else to eat that night.

I think Brian was also a little skeptical when he heard I was going to try to give our favorite soup another try in the Crockpot. I can’t lie, I think I was too. But it was freezing cold outside, I was feeling lazy, and comfort food in the Crockpot was all that I really wanted for dinner.

IMG_2530 copy

This soup is amazing! It’s incredibly creamy and it’s filled with hearty vegetables and tons of juicy shredded chicken. Have you ever had Panera’s chicken and wild rice soup? If you haven’t – try it. It’s delicious. It’s the only soup we ever get there, and this TASTES JUST LIKE IT.

I’m still in awe at how good this soup is, and even better – how easy it is to make!

The steps are pretty simple: throw the veggies, wild rice, chicken stock, and chicken into the Crockpot. Let them sit and hang out and get to know each other for 7 hours. When the chicken is fork tender, take it out and shred it with a fork. Put it back into the Crockpot to soak up more of the yummy juices. Meanwhile, you make the creamy base on the stove…. this is where you should pay attention, simply because it took me three tries to get it right. Trust me, you’ll thank me later :)

When making your creamy base on the stove, melt the butter over low heat. Then add in the flour, 1/4 cup at a time, whisking constantly throughout each addition. The milk must also be added only 1/2 cup at a time as well. This is suuuuuper important – the first few times I tried, I added all the flour in at once, whisked, and added all the milk in at once. Somehow it just doesn’t work that way – it became super lumpy and gross, and I contemplated whether we should just make it “chicken and wild rice soup” instead of “creamy chicken and wild rice soup”. The stubbornness in me wasn’t about to let some butter and flour stand in the way of me and my dinner, so 3 sticks of butter later, I finally got the results I wanted.

The trick is to whisk constantly on LOW heat. When I say constantly, I mean it – whisk that sucker the entire time. Don’t walk away from the stove. Don’t even go on Instagram or Facebook. It’ll seem like it’s taking forever for the mixture to start bubbling, but I promise patience pays off in the end.

IMG_2540 copy

crockpot creamy chicken wild rice soup
Print
Ingredients
  1. 1 cup uncooked wild rice
  2. 1 pound boneless skinless chicken breasts
  3. 3 medium carrots, peeled and diced
  4. 1 small onion, diced
  5. 2 celery sticks, diced
  6. 6 cups low sodium chicken broth
  7. 1 heaping teaspoon poultry seasoning
  8. 1/2 cup butter
  9. 3/4 cup flour
  10. 2 cups milk + 2 additional cups
  11. Salt and pepper
Instructions
  1. Place the diced carrots, onion, and celery in the crockpot, then place the chicken breast on top. Sprinkle poultry seasoning over the chicken.
  2. Rinse the wild rice, and add to crockpot. Then add in the chicken broth. Cover and cook on low for 6-7 hours, until chicken is fork tender. Remove chicken onto a cutting board, let cool and shred with two forks. Add the shredded chicken back into the crockpot.
  3. In a saucepan, melt the butter, then add the flour, 1/4 cup at a time, and cook until it starts to bubble. Slowly whisk the milk in with the flour mixture, 1/2 cup at a time, just until it starts to thicken. Add this to the rice and chicken in the crockpot, stir to combine. If mixture is too thick, add additional milk (or water) until it reaches the desired consistency. Serve immediately.
  4. Serves 6
Adapted from Pinch of Yum
Simple Everyday Food https://www.simpleeverydayfood.com/
So there. Next time there’s a snowstorm in the forecast and all you want to do is snuggle on the couch in warm fuzzy blankets drinking hot peppermint cocoa in front of the fireplace, I’ve got dinner covered for you (trust me, I wouldn’t be surprised if we had a snowstorm in April here in Minnesota).

IMG_2533 copy

IMG_2506 copy

Recipe adapted from Pinch of Yum

© Simple Everyday Food. All images & content are copyright protected. Please do not use any of my images without prior permission. If you want to republish this recipe, please re-write the recipe in your own words, or kindly link back to this post for the recipe.

Sharing is caring! Email this to someonePrint this pagePin on PinterestShare on YummlyShare on FacebookShare on Google+Tweet about this on Twitter

First off, can I just say that I would love to meet whoever invented the Crockpot and give them a hug? It’s probably one of the best inventions of the 20th century, and it’s days like today that I’m thankful for its existence.

IMG_1525

Coming into this weekend, I was super behind on all the homework and projects and reading that I had to do by Monday. Owning and operating a food blog and having to write a certain number of posts per week can be quite challenging when you’re taking five classes that have a ton of homework and don’t have enough hours in the day to cook and take pictures and blog (whew)… But fear not, my dear readers, I came up with a brilliant idea of being able to make home-cooked meals and getting homework done at the same time!

Enter our lovely Crockpot.

It’s the perfect way of eating at home and getting stuff done! I probably spent about 15-20 minutes prepping for this meal, and left the Crockpot to do the rest of the cooking. No need to spend hours prepping or slaving away over the stove. There’s really not even a whole lot of dishes to clean up afterward either (which means more time to study). I felt bad wasting this lovely day away by not grilling something outside, but sometimes getting stuff done is just a little bit more important than blogging (I can’t believe I just said that).

slow cooker pulled pork sandwiches
Print
Ingredients
  1. One 3-3.5 lb pork roast
  2. 1 medium onion, sliced
  3. 2 teaspoons light brown sugar
  4. 1 teaspoon paprika
  5. 2 teaspoons salt
  6. 1 teaspoon garlic powder
  7. A dash of cayenne pepper
  8. A pinch black pepper
  9. 3/4 cup apple cider vinegar
  10. 1/4 cup water
  11. 8 oz tomato sauce
  12. Dash hot sauce, such as Tabasco
  13. 1 teaspoon sugar
  14. 2 tablespoons Worcestershire sauce
  15. 12 whole wheat slider buns
  16. Your favorite kind of barbeque sauce
Instructions
  1. Place the sliced onions in the bottom of a 5- to 6-quart slow cooker. Mix the brown sugar, paprika, garlic powder, cayenne pepper, salt and pepper and rub it over the pork roast. Place roast in Crockpot over the onions.
  2. In a medium bowl, combine the vinegar, water, tomato sauce, 1/2 teaspoon black pepper, hot sauce, sugar, and Worcestershire sauce. Pour over the roast. Cover and cook on low for 8 hours, or until meat is tender and is easily shredded with a fork.
  3. Remove roast from Crockpot and shred finely with a fork.
  4. Assemble sandwiches by placing desired amount of pork in between the buns. Add your favorite barbeque sauce on top of the meat or simple drizzle extra juices for extra juiciness.
  5. Serves 3-4
Adapted from Food Network
Simple Everyday Food https://www.simpleeverydayfood.com/
We bought little slider buns instead of regular hamburger buns, since mini foods are always way cuter (and more fun to eat) than regular-sized foods, but feel free to use regular hamburger buns if that’s what you have around the house. If you prefer not to add the barbeque sauce on your sandwich, you can spoon a little bit of the leftover juice/sauce over the meat instead.

IMG_1523

The pork itself is very light in flavor, but the addition of the barbeque sauce gives it an extra tang and makes it more like a “barbeque pulled pork sandwich”, if that’s what you’re going for.

Baked beans, pulled pork sandwiches, and potato chips. Sounds like a summer meal to me.

IMG_1526

Enjoy!

Recipe adapted from Food Network

© Simple Everyday Food. All images & content are copyright protected. Please do not use any of my images without prior permission. If you want to republish this recipe, please re-write the recipe in your own words, or kindly link back to this post for the recipe.

Sharing is caring! Email this to someonePrint this pagePin on PinterestShare on YummlyShare on FacebookShare on Google+Tweet about this on Twitter

It’s midquarter already – that means there’s only about 5 more weeks of class until summer. But it also means that there’s only 5 weeks left until all 5 of my projects are due.

Well, since it’s the weekend and it’s the perfect time to catch up on homework, what better meals to prepare than something in a Crockpot? Something simple, something healthy, and something tasty. Then I won’t have to slave in the kitchen for hours prepping and cooking.

IMG_0818

IMG_0840

IMG_0843

crockpot cilantro lime chicken tacos
Print
Ingredients
  1. 1 lb. boneless skinless chicken breasts
  2. Juice from 2 limes
  3. 1/2 cup of cilantro
  4. 1 packet of taco seasoning
  5. 1/4 cup diced onions
  6. 1/2 cup of water
  7. Salt & pepper
  8. Taco tortillas
Instructions
  1. In a 3-5 quart Crockpot, combine everything except the chicken. Stir well, then add the chicken.
  2. Cook on low for about 4-6 hours or until the chicken is tender enough to shred with a fork.
  3. Take the chicken out and place on a plate. Shred, then drizzle some of the remaining sauce over the chicken to keep it moist.
  4. Spoon the chicken mixture into soft taco tortillas. Top with your favorite toppings.
Notes
  1. We cooked the chicken for about 8 hours and it turned out a tad on the dry side. It was already very tender at about the 4-6 hour mark, so next time we'll be keeping an eye on it to make sure it stays juicy.
Adapted from The Vintage Grove
Simple Everyday Food https://www.simpleeverydayfood.com/
IMG_0844

Another bonus of making Crockpot meals – not a whole lot of dishes to clean up in the end!

Oh hey, just in time for Cinco de Mayo!

Enjoy!

Recipe adapted from The Vintage Grove

Sharing is caring! Email this to someonePrint this pagePin on PinterestShare on YummlyShare on FacebookShare on Google+Tweet about this on Twitter