everyday food made simple

 The Big Game is tomorrow – are you ready?!

For all your last-minute party planners that are in need of a last-minute appetizer ideas, I’ve got you covered today! Here are some of the most popular game day recipes here on SEF:

>> Buffalo ranch chicken cups

 IMG_5158 copy    

>> Mini taco cups

IMG_1703

>> Mini taco cups, 2.0

IMG_5563 copy

>> Wonton wrapper wrapped mozzarella sticks

IMG_2017 copy

>> Chipotle hot corn dip

IMG_1714

>> Bacon cheeseburger quesadillas

IMG_2265 copy

>> Tailgate turkey chili

IMG_2611 copy

(can you tell which of these pictures were from a few years ago when I knew nothing about food photography?)

Plus I even have a new super quick and simple shrimp cocktail recipe for you to satisfy all your seafood-loving party guests.

IMG_5203 copy

IMG_5192 copy

Instead of the traditional cocktail sauce, I made a soy-ginger sauce to go with them instead. Because you know, I can never seem to make anything “traditional”. That’s just how I roll, yo.

IMG_5196 copy

This dish comes together easily within an hour and there’s really not a whole lot of prep work that goes into it – the most work you’ll have to do is mince some herbs and grate some garlic and ginger. Otherwise it’s just a lot of “throwing the ingredients in a bowl”, boiling, chilling, mixing, and more chilling. Not a lot of labor involved so you can spend more time watching the game and spending time with friends.

IMG_5194 copy

IMG_5190 copy

Whether you’ll be rooting for the Seahawks or the Patriots tomorrow, or if you’re just going to parties just for the food – I hope everyone has a fabulous time spending the day with family and friends!

shrimp cocktail with soy-ginger dipping sauce
Print
For the shrimp
  1. 2 bay leaves
  2. 1 lemon, quartered, plus more for serving
  3. 1 tablespoon whole black peppercorns
  4. 1 tablespoon coriander seeds
  5. 2 tablespoons salt
  6. 1 pound large uncooked shrimp, peeled and deveined, tails intact
For the sauce
  1. 1/3 cup low-sodium soy sauce
  2. 3 tablespoons cilantro, finely chopped
  3. 1 green onion, green parts only, minced
  4. Juice of 1 lemon
  5. Juice of 1 lime
  6. 1 tablespoon finely grated ginger
  7. 1 teaspoon sesame oil
  8. 1/4 teaspoon granulated sugar
  9. 1/4 teaspoon grated garlic
Make the shrimp
  1. In a large pot, combine 8 cups water, bay leaves, quartered lemon wedges, peppercorns, coriander seeds, and salt. Bring to a boil, then reduce the heat to medium-low. Add the shrimp and simmer until the tails curl slightly and the shrimp is just cooked through, about 3-4 minutes. Using a slotted spoon, remove the shrimp onto a plate and chill in refrigerator for at least 1 hour.
  2. While the shrimp is chilling, make the sauce by combining all the sauce ingredients with 3 tablespoons of water in a small bowl. Mix to combine and refrigerate for at least 1 hour prior to serving.
  3. Shrimp can be stored in an airtight container in the refrigerator for up to 2 days.
Adapted from Food Network Kitchens
Simple Everyday Food https://www.simpleeverydayfood.com/
Recipe adapted from Food Network Kitchens

© Simple Everyday Food. All images & content are copyright protected. Please do not use any of my images without prior permission. If you want to republish this recipe, please re-write the recipe in your own words, or kindly link back to this post for the recipe.

Sharing is caring! Email this to someonePrint this pagePin on PinterestShare on YummlyShare on FacebookShare on Google+Tweet about this on Twitter

Does everyone have their Super Bowl party plans planned out already?

Will you/are you:

  1. Be heading over to someone’s house to watch the big game?
  2. Going to be the one who hosts the party and has to plan out the big game day menu?
  3. Be going to bed at the lame hour of 8:30 because you have to get up the next day at 4 a.m. to go to work (and getting less than 7 hours of sleep is completely unfathomable)?

…I think we all have an idea of which of the three options I will be doing.

IMG_5563 copy

No matter which of the above categories you fall in, I’ve got a party appetizer for you today that’s guaranteed to be a big hit! The mini taco cups I posted two summers ago has turned out to be super popular, and has also been the most visited recipe here on SEF since then.

IMG_5533 copy

Today I gave them a little makeover and they taste even better than the ones before. Consider them to be the second generation, new-and-improved version of the original taco cups. What makes these better? I minced up some cilantro and mixed a bit of that into the filling. Then I dolloped the tops of the baked cups with a small amount of salsa and sprinkled more cilantro on top.

AND! New photos! Way prettier photos than the first generation mini taco cups 1.0. It’s funny how much my food photography skills have evolved throughout the past two years. I look back at my old food pictures and I’m not going to lie – most (if not all) of them make me cringe. But I still have so much to learn!

IMG_5520 copy

IMG_5523 copy

IMG_5531 copy

IMG_5552 copy

You really should make these for your party. Or bring them to a party. Or if you’re like me, make them for just you and your husband during pregame because once the game starts you’ll be going to bed shortly thereafter. And if none of the above applies to you, you should still make a pan of these and eat them yourself anyway, because you’ll be missing out if you don’t.

IMG_5539 copy

mini taco cups 2.0
Print
Ingredients
  1. One 12-oz package of wonton wrappers
  2. 1 pound lean ground turkey
  3. 1 package 40% less sodium taco seasoning
  4. 1 cup shredded Mexican blend cheese (you probably won't use all of it)
  5. A few handfuls of cilantro, finely chopped
  6. 1/4 cup of your favorite salsa
Instructions
  1. Preheat oven to 350 degrees.
  2. Brown the ground turkey in a large skillet. Drain the fat, and then season the meat with the taco seasoning according to package directions. Sprinkle in a few tablespoons worth of the cilantro, more or less depending on taste.
  3. Using a mini muffin tin, line the wells with wonton wrappers, so the wrappers are shaped into little cups inside the wells. Spoon the taco meat into each cup, about 1/2-2/3 full. Sprinkle the tops with cheese. Bake for 8 minutes, or until wrappers are slightly turning brown. Remove from oven, dollop the tops with salsa, and add more chopped cilantro as garnish, if desired. Serve immediately.
  4. Makes about 30 cups
Simple Everyday Food https://www.simpleeverydayfood.com/
© Simple Everyday Food. All images & content are copyright protected. Please do not use any of my images without prior permission. If you want to republish this recipe, please re-write the recipe in your own words, or kindly link back to this post for the recipe.

Sharing is caring! Email this to someonePrint this pagePin on PinterestShare on YummlyShare on FacebookShare on Google+Tweet about this on Twitter

IMG_5160 copy

First things first – I’ve become a publisher on Yummly! You can now find my official Publisher Page here (or simply click on the Certified Yummly button on my sidebar). And as you scroll past the recipe below, you’ll also notice that my social media sharing buttons have changed! I added a new Plug-in to SEF so now you can “Yum” my recipes and add it your Recipe Box on Yummly along with all your other “Yum’d” recipes… you know, for convenience and all. I started using Yummly a few months ago and it’s now one of my go-to places when I’m looking for dinner inspirations. They even send you weekly recommendations based on what you’ve “Yum’d” in the past! I’m super excited to be part of this new social media sharing platform, so bare with me as I get my Yummly page updated… in the meantime, keep Yum-ing!

The past few months, I’ve been hooked on the Lizzy Gardner series, written by T.R. Ragan. In case you’re not familiar, it’s a series of four books (so far) that centers around a private investigator Lizzy Gardner and the cases that she somehow always gets herself, as well as the people around her, involved in. The books aren’t particularly deep and complex, and the plots are always somewhat predictable (there are murders, Lizzy gets involved, she ends up figuring out who did it, yada yada yada). However, the author does do a good job at keeping the reader’s attention and the novels are pretty easy to read.

It started with spending 99 cents on the first book, then realizing I was able to borrow the 2nd, 3rd, and 4th book for free through my Amazon Prime membership. So for the past few months, I’ve been borrowing the next book in the series the first day of the month, finishing the book within 10 days, and impatiently waiting for the next 20 days until I can borrow the next book. It doesn’t help that the author seems to looooove ending her books on cliffhangers, because when I realized the 4th book was over (less than a week of starting it), I may have slammed my Kindle on my pillow a few times and yelled “NOOOOOO!!!!!!” (ask Brian about it – I’m pretty sure he jumped and thought I was crazy).

Initially I was going to wait it out and borrow the next book next month, but I just couldn’t wait it out any longer, so I broke down and went on Amazon with the intent of spending a few dollars and buying the next book….. only to realize that it won’t be released until February 3rd. Ahhhhhh! So much for that plan. Guess I’ll have to wait in the end anyway. Have I mentioned I hate waiting?

Okay, back to food. Because I’m sure you didn’t come on here to read about book reviews.

  IMG_5169 copy     

Can I just say these buffalo ranch chicken cups are so ridiculously deliciously easy to make? I even like them more than my mini taco cups, which happen to be the #1 most popular recipe on my site. That’s right, they’re that good.

IMG_5153 copy

IMG_5159 copy

These bite-sized appetizers are so easy to assemble and they pack so much flavor in just one bite, you won’t be able to eat just one! The light, crispy, flaky phyllo (or “fillo”) shells are filled with a creamy chicken filling with large chunks of chicken and a slight hint of heat, baked to crispy perfection.

IMG_5163 copy

 IMG_5158 copy

IMG_5176 copy

IMG_5179 copy

So in case you’re already looking for Super Bowl party finger foods for next month, you should most definitely add these to your list… your guests will thank you! And even if you decide to eat the whole pan yourself, that’s okay too. We don’t judge here in the food blogging world.

 IMG_5166 copy

buffalo ranch chicken cups
Print
Ingredients
  1. 1/4 cup light ranch dressing
  2. 1 tablespoon Frank's Red Hot sauce (more or less depending on taste)
  3. 3 oz low fat cream cheese, softened to room temperature
  4. One generous 1/4 cup of shredded cheddar cheese
  5. 2 tablespoons finely chopped cilantro (plus more for garnish, if desired)
  6. About 10 pieces of Tyson's Any'tizers Buffalo Chicken Wyngz, roughly chopped
  7. One package pre-baked fillo (phyllo) shells
Instructions
  1. Preheat oven to 400 degrees.
  2. In a small bowl, combine the ranch dressing and hot sauce. Set aside.
  3. In a medium bowl, combine the cream cheese, cheddar cheese, cilantro, and 2 tablespoons of the ranch mixture. With a spoon, mix ingredients together until thoroughly combined. Gently stir in the chicken bits and mix some more.
  4. Place the fillo shells into an ungreased mini muffin tin, and generously spoon the chicken mixture into the shells. Bake for 10 minutes, or until the fillo shells are golden brown.
  5. Drizzle the remaining ranch mixture over the chicken bites and sprinkle with additional cilantro, if desired. Serve immediately.
  6. Makes 15 mini cups
Adapted from Lauren's Latest
Simple Everyday Food https://www.simpleeverydayfood.com/
Recipe adapted from Lauren’s Latest

© Simple Everyday Food. All images & content are copyright protected. Please do not use any of my images without prior permission. If you want to republish this recipe, please re-write the recipe in your own words, or kindly link back to this post for the recipe.

Sharing is caring! Email this to someonePrint this pagePin on PinterestShare on YummlyShare on FacebookShare on Google+Tweet about this on Twitter

After a few months after it came out in theaters, yesterday I finally rented Monsters University on DVD. Has anyone else seen it? The first one was perhaps my favorite Pixar movie ever, so naturally I’ve been itching to watch the prequel to it ever since it came out. I absolutely loved it and thought little Mike Wozowski was the cutest thing ever. I swear I’m just a 12 year old kid in a 27-year-old body….

After lounging around in my PJs all day yesterday, I finally mustered enough energy to go to Kowalski’s to return it last night. You know you’re in the medical field when you say “let me go upstairs and change into something ‘normal’ real quick” before going to store, means changing into a pair of scrub pants. Not yoga pants, not jeans… scrubs. Apparently it’s what I now consider “normal” attire.

I didn’t even notice it until Brian laughed and pointed that out to me at the store. In my defense, I’ve been wearing scrubs 5-6 days a week for the past 8 weeks. I go to work, I wear scrubs. I go to class, I wear scrubs. I go run errands and grocery shop after work, I’m in scrubs. I don’t really go anywhere else so I don’t get to wear a whole lot of “normal people” clothes anymore. On my day off, I don’t really go places so I stay in my PJs.

[sigh]

Since it’s December and December marks the official start of the Christmas season, it’s only right for:

1. Hanging up Christmas decorations around the house…. (Bentley – @boxerbentley on Instagram – helped hang Christmas lights)

photo

and

2. The first post of December to be something that involved mint and chocolate.

News flash: I’m obsessed with anything that involved mint and chocolate. Every year when stores stock their shelves up with anything mint chocolate, I go crazy and start hoarding all things mint chocolate, enough to last me for the next 11 months. Candy cane coffee, mint M&Ms, peppermint M&Ms, candy cane Oreos, peppermint bark, Andes peppermint candies, all kinds of mint chocolate baking chips, Dove mint chocolates… you name it, I probably have it in my cupboard.

IMG_2379 copy

#mintchocolate4life

This recipe is made in the similar manner I made my pumpkin spice puppy chow back in November – seasonal Hershey’s Kisses mint truffles melted down, poured over gluten free chocolate Chex, coated with powdered sugar. It’s sweet, minty, and really addicting! They’re so addicting that I’m bringing some to work today to share so I don’t eat 5738293 grams of sugar in two days….

IMG_2388 copy

IMG_2390 copy

mint chocolate puppy chow
Print
Ingredients
  1. 1.5 bags of 10-oz Hershey's mint truffle Kisses, unwrapped
  2. One 14.25-oz box of chocolate Chex cereal
  3. 3 cups powdered sugar
Instructions
  1. Pour the Chex cereal into a large bowl and set aside.
  2. Using a double boiler, melt the unwrapped Hershey's Kisses until smooth, stirring occasionally. Pour chocolate mixture over the Chex cereal. Stir to make sure all the cereal is coated with chocolate.
  3. Pour the powdered sugar into the large bowl of cereal mixture. Toss and stir thoroughly to make sure everything is evenly coated with the powdered sugar.
  4. Store in an airtight container for up to 7 days.
  5. Makes about 8 cups
Simple Everyday Food https://www.simpleeverydayfood.com/
Along with being delicious, this recipe is also super easy to make. It only requires 3 ingredients! Three! And there are only about 3 steps to the whole thing as well. From start to finish, it took me less than 30 minutes to make. No baking, no cooling, and not a whole lot of measuring.

IMG_2394 copy

IMG_2385 copy

Yep, you’re welcome :)

If you’ve been following my blog since the beginning of time, you’ll know that I’m a fan of puppy chow… here are a few other versions for you to try!

pumpkin spice puppy chow

IMG_2075 copy

apple pie spice puppy chow

IMG_1768 copy

orange creamsicle puppy chow

IMG_1600

© Simple Everyday Food. All images & content are copyright protected. Please do not use any of my images without prior permission. If you want to republish this recipe, please re-write the recipe in your own words, or kindly link back to this post for the recipe.

Sharing is caring! Email this to someonePrint this pagePin on PinterestShare on YummlyShare on FacebookShare on Google+Tweet about this on Twitter

About a week or two ago when I was getting ready to transition to my week of overnight shifts for my internship, I decided I needed some motivation to stay up later than 2 a.m.. I figured I could slowly train my body to get used to going to bed at a later time, so getting off of work at 8 a.m. wouldn’t seem like such a ridiculous idea. What better way to stay awake than making something that smells delicious in the oven in the middle of the night?

IMG_2192 copy

The actual baking time for this recipe really only takes about half an hour or so, but the prep time leading up to it literally took about 8 hours. If you just slightly freaked out over how long this is going to take, don’t worry – it’s nothing that requires constant attention. It’s a good recipe to work on if you’re at home all day running around doing laundry, chasing after kids, going to the grocery store, or even if you’re just having a lazy day sitting around watching TV on the couch.

The reason it takes so long is because the key to these chickpeas being perfectly crunchy is for them to be 100% dry before throwing them in the oven. The drier they are, the crunchier they get. Any moisture left in them would give you soft, mushy chickpeas, and I don’t know about you, but that sure doesn’t sound appetizing to me at all. It is also for this reason why this recipe is a good, easy one to work on if you’re craving that sweet, crunchy snack.

Before you start, make sure you rinse the chickpeas under cold water for a few minutes to get rid of the extra starch that’s on the outside. During this time, the thin, semi-translucent outer shell may come off – that’s okay. Leaving them on is totally optional because unless you’re extremely OCD like I am, otherwise spending an hour in front of the sink trying to peel away the outer shell on EVERY.SINGLE.CHICKPEA is entirely unnecessary….

photo 2

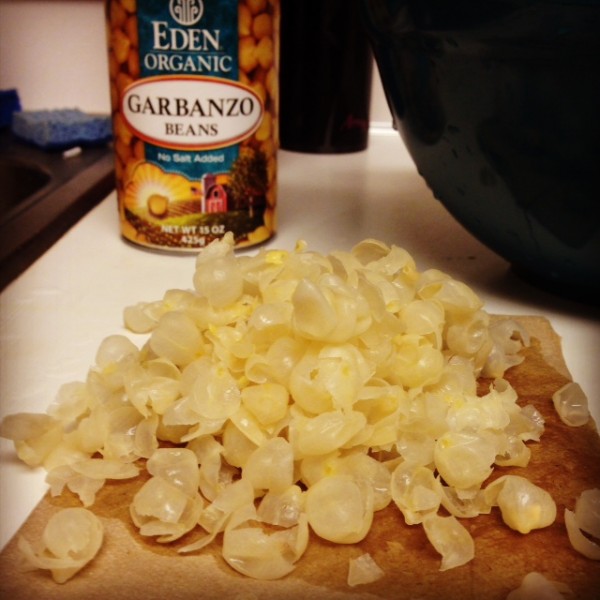
When I first started on this, I tried to convince myself that whatever shells came off during the rinsing process will be perfectly fine, and that it wouldn’t bother me one single bit if I left the other non-naked peas alone. Well, a few minutes into the rinsing, I quickly realized that my OCD tendencies were going to take over, because picking every single shell off of every single chickpea quickly became an obsession.

Once you’re satisfied, lay the chickpeas on a paper towel-lined baking sheet to dry. For me, the process took me all day, simply because it gave me something to do and I had all day to do it. Every few hours or so into the evening, I would periodically stir those peas around on the paper towel, making sure that they’re nice and dry. If you want, you can even change the paper towel underneath every once in a while so the peas have a dry surface to dry on. If I had the time, I totally would’ve just used my hair dryer and blew hot air over them to speed up the process…

photo 1

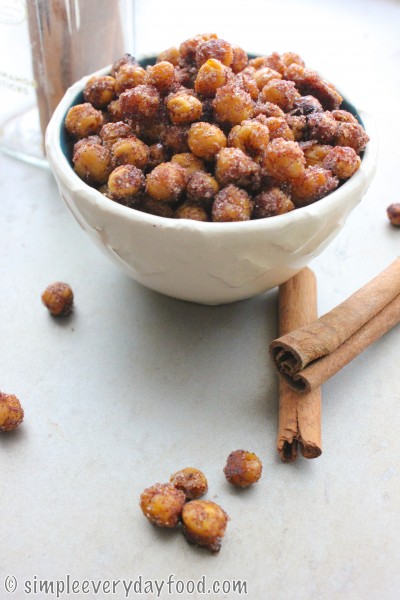
When your chickpeas have dried, throw in them in the oven to roast for the first half of the cooking time. Take them out, drizzle a little bit of EVOO, then toss them in the cinnamon sugar mixture and throw them back into the oven to cook some more. I think I went a little cinnamon-happy with mine, because let’s face it – one can never have too much cinnamon.

Once the roasting is done, leave the chickpeas in the oven with the oven door cracked open as they cool. They’ll be crunchier this way. I remember I put these in the oven at 3 a.m., and when they were done, my kitchen smelled amazing at 4 in the morning.

IMG_2199 copy

IMG_2201 copy

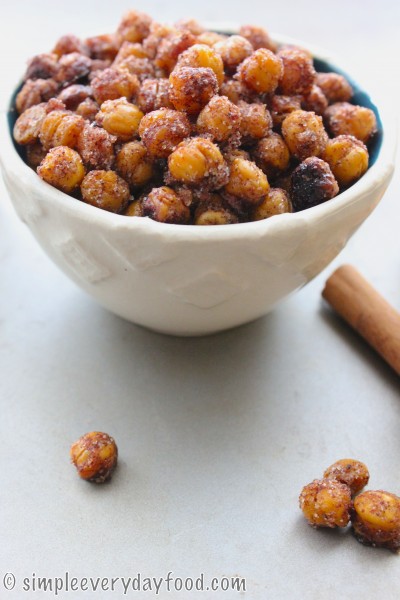
crunchy roasted cinnamon chickpeas
Print
Ingredients
  1. One 15-oz can of garbanzo beans (a.k.a. chickpeas)
  2. 1 tablespoon EVOO
  3. 2 tablespoons granulated sugar
  4. 1 teaspoon ground cinnamon
Instructions
  1. Line a rimmed baking sheet with
  2. Preheat oven to 400F degrees. Line a large baking sheet with a silicone baking mat. Set aside.
  3. In a large strainer, rinse and drain the chickpeas very well to remove the starch. Spread them out onto prepared baking sheet and pat very, very dry. The drier the chickpeas, the crunchier they will be. The skin of the bean may peel off as you pat them dry. That is ok. You may remove the skins or leave them on. I like to remove them, but that takes time and is not mandatory.
  4. Once 100% dry, place chickpeas into the oven and roast for 15 minutes. After 15 minutes, remove from the oven and drizzle with olive oil. Using a large spoon or spatula, mix the beans around to make sure they are all evenly coated. Mix the cinnamon and sugar together and sprinkle over beans. Mix around very well to heavily coat each bean. The beans will be flavorless, so you want to make sure each one is thoroughly coated. Add more cinnamon-sugar if you'd like. Place back into the oven and roast for another 15 minutes.
  5. Leaving the chickpeas inside, turn the oven off and crack open the door slightly. Allow the chickpeas to sit inside as the oven cools down for 30 minutes. This will help them get crunchier as opposed to sitting at room temperature. Chickpeas are crunchiest on day 1. Store at room temperature.
Adapted from Sally's Baking Addiction
Simple Everyday Food https://www.simpleeverydayfood.com/
So next time you have to stay up til morning for whatever reason and need something to keep you occupied throughout the night, you should make these! Every time I thought about going to bed, I remembered the chickpeas laying on my kitchen counter needed to be dried and roasted. Perfect for staying awake!

Who needs coffee to keep you awake when you can make cinnamon sugar roasted chickpeas instead?!

Recipe adapted from Sally’s Baking Addiction

© Simple Everyday Food. All images & content are copyright protected. Please do not use any of my images without prior permission. If you want to republish this recipe, please re-write the recipe in your own words, or kindly link back to this post for the recipe.

Sharing is caring! Email this to someonePrint this pagePin on PinterestShare on YummlyShare on FacebookShare on Google+Tweet about this on Twitter