everyday food made simple

I think I have a problem, guys. Now that I’ve caved in and made my first pumpkin dessert of the year, I can’t seem to stop. I have a bunch of pumpkin recipes lined up on my “make before the end of October” list already!  I made these a few days ago, and today I’ve already made my 3rd pumpkin dessert in 2 weeks. Don’t worry, that recipe will also be on Simple Everyday Food here soon too.

I present to you today: pumpkin n’ spice cream cheese truffles

IMG_1827 copy

IMG_1831 copy

IMG_1826 copy

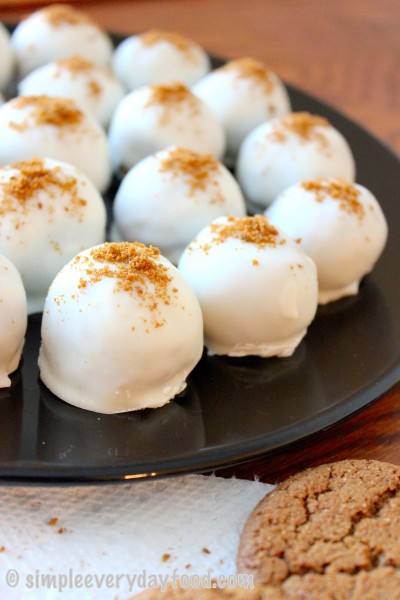
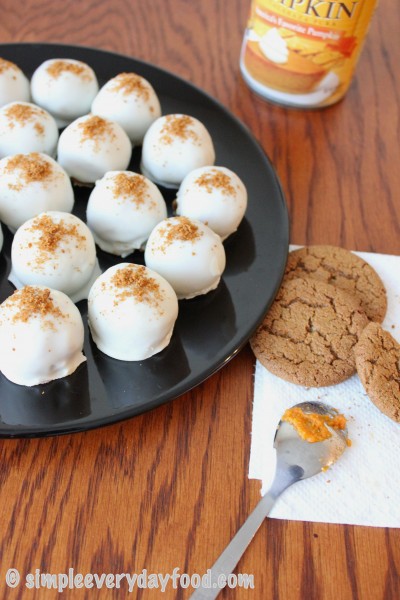
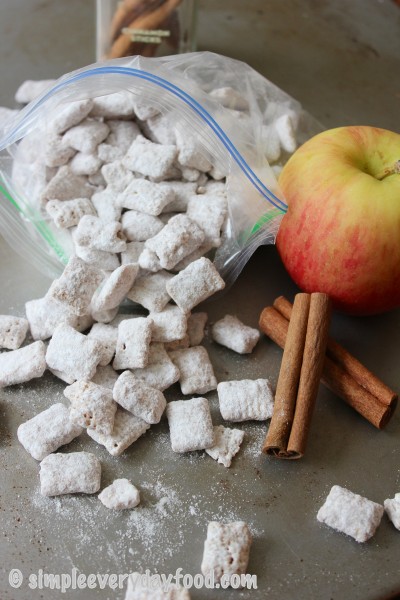
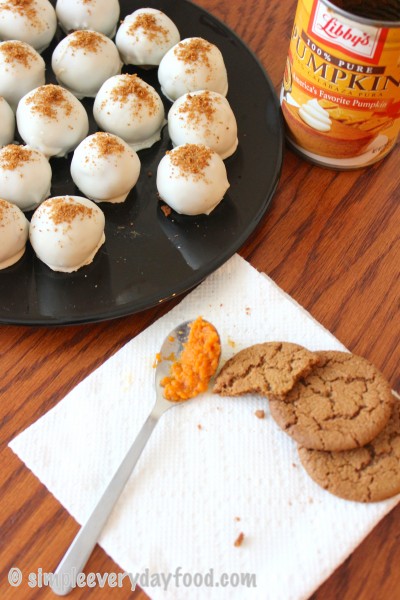
Yep, you heard that right. Pumpkin + gingersnap cookie crumbs + pumpkin spices + cream cheese + almond bark. These little balls of deliciousness are bursting with plenty of pumpkin flavor! Smooth, velvety pumpkin n’ spice mixture encased in a thin, crunchy white chocolate-y almond bark.

‘Tis the season, right?

The whole process of making these can take a good 3-4 hours, but the result is totally worth it! You first mix all the filling ingredients in a bowl. I chose to use an electric mixer to make sure everything was thoroughly incorporated. Then you freeze the filling for at least an hour. Then you take the filling out, roll them into balls, freeze them for at least two more hours. If they don’t seem hard enough, freeze them longer. Then you melt your almond bark and coat the truffle balls in them and throw them in the fridge until ready to serve. Waiting for everything to set will be the hardest part! It’s truly a test of patience, but I promise it’ll totally be worth it :)

IMG_1833 copy

IMG_1840 copy

pumpkin n' spice cream cheese truffles
Print
Ingredients
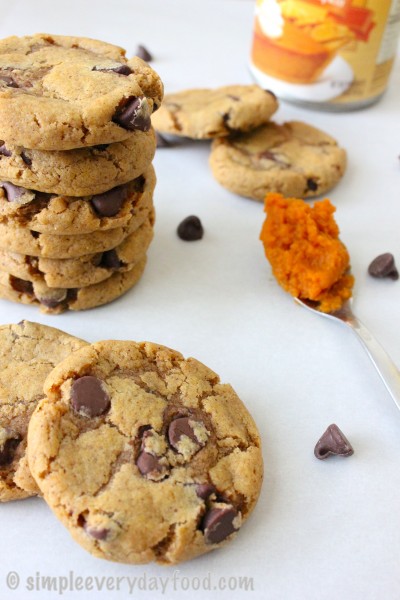
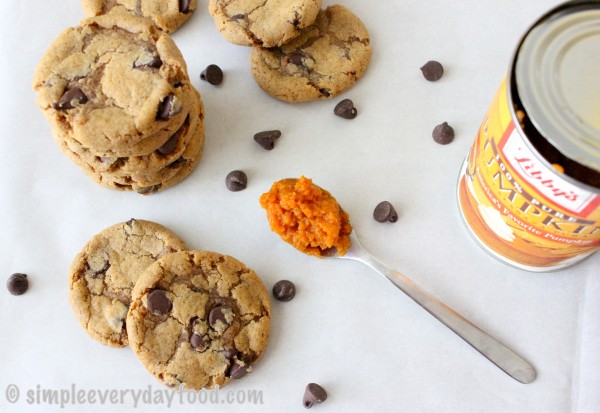
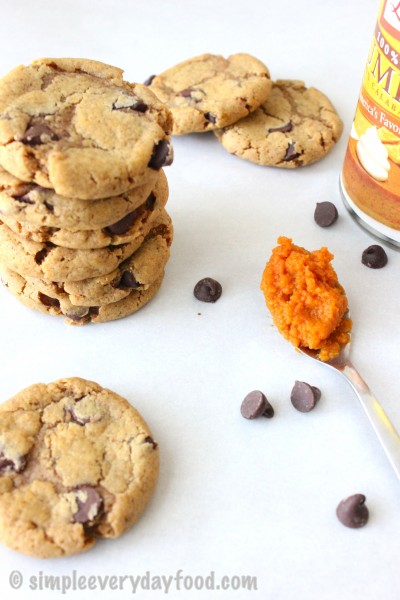
  1. 1/3 cup pumpkin puree (not pumpkin pie filling)
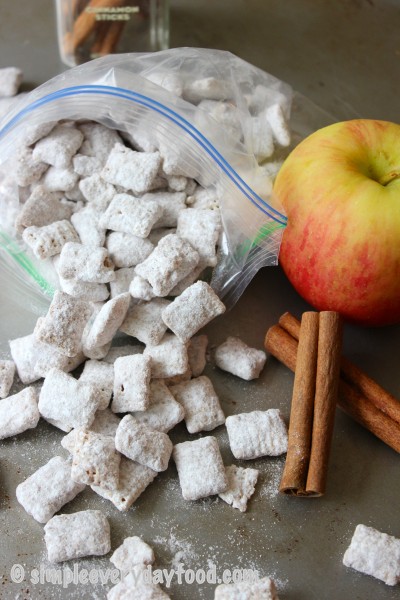
  2. 1 and 1/2 cups gingersnap cookie crumbs, finely pulsed, plus an extra 1-2 tablespoons for garnish
  3. 3 tablespoons powdered sugar
  4. 1/2 teaspoon cinnamon
  5. 1/8 teaspoon ground nutmeg
  6. 1/4 teaspoon ground ginger
  7. 1/8 teaspoon salt
  8. 4 oz reduced fat cream cheese
  9. 1 cup white chocolate chips
  10. 12 oz vanilla almond bark
  11. 1 tablespoon shortening
Instructions
  1. Using an electric mixture, combine the pumpkin puree, cookie crumbs, powdered sugar, cinnamon, ginger, nutmeg, salt, and cream cheese together.
  2. Melt the white chocolate chips using a double boiler. Add the white chocolate in with the rest of the filling, combine until smooth.
  3. Transfer the mixture into a small bowl and freeze for an hour or until filling is fairly hardened.
  4. Using your hands, roll the filling into 1" balls, and set them on a parchment-lined baking sheet. Freeze until hardened, about 2 hours.
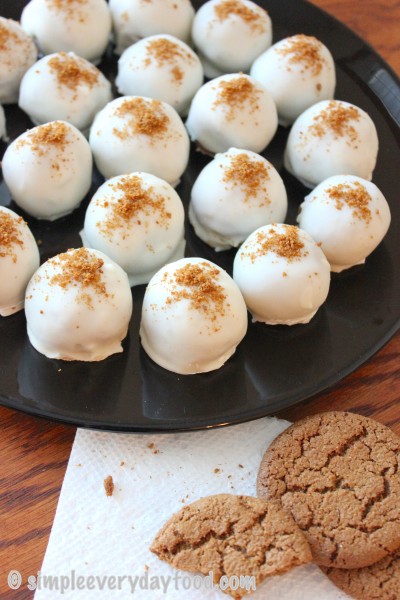
  5. Once the balls are frozen, melt the almond bark and shortening using a double boiler, stirring occasionally until smooth. Using a spoon and a fork, dunk a filling ball into the almond bark until it's completely covered. Remove the ball from the almond bark using the fork, and remove the ball from the fork using the spoon onto the parchment-lined baking sheet. Repeat for all filling balls. Top each ball with a pinch of gingersnap crumbs before the coating hardens.
  6. Place the coated balls in the refrigerator until ready to serve.
  7. Store in airtight container for up to a week.
  8. Makes about 20 truffles
Adapted from Gimme Some Oven
Simple Everyday Food https://www.simpleeverydayfood.com/
The magic ingredient in these truffles are the gingersnap cookie crumbs. They share a lot of similar spices as those found in the traditional “pumpkin spice”, so not only does the cookie crumbs give the extra “umph” to the pumpkin spice, it also serve as a binding agent to bind all the wetter ingredients together.

Because the filling balls are made up of ingredients that don’t hold their shape up well under heat, you’ll have to work quickly when you’re ready to coat them with almond bark. Since I melt my almond bark over a double boiler, I found out that my filling balls tend to start to slowly fall apart if I leave them in the coating mixture too long.

They’re not as cake-y as the traditional truffles I’m used to making due to the amount of wet ingredients required (i.e. pumpkin puree), but the soft velvety texture sort of reminds me of pumpkin pie. Everyone that was lucky enough to try them raved about how good they were!

IMG_1848 copy

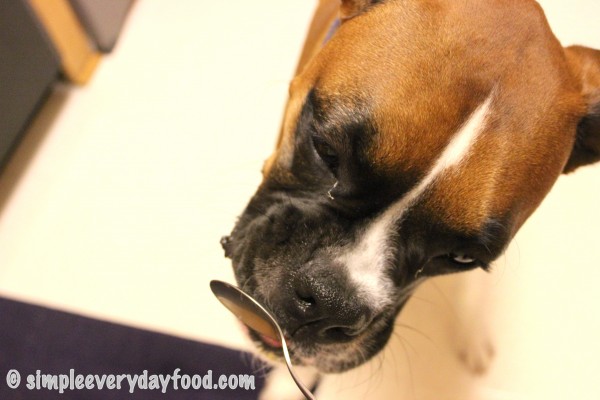
Poor Bentley wanted to be my taste tester… it was pure torture.

IMG_1847 copy

Bring on the fall baking season!

Recipe adapted from Gimme Some Oven

© Simple Everyday Food. All images & content are copyright protected. Please do not use any of my images without prior permission. If you want to republish this recipe, please re-write the recipe in your own words, or kindly link back to this post for the recipe.

Sharing is caring! Email this to someonePrint this pagePin on PinterestShare on YummlyShare on FacebookShare on Google+Tweet about this on Twitter

First of all, is that even how you spell “ooey“? Initially I started typing it as “ooy” but that didn’t look right. “Oo-y” would’ve worked too, but I don’t think that’s how people spell it either. Ooey will just have to suffice for now.

IMG_1785 copy

I’ve been boycotting posting anything pumpkin-related on here ever since I found out my local Caribou coffee decided to start promoting their pumpkin drinks at the end of August (that obviously changed today).

August – really?  Can’t we just enjoy one season at a time? It’s like a competition between chain coffee stores nowadays to see who can come out with fall drinks the earliest. Why are these stores rushing the months away? I want to enjoy my summer to the fullest, then I’ll savor the fall scents and flavors when the time comes. It only makes sense – that way there’s something to look forward to every month, right? Am I the only one who feels this way? I mean, summer’s not even over yet in August, for cryin’ out loud. The days are still (relatively) long, it’s still hot out, and if it’s still warm enough for me to be out in shorts and a t-shirt, it’s sure not the right time to be sipping pumpkin-anything just yet.

In my world, pumpkins are synonymous with Halloween, which occurs in October, therefore pumpkin drinks and desserts should be saved for the month of October only.

Hooooweveeerrr… I caved in. Yes, that’s right, I caved in and made these cookies before the month of October even arrived. Well, I guess it’s technically fall now, and October is just a few days away… so I’ll forgive myself for jumping the gun a little bit earlier this year.

IMG_1777 copy

I’m not as big of a fan of pumpkin as many of my other food blogger friends, but I don’t mind it I guess. I won’t go out and eat a whole slice of pumpkin pie, but an occasional bite or two of it is okay with me. I think I associate pumpkin desserts with pumpkin pie and pumpkin puree, and I’m not a fan of the texture of either of those. They’re mushy. I don’t like mushy. It’s also the reason why I don’t eat hummus or guacamole… yeah, I don’t like guacamole. I’m weird.

IMG_1790 copy

This recipe is simple and straight forward. You don’t even need an electric mixer for it! The cookies turn out to be super soft and bursts with plenty of pumpkin flavor and pumpkin spices. I think the cookies would’ve been delicious enough by itself, but then you add in chocolate chips and guess what – it becomes even more amazing. Bites of soft pumpkin cookie with chocolate chips… because chocolate chips always make cookies taste better!

IMG_1783 copy

These cookies don’t spread much when they’re in the oven, so you can either 1) bake them in the oven for 8 minutes, take them out, flatten them with the back of a spoon and bake for another minute; or 2) flatten them first and then bake them for 8-10 minutes. I chose the do the former simply because I loved the little cracks and crinkles that are created once you flatten out a semi-cooked cookie :)

ooey gooey pumpkin chocolate chip cookies
Print
Ingredients
  1. 1/2 cup unsalted butter
  2. 1/4 cup light brown sugar
  3. 1/2 cup granulated sugar
  4. 1 teaspoon vanilla extract
  5. 6 tablespoons pumpkin puree (not pumpkin pie filling) - use a little bit more if you want more pumpkin flavor
  6. 1 and 1/2 cups all-purpose flour
  7. 1/4 teaspoon salt
  8. 1/4 teaspoon baking powder
  9. 1/4 teaspoon baking soda
  10. 1 and 1/2 teaspoons ground cinnamon
  11. 1/2 teaspoon ground nutmeg
  12. 1/4 teaspoon ground cloves
  13. 1/4 teaspoon pumpkin pie spice, if desired
  14. 1/2 cup (90 grams) semi-sweet chocolate chips
Instructions
  1. In a medium bowl, combine the melted butter and the two sugars together, whisk until thoroughly combined. Whisk in the vanilla and pumpkin until smooth and set aside.
  2. In a large bowl, add in the flour, salt, baking powder, baking soda, cinnamon, nutmeg, and cloves. Slightly mix with a spatula. Pour the wet ingredients into the dry ingredients and mix well. Fold in 1/2 cup semi-sweet chocolate chips and mix some more. Cover the dough and chill for 30-60 minutes.
  3. Preheat the oven to 350 degrees. Line baking sheets with parchment paper or silicone baking mats and set aside.
  4. Roll about 1.5 tablespoons of cookie dough into balls. Bake for ~8 minutes. Take the baking sheet out and slightly flatten the dough balls with the back of a spoon until they're about 1/2" thick. Bake for another 1-2 minutes. Remove from oven and let the cookies cool on the baking sheet for 5-10 minutes, then transfer to a cooling rack. If the cookie dough still doesn't seem flattened enough, flatten them out a little bit more after you take them out to cool. Store in an airtight container for up to a week.
  5. Makes about 20 cookies
Adapted from Sally's Baking Addiction
Simple Everyday Food https://www.simpleeverydayfood.com/
The only complaint I have about these cookies is that they don’t make enough! I had to debate long and hard on how many to bring to school to share, and how many to keep at home for ourselves. Next time I’m totally making a double batch of these!

IMG_1793 copy

Now that I’ve gotten my first pumpkin dessert of the way, stay tuned for more yummy pumpkin-related desserts in the next few months!

I’m sure a certain someone would love to see more pumpkin puree used around the house!

IMG_1797 copy

IMG_1798 copy

I’m just glad I haven’t seen any Christmas decorations out on the shelves in September…. yet.

Enjoy!

Recipe adapted from Sally’s Baking Addiction

© Simple Everyday Food. All images & content are copyright protected. Please do not use any of my images without prior permission. If you want to republish this recipe, please re-write the recipe in your own words, or kindly link back to this post for the recipe.

Sharing is caring! Email this to someonePrint this pagePin on PinterestShare on YummlyShare on FacebookShare on Google+Tweet about this on Twitter

I’ve actually been making this for years now, but it wasn’t until a few weeks ago that my coworker Erika inspired me to make it again and share it with you guys!

IMG_1820 copy

You see, I’ve always had this thing where “old” recipes weren’t worth sharing and that only new things that I make (and that taste good) should be posted on here. But after today, successful recipes that have endured the test of time and multiple taste buds will start to make appearances on this blog, and I’m super excited about it!

This recipe is AWESOME – let me repeat, AWESOME – due to several reasons:

  1. it involves tator tots. Who doesn’t like tator tots?! If you, or someone you know, is/are not a fan of these little things, let me have a little talk with them.
  2. it’s completely customizable, and any dish that’s customizable is a win in my book. You can add different things in this dish any way you want. Exact measurements aren’t necessary either.
  3. it’s super easy to make. Prep time literally only took me 15-20 minutes.
  4. the leftovers taste just as good (if not better). Brian is not a big fan of leftovers, and this is one of the few dishes that we actually have to fight over leftovers the next day.

To start things out, you brown some turkey meat – it’s healthier that way. Using reduced sodium taco seasoning (or making your own) also bumps it up the healthy meter a little bit more. Add corn, cheese sauce/soup, then tator tots. Throw it in the oven for 45 minutes, and dinner’s ready. It’s that easy.

IMG_1814 copy

taco tator tot casserole
Print
Ingredients
  1. 1 pound ground turkey
  2. 1 package 40% reduced sodium taco seasoning
  3. 3/4 cup water
  4. 2-2.5 cups frozen corn
  5. One 10.75 oz canned cheese soup/sauce
  6. 1 bag frozen tator tots (you won't need the whole bag)
  7. Any other toppings you may like - salsa, diced tomatoes, shredded lettuce, sour cream...
Instructions
  1. Preheat the oven to 375 degrees.
  2. In a skillet over medium-high heat, brown the ground turkey until done. Add in the water and taco seasoning and stir until combined.
  3. Transfer the meat into a 8x11" casserole pan. Add in the corn and level it out with a spatula to make sure it covers the meat. If you'd like extra corn, feel free to add a little bit more.
  4. Next, pour/scoop the cheese soup on top, covering the corn. Layer the top with the tator tots.
  5. Bake for 45 minutes, or until tator tots are brown and crispy. Transfer to cooling rack and serve with desired toppings.
  6. Serves 3-4
Simple Everyday Food https://www.simpleeverydayfood.com/
Me, a little OCD? No way…

IMG_1810 copy

Yeah, who am I kidding, I totally am. Lining up those little tator tots perfectly in rows totally satisfies my inner OCDness. And it’s the only way you can get as many tator tots in the dish!

IMG_1811 copy

And just for the record, I hate making food with canned “soup”. If a recipe requires anything along the lines of “cream of…” I usually either don’t bother with it, or try to substitute it with something healthier. You probably won’t ever see me using any pre-packaged semi-gelantinous “soups” from a can other than this one.

I like my tacos with a little bit of salsa, so after I fill my bowl up with delicious goodness, I like to put a dollop or two of salsa on top of mine. I’ve also shared this recipe with a fellow coworker, and she added some black beans into the layers before throwing it in the oven. If you like sour cream, lettuce, cilantro, or anything else, definitely give it a whirl – I’m sure it’ll taste good!

IMG_1823 copy

IMG_1815 copy

After I add my salsa, I like to mix mine up – it doesn’t look the prettiest, but it sure is tasty! Every bite consists of a little bit of spicy salsa, crispy tator tots, taco meat, and corn. Next time I’m totally adding shredded lettuce (and maybe a Mexican blend shredded cheese) to it too.

Enjoy!

© Simple Everyday Food. All images & content are copyright protected. Please do not use any of my images without prior permission. If you want to republish this recipe, please re-write the recipe in your own words, or kindly link back to this post for the recipe.

Sharing is caring! Email this to someonePrint this pagePin on PinterestShare on YummlyShare on FacebookShare on Google+Tweet about this on Twitter

I really apologize about the lack of posts the past few months. I’m wrapping my last few quarters of school before graduation, and there’s just so much to do everyday! I really wish there were 30 hours in a day instead of 24. Twenty four hours just doesn’t feel like it’s enough. I don’t understand how people can be “bored” when I’m constantly trying to find time to get things done. It’s not like I sit around and waste my time away… somehow days and weeks are just going by way too fast.

1. It’s been one heck of a week this past week. It was perhaps the busiest and most stressful week I’ve experienced since I started the program last January. I had two major exams to study for, two big papers to write, and five worksheets that were all due by Tuesday (yesterday). It’s partially my fault that I procrastinated and put off writing those two papers all quarter, but right now, I’m just glad that it’s over and that I can focus on finals. The really ironic thing was that one of my papers was on stress/euthanasia-related stress and unhealthy/healthy coping methods. Impatience, withdrawal from friends and activities, stress eating, compulsive spending (or the feeling of the need to spend money), mental exhaustion, fatigue… check, check, check, check, and check.

I’ll be looking forward to some much needed R&R in a week :)

93 more days til graduation!!!!

2. It was also during this time of extreme stress that I really wanted to be in the kitchen to bake. It’s really all I wanted to do – I really wanted to procrastinate and go bake some cookies.. or cupcakes… or donuts. But the logical side of me told the emotional side to wait til the week is over. I guess I discovered this week that baking really is my best form of therapy. I don’t necessarily bake because I want to eat the end product, but more so for the process of being in the kitchen, piping frosting, rolling little cookie dough balls… it’s calming and very therapeutic to me for some reason.

3. I have a little confession to make: I have a little unhealthy relationship with Ramen (shh, don’t tell Brian). I love Ramen noodles. A lot. I know it’s so bad for you, that it contains a ton of sodium and all kinds of preservatives that can kill your liver, blah blah blah… but I just love it. I think it’s because Taiwan spoiled me with the different amazingly delicious flavors of Ramen noodles they have. I could probably eat a different flavor of a different brand for two months in a row. I even ask my parents to mail packages of them to me every once in a while… There, now you know another weakness of mine when it comes to food :)

4. The 27th season of Survivor (Blood vs. Water) started tonight! Brian had to work tonight, so we won’t be watching it until this weekend probably. I still remember watching the series when it first came out years and years ago.

Survivor

5. In case you’re a techie and you haven’t heard, Apple’s newest operating system, iOS 7 came out today!!!!! As big of a nerd as I am, I made sure I backed up my phone and iPad last night. I sure am not disappointed with its latest upgrade – everything is amazing and I love it so far. A few of my favorite new features include that Siri can now be a male or female, you can send someone a picture through Air Drop, iTunes radio is now available, and that you can block messages/phone calls from people you don’t want to hear from! I also discovered that Siri can speak in different languages, including Mandarin!!!! Was that a feature in the older iOS?? If so, I can’t believe I never knew that. I just had to try it out.

So I asked Siri if she was able to do my homework for me tonight. Unfortunately her response was “I don’t think I’m able to do that”.

Boo, Siri. Boo.

photo 1 photo 2

Sharing is caring! Email this to someonePrint this pagePin on PinterestShare on YummlyShare on FacebookShare on Google+Tweet about this on Twitter

I’ve been a little obsessed with puppy chow lately. I just made these, and I already have about a dozen different other variety of flavor combinations I want to make already!

IMG_1758 copy

IMG_1770 copy

Brian really isn’t a big fan of puppy chow, so every time I make these, my friends and coworkers are in luck – as much as I’d love to eat 8 cups worth of Chex cereal covered in sugary goodness, I find myself packing them into little snack bags to bring to work and school to share (sharing is caring, right?). My friends really aren’t as lucky when I make cookies or cupcakes, as those tend to slowly mysteriously disappear when I’m out of the house [ahem] :)

Although I’m not ready to let summer go and am in some sort of a denial state of mind that autumn is upon us, I can’t help but be excited about the different fall recipes I have planned for the next few months – apple pie spice puppy chow sounded like the perfect way to welcome the arrival of fall.

IMG_1754 copy

IMG_1760 copy

apple pie spice puppy chow
Print
Ingredients
  1. 8 cups apple & cinnamon Chex cereal
  2. 16 oz vanilla coating/almond bark
  3. 2 teaspoons apple pie spice mix (see below)
  4. 2 cups powdered sugar
For the apple pie spice mix
  1. 4 tablespoons ground cinnamon
  2. 1 and 1/2 teaspoons ground nutmeg
  3. 1/2 teaspoon ground allspice
  4. 1 and 1/2 teaspoons ground cardamom
  5. A pinch of ground ginger
Instructions
  1. Pour cereal into a large bowl.
  2. Using a double boiler, melt the vanilla coating/almond bark.
  3. Pour the melted vanilla coating onto the cereal, stir. Add in the apple pie spice mixture, stir until thoroughly combined.
  4. Add the powdered sugar into the cereal mixture, about 1 cup at a time, until the cereal is evenly coated with powdered sugar.
  5. Spread onto waxed baking sheets for coating to set. Store in airtight container for 1 week.
  6. Makes about 8 cups.
Notes
  1. Measurements for the ingredients for the apple pie spice does not have to be exact. Amount can be varied if you prefer a little bit more (or less) of one particular spice.
  2. Spice mixture recipe adapted from My Baking Addiction.
Adapted from A Pumpkin & A Princess
Simple Everyday Food https://www.simpleeverydayfood.com/
IMG_1766 copy

As if the apple pie spice mixture wasn’t delicious enough, the apple and cinnamon Chex cereal really kicks the flavor up a notch. If regular Chex cereal is all you have on hand, I’m sure it’ll taste just fine, too. Like I mentioned in the recipe card, the measurements of the spice mixture doesn’t have to be exact – everything can be made “according to taste” when it comes to these babies! I personally love cinnamon and nutmeg, so I added a bit more in mine. I wasn’t sure quite sure about the ginger flavor, so a dash of ground ginger was all I put in it. So feel free to play around with the spices – this is one of those recipes that doesn’t require exact measurements!

IMG_1768 copy

I brought a few little baggies of these to school to share, and they sure got rave reviews from everyone! I think the smell of apple pie brings back warm happy memories for everyone – family gatherings, warm cozy blankets, falling leaves…

I would be one happy camper only if there could be two seasons in a year: summer and fall.

Enjoy!

Recipe adapted from A Pumpkin & A Princess

© Simple Everyday Food. All images & content are copyright protected. Please do not use any of my images without prior permission. If you want to republish this recipe, please re-write the recipe in your own words, or kindly link back to this post for the recipe.

Sharing is caring! Email this to someonePrint this pagePin on PinterestShare on YummlyShare on FacebookShare on Google+Tweet about this on Twitter